Have you noticed a chipped tile in your home and wondered how to fix it quickly and easily? A small chip might seem like a minor problem, but it can make your entire space look worn down.
You don’t need to call a professional or spend a lot of money to restore your tile’s smooth, polished look. You’ll discover simple, step-by-step methods to repair chipped tile yourself. By the end, you’ll feel confident tackling the repair and making your floors or walls look as good as new.
Keep reading—you’re closer than you think to a flawless finish!
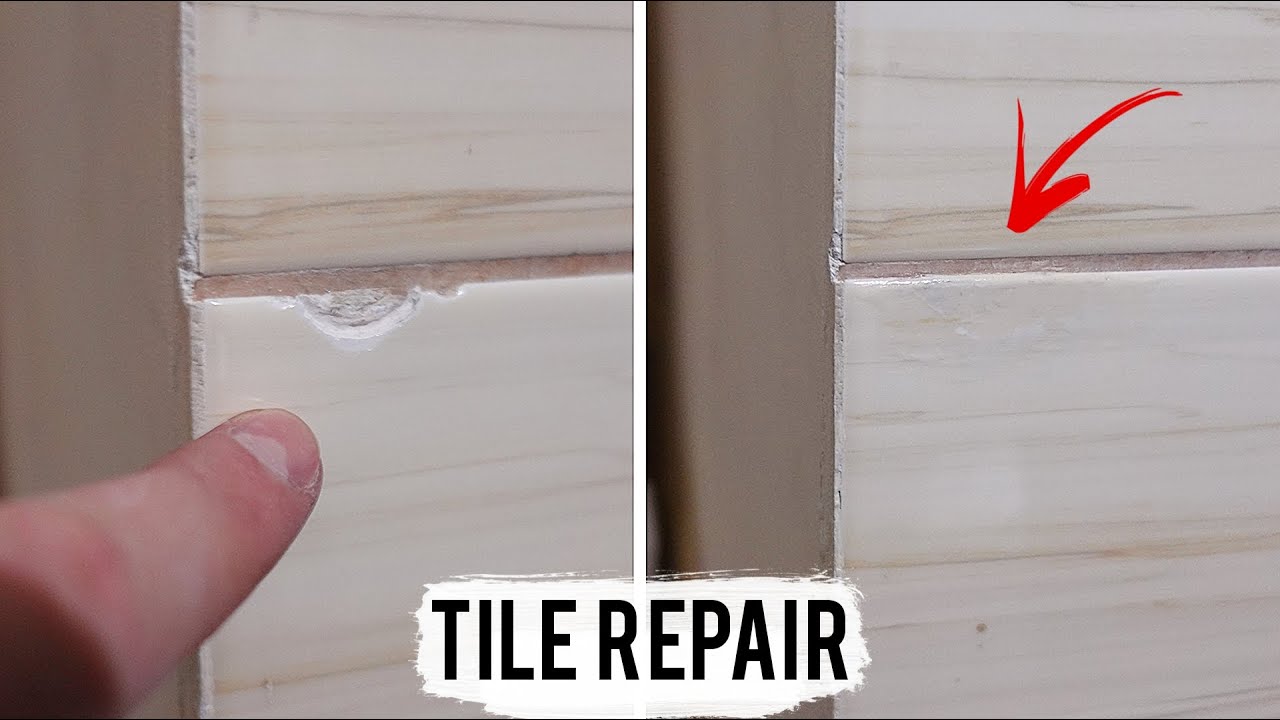
Credit: www.youtube.com
Identify The Damage
Before fixing a chipped tile, you must identify the damage clearly. This step helps decide the right repair method. Examining the chip carefully saves time and effort later. Understanding the damage size and tile type guides the repair process.
Assess The Chip Size
Start by looking closely at the chip’s size. Small chips under a quarter inch need simple fixes. Larger chips might require filling or replacing the tile. Use a ruler to measure the chip’s width and depth. Knowing the size helps pick the right repair materials.
Check Tile Material
Next, identify the tile material. Tiles can be ceramic, porcelain, glass, or natural stone. Each material needs different repair techniques and products. Ceramic and porcelain tiles are easier to fix with fillers. Natural stone tiles may need special sealers or adhesives. Glass tiles require careful handling to avoid more damage.
Gather Repair Materials
Before fixing a chipped tile, gather all necessary repair materials. Having everything ready saves time and avoids interruptions. Each item plays a vital role in the repair process. Use quality products for the best results.
Choose The Right Adhesive
Select an adhesive made for tile repairs. Epoxy or strong construction adhesive works well. It must bond the chipped piece firmly to the tile base. Avoid using general glue, as it may not hold long.
Select Matching Paint Or Epoxy
Find paint or epoxy that matches your tile color. This step is important for a seamless fix. Use small amounts to blend with the existing tile. Color match helps the repair look natural and neat.
Prepare Cleaning Supplies
Clean the damaged area before applying any material. Use rubbing alcohol or mild soap and water. A clean surface improves adhesion and finish. Have cloths or paper towels ready for drying and wiping.
Prepare The Tile Surface
Preparing the tile surface is the first important step to fix a chipped tile. This step helps the repair materials stick better and last longer. A clean, smooth surface ensures the chip repair looks good and blends well with the rest of the tile.
Take time to do this carefully. Proper preparation can save you from future repairs and keep your tile looking fresh.
Clean The Area Thoroughly
Start by cleaning the chipped area well. Use warm water and a mild detergent to remove dirt and grease. Dirt can stop the repair from sticking properly. Use a soft cloth or sponge to avoid scratching the tile surface. Rinse with clean water and dry the area completely with a towel.
Remove Loose Fragments
Check the chip for any loose pieces of tile or debris. Gently remove all loose fragments using tweezers or a small brush. Loose parts can cause bumps or holes in the repair. Make sure the edges of the chip are smooth by lightly sanding them with fine-grit sandpaper. Wipe away any dust after sanding.
Apply Repair Compound
Applying a repair compound is the next step after cleaning the chipped tile area. This compound fills the chip and restores the tile’s surface. It needs to be smooth and even to blend well with the rest of the tile. Using the right materials and technique ensures a strong, lasting fix.
Mix Epoxy Or Filler
Start by choosing an epoxy or tile filler suitable for your tile type. Follow the package instructions carefully. Measure equal parts of resin and hardener for epoxy. Mix them thoroughly until the color is even. Avoid mixing too much at once; it can harden before use. For filler, stir the powder and liquid until smooth. The mix should be thick but easy to spread.
Fill The Chip Smoothly
Use a small putty knife or a plastic scraper to apply the compound. Press it firmly into the chip to avoid air bubbles. Spread the compound evenly over the chipped area. Level it with the tile surface by scraping off excess gently. Smooth edges prevent noticeable repairs later. Let the compound dry fully before any sanding or painting.
Shape And Smooth Repair
Shaping and smoothing the repair is key to fixing chipped tile. It makes the repair look natural and neat. This step helps the patch blend with the rest of the tile. Proper shaping removes rough edges that catch the eye. Smoothing creates a surface that matches the original tile’s finish. A careful approach here ensures your tile looks good as new.
Use Sandpaper For Finishing
Start with fine-grit sandpaper to shape the repair. Gently sand the filler or epoxy to match the tile’s contour. Do not press too hard to avoid damaging the tile. Sand in small, circular motions for a smooth finish. Check your progress often under good light. Stop sanding once the repair feels even and smooth.
Match Texture And Color
Matching texture and color is crucial for a seamless fix. Use paint or colored fillers that closely resemble your tile. Apply in thin layers to build up color gradually. For texture, mimic the tile’s surface with tools like sponges or brushes. Blend edges carefully to avoid visible lines. Patience here creates a repair that almost disappears.
Seal And Protect
Sealing and protecting your repaired tile is important for long-lasting results. It keeps water and dirt from damaging the fix. This step also helps the repair blend in with the rest of the tile. Proper sealing adds strength and stops further chipping or cracking.
Apply Sealant
Choose a clear, waterproof sealant made for tiles. Use a small brush or sponge to apply the sealant evenly. Cover the entire repaired area and a bit around it. Avoid thick layers to prevent bubbling or peeling. Let the sealant soak into the surface for better protection.
Allow Proper Drying Time
Let the sealant dry completely before using the tile. Drying can take several hours or more, depending on the product. Check the label for exact drying times. Avoid touching or walking on the tile until the sealant is fully dry. This step ensures the repair stays strong and clean.
Prevent Future Damage
Preventing future damage to your tiles keeps them looking great longer. Small steps protect your floors and walls from chips and cracks. Taking care of your tiles is easier than fixing them again.
Use Protective Pads
Place soft pads under furniture legs. This stops sharp edges from scratching or chipping tiles. Pads reduce pressure and spread weight evenly. Replace pads if they wear out over time. This simple step saves tile surfaces from damage.
Regular Tile Maintenance
Clean tiles often to avoid dirt buildup. Dirt can cause tiny scratches leading to chips. Use a gentle cleaner and soft cloth or mop. Check grout and tile edges for cracks regularly. Repair small cracks quickly to prevent larger damage.
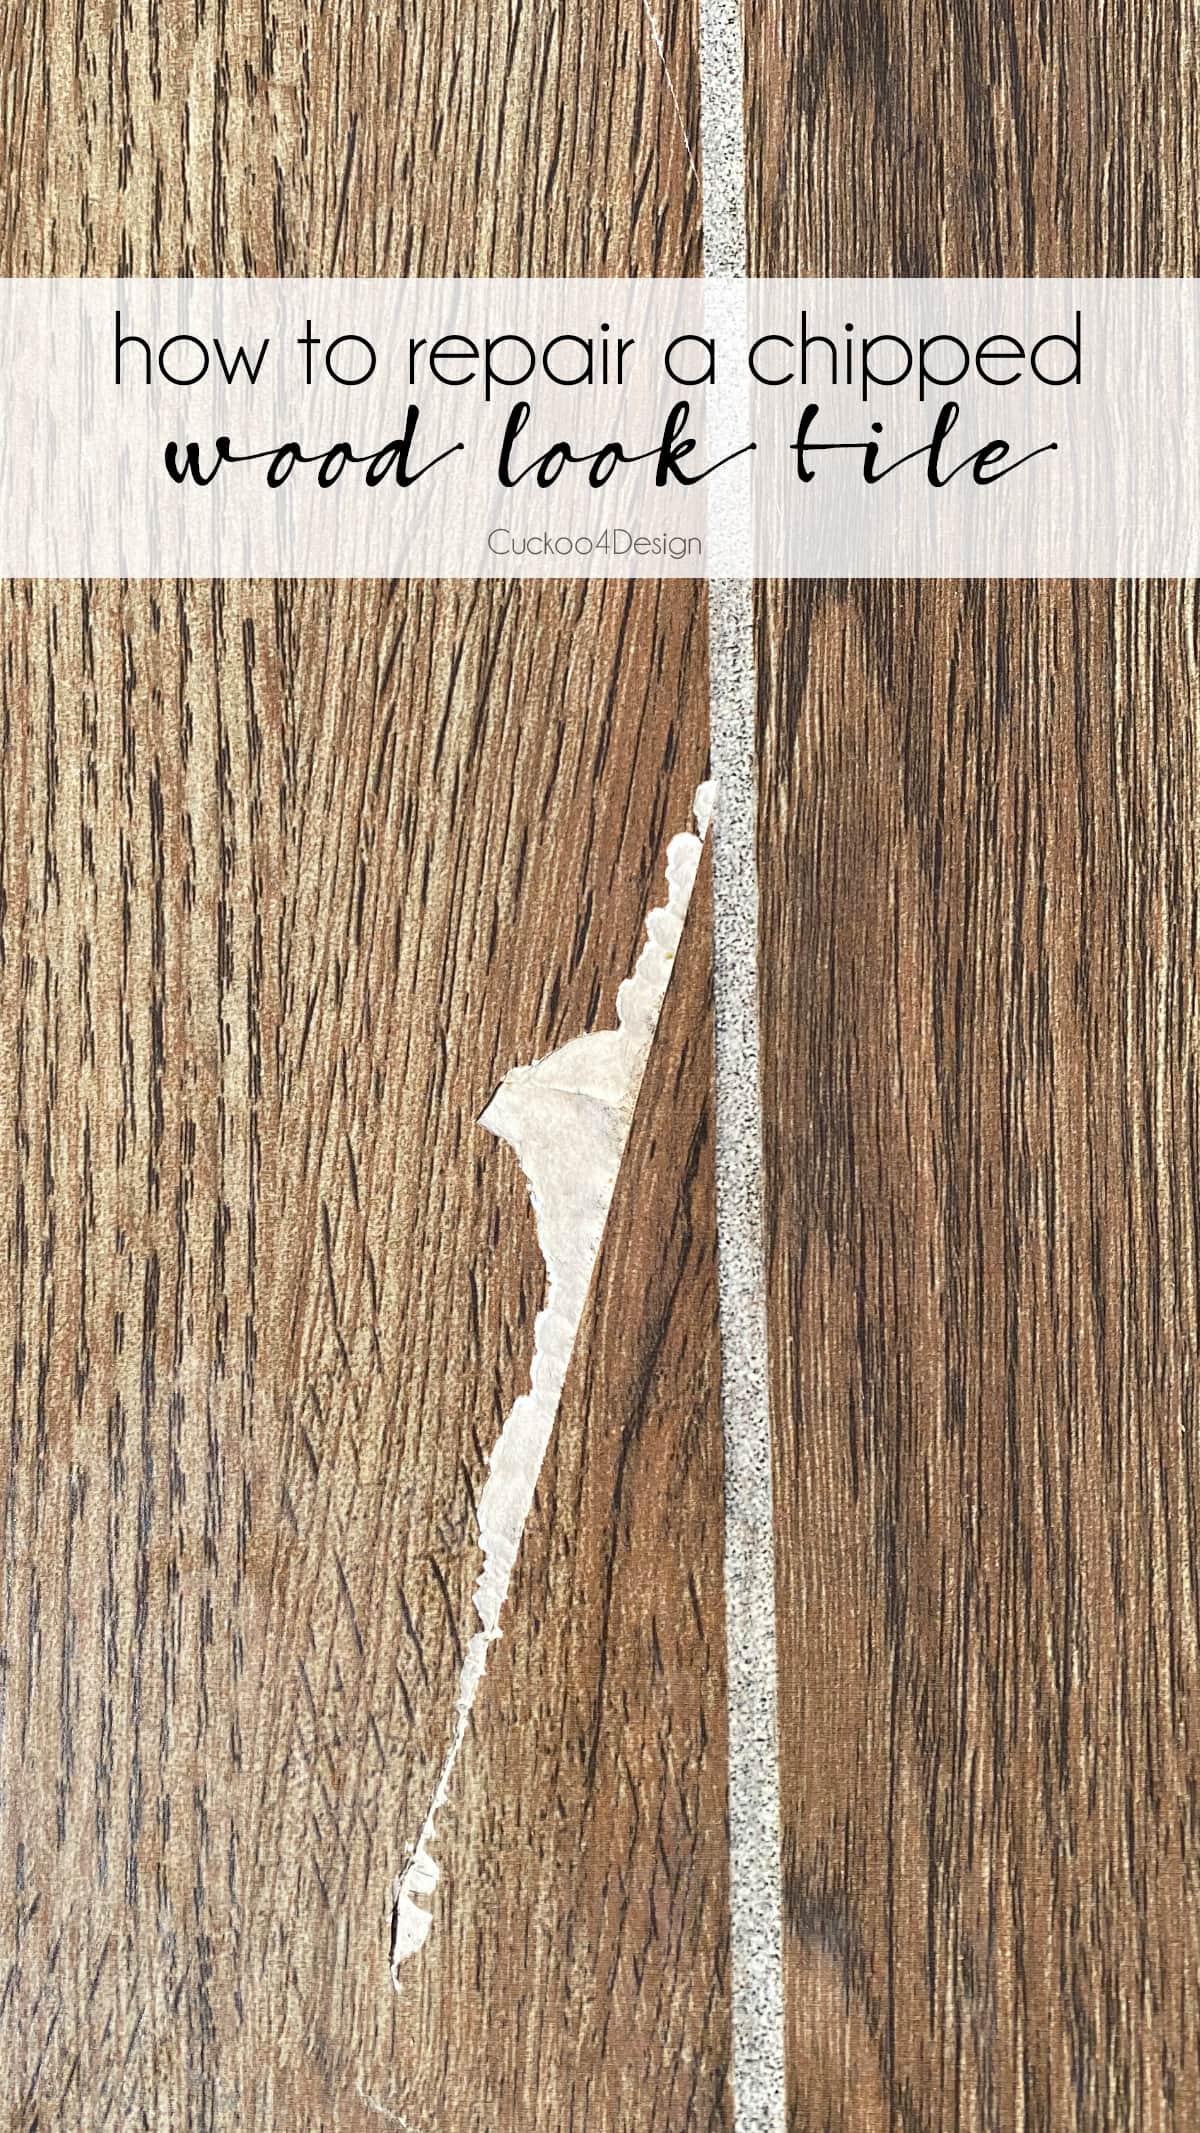
Credit: cuckoo4design.com

Credit: www.labic.net
Frequently Asked Questions
How Can I Repair A Small Chipped Tile At Home?
Use a tile repair kit or epoxy filler to fix small chips. Clean the area well, apply the filler, and smooth it out. Let it dry fully before use.
What Tools Do I Need To Fix A Chipped Tile?
You’ll need a tile repair kit, putty knife, fine sandpaper, and matching paint or glaze. These help fill and blend the chip with the tile. Easy tools, easy fix.
Can I Fix A Chipped Tile Without Removing It?
Yes, you can repair chips without tile removal using epoxy or filler. This method saves time and avoids big repairs. Just clean, fill, and dry.
How Long Does It Take To Fix A Chipped Tile?
Repairing a chip usually takes 30 minutes to an hour. Drying time may add a few hours. It’s a quick and simple fix.
Will A Repaired Tile Chip Be Visible After Fixing?
A well-done repair is often hard to see, especially on small chips. Matching the filler color helps blend the repair. Perfect for hiding small damage.
Conclusion
Fixing chipped tiles can save time and money. Small repairs keep your floors and walls looking nice. Use the right tools and materials for best results. Take your time and follow the steps carefully. Even beginners can handle simple tile fixes.
A little effort brings great improvement to your space. Keep your home safe and attractive with these tips. Try fixing chipped tiles yourself before calling a professional. You will feel proud when your tiles look like new again. Simple fixes make a big difference.