Have you just noticed a hole in your wall and wondered how to fix it quickly and easily? Whether it’s from a door handle mishap, a picture frame accident, or just everyday wear and tear, a hole can make your room look messy and unfinished.
But don’t worry—you don’t need to call a professional or spend a fortune. You’ll discover simple, step-by-step ways to repair that hole yourself. By the time you’re done reading, your wall will look as good as new, and you’ll feel proud of the work you did with your own hands.
Ready to get started? Let’s dive in!
Credit: www.youtube.com
Tools And Materials Needed
Fixing a hole in the wall needs the right tools and materials. Having these ready makes the repair easier and faster. This section lists everything required for a smooth patch job.
Tools Required
You will need a putty knife to spread the filler smoothly. A utility knife helps clean the edges of the hole. Sandpaper or a sanding block smooths the patch once dry. A paintbrush or roller is necessary for repainting after the fix. A dust mask protects you from fine dust during sanding.
Materials Needed
Use spackling paste or joint compound to fill the hole. For larger holes, mesh patch or drywall repair kit works best. Primer and paint match your wall color for a clean finish. Painter’s tape protects the surrounding wall from paint. Clean cloth or sponge helps wipe dust and excess filler.
Credit: www.taskrabbit.com
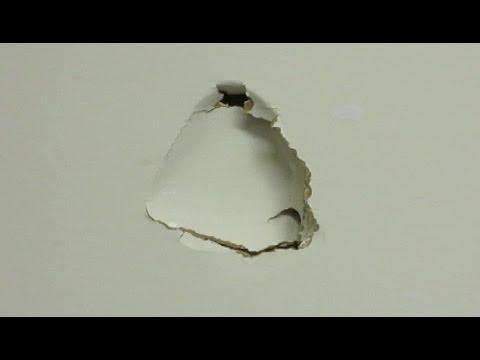
Assessing The Damage
Assessing the damage is the first step to fix a hole in the wall. It helps to understand how big the problem is. This step guides what tools and materials you need. It also saves time and effort during repair.
Inspect The Size Of The Hole
Look closely at the hole. Measure its width and height. Small holes under half an inch need simple patching. Larger holes require extra care and materials. This helps to decide the best repair method.
Check For Wall Material
Know what type of wall you have. Common types are drywall, plaster, or wood paneling. Each needs different repair steps. Identifying the material avoids mistakes in the repair process.
Look For Hidden Damage
Damage may go beyond the hole. Check for cracks, moisture, or mold around it. Hidden damage can weaken the wall. Fix these issues before patching the hole. This ensures a stronger repair.
Assess Structural Issues
Some holes show bigger problems in the wall. Check if the wall feels loose or unstable. If yes, call a professional. Structural problems need expert care to avoid risks.
Preparing The Area
Preparing the area is the first step to fix a hole in the wall. It helps the repair last longer and look better. Taking time to prepare the space makes the next steps easier and cleaner.
Clear The Surrounding Area
Remove furniture and items near the wall. This prevents dust and debris from settling on them. Cover the floor with a drop cloth or plastic sheet. It protects your floor from dust and paint splashes.
Clean The Wall Surface
Use a damp cloth to wipe around the hole. Remove dust, dirt, and loose paint flakes. A clean surface helps the patch stick properly. Let the wall dry completely before moving on.
Remove Loose Or Damaged Material
Use a putty knife or scraper to clear loose drywall. Cut away torn paper or crumbled plaster. A smooth edge around the hole helps the patch fit better. Be gentle to avoid making the hole bigger.
Sand The Edges
Lightly sand the edges of the hole with fine-grit sandpaper. This smooths rough spots and helps the patch blend in. Wipe away sanding dust with a dry cloth.
Fixing Small Holes
Small holes in the wall are common. They happen from nails, hooks, or accidental bumps. Fixing these holes is simple and quick. You do not need special tools or skills. A few steps can make your wall look new again.
Start by cleaning the hole area. Remove dust and loose bits. This helps the repair material stick well. Next, choose the right filler for the job.
Using Spackle Or Putty
Spackle or wall putty works best for small holes. Take a small amount on a putty knife. Press it firmly into the hole. Fill the hole completely without air pockets. Smooth the surface as much as possible. Let it dry for a few hours. Drying time depends on the product used.
Sanding And Smoothing
After the filler dries, sanding is important. Use fine sandpaper for best results. Sand gently to make the surface even. Remove any bumps or rough edges. Wipe the area clean with a dry cloth. The wall is now ready for painting or touch-up.
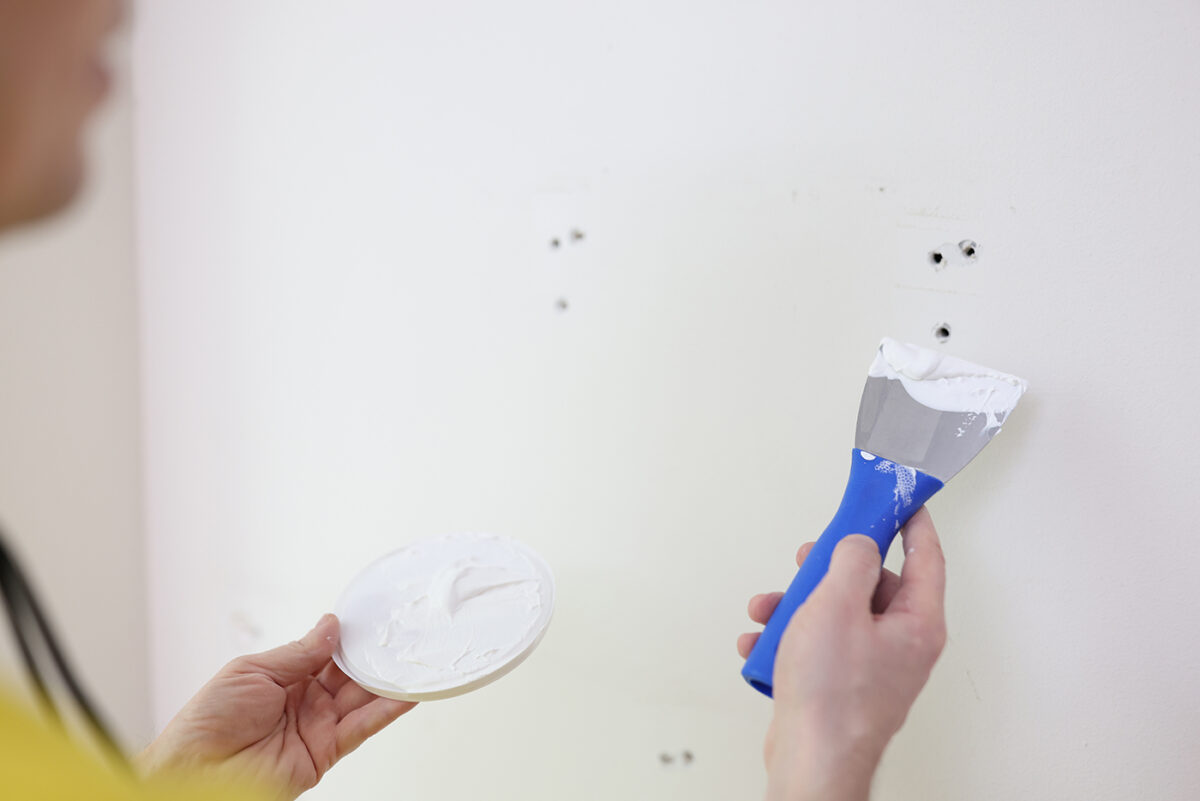
Repairing Medium Holes
Repairing medium holes in walls is a common task that anyone can handle. These holes are bigger than nail holes but smaller than large damage areas. Fixing them properly restores the wall’s smooth look and prevents further damage.
Medium holes usually range from about 1/2 inch to 6 inches across. You need some special tools and materials, but the process is simple and quick. This guide covers how to use patch kits and blend the repair for the best results.
Applying Patch Kits
Start by cleaning the hole and removing loose debris. A patch kit often includes a mesh patch and joint compound. Place the mesh patch over the hole. Press it flat against the wall surface. Use a putty knife to spread joint compound over the patch. Spread it smoothly, covering the edges well. Let the compound dry fully, usually for 24 hours. Apply a second thin layer if needed. This helps to fill in any low spots and smooth the surface.
Blending The Patch
Once the compound dries, sand the area gently with fine sandpaper. Sand until the patch blends evenly with the wall. Remove dust with a damp cloth. Apply primer over the patch to seal it. After the primer dries, paint the area to match the wall color. Use thin layers of paint for a natural finish. Feather the edges of the paint to avoid harsh lines. This makes the patch nearly invisible.
:strip_icc()/how-to-patch-drywall-gray-wall-aadf75af0f5d4ec19704a770bd84efc2.jpg)
Credit: www.bhg.com
Fixing Large Holes
Large holes in walls need more than just a quick patch. These holes require careful steps to restore the wall smoothly. Fixing large holes involves cutting new drywall, taping the seams, and sanding the surface. Each step helps the repair blend in with the rest of the wall.
Cutting And Installing Drywall
Start by cleaning the hole edges to make a neat square or rectangle. Cut a drywall piece that fits the hole exactly. Attach the drywall patch inside the hole using screws or adhesive. Make sure the patch sits flush with the wall surface.
Taping And Mudding
Apply drywall tape over the seams between the patch and the wall. Use joint compound, called mud, to cover the tape and screws. Spread the mud evenly with a putty knife. Let the first layer dry completely before adding more layers.
Sanding And Finishing
Once the mud is dry, sand the surface smooth with fine-grit sandpaper. Be gentle to avoid damaging the drywall. Wipe away dust with a damp cloth. Paint the patched area to match the wall color for a seamless finish.
Painting And Touching Up
Painting and touching up the repaired wall is the last step. It helps the wall look smooth and new. Proper painting hides the patch well. It also protects the repair from damage and moisture. Follow simple steps for a clean finish.
Priming The Surface
Apply a primer to the patched area first. Primer seals the repair and stops paint from peeling. Use a small brush to cover the patch evenly. Let the primer dry completely before painting. This step ensures the paint sticks well.
Matching Paint Colors
Match the paint color to your wall carefully. Take a small chip of paint to a store for matching. Choose a finish that matches the rest of the wall. Test the paint color on a hidden spot first. This helps avoid color differences after painting.
Applying Paint
Use a small brush or roller for the patched spot. Paint in thin, even coats for best results. Let each coat dry before adding the next one. Blend the paint edges softly into the rest of the wall. This makes the repair less visible and neat.
Preventing Future Damage
Fixing a hole in the wall is just the first step. Preventing future damage keeps your walls strong and looking good. Small habits and smart choices protect your walls from new holes and cracks. Follow easy tips to avoid common causes of damage.
Protect High-traffic Areas
High-traffic spots get more bumps and scrapes. Use corner guards or wall protectors to shield these areas. Furniture placed too close to walls can cause dents. Keep a small gap between furniture and walls to reduce impact.
Use Wall Hooks And Anchors Properly
Wrong hooks can create big holes. Choose the right anchors for your wall type. Use lightweight hooks for small pictures or decorations. For heavier items, use strong anchors designed for drywall or plaster.
Control Moisture And Humidity
Moisture weakens walls and causes peeling paint. Use a dehumidifier in damp rooms like bathrooms. Fix leaks and water spills quickly. Proper ventilation keeps walls dry and healthy.
Handle Furniture With Care
Dragging furniture can scratch or puncture walls. Lift furniture when moving it. Add felt pads to chair and table legs to reduce damage. Teach family members to be careful near walls.
Frequently Asked Questions
How Do I Repair A Small Hole In Drywall Quickly?
Fill the hole with spackle or joint compound using a putty knife. Let it dry, then sand smooth. Finally, paint over the area to match the wall.
What Materials Do I Need To Fix A Wall Hole?
You need spackle or joint compound, a putty knife, sandpaper, primer, and paint. For larger holes, use a patch kit or drywall piece.
Can I Fix A Hole In Plaster Walls Myself?
Yes, small plaster holes can be filled with patching plaster or joint compound. For bigger holes, use a mesh patch before applying plaster.
How Long Does It Take To Fix A Wall Hole?
Small holes usually take a few hours to repair, including drying time. Larger holes may need a day or two for full drying.
Should I Prime The Wall After Patching The Hole?
Priming is important to seal the patch and prevent paint from peeling. Use a primer before painting for a smooth, even finish.
Conclusion
Fixing a hole in the wall is easier than it seems. Small holes need just a few tools and some patience. Take your time to clean, patch, and sand the area well. A smooth finish will make your wall look good as new.
With simple steps, you can save money and improve your space. Try this yourself and see the difference it makes. No need to call a pro for small repairs. You have what it takes to fix it right.