
Is your Harley Davidson refusing to start when you’re ready to hit the road? Nothing’s more frustrating than a stubborn starter that leaves you stuck and wondering what went wrong.
You might be asking yourself, “Why won’t my bike start? ” or “How can I fix this quickly and get back on the road? ” You’re not alone. Many Harley owners face starter problems, but the good news is that most issues can be diagnosed and solved with a few simple steps.
You’ll discover clear, easy-to-follow troubleshooting tips that will help you understand what’s causing your starter trouble and how to fix it fast. Keep reading to get your Harley roaring again.

Credit: www.youtube.com
Common Harley Starter Issues
Harley Davidson motorcycles are known for their power and style. Yet, starter problems are common among riders. These issues can stop your bike from starting and cause frustration. Understanding common starter problems helps you fix them faster. Knowing what to check saves time and money on repairs.
Symptoms Of Starter Failure
A failing starter shows clear signs. The engine may not turn over when you press the start button. You might hear a clicking sound but no engine movement. Sometimes the starter spins without engaging the engine. The bike may start intermittently or stall soon after starting. These symptoms signal a starter problem needing attention.
Electrical Vs Mechanical Problems
Starter issues come from electrical or mechanical faults. Electrical problems involve the battery, wires, or starter relay. A weak battery or loose connections can stop the starter from working. Mechanical problems affect the starter motor or gears. Worn brushes, damaged gears, or a stuck solenoid cause the starter to fail. Identifying the type guides your troubleshooting steps.
Frequent Causes
Common causes include a dead battery, corroded terminals, or faulty wiring. Dirt and grime build-up on the starter motor can block its function. A worn-out starter solenoid often leads to starting problems. Loose or broken wires disrupt power flow to the starter. Regular checks and cleaning reduce the risk of these issues.
Checking The Battery
Checking the battery is the first step in solving Harley Davidson starter problems. A weak or dead battery often causes starting issues. Ensuring the battery is healthy can save time and money.
Testing the battery voltage helps identify its condition. A fully charged battery should read around 12.6 volts or higher. Lower voltage means the battery may need charging or replacement.
Testing Battery Voltage
Use a multimeter to test the battery voltage. Set the meter to DC voltage. Place the positive lead on the battery’s positive terminal and the negative lead on the negative terminal. Read the voltage displayed. Below 12.4 volts means the battery is weak. Charge or replace it based on the reading.
Signs Of A Weak Battery
The engine cranks slowly or not at all. Lights on the dashboard dim or flicker. Electrical accessories may work unevenly. The battery may look swollen or corroded. These signs suggest the battery needs attention.
Battery Maintenance Tips
Keep battery terminals clean and free from corrosion. Use a wire brush to remove rust or dirt. Check battery fluid levels regularly if applicable. Charge the battery after long periods of inactivity. Store the motorcycle in a cool, dry place to protect the battery.
Inspecting The Starter Relay
Inspecting the starter relay is a key step in fixing Harley Davidson starter problems. The starter relay acts as a bridge between the battery and the starter motor. If it fails, the bike won’t start. Checking this part can save time and money before replacing more expensive components.
Start by understanding what the starter relay does. Then, learn how to test it for faults. Finally, know how to replace it if needed. These steps help keep your Harley running smoothly.
Role Of The Starter Relay
The starter relay sends electrical current from the battery to the starter motor. It works like a switch that controls high power with a small signal. When you press the start button, the relay closes the circuit and powers the motor.
If the relay is bad, the current won’t flow. The starter motor will not turn, and the engine won’t start. A faulty relay can cause clicking sounds or no sound at all.
How To Test The Relay
First, locate the starter relay on your Harley. It is usually near the battery or fuse box. Use a multimeter to check for continuity and proper voltage.
Test the relay coil by measuring resistance. A very high or low reading means a problem. Next, listen for a clicking sound when you press the start button. No click may indicate a bad relay.
You can also swap the relay with a known good one. If the bike starts, the original relay is faulty.
Replacing A Faulty Relay
Turn off the motorcycle and disconnect the battery before replacing the relay. Remove the old relay by unplugging the connectors or unscrewing it. Place the new relay in the same position.
Reconnect all wires securely. Reconnect the battery and test the starter. The bike should start smoothly if the relay was the issue.
Use only a relay that matches your Harley’s model and specifications. This ensures proper function and safety.
Examining Starter Motor
The starter motor is a key part of your Harley Davidson. It starts the engine by turning it over. Checking this motor can help find many common starting problems. Understanding its parts and how they work is the first step. Then, you can spot issues and fix them to get your bike running smoothly again.
Starter Motor Components
The starter motor has several important parts. The armature spins inside the motor. The brushes press against the armature to send electrical current. The commutator helps transfer power to the armature. The solenoid acts like a switch to start the motor. Each part must work well to start the engine.
Diagnosing Motor Issues
Listen for clicking sounds when pressing the start button. No sound may mean a dead battery or bad solenoid. A slow spin can show a weak battery or worn brushes. If the motor does not turn at all, the armature could be stuck. Testing each part with a multimeter helps find the problem.
Cleaning And Repairing
Dirt and corrosion often cause starter motor issues. Clean the motor with a soft brush and electrical cleaner. Check the brushes for wear and replace if needed. Make sure the commutator is smooth and free of grime. Tighten loose wires and connections. Proper cleaning and minor repairs can restore motor function.
Wiring And Connections
Wiring and connections play a key role in your Harley Davidson’s starting system. Faulty wires or bad connections often cause starter problems. Checking these parts can save time and money on repairs. Start with a careful look at all wires and connectors near the starter motor and battery. Signs of wear or damage are clues to possible issues.
Checking For Loose Wires
Loose wires can stop the starter from working. Gently wiggle wires connected to the starter and battery. Tighten any that feel loose. Loose wires cause poor electrical flow, making the starter weak or unresponsive. Use a wrench or pliers to secure wires firmly. Avoid overtightening, which can break the wire or connector.
Corrosion And Damage
Corrosion builds up on wire ends and connectors over time. It looks like white or green powder. Corrosion blocks electricity and can stop the starter. Use a wire brush or sandpaper to clean corroded parts. Check wires for cracks, frays, or breaks. Replace any damaged wires to avoid future problems.
Securing Electrical Connections
Proper connections ensure the starter gets enough power. Tighten all nuts and bolts on battery terminals and starter cables. Use dielectric grease on connections to stop corrosion. This grease keeps moisture out and improves conductivity. Double-check all connectors for a snug fit before testing the starter again.
Credit: www.insurance.harley-davidson.com
Starter Solenoid Troubleshooting
Troubleshooting the starter solenoid is key to fixing Harley Davidson starter problems. The solenoid controls the electric current to the starter motor. If it fails, the engine won’t start. Understanding how the solenoid works helps identify issues fast.
Check the solenoid before replacing other parts. It often causes common starting troubles. Testing the solenoid with simple tools can save time and money. This section explains solenoid function, testing methods, and frequent faults.
Solenoid Function
The starter solenoid acts like a switch. It sends power from the battery to the starter motor. When you press the start button, the solenoid closes the circuit. This allows electricity to flow and crank the engine. Without a working solenoid, the starter motor stays off.
Testing The Solenoid
Use a multimeter or test light to check the solenoid. First, ensure the battery is fully charged. Listen for a clicking sound when pressing the start button. No click often means a bad solenoid. Measure voltage at the solenoid terminals to confirm power flow.
Another test is to jump the solenoid terminals. This bypasses the control circuit. If the starter motor runs, the solenoid is faulty. Always test in a safe, controlled way to avoid sparks or damage.
Common Solenoid Faults
Corrosion on terminals can stop the solenoid from working. Loose or damaged wires also cause failures. The solenoid’s internal coil can burn out or short circuit. These faults stop the starter motor from receiving power.
Wear and tear over time reduce solenoid performance. Heat and vibration inside the engine space cause damage. Regular inspection and cleaning help prevent solenoid problems. Replace the solenoid if tests show no continuity or power flow.
Quick Fixes For Starter Problems
Starter problems can stop your Harley Davidson from running. Quick fixes help get your bike going fast. These easy steps save time and effort. Follow simple methods to deal with common starter issues. Keep your ride ready and avoid long waits.
Jump-starting Techniques
Jump-starting gives your battery a quick boost. Use jumper cables and a working battery. Connect positive terminals first, then negative. Avoid sparks by not touching cables together. Start the working bike, then try your Harley. Let it run for a few minutes to charge. This method works if the battery is weak.
Using Starter Fluid Safely
Starter fluid can help if the engine is hard to start. Spray a small amount into the air intake. Do not use too much—it can damage the engine. Use in a well-ventilated area. Avoid direct contact with skin and eyes. This method helps if the fuel system is slow. Always follow the instructions on the can.
Temporary Bypass Methods
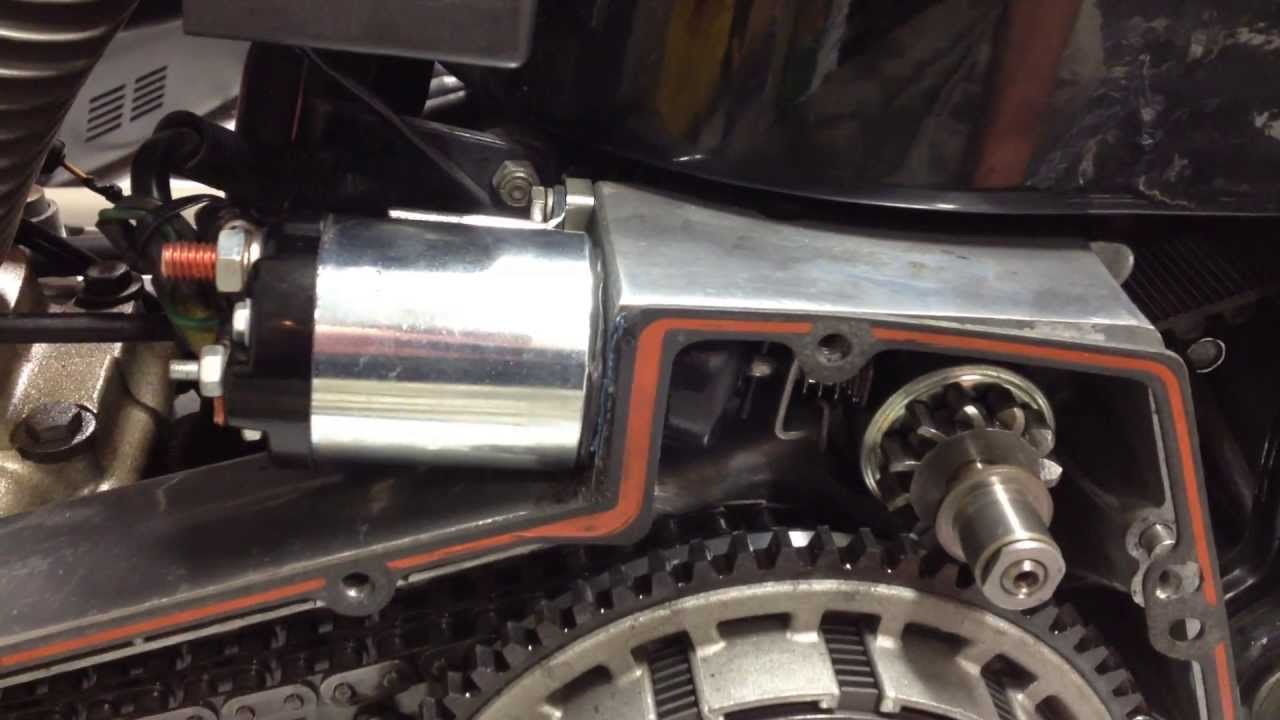
Bypass methods help test the starter motor directly. Locate the starter solenoid and use a wire to connect terminals. This sends power straight to the starter. Be careful to avoid sparks or short circuits. This trick checks if the starter motor works. Only try this if you know basic bike wiring.
Credit: www.youtube.com
Preventive Maintenance Tips
Preventive maintenance helps keep your Harley Davidson starter working smoothly. Small steps taken regularly can avoid big problems later. It saves time and money by stopping issues before they start.
Focus on key areas like the battery and starter system. Avoid common mistakes that cause starter failures. Simple care routines make a big difference in your bike’s reliability.
Regular Battery Care
Check your battery often. Clean the terminals to stop corrosion. Make sure the connections are tight and secure. Use a voltmeter to test the battery charge. Replace the battery if it shows low power or age.
Starter System Inspections
Look over the starter motor and wiring regularly. Check for loose wires or damage. Listen for unusual sounds when starting. Tighten any loose bolts. Keep the starter clean from dirt and oil.
Avoiding Common Mistakes
Never hold the starter button too long. It can burn the starter motor. Avoid jump-starting your bike incorrectly. Use the right tools and follow instructions. Do not ignore warning signs like slow starting or clicking noises.
Frequently Asked Questions
Why Won’t My Harley Davidson Starter Motor Turn?
A common cause is a weak or dead battery. Check battery voltage and connections first. Also, inspect starter relay and wiring for damage.
How To Fix A Clicking Sound When Starting Harley?
Clicking usually means low battery power or poor electrical connections. Tighten battery terminals and test the battery charge. Replace the starter relay if needed.
What Causes Harley Starter To Spin But Not Engage?
This can happen if the starter clutch is worn or damaged. Inspect the starter clutch and gears for wear. Replace parts if they don’t engage properly.
How Do I Test The Harley Davidson Starter Relay?
Use a multimeter to check for continuity and proper voltage. Listen for a clicking sound when activating the relay. Replace the relay if it fails tests.
Why Does My Harley Starter Work Intermittently?
Loose battery cables or corroded connections often cause intermittent starts. Clean and tighten all electrical connections. Also, inspect the ignition switch for faults.
Can A Bad Starter Solenoid Cause Harley Starting Problems?
Yes, a faulty solenoid can prevent the starter motor from receiving power. Test the solenoid with a multimeter or by bypassing it. Replace if it doesn’t function correctly.
Conclusion
Harley Davidson starter problems can be fixed with basic checks. Start by testing the battery and connections. Clean or replace dirty parts to improve performance. Listen for unusual sounds during starting attempts. Regular maintenance helps prevent future issues. Taking small steps saves time and money.
Keep your motorcycle ready for the road. Troubleshooting is easier than it seems. Stay patient and follow simple tips. Your Harley will run smoothly again.