Is your Moen faucet leaking or not working smoothly? The Moen 1225 cartridge might be the culprit.
Replacing it can seem tricky, but with the right guidance, you can fix it yourself quickly and save money. You’ll find simple troubleshooting tips and step-by-step instructions to get your faucet back in top shape. Keep reading—your faucet’s perfect flow is just a few easy steps away.
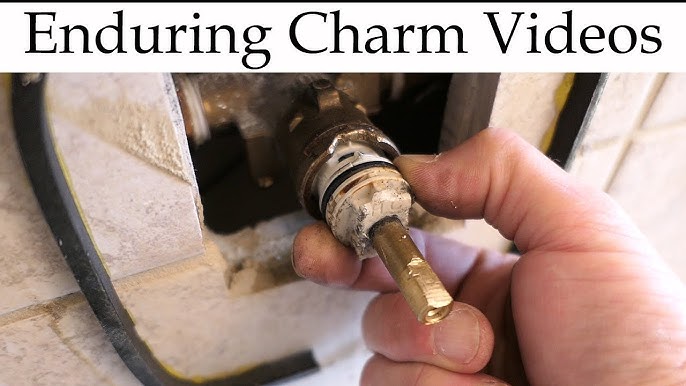
Credit: www.youtube.com
Signs Of A Faulty Moen 1225 Cartridge
The Moen 1225 cartridge controls water flow and temperature in your faucet. It can wear out over time, causing problems. Knowing the signs of a faulty cartridge helps fix issues fast. Spotting these signs early saves water and prevents bigger repairs.
Check your faucet for common problems. A damaged cartridge often causes leaks, poor temperature control, or low water flow. Recognizing these symptoms guides you toward replacing the cartridge promptly.
Leaking Faucet Issues
A leaking faucet often points to a worn cartridge. Drips from the spout waste water and increase bills. Persistent leaks show the cartridge seal is damaged or cracked. Fixing the leak requires removing the old cartridge and installing a new one.
Difficulty In Temperature Control
The cartridge mixes hot and cold water. If your faucet struggles to keep a steady temperature, the cartridge may be faulty. Sudden changes in water temperature or only hot or cold water coming out indicate problems. Replacing the cartridge restores smooth temperature control.
Reduced Water Flow
Blocked or damaged cartridges reduce water flow. You may notice weak water pressure or uneven flow from the faucet. Mineral buildup inside the cartridge can cause this. Cleaning or replacing the cartridge improves water flow and faucet performance.
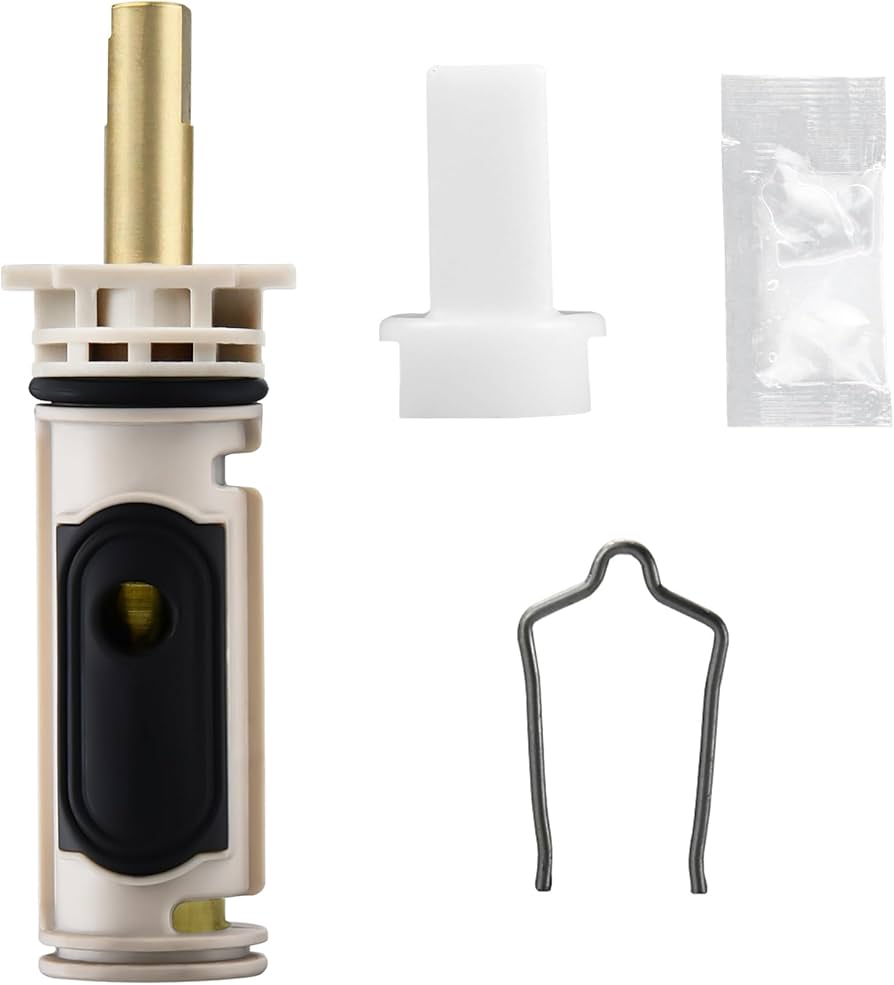
Credit: www.amazon.com
Tools Needed For Cartridge Replacement
Replacing the Moen 1225 cartridge requires a few tools. Having the right tools makes the job easier and faster. This section covers the tools needed for a smooth cartridge replacement.
Essential Hand Tools
A good set of pliers helps you grip and remove parts easily. An adjustable wrench fits different bolt sizes perfectly. A flathead screwdriver is useful for prying off handles and covers. A Phillips screwdriver helps remove screws that hold the cartridge. A utility knife can cut any old sealant or caulk around the faucet. These basic tools are must-haves for the job.
Optional Helpful Accessories
A cartridge puller tool can make removing the cartridge easier. It prevents damage to the faucet during removal. Silicone grease helps lubricate the new cartridge for smooth operation. A flashlight lights up tight or dark spaces under the sink. A small container keeps screws and parts safe while you work. These extras are not required but improve the repair experience.
Step-by-step Cartridge Removal
Removing the Moen 1225 cartridge is key to fixing leaks or poor water flow. This step-by-step guide helps you take out the cartridge safely. Follow each part carefully to avoid damage and ensure a smooth repair.
Shutting Off Water Supply
First, turn off the water supply to the faucet. Find the valves under the sink. Turn both the hot and cold water valves clockwise. This stops water flow during the repair. Open the faucet to drain any leftover water.
Removing Handle And Trim
Next, remove the faucet handle. Look for a small screw on the handle’s base or under a decorative cap. Use a screwdriver or Allen wrench to loosen it. Pull the handle straight up to remove it. Then, take off the trim parts around the cartridge carefully.
Extracting The Old Cartridge
Use pliers or a cartridge puller tool to grab the cartridge. Pull it straight out with steady force. Avoid twisting or bending to prevent damage. Check the cartridge for wear or buildup. Clean the inside of the faucet before inserting a new cartridge.

Credit: www.youtube.com
Installing The New Moen 1225 Cartridge
Installing the new Moen 1225 cartridge is a key step in fixing your faucet. This process restores smooth water flow and stops leaks. Taking careful steps ensures the cartridge fits perfectly and works well. Follow the simple guide below to install the cartridge correctly.
Preparing The Cartridge For Installation
Start by checking the new cartridge for any damage. Remove any protective covers or caps. Clean the inside of the faucet body gently. This removes old debris and helps the cartridge fit snugly. Apply a small amount of plumber’s grease to the cartridge O-rings. This helps prevent leaks and makes insertion easier.
Inserting And Aligning The Cartridge
Hold the cartridge upright and slide it into the faucet body. Make sure the cartridge tabs line up with the slots inside the faucet. Push the cartridge firmly but gently until it stops. Avoid forcing it, as this can cause damage. Proper alignment is crucial for the faucet to work correctly.
Reassembling Faucet Components
Place the retaining clip or nut back to secure the cartridge. Tighten it by hand, then use a wrench for a snug fit. Replace the handle and any decorative parts. Tighten screws carefully to avoid stripping them. Turn on the water and check for leaks. Your faucet should now work smoothly and leak-free.
Troubleshooting Common Replacement Issues
Troubleshooting common issues after replacing the Moen 1225 cartridge helps save time and stress. Knowing how to handle stuck cartridges, fix leaks, and adjust water temperature ensures your faucet works well. This guide covers simple steps to solve these frequent problems.
Handling Stuck Cartridges
Stuck cartridges are a common problem during replacement. Use a cartridge puller or pliers to grip the cartridge firmly. Apply steady pressure while twisting gently to loosen it. Avoid using too much force to prevent damage to the faucet body. Applying a lubricant like WD-40 can help loosen rust or mineral build-up. Let it sit for a few minutes before trying to remove the cartridge again.
Dealing With Water Leaks After Replacement
Leaks after cartridge replacement usually come from poor sealing or incorrect installation. Check that the cartridge is seated properly in the valve body. Make sure all O-rings and seals are in place and not damaged. Tighten the retaining clip or nut securely but do not overtighten. Inspect the water supply lines for any loose connections. Test the faucet by turning the water back on slowly and watching for leaks.
Adjusting Water Temperature Problems
Water temperature issues often happen if the cartridge is not aligned correctly. The Moen 1225 cartridge has a specific orientation for hot and cold water. Rotate the cartridge slightly to adjust the mix of hot and cold water. If the water is too hot or too cold, move the cartridge in small increments until the temperature balances. Check the faucet handle position to ensure it matches the cartridge setting.
Maintenance Tips For Longevity
Keeping your Moen 1225 cartridge in good shape helps your faucet last longer. Simple steps can stop problems before they start. Regular care saves money and time on repairs. Below are tips to keep the cartridge working well.
Regular Cleaning Practices
Clean your faucet parts often. Wipe the handle and spout with a soft cloth. Use mild soap and water to remove dirt. Avoid harsh chemicals that can damage the cartridge. Rinse well and dry completely. This keeps the cartridge free from grime and buildup.
Preventing Mineral Buildup
Hard water can cause mineral deposits. These deposits block the cartridge and reduce flow. Use a vinegar soak to dissolve mineral buildup. Soak a cloth in vinegar and wrap it around the faucet base. Let it sit for 30 minutes, then scrub gently. Repeat this every few months to prevent damage.
When To Replace The Cartridge Again
Sometimes cleaning is not enough. If the faucet leaks or drips constantly, check the cartridge. If water flow is weak or uneven, it might be time to replace. Also, if the handle feels stiff or hard to turn, replacement can help. Regular checks avoid bigger problems later.
Frequently Asked Questions
What Tools Are Needed To Replace Moen 1225 Cartridge?
You need a screwdriver, pliers, and a cartridge puller. These tools help remove the old cartridge safely.
How Do I Identify A Faulty Moen 1225 Cartridge?
Look for leaks, low water pressure, or difficulty turning the handle. These signs often mean the cartridge needs replacement.
How Long Does Moen 1225 Cartridge Replacement Take?
It usually takes about 15 to 30 minutes. The time depends on your experience and tool availability.
Can I Replace Moen 1225 Cartridge Without Shutting Off Water?
No, always turn off the water supply before starting. This prevents water damage and makes the job easier.
What Causes Moen 1225 Cartridge To Fail Early?
Hard water buildup and worn-out seals often cause failure. Regular cleaning helps extend cartridge life.
How To Avoid Leaks After Installing Moen 1225 Cartridge?
Ensure the cartridge is seated properly and tighten screws firmly. Double-check all connections before turning water back on.
Conclusion
Replacing the Moen 1225 cartridge can fix many faucet problems. Follow each step carefully for best results. Clean parts and check for damage before installing new cartridge. Tighten everything well to stop leaks and drips. Take your time, and don’t rush the process.
This simple fix can save money and avoid a plumber’s visit. Keep tools and instructions handy for future repairs. Small efforts bring smooth water flow and less frustration.