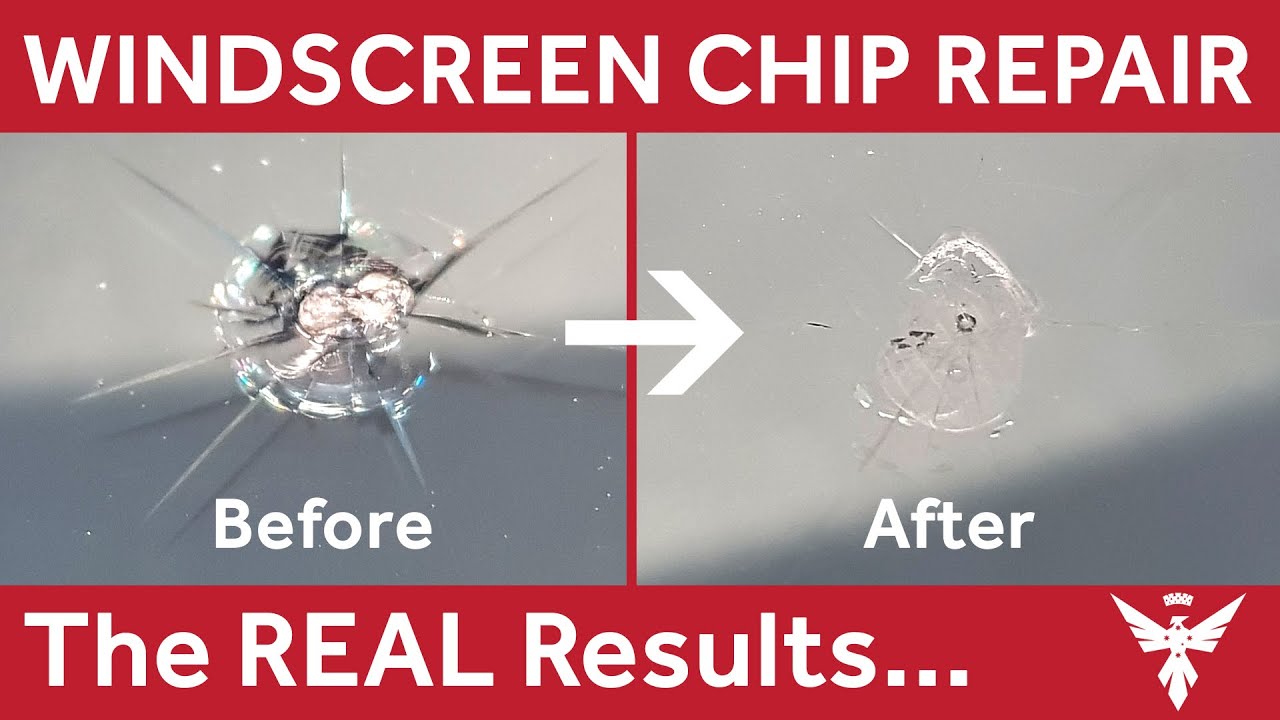
A chipped windscreen might seem like a small problem, but if you ignore it, it can quickly turn into a costly repair. You might be wondering if you really need to fix it right away or if it’s safe to drive with the chip.
The truth is, addressing the damage now can save you time, money, and stress later. You’ll learn simple, effective ways to fix a chipped windscreen yourself or know when to call in a professional. Keep reading to protect your safety and avoid bigger headaches down the road.
Credit: warpweftandway.com
Identify The Chip Type
Identifying the type of chip on your windscreen is the first step to fixing it correctly. Knowing the chip type helps you decide if repair is possible or replacement is needed. It also guides the repair process to prevent the damage from spreading. This section explains common chip shapes and how to assess their size and location.
Common Chip Shapes
Chips on windscreens come in several typical shapes. The most common are star, bullseye, and crack chips. Star chips have lines radiating from the center, like a starburst. Bullseye chips look like a circle with a dark center. Crack chips appear as a small break or split in the glass. Each shape affects the repair method and urgency differently.
Assessing Chip Size And Location
Chip size matters for repair options. Most repair kits work well for chips smaller than a quarter. Larger chips may need professional attention. The chip’s location also affects safety. Chips near the driver’s line of sight can be dangerous. Chips at the edge of the windscreen can spread quickly. Understanding size and location helps you choose the right fix.
Gather Necessary Tools
Before fixing a chipped windscreen, gather all necessary tools. Having the right tools makes the repair easier and more effective. Prepare your workspace and keep everything within reach. This saves time and avoids frustration during the repair process.
Essential Repair Kits
A good repair kit is the first thing to get. It usually includes resin, an injector, and curing strips. Resin fills the chip and bonds the glass. The injector helps push resin into the crack. Curing strips protect the resin while it hardens. Some kits also come with a razor blade to remove extra resin. Choose a kit that fits your chip size and type.
Additional Supplies You May Need
Besides the repair kit, some extra supplies help the job. Clean the glass with glass cleaner and a lint-free cloth. This removes dirt and oil from the chip area. Use masking tape to mark the chip location. A small flashlight helps see the chip clearly. Gloves protect your hands from resin and glass. Keep paper towels nearby for quick cleanups.
Prepare The Windscreen
Preparing the windscreen is an important first step in fixing a chip. This step helps the repair resin stick better. It also stops dirt or dust from making the damage worse. Taking time to prepare the area improves the repair quality.
Cleaning The Damaged Area
Start by removing any loose glass pieces from the chip. Use a soft brush or cloth to gently clean the area. Avoid using water directly on the chip. Instead, wipe with a dry cloth to remove dust. Clean surfaces help the resin fill the chip completely.
Protecting Surrounding Surfaces
Cover the area around the chip with tape or plastic film. This protects the paint and glass from resin spills. Use painter’s tape for easy removal later. Keep the protected area dry and free from dirt. This step keeps your car clean during the repair process.
Apply The Repair Resin
Applying the repair resin is a key step in fixing a chipped windscreen. This resin fills the chip and prevents cracks from growing. It also restores the glass’s strength and clarity. Proper application ensures a smooth, lasting repair.
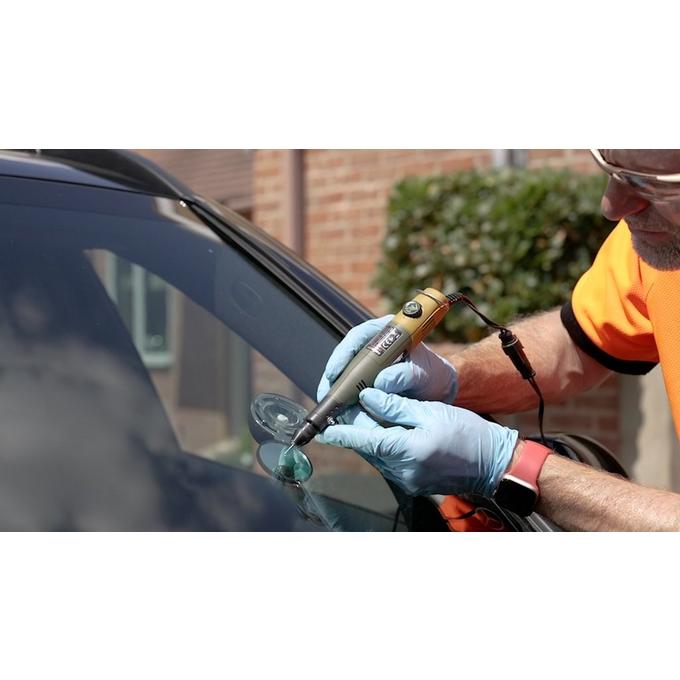
Using The Injector Correctly
Start by attaching the injector to the chip carefully. Make sure the injector seals tightly on the glass. Slowly press the resin into the chip. Avoid pressing too hard, which can cause bubbles. Keep the injector steady and controlled. Let the resin fill the chip completely for best results.
Removing Air Bubbles
Air bubbles weaken the repair and reduce clarity. After applying the resin, check for bubbles inside the chip. Use a pin or a small tool to gently remove trapped air. Tap the glass lightly to release bubbles. Repeat the process until no bubbles remain. A clear, bubble-free resin means a stronger repair.
Cure The Resin
After applying resin to a chipped windscreen, curing it properly is essential. This step hardens the resin, sealing the chip and preventing cracks from spreading. Curing strengthens the repair and restores the windscreen’s clarity. The process uses light to harden the resin quickly and effectively.
Using Uv Light Or Sunlight
Resin cures best under ultraviolet (UV) light. Many repair kits include a small UV lamp. Place the lamp close to the resin and turn it on. Keep it there for the recommended time, usually 5 to 10 minutes. If a UV lamp is not available, natural sunlight works too. Position the car so sunlight hits the resin directly. Sunlight may take longer but still cures the resin well.
Timing And Best Practices
Follow the instructions for curing time carefully. Under-curing leaves the resin soft and weak. Over-curing can cause the resin to become brittle. Avoid touching the resin during curing. Dust or dirt can stick and ruin the finish. Cure the resin in a shaded area if using a UV lamp. This prevents interference from other light sources. Proper timing ensures a strong, clear repair.

Credit: www.oneminutesouth.com
Finish The Repair
After injecting resin into the chip, it is time to finish the repair. This step ensures the repair looks smooth and strong. Proper finishing improves visibility and stops the chip from spreading.
Removing Excess Resin
Use a razor blade to carefully scrape off extra resin. Hold the blade flat against the glass. Remove resin until the surface feels even. Do this gently to avoid scratching the windscreen. Clean the area with a soft cloth to remove dust or residue.
Polishing The Windscreen
Apply a small amount of glass polish on a soft cloth. Rub the polish in circular motions over the repaired area. This helps blend the repair with the rest of the windscreen. Keep polishing until the surface shines and feels smooth. Wipe off any leftover polish with a clean cloth.
When To Seek Professional Help
Knowing when to seek professional help is crucial for fixing a chipped windscreen. Some damages are too big or complex for simple DIY repairs. Ignoring these signs can cause bigger problems and safety risks. Here are key points to consider before deciding to call an expert.
Large Or Complex Cracks
Cracks longer than a few inches need professional attention. Large chips spread quickly and weaken the glass. Complex cracks, like star shapes or multiple lines, are hard to fix at home. Experts have the right tools and materials to handle these issues safely and effectively.
Safety Considerations
A damaged windscreen can reduce visibility and increase injury risk. Professionals check if the damage affects the car’s safety features. They ensure the repair or replacement meets safety standards. Driving with a compromised windscreen puts you and others in danger. Trusting a trained technician can keep everyone safer on the road.
Prevent Future Damage
Preventing future damage to your windscreen saves time and money. Small chips can grow into big cracks fast. Taking steps to protect your windscreen keeps it strong and clear. Simple habits help avoid costly repairs or replacements.
Safe Driving Tips
Drive carefully on rough roads and avoid potholes. Keep a safe distance from trucks and construction vehicles. Flying stones often come from their tires or loads. Slow down on gravel and dirt roads to reduce impact. Avoid sudden braking or sharp turns near debris.
Windshield Maintenance
Clean your windscreen regularly with mild soap and water. Avoid harsh chemicals that can weaken the glass. Replace old or damaged wiper blades to prevent scratches. Park in shaded areas to protect against sun damage. Inspect the windscreen often for small chips or cracks. Fix minor damage early to stop it from spreading.
Credit: www.youtube.com
Frequently Asked Questions
How Quickly Should I Repair A Chipped Windscreen?
Fix a chip as soon as possible. Small chips can spread and cause bigger cracks. Early repair saves money and keeps you safe.
Can I Fix A Chipped Windscreen Myself?
Yes, small chips can be repaired at home using a repair kit. Follow instructions carefully for the best results. Larger cracks need professional help.
What Tools Are Needed To Fix A Windscreen Chip?
A windscreen repair kit usually includes resin, an applicator, and curing strips. Clean the chip before applying resin. Use sunlight or a UV lamp to cure the resin.
Will A Repaired Chip Affect My Visibility?
Properly repaired chips usually do not affect visibility. The resin fills the chip and smooths the surface. Avoid driving if cracks distort your view.
How Much Does It Cost To Fix A Chipped Windscreen?
Repair costs depend on chip size and location. Small chips may cost between $20 and $50. Larger cracks might need full windscreen replacement, which costs more.
Conclusion
Fixing a chipped windscreen is important for safety and visibility. Small chips can turn into big cracks quickly. Acting fast helps avoid costly replacements. Use a repair kit or visit a professional for best results. Regularly check your windscreen for damage.
Clear, strong glass keeps you safe on the road. Taking care of chips early saves time and money. Don’t ignore even tiny cracks. Your windscreen protects you every day. Simple steps can keep it in good shape.