
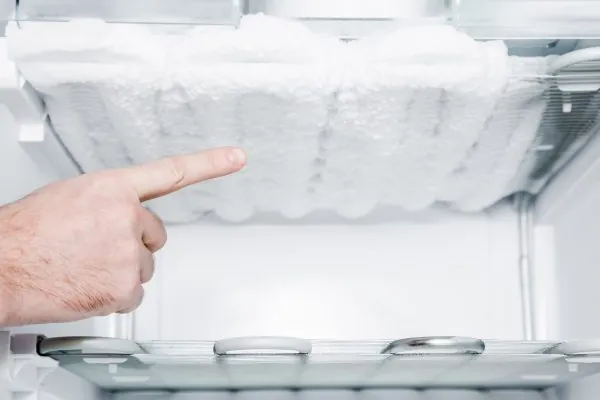
When your kitchen turns into a swamp or your food starts spoiling, discovering your Frigidaire refrigerator not defrosting is a stressful experience. This malfunction typically stems from a failure in the automatic defrost cycle, which is responsible for melting away the frost that naturally accumulates on the evaporator coils. When this system fails, ice builds up, blocks airflow, and prevents the freezer and fresh food compartments from maintaining safe temperatures. Resolving this issue usually costs between $50 and $450 depending on whether you perform a DIY repair or hire a professional technician. By understanding the mechanical components involved, you can often pinpoint the culprit and restore cooling efficiency.
Key Takeaways
- Check the evaporator fan for obstructions or ice buildup before ordering expensive replacement parts.
- The defrost heater is the most frequent point of failure in Frigidaire cooling systems.
- You can test most electrical components using a standard multimeter set to the ohms setting.
- Always unplug the unit from the power source before touching any internal wiring or heating elements.
- Verify the door seals are airtight, as warm air leaks cause excessive frost buildup that overwhelms the system.
Understanding the Defrost Cycle
The defrost cycle is a timed event that keeps your refrigerator running efficiently. Every 8 to 12 hours, the control board or timer sends power to the defrost heater to melt frost from the evaporator coils. If the defrost sensor or the heater fails, the ice continues to grow until it encapsulates the coils, creating a physical barrier to cold air circulation. This is why you might notice your freezer temperature rising even if the compressor is still running.
Is the Defrost Heater Faulty?
The defrost heater is a metallic tube or coil located directly behind the back panel of the freezer. Its job is to generate heat to melt the frost. If this component burns out, the ice will never melt, leading to a complete blockage of the air vents. To inspect it, you must remove the rear freezer panel. Look for visible signs of damage, such as a broken element or black, charred spots on the casing.
Testing the heater
To determine if your heater is truly dead, use a multimeter to check for continuity. A heater that shows “OL” or infinite resistance is defective and must be replaced. A functional heater should show a low resistance reading, typically between 20 and 100 ohms depending on the specific model.
| Component | Function | Typical Failure Sign |
|---|---|---|
| Defrost Heater | Melts ice on coils | Visible break or open circuit |
| Defrost Timer | Initiates cycle | Compressor runs indefinitely |
| Defrost Thermostat | Monitors temperature | Stays closed/open constantly |
| Control Board | Manages timing | No power to heater |
Testing the Defrost Thermostat
The defrost thermostat acts as a safety switch. It remains closed only when the evaporator coils are cold enough to require defrosting. Once the ice has melted, the thermostat opens to cut power to the heater, preventing the freezer from overheating. If this thermostat is stuck in the open position, the heater will never receive power.
Diagnosing the sensor
You can test the thermostat by placing it in a freezer or a cup of ice water until it reaches the temperature specified by the Frigidaire appliance support documentation for your specific model. At that temperature, the device should show continuity. If it doesn’t show continuity when cold, it’s faulty and must be swapped out for a new part.
Could the Timer Be Stuck?
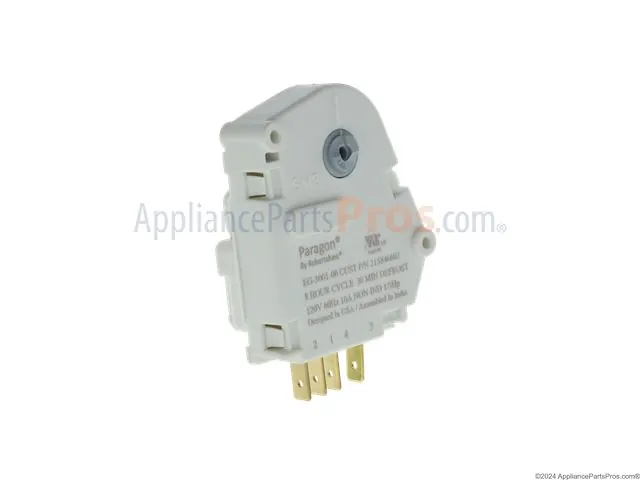
In older Frigidaire models, a mechanical defrost timer controls the frequency of the cycle. If this timer is stuck in the cooling mode, the heater will never turn on. You can often manually advance the timer by turning the small dial on the bottom of the unit with a flathead screwdriver. If the refrigerator clicks and stops cooling while the heater begins to warm up, your timer is the likely culprit.
Inspecting the Main Control Board
Modern refrigerators use an electronic main control board instead of a mechanical timer. This board monitors sensors and dictates when the defrost cycle occurs. If the board has a fried relay or a corrupted chip, it may fail to send the “start” signal to the heater. While this is less common than a failed heater or thermostat, it’s a possibility if all other components test positive for continuity.
Why Door Seals Matter
Sometimes, the refrigerator isn’t actually broken, but rather overwhelmed by moisture. If your door gaskets are loose, cracked, or dirty, humid air from your kitchen enters the refrigerator constantly. This moisture condenses and freezes on the coils much faster than the defrost cycle can handle.
- Seal check: Close the door on a piece of paper; if you can pull it out with no resistance, your seal needs replacing.
- Cleaning: Use warm water and mild soap to remove food debris from the magnetic strip.
- Maintenance: Apply a thin layer of petroleum jelly to the rubber to keep it supple.
Pro Tip: If you notice a thick wall of ice on the back wall of your freezer, this is a classic sign of an air leak or a failed defrost component that requires immediate attention before the compressor burns out.
Checking the Evaporator Fan
The evaporator fan is responsible for pulling air across the cold coils and pushing it into the rest of the unit. If the fan is blocked by ice, you’ll hear a loud grinding noise or no sound at all. If the fan motor itself is burnt out, the cold air will remain trapped in the freezer compartment, while the fresh food section will warm up. Always ensure the fan blades are free of debris and spin freely by hand.
How to Defrost Manually
If you need to clear the ice immediately to save your food, you can perform a manual defrost. Unplug the unit and use a hairdryer on a low, cool setting to gently melt the ice buildup.
Warning: Never use a knife, screwdriver, or ice pick to chip away at the ice. The evaporator coils are made of thin aluminum and are easily punctured. A single puncture will release the refrigerant and effectively total the refrigerator, making it non-repairable without expensive professional intervention.
Troubleshooting the Defrost System
Follow this step-by-step process to narrow down the exact cause of your cooling failure.
| Step | Action | Objective |
|---|---|---|
| 1 | Unplug unit | Ensure electrical safety |
| 2 | Remove back panel | Access coils and heater |
| 3 | Inspect for ice | Confirm defrost failure |
| 4 | Test thermostat | Check for electrical path |
| 5 | Test heater | Confirm heating element integrity |
Maintenance for Long-Term Reliability
To keep your Frigidaire running for years, focus on airflow and cleanliness. Dust the condenser coils located at the bottom or back of the unit twice a year. When these coils are covered in pet hair and dust, the refrigerator must work significantly harder to dissipate heat. This extra heat load forces the compressor to run longer cycles, which can lead to premature wear on the defrost timer and control board.
Frequently Asked Questions
How long does a defrost cycle last?
A typical defrost cycle on a Frigidaire refrigerator lasts between 20 and 30 minutes. During this time, the heater warms the evaporator coils to melt the frost. If your refrigerator stays in a defrost mode for longer than an hour, or if it never enters the mode at all, you likely have a faulty thermostat or a malfunctioning control board that needs replacement.
Can I replace the defrost heater myself?
Yes, replacing a defrost heater is a common DIY repair. You’ll need a screwdriver to remove the back panel and potentially a pair of wire strippers or pliers to disconnect the electrical harness. Most heaters are held in place by simple clips. Always ensure the unit is unplugged and use a multimeter to verify the new part is functional before installing it.
Why is my refrigerator leaking water?
Water leaking onto the floor is often a result of a clogged defrost drain. When the defrost cycle melts the ice, the water should flow into a pan underneath the unit to evaporate. If the drain is frozen or blocked by debris, the water will overflow inside the unit and eventually leak out the bottom. Clear the drain tube using a small piece of flexible wire or warm water.
Is it cheaper to repair or replace?
If the repair involves a simple part like a defrost thermostat or heater, it’s almost always cheaper to repair. These parts typically cost between $20 and $100. If the main control board is faulty or the compressor has failed, the repair costs can reach $400 or more. If your refrigerator is over 10 years old, a major repair might not be worth the investment compared to a new unit.
How do I know if the compressor is the problem?
If the compressor isn’t running, the refrigerator won’t cool, but this is different from a defrost issue. A failing defrost system will usually result in the compressor running constantly while the temperature remains too warm. If you don’t hear the compressor running at all, check the start relay or the capacitor before assuming the defrost system is the primary cause of your cooling trouble.
Conclusion
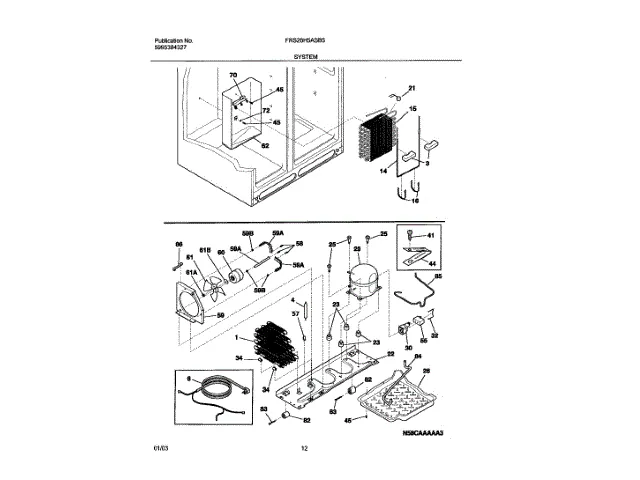
If you have completed the troubleshooting steps above and identified a faulty component, search for your refrigerator’s model number to find the exact part needed. Most online appliance parts retailers provide diagrams that make it easy to match the component to your unit. Once you have the replacement, follow the installation instructions carefully, ensure all electrical connections are secure, and restore power to your appliance to begin the cooling process.