
Finding a puddle on your kitchen counter is never a pleasant experience, especially when you’re looking forward to your morning cup. If you find your coffee maker leaking from bottom surfaces, it’s usually a sign that an internal component has failed or a seal has degraded. Dealing with water near electrical appliances requires caution, so unplugging the machine immediately is the safest first step. By systematically checking the water reservoir, internal tubing, and pump seals, you can determine if the repair is something you can handle at home or if it’s time to contact the manufacturer.
Key Takeaways
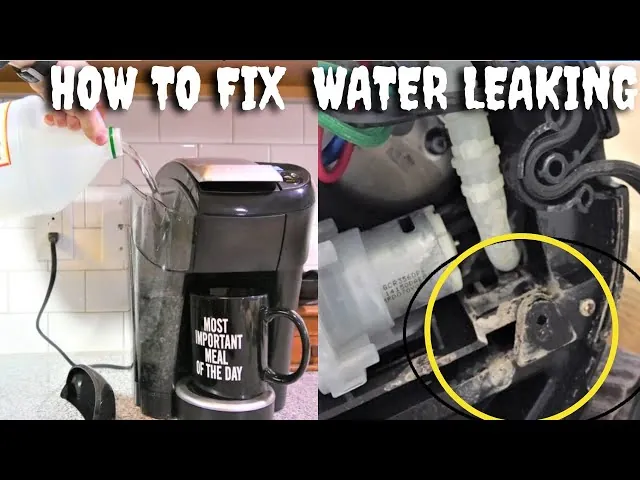
- Always unplug your coffee maker before inspecting the base or removing any outer panels.
- Check the water reservoir seating to ensure the O-ring or valve isn’t obstructed by mineral buildup.
- Internal leaks are often caused by cracked silicone tubing or a faulty check valve.
- Descaling your machine regularly prevents the pressure buildup that often leads to seal failure.
- Professional repair is recommended if the leak originates from the heating element or the pump housing.
Why Is Water Appearing Down There?
Most drip coffee machines and single-serve brewers are designed as closed systems. When water escapes the internal plumbing, gravity pulls it toward the lowest point, which is the base of the machine. The most common cause is a compromised water seal within the reservoir valve. Over time, the rubber O-ring that seals the tank to the base can harden, crack, or accumulate enough scale to prevent a watertight fit.
Another frequent culprit is the internal tubing. Many machines use flexible silicone or plastic hoses to transport hot water from the reservoir, through the heating element, and into the brew basket. If these hoses become brittle from repeated thermal cycling, they can develop micro-cracks. When the machine is heating, these cracks expand, allowing water to drip slowly onto the internal floor of the housing.
How to Locate a Coffee Maker Leaking from the Bottom
Before you begin taking your machine apart, you need to confirm where the water is originating. Start by thoroughly drying the exterior of the machine and the surface of your countertop. Place the coffee maker on a dry, light-colored paper towel. Run a brewing cycle without coffee grounds. Check the paper towel after a few minutes to see where the dampness appears first.
| Leak Location | Likely Component | Repair Difficulty |
|---|---|---|
| Under Reservoir | Reservoir Valve / O-ring | Low |
| Under Brew Head | Gasket / Shower Screen | Medium |
| Under Machine Base | Internal Tubing / Pump | High |
| Under Water Tank | Sealing Gasket | Low |
Managing Reservoir Valve Issues
The reservoir valve is the most frequent point of failure. This valve controls the flow of water from the tank into the internal heating system. If it doesn’t seat correctly, water will leak out of the bottom of the tank assembly and pool under the machine.
To inspect this, remove the water reservoir and look at the bottom. You should see a small spring-loaded valve. Press it gently with your finger; it should move smoothly and return to its original position. If it feels stuck or if you see visible mineral deposits, use a soft toothbrush and white vinegar to clean the area.
If the rubber seal surrounding the valve is cracked or deformed, it must be replaced. According to the United States Consumer Product Safety Commission, maintaining appliances properly is essential to preventing electrical hazards caused by moisture intrusion.
Internal Tubing and Pump Failures
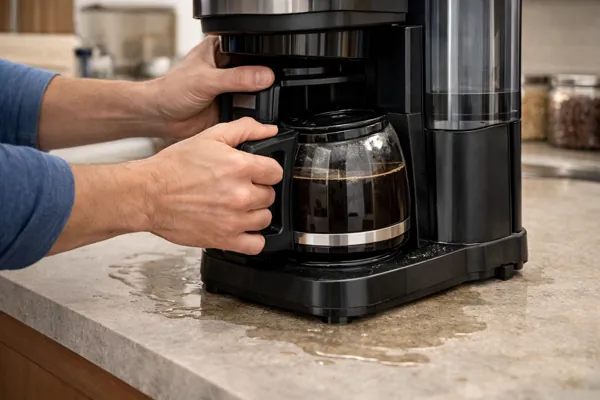
If the reservoir valve is clean and intact, the issue may lie deeper inside the chassis. You’ll need to remove the outer plastic casing to inspect the internal plumbing. Warning: Opening the housing of a coffee maker will almost certainly void your warranty and exposes you to live electrical components. Only proceed if you’re comfortable with basic appliance repair and have confirmed the unit is unplugged.
Inspect the tubing for signs of discoloration, bulging, or mineral crusting. A white, chalky residue on the outside of a hose is a “smoking gun” that indicates a slow leak has been evaporating over time. If you find a damaged tube, you can often source a replacement from the manufacturer’s parts website. Ensure the replacement tubing is rated for high-temperature use to prevent immediate failure upon your next brew.
Is It Time for Descaling?
Sometimes, a leak is actually a symptom of extreme internal pressure caused by blockages. When mineral scale builds up inside the heating element or the outflow nozzle, the pump has to work much harder to push water through the system. This increased pressure can force water out of weak connections or cause hoses to pop off their fittings entirely.
If you haven’t descaled your machine in the last three months, perform a deep clean using a commercial descaling solution or a mixture of white vinegar and water. A clogged flow path can lead to backpressure that stresses every seal in the machine. If the leak stops after a thorough descaling, you have successfully avoided a more complex mechanical repair.
Checking the Heating Element
The heating element, often called the thermoblock or boiler, is a critical component that can occasionally fail. If the seal where the heating element meets the delivery tube has degraded, water will leak during the heating phase. Because this part gets extremely hot, it’s common for the gaskets here to become brittle faster than those in the cool parts of the machine.
If you notice a burning smell accompanying the leak, unplug the machine immediately and don’t attempt to use it again. This could indicate that water is dripping onto the electrical terminals of the heating element, which creates a significant fire hazard. In such cases, the machine is likely beyond a simple DIY repair and should be professionally serviced or replaced.
When to Contact the Manufacturer
Not all coffee makers are built to be serviced by the end user. High-end espresso machines and integrated brewing systems often have proprietary screws or glued panels that make inspection difficult. If your machine is still under warranty, don’t attempt to open it yourself.
Contact the customer support department of your brand. Have your model number and serial number ready, as these are typically located on a sticker on the bottom or back of the unit. Many manufacturers offer a repair service or will send a replacement unit if the leak is determined to be a result of a manufacturing defect. Using unauthorized parts or attempting to force open a sealed unit will definitively end your coverage.
Troubleshooting Minor Drip Issues
If the leak is very minor, it might just be a condensation issue. In high-humidity environments, steam can escape from the brew basket and condense on the cold walls of the machine’s interior. This moisture then runs down the inside of the casing and pools at the bottom.
To determine if this is the cause, run a brew cycle with the machine’s cover removed or in a well-ventilated area. If no water collects under the machine during this test, you’re likely dealing with excessive condensation rather than a mechanical failure. Ensure your coffee maker is placed away from other steam-producing appliances like rice cookers or kettles.
Preventing Future Leaks
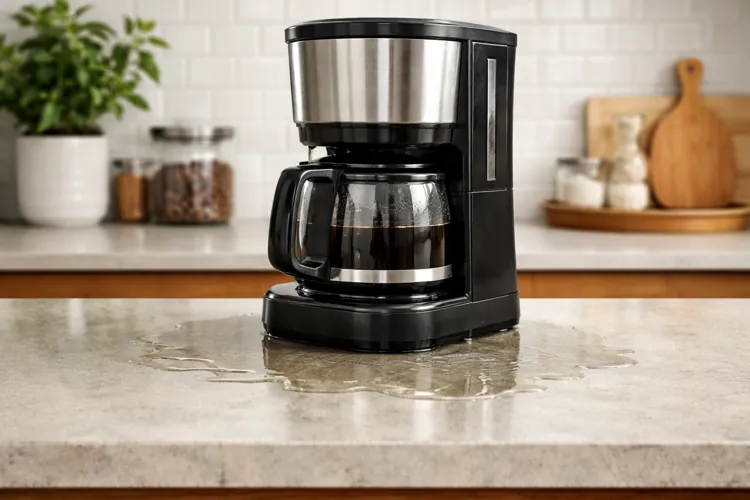
Maintenance is the best way to ensure your machine lasts for years. Start by using filtered water if you live in an area with hard water. Minerals in tap water are the primary cause of the scale buildup that ruins internal seals and clogs valves.
- Daily: Rinse the reservoir and dump out any leftover water to prevent scale from forming in the valve.
- Monthly: Run a descaling cycle to clear internal pathways and reduce pump stress.
- Quarterly: Wipe down the exterior and check the base for any signs of moisture or discoloration.
- Annually: Inspect the condition of the power cord and ensure the base vents are free of dust.
Related guides
- 10 Best Coffee Makers to Buy for a Perfect Morning Brew in 2026
- Cuisinart Troubleshooting Coffee Maker: Fix Common Issues Fast in 2026
Frequently Asked Questions
Can I use a coffee maker that’s leaking?
No, you should stop using a leaking coffee maker immediately. Water leaking from the base can reach electrical components, which poses a severe risk of short-circuiting, electric shock, or fire. Even a small leak indicates that the internal pressure or sealing systems are compromised. Unplug the device and keep it disconnected until you have identified and repaired the exact source of the moisture.
Is it cheaper to repair or replace?
For most standard drip coffee makers, the cost of professional repair often exceeds the value of the machine. If a replacement part like a hose or reservoir valve costs $10.00 to $30.00, it’s worth fixing. However, if the pump or heating element has failed, you should expect to spend $50.00 to $150.00 on a new unit, which is typically more cost-effective than professional labor.
Does vinegar damage the internal seals?
Using a standard mixture of one part white vinegar to one part water is generally safe for most machines. However, using pure, undiluted vinegar or leaving the solution in the machine for too long can potentially degrade certain types of rubber gaskets. Always follow the manufacturer’s recommended descaling ratio and rinse the machine with at least two full reservoirs of fresh water after the process.
Why does my coffee maker leak only when brewing?
Leaking only during the brewing cycle suggests the issue is related to pressure or heat expansion. When the machine is idle, there’s no pressure forcing water through the seals. Once the pump activates and the water heats, the internal pressure rises, forcing water out of a loose fitting, a cracked hose, or a failing pump gasket. This confirms the leak is internal and not from the tank.
How do I find the model number for parts?
The model number is almost always printed on a silver or white sticker located on the underside of the coffee maker. If the sticker is worn, check the back or the bottom of the water reservoir. You can also find this information in your original user manual or on the confirmation email from when you purchased the device from the manufacturer’s website.
Conclusion
Taking apart a coffee maker can be intimidating, but by following the steps above, you can often identify the problem area without professional help. If you have confirmed that the leak is coming from a simple component like a reservoir O-ring, look up your specific model online to find the exact part number.
Once you have the replacement part in hand, swap it out carefully, perform a test brew with plain water, and monitor the base of the machine for any remaining moisture.