
For Pride Battery Charger Troubleshooting, verify the wall outlet has power and ensure all cables are secure. Check the LED status lights against your owner’s manual to identify errors. If the unit remains unresponsive after testing a different outlet, the internal circuitry has likely failed and shouldn’t be opened.
Pride Battery Charger Troubleshooting
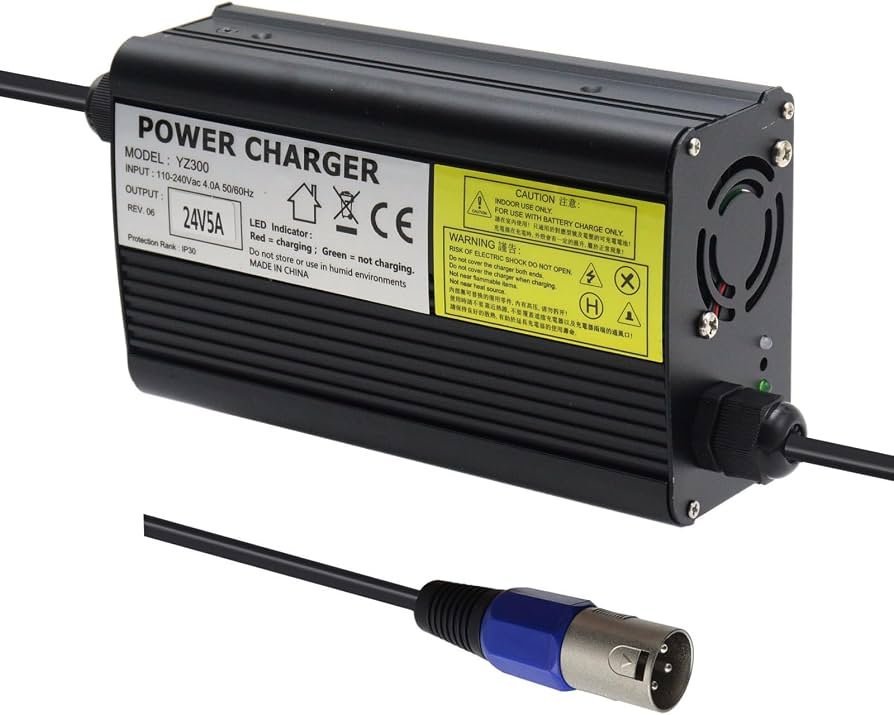
The primary reason a charger fails to start is a break in the electrical circuit. This often happens because the power cord has become loose at the wall or the battery plug isn’t pushed all the way into the mobility device. If the cord is damaged or bent at a sharp angle, the internal wires may be broken even if the outer plastic looks fine.
Another common cause is that the battery has been left discharged for too long. If a battery voltage drops below a certain threshold, the charger will not “see” it and will refuse to activate its charging cycle. This is a safety feature designed to prevent the charger from overheating or damaging a battery that can no longer hold a charge safely.
Environmental factors also play a role. If the charger is kept in a damp area or extreme temperatures, the internal components can corrode or fail. You should always keep your equipment in a dry, room-temperature environment to prevent moisture buildup. The official Pride Mobility support resources provide specific guidance on environmental storage and recommended operating temperatures for their power products. If your charger doesn’t react at all when plugged into a known working wall socket, the internal fuse or power management board has likely failed. At this stage, the unit is no longer safe for a home user to handle. You should contact an authorized dealer or a qualified technician to assess whether the unit can be serviced or if a replacement is necessary to ensure your safety and the longevity of your batteries.
Safety: Inside a mains-powered machine, the parts behind the outer cover can hold a dangerous electrical charge even after it has been unplugged — that’s why they sit behind a cover. Opening the housing, or testing or replacing anything behind it, is a job for a qualified technician, never a home repair.
Check the connections
The first step is to confirm that power is actually reaching the charger. Start by plugging a small lamp or another device into the exact wall outlet you’re using. If the lamp doesn’t turn on, the problem is with your home’s electrical circuit, not the charger. If the outlet works, inspect the charger cord for any visible cuts, fraying, or burn marks. If you see damage, stop using the charger immediately.
Next, look at the connection between the charger and your mobility device. Ensure the connector is clean and free of debris. Dirt or lint inside the port can block the metal pins from making a solid connection. Use a dry, soft cloth to wipe the exterior of the plug. Never use water or liquid cleaners. Once the plug is clean, push it firmly into the port on your device. You should feel a slight click or firm resistance.
If the charger has multiple indicator lights, watch their behavior closely. A flashing light often indicates a specific error code. If the lights don’t turn on at all, try to wiggle the cord slightly where it enters the charger body. If the lights flicker during this movement, the cord itself is faulty. This fix is for users who have confirmed their wall power is stable. If you find the cord is damaged, don’t attempt to tape it or use it. A damaged cord is a fire hazard. You must replace the charger entirely if the cable is compromised, as internal electrical repairs require specialized training and tools that aren’t available to the average owner.
Verify battery status
Sometimes the charger is perfectly fine, but the battery is too low to trigger the charging process. If your device has been sitting for weeks or months, the battery may have fallen into a deep discharge state. In this case, the charger will appear to be off because it can’t detect a battery to charge.
Check your device’s battery gauge or display. If the gauge shows zero or doesn’t turn on at all, the battery might be the culprit. If you have access to another battery that you know is working, try using the charger with that unit. If the charger starts working immediately with the second battery, your original battery is likely the issue. This is a common situation for users who store their mobility devices in cold garages or sheds during the winter.
If you suspect the battery is the problem, leave the charger connected for a few hours. Some chargers will eventually detect the battery once it reaches a tiny, minimum charge level. If this is the case, you need to contact a battery supplier to test the battery’s health. Never try to “jump-start” a battery or use a car charger to force power into it. These methods are dangerous and will likely destroy the battery or cause a fire. If the charger works on other batteries but not yours, consult a professional to confirm if your battery can be revived or if it needs to be recycled and replaced.
Inspect the environment
The final step is to check if the charger is overheating or blocked by external conditions. Chargers generate heat while they work. If you have the charger tucked away in a closed cabinet or buried under blankets, it will trigger an internal thermal cutoff to prevent damage. This is a built-in safety feature.
Ensure the charger is sitting on a hard, flat surface with at least six inches of space around all sides for airflow. Never cover the charger with a towel or cloth to “keep it clean” while it’s plugged in. This traps heat and can cause the unit to shut down or fail permanently.
If you have tried all three fixes—checking the power, verifying the battery, and ensuring proper airflow—and the charger still doesn’t work, you have reached the limit of what you can safely do at home. Don’t attempt to take the plastic casing apart. These units contain high-voltage capacitors that can deliver a painful or dangerous shock even when the unit isn’t plugged in. If the charger is faulty, contact the manufacturer or your local mobility equipment provider. They have the tools to safely test the unit and can provide a replacement that meets the exact safety standards required for your device.
What not to do
- Don’t open the charger housing: The internal components, especially the capacitors, hold a lethal charge even when the unit is disconnected from the wall.
- Don’t use a different charger: Using a charger from another brand or one with different voltage output can cause a fire or permanently ruin your mobility device’s battery.
- Don’t leave the charger on carpet: Carpet blocks airflow and traps heat, which can lead to the charger shutting down or even melting the plastic casing.
- Don’t use extension cords: An extension cord can cause a voltage drop that prevents the charger from sensing the battery properly and may lead to inconsistent charging cycles.
- Don’t force the plug: If the connector doesn’t slide in easily, check for bent pins; forcing it will damage the port, which is a much more expensive repair than a new charger.
How to stop it happening again
Consistency is the best way to keep your charging system healthy. By following a regular routine, you avoid the most common causes of failure, such as deep battery discharge and cord damage.
| If you’re doing this | Do this instead | Why |
|---|---|---|
| Leaving batteries empty | Charge after every use | Prevents deep discharge failure |
| Wrapping cords tightly | Coil cords loosely | Prevents internal wire breakage |
| Charging in a closet | Charge in the open | Prevents thermal shutdown |
| Cleaning with wet cloths | Use a dry microfiber | Prevents electrical shorts |
| Ignoring warning lights | Check the user manual | Catches minor issues early |
Frequently asked questions
Can I leave my mobility scooter plugged in all the time?
Always check your manual, as some older models lack this safety feature and may overcharge if left connected indefinitely.
How long should a battery charger last?
Frequent use increases heat cycles, which shortens the lifespan of internal components. If your charger begins making loud buzzing noises or takes significantly longer to charge, the electronics are likely degrading and require replacement.
Is it safe to use a third-party charger?
No, you should only use a charger specifically approved for your mobility device model. Third-party chargers often lack the precise voltage control necessary to protect your battery. Using an unapproved charger can void your warranty, damage the battery, or create a significant fire risk.
Why does my charger make a humming sound?
A light hum is normal, but a loud buzzing or clicking sound indicates internal component failure. This noise often results from a transformer or loose component vibrating during operation. If the sound is new or loud, stop using the charger immediately to prevent a short circuit or battery damage.
What happens if I use the wrong charger voltage?
Using the wrong voltage will likely cause permanent damage to your battery or charger within minutes. High voltage can cause batteries to overheat or swell, while low voltage stresses internal electronics. Always verify that the output voltage on your charger label matches the requirements in your device’s owner’s manual.
Final Thoughts
If these simple checks don’t resolve the issue, it’s time to contact a professional technician for help. They’ll have the right tools to safely inspect your equipment. Don’t worry, as getting your mobility device back in working order shouldn’t be too difficult once you reach out to a certified service center.
Related guides
- Dewalt Battery Charger Troubleshooting: Fix Charging Failures in 2026
- Yamaha 48 Volt Charger Troubleshooting: Simple Fixes That Work in 2026
- Pool Light Transformer Troubleshooting: Simple Fixes That Work in 2026