
Brother Sewing Machine Troubleshooting often involves re-threading the needle and cleaning the bobbin area. These issues usually stem from a mismatch between thread weight, needle size, and fabric type. Most setup errors are easily corrected in minutes, but you should contact a professional if you hear grinding noises or face persistent mechanical jams.
Brother Sewing Machine Troubleshooting
Most sewing machine problems occur because of the interaction between the needle, the thread, and the feed dogs. When the thread isn’t seated correctly in the tension discs, the machine can’t form a proper stitch, leading to loops or knots underneath your fabric. This often happens if you thread the machine while the presser foot is in the down position. The tension discs remain closed when the foot is down, which prevents the thread from entering the mechanism correctly.
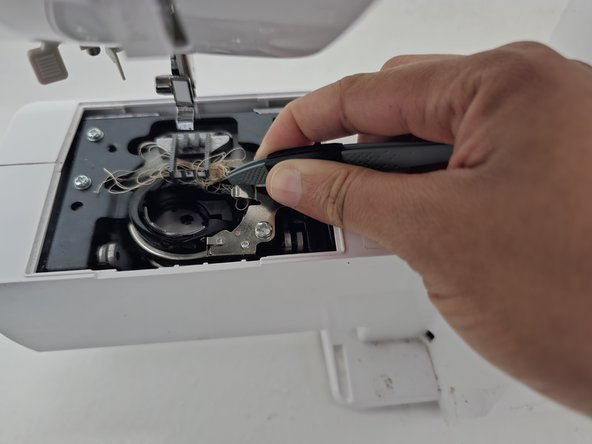
Another common cause involves the bobbin assembly. If lint builds up in the race—the area where the bobbin sits—the shuttle hook can’t catch the needle thread effectively. This results in skipped stitches or “bird nesting,” where a large tangle of thread forms on the underside of your project. You should clean this area regularly to ensure smooth movement.
Finally, the needle itself is a frequent culprit. A bent or dull needle will deflect when it hits the fabric, preventing the hook from picking up the thread loop. You should replace the needle after every 8 to 10 hours of sewing time. If you’re using a needle that’s too thin for heavy fabric, it will bend under pressure. If you’re using a needle that’s too thick for delicate fabric, it will create visible holes. Always verify your setup against the official Brother machine support guides to ensure you have the correct needle and thread combination for your specific material. If the machine continues to malfunction after you have cleaned the bobbin, checked the threading, and replaced the needle, the issue may be a misaligned timing mechanism, which requires a trained technician.
Reset the upper thread path
If your machine is bunching thread or the tension seems off, start by completely removing the upper thread. Raise the presser foot to the highest position; this opens the tension discs. If you don’t raise the foot, the thread will sit on top of the discs rather than between them, which causes the thread to loop uncontrollably on the underside of the fabric.
Once the foot is up, remove the spool and the thread. Re-thread the machine slowly, following the numbered path on the machine casing exactly. Ensure the take-up lever is at its highest point before you begin. If you skip a guide, the tension will be uneven. After threading, pull the thread through the needle eye and hold the thread tail while you turn the handwheel toward you to pick up the bobbin thread. If you can’t pull the thread through, check the thread spool cap. Using the wrong size cap can cause the thread to snag as it unwinds. This fix is for anyone experiencing uneven stitches or thread breakage. If the thread still bunches after re-threading, check that your bobbin is wound evenly and inserted in the correct direction; most Brother machines require the thread to pull off the bobbin in a specific way, usually counter-clockwise.
Clear the bobbin area
When the machine jams or makes a loud thumping sound, remove the needle plate and the bobbin case. Use a small, soft brush to remove lint and dust from the feed dogs and the shuttle race. This is where the most common mechanical errors occur. If you see a clump of thread, use tweezers to pull it out gently. Never use a metal tool to scrape the surface, as this can create tiny burrs that will cut your thread as you sew.
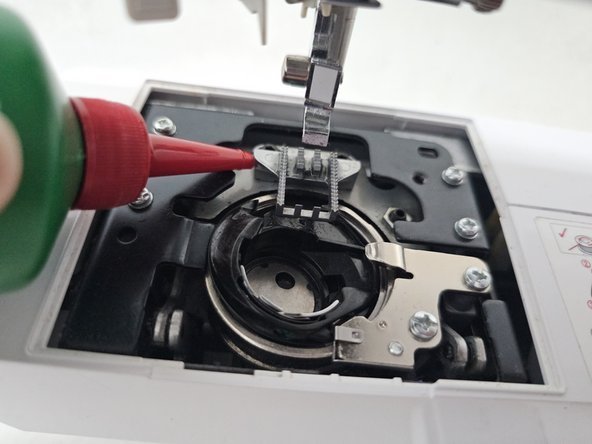
Once you have cleaned the area, check the bobbin case for any scratches or damage. If the case is cracked, you must replace it with a genuine part. After cleaning, place a drop of sewing machine oil in the shuttle race only if your specific model manual says to do so. Some modern machines use self-lubricating materials and don’t require oil; adding oil to these can attract more dust and cause the machine to seize. If you’re unsure, check your model’s manual. This fix is for users who hear grinding noises or see the machine struggling to move the fabric. If the machine still doesn’t run smoothly after cleaning, the issue is likely internal, and you should stop using it to prevent further damage.
Adjust the tension settings
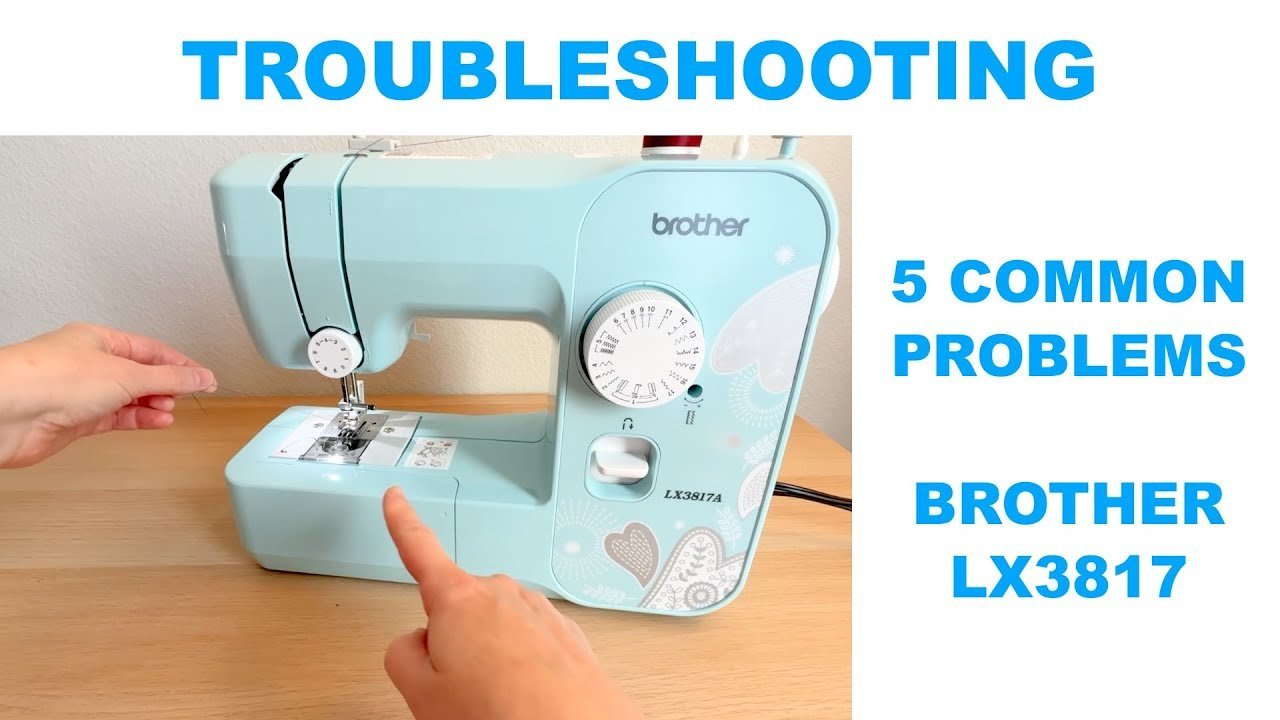
If your stitches are too loose or the bobbin thread is pulling to the top, adjust the tension dial. Most Brother machines have a default setting, usually marked with a dot or the number four. If you’re sewing thin fabric, you may need to lower the tension number. If you’re sewing heavy denim or multiple layers, you may need to increase the tension.
Always test your settings on a scrap piece of the same fabric you plan to use for your project. If the stitches look puckered, your tension is likely too tight. If the thread is looping, it’s too loose. Only adjust the dial by one increment at a time. If you move it too far, you’ll lose track of the baseline. This fix is for those who have already confirmed the machine is threaded correctly but still see poor stitch quality. If you find that the tension dial has no effect on the stitch, the internal tension spring may be damaged. This isn’t a user-serviceable part. You’ll need to take the machine to an authorized repair shop. Don’t attempt to open the machine housing, as this can void your warranty and expose you to internal parts that may be under spring tension or connected to electrical circuits.
What not to do
- Don’t force the handwheel if it’s stuck. If the machine won’t turn, forcing it can bend the drive shaft or break the internal plastic gears, which is an expensive repair.
- Don’t use compressed air to clean the machine. Blowing air into the machine often pushes lint deeper into the motor and sensors, which can cause electrical shorts or sensor failures.
- Don’t pull the fabric while sewing. Many people try to guide the fabric by pulling it from behind, but this bends the needle and puts unnecessary stress on the feed dogs, leading to uneven stitch lengths.
- Don’t sew over pins. Hitting a pin can chip the needle or damage the bobbin case, and the force of the impact can cause the needle to shatter, which poses a risk of eye injury.
How to stop it happening again
Consistent maintenance prevents most failures. Keep your machine covered when not in use to stop dust from entering the internal parts.
| If you’re doing this | Do this instead | Why |
|---|---|---|
| Leaving the machine out | Use a dust cover | Prevents internal lint buildup |
| Sewing with old needles | Replace every 8 hours | Dull needles damage fabric |
| Using random thread | Match needle and thread | Prevents tension imbalances |
| Forcing thick fabrics | Use a walking foot | Maintains even feed pressure |
Frequently asked questions
Can I fix a jammed machine myself?
Most sewing machine jams are fixed by removing the bobbin and clearing tangled thread from the shuttle race. This usually occurs when thread gets caught under the needle plate. Always unplug the machine before using tweezers to remove debris, but seek professional help if thread is wrapped around the drive shaft.
Why is my needle breaking constantly?
Needles break primarily due to incorrect sizing for your fabric or pulling the material while sewing. Use a size 80/12 or 90/14 needle for standard fabrics and a 100/16 denim needle for heavy canvas. Ensure the needle is fully inserted into the clamp with the flat side facing the correct direction.
How long should a sewing machine last?
A well-maintained sewing machine can last over twenty years with regular care. Longevity depends on cleaning the bobbin area frequently and scheduling professional service. If you sew daily, seek professional maintenance annually, while occasional users should service their machines every two to three years to ensure smooth operation.
Is it safe to oil my sewing machine?
No, you shouldn’t add oil unless your specific user manual explicitly instructs you to do so. Many modern machines are designed with permanent lubricants and don’t require oiling. Adding oil to these models can cause dust and lint to clump together, which creates a thick paste that slows down the motor. Always check the maintenance section of your manual before applying any lubricant to the shuttle race or internal parts.
What happens if I use the wrong bobbin?
Using the wrong bobbin causes thread jams, breakage, and uneven tension. Machines are designed for specific bobbin materials and heights, and using the incorrect type can scratch the case or rub against the needle plate. Always verify the correct part number in your manual or on the packaging.
Final Thoughts
If you still feel unsure, don’t hesitate to reach out to a local service center for a quick checkup. They’ll help you get back to your projects with confidence. Once your machine is running smoothly again, you’ll find that sewing is much more relaxing and fun than it was before.
Related guides