
To run a samsung self clean washer cycle, you need to empty the drum and select the “Self Clean” or “Self Clean+” setting on your control panel, then press start. This cycle typically lasts between 2 to 4 hours depending on the specific model and the amount of buildup inside the tub. It uses high-speed water jets and heat to remove residue without needing harsh chemical detergents. This maintenance method is ideal for owners who want to keep their machine smelling fresh and working efficiently.
Supplies for your Samsung washer self clean
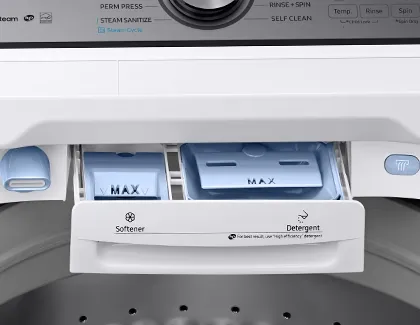
Before you begin the cycle, gather the items necessary to prepare your machine for the cleaning process. Having these supplies ready ensures that you don’t have to stop mid-step to find what you need.
A microfiber cloth for wiping the door gasket and drum interior. A mild liquid soap for cleaning the detergent drawer. A soft-bristle brush to scrub away stubborn soap scum or mold spots. White vinegar or a specialized washing machine cleaner, if your specific manual suggests it for your model. Clean, dry towels to wipe down the exterior surfaces after the cycle finishes.
Consult your official Samsung user manual to confirm which cleaning agents are safe for your specific drum material. While many owners try to use bleach to disinfect the tub, you must be careful. Using more than one-half cup of bleach can degrade the rubber seals over time, leading to leaks.
If you don’t have the manual, find the digital version using your washer’s model number on the manufacturer’s support portal. Never use abrasive scrubbers on the glass door, as these leave permanent scratches that trap dirt and bacteria in the future.
When cleaning the gasket, pull the folds back gently to check for trapped coins or hairpins. These small metal objects cause rust spots that eventually compromise the drum’s finish. If you find standing water in the gasket, your drain pump filter likely needs a manual clearing before you run the cleaning cycle.
Ignoring this step often results in the machine failing to drain properly during the rinse phase, leaving your clothes smelling musty. Always verify the filter housing is locked securely back into place to prevent water damage to your flooring.
Operating Your Cleaning Cycle
Follow these steps to ensure your machine is cleaned properly and safely. Always make sure the washer is completely empty before you press the start button.
- Remove all clothing and items from the drum to ensure the water jets have a clear path.
- Wipe the inside of the door glass and the rubber gasket with your microfiber cloth to remove hair or lint.
- Pull out the detergent drawer and rinse it under warm water to clear away any caked-on powder or fabric softener.
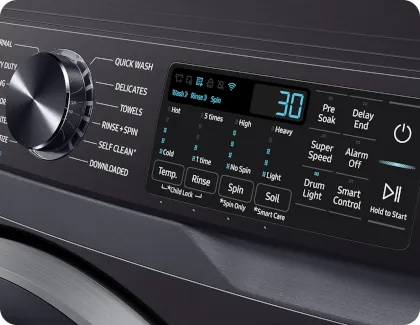
- Close the door securely and turn the power on by pressing the power button on your machine’s console.
- Turn the cycle selector dial or press the cycle button until you reach the “Self Clean” or “Self Clean+” setting.
- Press and hold the “Start/Pause” button for 3 seconds to begin the cycle.
- Wait for the machine to finish the complete cycle and the “End” message to appear on the display.
- Open the door and leave it slightly ajar to allow the interior to air dry fully.
Tip: If your machine has a “Delay End” feature, don’t use it for the self-clean cycle. Careful: Never add laundry detergent or bleach into the drum during this cycle, as it can create excessive suds that leak or damage the sensors. If you notice a strong chemical smell after the cycle, run an extra “Rinse + Spin” cycle to flush out any remaining residue before washing your next load of clothes.
Cleaning Requirements by Situation
The time and effort required to maintain your machine depend on how often you use it and the quality of your local water supply. If you live in an area with hard water, you may need to perform this task more frequently to prevent mineral buildup.
| Situation | Frequency | Estimated Time | What to Watch |
|---|---|---|---|
| Daily heavy use | Once a month | 3.5 hours | Musty odors |
| Average household use | Every 40 cycles | 2.5 hours | Visible mold |
| Hard water supply | Every 20 cycles | 3 hours | White scaling |
| Occasional use | Every 3 months | 2 hours | Dust buildup |
Test your water hardness using a simple strip from a hardware store. If your results show more than 120 parts per million of calcium carbonate, treat your machine as a high-risk unit. You must double your cleaning frequency to prevent internal pump failure.
Many users make the mistake of relying on the machine’s internal sensors to alert them when a cycle is needed. These sensors often fail to detect mineral deposits until the heating element is already coated. If your clothes emerge with a faint, chalky residue, ignore the sensor and run a cleaning cycle immediately.
If you use your machine daily, check the rubber door seal for standing water after every load. Leaving moisture inside creates a breeding ground for mildew that a standard cycle can’t remove.
Always start with a standard cycle and add more maintenance steps if needed. Heavy-duty cleaners often contain harsh acids that wear down rubber seals and plastic components prematurely. If you notice a chemical smell lingering after the machine finishes, don’t add any cleaning agents to the drum for the next cycle.
Checking for a Successful Clean
A clean washer will smell neutral and look bright inside, with no visible dark spots or slime on the rubber door seal. If you see black streaks or smell mildew after the cycle, it means the water didn’t reach the affected area or the buildup is too deep for one cycle. This usually happens because the machine was overloaded with soap in previous washes, causing a layer of “biofilm” to form.
To prevent this, always measure your detergent according to the manufacturer’s lines rather than guessing. If the problem persists, wipe the gasket with a mixture of water and a small amount of white vinegar to lift the remaining residue. Keeping the door open between washes is the single most effective way to prevent these issues from returning.
Maintenance Rules and Safety
Samsung recommends running the self-clean cycle based on your usage levels to maintain the integrity of internal components and prevent mold growth; consult your owner’s manual for the specific frequency required for your household. After the cycle completes, always wipe the rubber door boot dry with a clean towel to remove standing water. This specific area is the most common site for mold to develop because moisture remains trapped against the seal.
Clear the drain filter, located behind the small panel on the front bottom of the machine, as often as your usage requires; consult your owner’s manual for the recommended schedule. Place a shallow tray or a folded towel beneath the access door before opening it, as roughly one cup of residual water will typically spill out. If the filter resists turning, don’t force it with pliers; instead, gently wiggle it to dislodge trapped debris like coins or hairpins.
If you notice water leaking from the bottom of the machine during a cycle, stop it immediately and inspect the drain hose for kinks or blockages. Ensure the hose isn’t pushed too far into the standpipe, as this creates a siphon effect that leads to premature pump failure.
If the leak persists, don’t attempt to open the machine’s inner housing. Electrical components can hold a lethal charge even when the unit is unplugged. Contact a professional appliance technician for any internal repairs to avoid voiding your warranty or causing an electrical hazard.
If the machine displays a “5E” or “E2” error code, check the drain filter first. If the filter is clean but the code remains, the issue likely involves the drain pump motor rather than a simple blockage.
Alternative Cleaning Methods
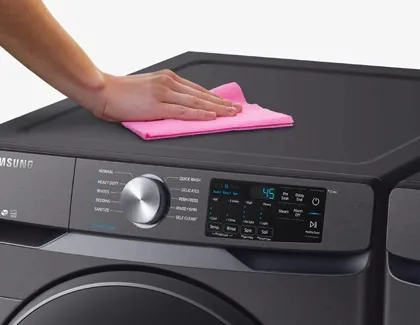
Manual Wipe Down
If you can’t run a full cycle, manually wiping the drum and gasket with a damp cloth removes surface-level lint. This takes 5 minutes but doesn’t address deep-seated mold or mineral deposits inside the internal pipes.
Vinegar and Baking Soda
This can help break down scale, but check your warranty first, as some manufacturers recommend only the built-in cycle.
Professional Maintenance
If the machine produces a loud noise or persistent foul smell, a technician can perform a deep chemical flush and inspect the pump. This costs more than a DIY clean but prevents expensive part failures.
Frequently asked questions
How often should I run the self-clean cycle?
You should run the cycle every 40 washes or once a month, whichever comes first. If your household does many loads of laundry each week, you might need to run it more often to keep the drum clear of soap residue.
Is it safe to use bleach in the self-clean cycle?
No, you shouldn’t add bleach unless your specific manual explicitly allows it for your model. Using bleach can damage the rubber gaskets and internal hoses over time, potentially leading to leaks.
Why does my washer still smell after cleaning?
The smell often stays in the rubber door gasket if it wasn’t wiped down properly before the cycle. Check for trapped coins, hair, or standing water under the folds of the rubber seal.
How long does the cycle take to finish?
The cycle usually takes between 2 to 4 hours to complete. The exact time varies based on the water temperature and the duration of the agitation phase programmed into your specific model.
What happens if I stop the cycle early?
Stopping the cycle early leaves water inside the drum and prevents the machine from finishing its rinsing phase. If you stop it, run a full “Rinse + Spin” cycle to drain the water and clear any remaining soap.
Can I put clothes in with the self-clean cycle?
No, you must never put clothes in the machine during this cycle. The high-heat settings and water levels are designed for an empty drum and can damage fabrics or interfere with the cleaning process.
Conclusion
Regular maintenance ensures your machine runs smoothly for years. By following these simple steps, you keep your laundry fresh and avoid costly repairs.