
You should perform a thorough dryer vent cleaning once every twelve months to maintain optimal appliance efficiency and fire safety, though households with large families or older machines may require service as often as every six months. Professional cleaning services typically range from $100 to $250 per visit depending on the complexity of the duct run and accessibility. If you choose to perform the maintenance yourself, the initial investment in a basic brush kit and vacuum attachment usually costs between $25 and $60, providing a long-term solution for routine upkeep.
Key Takeaways
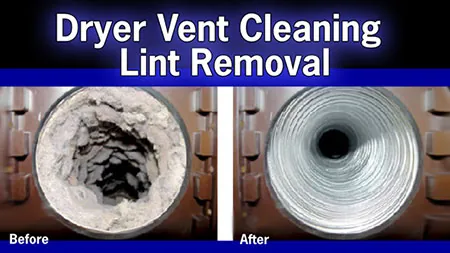
- Schedule a professional inspection at least once per year to ensure there are no hidden blockages or mechanical failures.
- Clean the interior lint screen after every single load of laundry to improve airflow and reduce immediate fire risks.
- Monitor for signs of poor ventilation, such as clothes staying damp after a full cycle or the dryer casing becoming hot to the touch.
- Use a rigid metal duct rather than flexible plastic or foil tubing to prevent lint accumulation and meet modern building codes.
- Clear the external exhaust hood of debris, bird nests, or landscaping materials that could restrict airflow during operation.
How Often To Clean Dryer Vent
Determining the precise frequency for maintenance depends heavily on your household’s laundry volume and the specific configuration of your ductwork. A standard family doing five to seven loads of laundry per week generates a significant amount of lint that eventually accumulates within the exhaust system. If your dryer vent run is longer than ten feet or includes multiple sharp 90-degree elbows, lint will collect much faster than in a short, straight pipe.
Pro Tip: If your dryer takes longer than one cycle to dry a standard load of towels, it’s a primary indicator that your vent system is restricted and needs immediate cleaning regardless of when you last serviced it.
Signs You Need Immediate Cleaning
You don’t always have to wait for your annual service window if your appliance begins displaying warning signs. Recognizing these symptoms early can prevent catastrophic failure or fire hazards. The most common indicators include a burning smell coming from the unit, a room that feels excessively humid while the dryer is running, or a dryer that shuts off mid-cycle due to high-limit thermostat overheating.
| Symptom | Meaning | Action Required |
|---|---|---|
| Clothes take >60 mins | Blocked airflow | Clean vent and duct |
| Hot exterior cabinet | Restricted exhaust | Check for kinks |
| Burning odor | Lint overheating | Stop use immediately |
| No lint on screen | Clogged internal path | Inspect blower housing |
The Dangers Of Neglected Vents
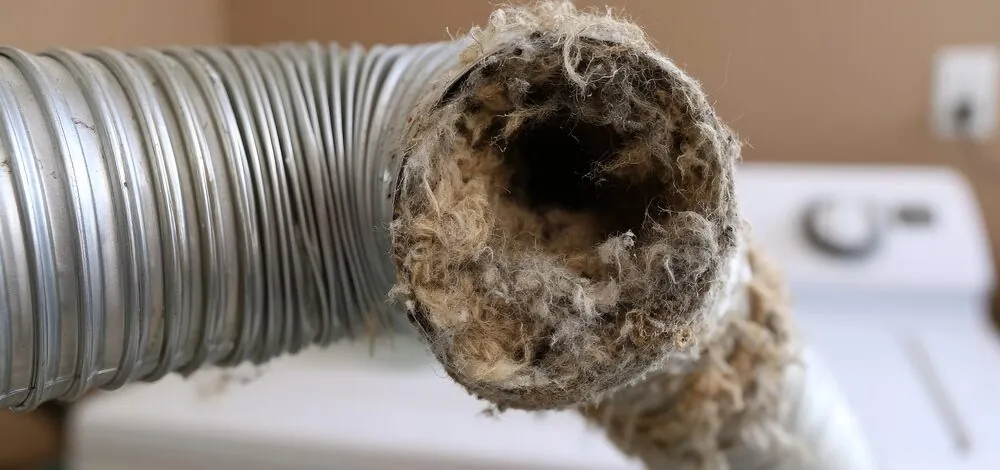
Neglecting to clear out your ventilation system creates a perfect environment for house fires. Lint is highly combustible, and when it builds up inside the duct, the intense heat from the dryer heating element can ignite the material. Beyond fire risks, an obstructed vent forces the dryer motor to work harder, leading to premature mechanical failure and higher utility bills.
Essential Tools For DIY Cleaning
If you decide to handle the maintenance yourself, you need specific equipment to reach deep into the walls or floor joists where the ducting resides. Avoid using makeshift tools like wire coat hangers, as these can puncture thin metal ducts and create jagged edges that snag lint more aggressively in the future.
- Dryer vent cleaning brush with flexible, extendable rods.
- Heavy-duty vacuum with a narrow crevice tool.
- Power drill (to attach to the brush rod for rotation).
- Duct tape (UL-listed metallic foil tape for sealing joints).
- Screwdriver (to remove the dryer exhaust connection).
Steps For Safe Manual Cleaning
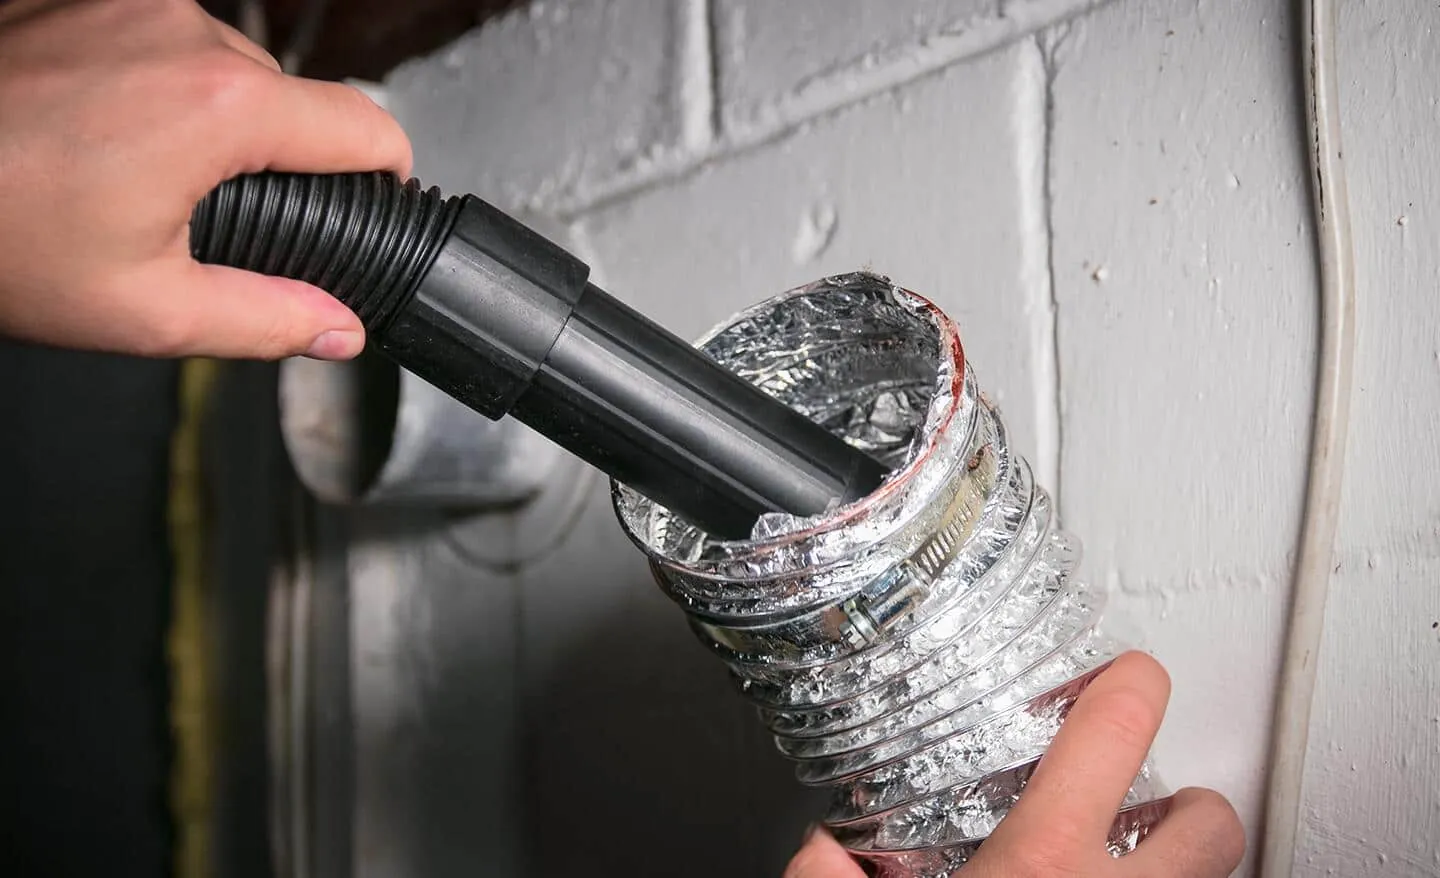
Begin by unplugging your dryer from the electrical outlet or shutting off the gas supply. Pull the unit several feet away from the wall to access the rear exhaust port. Disconnect the flexible duct from the back of the machine and the wall. Use your vacuum to remove loose debris from both the dryer’s internal exhaust port and the immediate opening of the wall duct.
Insert the cleaning brush into the wall duct, rotating it as you push it through the length of the vent. Pull the brush back out slowly to drag the loosened lint toward you, vacuuming up the debris as it exits. Repeat this process from the exterior vent hood outside your home to ensure the entire run is clear. Reconnect all joints firmly, ensuring there are no sags or kinks in the flexible transition duct.
Why Rigid Ducting Is Essential
The material used for your venting makes a massive difference in how often you must clean it. Many older homes were built using flexible plastic or thin foil “accordion” style ducts. These materials are prone to sagging, which creates low points where lint settles and accumulates quickly. Furthermore, the ribbed interior of these hoses provides thousands of tiny crevices for lint to cling to.
Warning: Never use flexible plastic or vinyl ducting for a dryer vent, as these materials aren’t fire-rated and can melt or ignite if the dryer overheats.
Always replace these with rigid metal ducting whenever possible. Rigid metal pipes have smooth interior walls, which allows air to flow freely and prevents lint from snagging on the pipe surface. If you must use a flexible transition piece between the dryer and the wall, ensure it’s a semi-rigid aluminum product and keep it as short as possible, ideally under five feet in length.
Managing External Vent Hoods
The external exhaust hood is the final point of exit for your dryer’s air. If this vent is blocked, the entire system will back up. Check this area every few months to ensure the louvers or flaps open easily when the dryer is running.
If you live in an area with high pest activity, you may be tempted to install a screen over the vent, but this is a major mistake. Screens catch lint rapidly and will create a complete blockage within weeks, forcing you to clean the vent far more frequently than necessary. Instead, use a hood design that prevents pest entry without using a fine-mesh screen.
Professional Cleaning Versus DIY
Choosing between a professional service and a DIY approach comes down to your comfort level with home maintenance and the complexity of your home’s layout. If your vent travels through a finished basement, a second-story wall, or a roof, a professional is recommended. These setups often require specialized equipment like high-powered vacuums and cameras to verify that the entire length of the pipe is clear of debris.
When To Hire A Pro
- The vent runs through a roof or multiple levels.
- You can’t reach the exterior vent due to height or landscaping.
- The dryer is still malfunctioning after a thorough cleaning.
- You’re uncomfortable disconnecting gas lines or electrical cords.
Benefits Of DIY
- Significant cost savings over time.
- Ability to perform “spot checks” whenever you notice drying times increasing.
- Full control over the thoroughness of the cleaning process.
Maintaining Your Lint Screen
While the vent duct requires periodic deep cleaning, the lint screen inside your dryer door is the first line of defense. Cleaning this screen after every single load is the most effective way to slow down the accumulation of debris in the rest of your system.
If you use dryer sheets, they can leave a waxy, invisible film on the screen that restricts airflow even when the screen looks clean. Periodically scrub the screen with a soft brush, warm water, and mild detergent to remove this buildup. If water doesn’t pass through the screen easily, it’s time for a deep clean.
Common Troubleshooting Scenarios
If you have cleaned your vent and the dryer still performs poorly, the issue may lie elsewhere. First, inspect the blower wheel inside the dryer. Over time, lint can build up on the blades of the blower wheel, reducing its ability to pull air through the system. This often requires disassembling the dryer cabinet to access the motor housing.
If the unit is an electric model, ensure the heating element isn’t partially burned out. If it’s a gas model, ensure the igniter is functioning correctly. If you’re uncertain about internal repairs, consult a professional technician to avoid damage to the sensitive control boards or heating components.
Related guides
- Shark Duo Clean Vacuum Troubleshooting: Fix Suction and Brush in 2026
- 10 Best Hearing Aid Amplifier Cleaning Kits for Clear Sound in 2026
Frequently Asked Questions
How do I know if my vent is clogged?
The most reliable sign is a dryer that takes significantly longer to dry clothes than it did when new. You might also notice the clothes feel damp at the end of a cycle, the top of the dryer feels excessively hot, or the exterior vent hood flaps don’t open during operation. If you notice a musty or burning smell, stop using the machine immediately.
Can I use a leaf blower to clean the vent?
While some people attempt to use a leaf blower to force air through the duct, this is generally discouraged. It can blow lint into the internal components of the dryer or disconnect the pipe joints inside your walls. A specialized dryer vent brush attached to a drill is much more effective at scrubbing the walls of the duct to remove stubborn, caked-on lint safely.
Does the type of dryer affect cleaning frequency?
Yes, gas dryers and electric dryers have different airflow characteristics, but both require regular cleaning. However, the age of the dryer matters more than the power source. Older dryers often have less efficient airflow systems and may lack the modern sensors that detect restricted venting. Regardless of your model, the volume of laundry and the length of your ductwork remain the primary drivers of maintenance needs.
Should I clean the vent from inside or outside?
Ideally, you should clean the vent from both directions. Starting from the dryer side allows you to push the majority of the lint out through the exterior hood. Finishing the process from the outside ensures that the final section of the pipe and the hood itself are completely clear. This dual-access approach provides the most thorough cleaning possible for your home’s specific ventilation layout.
How do I clean a vent that goes through the roof?
Roof vents are difficult and dangerous to clean from the outside. If your dryer vents through the roof, it’s highly recommended that you hire a professional service. They possess the necessary safety gear, such as roof harnesses and specialized cleaning tools, to navigate the slope of your roof and clear the stack without causing damage to your shingles or the vent cap itself.
Conclusion
Establishing a reliable maintenance schedule is the best way to protect your home and extend the life of your appliances. Start by checking your lint screen after every load and marking your calendar for a thorough vent cleaning every twelve months. If you notice any of the warning signs mentioned above, prioritize a deep clean immediately to ensure your home remains safe and energy-efficient.