
The Keurig K-Supreme Plus Smart coffee maker represents a significant leap in home brewing technology, offering unparalleled convenience and customization. With its smart features, multiple brew sizes, and strength control, it aims to deliver the perfect cup every time. However, like any sophisticated appliance, it can occasionally encounter issues.
Understanding how to troubleshoot common problems can save you time, frustration, and potentially the need for costly repairs. This guide is designed to equip you with the knowledge and step-by-step solutions to get your K-Supreme Plus Smart back to brewing delicious coffee efficiently.
Key Takeaways
- Power Issues: Check the power cord, outlet, and reset the machine if it won’t turn on.
- Brewing Problems: Address clogs, water temperature, and probe issues by cleaning, descaling, and checking for obstructions.
- Water Flow/Dispensing: Ensure the water reservoir is properly seated and the needle is clear of grounds.
- Connectivity & App Issues: Restart devices, re-pair the machine, and check Wi-Fi settings for smart features.
- Error Messages: Decode common error codes and follow specific reset or cleaning procedures.
- Maintenance is Key: Regular descaling and cleaning are crucial for preventing most issues.
Understanding Your Keurig K-supreme Plus Smart
Before diving into troubleshooting, it’s beneficial to understand the core components and functions of your Keurig K-Supreme Plus Smart. This model boasts several advanced features that differentiate it from standard Keurig brewers, including:
- MultiStream Technology: This feature saturates the coffee grounds more evenly, aiming to extract more flavor.
- Brew Temperature Control: Allows you to select your preferred temperature for optimal taste.
- Brew Strength Control: Offers options to adjust the intensity of your coffee.
- Smart Connectivity (Wi-Fi): Enables control via the Keurig app, allowing for remote brewing, scheduling, and maintenance reminders.
- Multiple Brew Sizes: Typically offers a range of sizes from 4 oz to 12 oz.
- Large Water Reservoir: Reduces the frequency of refills.
These advanced features, while enhancing the user experience, can also introduce unique troubleshooting scenarios. For instance, connectivity issues or specific error codes might arise that aren’t present in simpler models. Familiarizing yourself with the user manual for specific details about your model is always a good first step.
Common Components And Their Functions
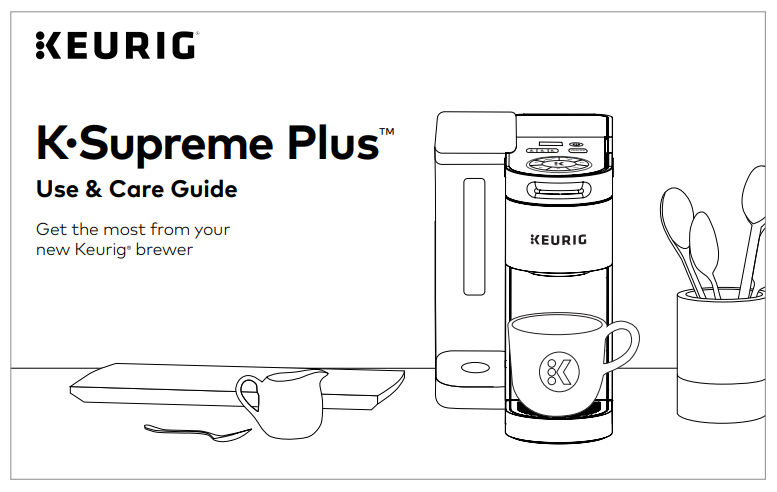
- Water Reservoir: Holds the water for brewing. Must be seated correctly for the machine to operate.
- Lid: Seals the reservoir and houses the water inlet.
- Handle/Lid Assembly: Covers the K-Cup pod holder. Opening and closing it can sometimes trigger sensors.
- K-Cup Pod Holder: Where you insert your coffee pod. It contains a top and bottom needle for piercing the pod.
- Drip Tray: Catches spills and can be removed for larger mugs.
- Control Panel/Touchscreen: The interface for selecting brew settings, initiating brews, and displaying messages.
- Power Cord: Connects the machine to the electrical outlet.
- Internal Water Pump and Heating Element: Responsible for drawing water and heating it to the correct temperature.
- Wi-Fi Module: Enables smart connectivity.
Troubleshooting often involves identifying which of these components might be malfunctioning or obstructed.

Credit: www.youtube.com
Power And Startup Issues
One of the most frustrating problems is when your Keurig K-Supreme Plus Smart refuses to power on or start a brew cycle. This can stem from simple electrical issues or internal faults.
Machine Will Not Power On
If your coffee maker is completely unresponsive, meaning no lights illuminate and no sounds are made:
- Check the Power Cord: Ensure the power cord is securely plugged into both the coffee maker and a functioning wall outlet. If it’s a detachable cord, verify it’s firmly seated in the machine.
- Test the Outlet: Plug another small appliance (like a lamp or toaster) into the same outlet to confirm it’s providing power. If the outlet is dead, try a different one. Avoid using extension cords or power strips, as they can sometimes cause insufficient power delivery.
- Inspect the Power Cord: Look for any visible damage to the power cord, such as cuts, fraying, or kinks. If damaged, the cord may need replacement, which typically requires contacting Keurig support.
- Perform a Power Cycle/Reset: Unplug the coffee maker from the wall outlet. Wait for at least 60 seconds. While unplugged, press and hold the power button for about 10-15 seconds to discharge any residual electricity. Then, plug the machine back in and attempt to power it on.
Machine Powers On But Won’t Brew
If the machine powers on, lights up, and responds to button presses, but doesn’t initiate a brew cycle:
- Check Water Level: Ensure the water reservoir is filled to the minimum line and is properly seated. The machine has sensors that prevent brewing if the water level is too low or the reservoir isn’t correctly positioned. Remove the reservoir, check for debris in the seating area, and then reinsert it firmly.
- Verify Handle Closure: Make sure the handle is fully closed. If it’s not completely down, the machine won’t pierce the K-Cup pod and start brewing.
- Inspect K-Cup Holder: Open the handle, remove the K-Cup pod holder assembly, and check for any obstructions. Ensure no coffee grounds or pod fragments are lodged in the mechanism. Refer to your manual for instructions on safely removing and cleaning the holder.
- Confirm Brew Settings: Double-check that you have selected a brew size and strength, and have pressed the brew button. Sometimes, a missed selection can prevent the cycle from starting.
- Listen for Pump: When you attempt to brew, do you hear the pump trying to engage? If you hear a humming or grinding noise but no water is dispensed, it could indicate a blockage or a failing pump. If you hear nothing at all, it might be an electrical or sensor issue.
Credit: support.keurig.com
Brewing And Water Flow Problems
Issues with water not heating, not dispensing, or dispensing too slowly are common and often related to clogs or maintenance needs.
Water Not Heating
If the water remains cold or lukewarm during the brew cycle:
- Allow Heating Time: After powering on, the machine needs time to heat the water. Wait a few minutes for the heating indicator (if applicable) to signal readiness.
- Check Brew Temperature Setting: Ensure you haven’t inadvertently selected the lowest temperature setting. Cycle through the temperature options on the control panel.
- Descale the Machine: Mineral buildup from water can significantly impede the heating element’s efficiency. This is a prime candidate for descaling. Follow the descaling instructions in the next section.
- Potential Heating Element Failure: If descaling doesn’t resolve the issue, the heating element may have failed. This requires professional repair or replacement.
Water Not Dispensing Or Dispensing Slowly
When water fails to come out, or the brew takes an exceptionally long time:
- Check Water Reservoir: As mentioned earlier, ensure the reservoir is full and properly seated. A loose reservoir will prevent water from reaching the pump.
- Clear the Brew Head Needle: The top needle pierces the K-Cup pod. If it’s clogged with coffee grounds or debris, water cannot flow through.
- Open the handle.
- Carefully use a straightened paperclip or the cleaning tool provided with your Keurig (if applicable) to probe the top needle. Wiggle it gently to dislodge any blockages. Be cautious not to bend or break the needle.
- Clear the Exit Needle: The bottom needle allows the brewed coffee to exit the pod holder.
- Remove the K-Cup pod holder assembly.
- Locate the exit needle at the bottom center.
- Use a straightened paperclip to clear any grounds or debris from this needle.
- Descale the Machine: Scale buildup can constrict the water flow pathways throughout the machine, leading to slow or no dispensing. This is a critical step.
How to Descale Your Keurig K-Supreme Plus Smart:
- Empty the Reservoir: Remove any remaining water and the K-Cup pod.
- Use a Descaling Solution: Fill the reservoir with a mixture of 1/3 Keurig descaling solution and 2/3 water. Alternatively, use a DIY solution of equal parts white vinegar and water (though Keurig recommends their solution for optimal results and to avoid voiding the warranty).
- Run a Brew Cycle: Place a mug on the drip tray and run a large brew cycle (without a K-Cup pod). Discard the hot water.
- Let it Sit: Allow the machine to sit for at least 30 minutes (or longer if the buildup is severe).
- Repeat Brew Cycles: Run more brew cycles with the descaling solution until the reservoir is empty.
- Rinse Thoroughly: Empty the reservoir, rinse it well, and refill it with fresh, clean water. Run at least 8-12 full brew cycles with fresh water to completely flush out the descaling solution and any loosened scale.
- Clean the Exterior: Wipe down the exterior of the machine with a damp cloth.
*Note: Descaling frequency depends on water hardness. Keurig recommends descaling every 3-6 months.*
- Check for Pod Issues: Ensure the K-Cup pod is not damaged or deformed, which could prevent proper piercing or water flow. Try a different brand or type of pod.
- K-Cup Holder Clog: Sometimes, coffee grounds can accumulate around the pod holder seal. Remove the holder and clean it thoroughly under running water.
Leaking Issues
If your coffee maker is leaking water:
- Check the Water Reservoir: Ensure it’s not cracked and is seated correctly. A misaligned reservoir is a common cause of leaks. Check the gasket or seal at the base of the reservoir.
- Inspect the Drip Tray: Make sure it’s properly inserted and not overflowing.
- Examine K-Cup Holder: Ensure the pod is correctly seated within the holder and that the holder itself is clean and free of cracks.
- Internal Leaks: If the leak appears to be coming from the base or internal components, unplug the machine immediately and contact Keurig support. Internal leaks can be a safety hazard.

Credit: www.ceramicasvalera.com
Smart Features And Connectivity Problems
The K-Supreme Plus Smart’s Wi-Fi capabilities offer convenience but can also be a source of troubleshooting.
Cannot Connect To Wi-fi
If your coffee maker is not connecting to your home Wi-Fi network:
- Check Network Status: Ensure your home Wi-Fi network is operational and other devices can connect.
- Router Proximity: The coffee maker needs to be within a reasonable range of your Wi-Fi router. Weak signals can prevent connection. Consider moving the router closer or using a Wi-Fi extender if necessary.
- Network Compatibility: Verify your network meets Keurig’s requirements (e.g., 2.4 GHz band). Some routers broadcast both 2.4 GHz and 5 GHz bands; ensure you are trying to connect to the correct one.
- Password Accuracy: Double-check that you are entering the correct Wi-Fi password. Passwords are case-sensitive.
- Restart Devices: Power cycle your router, modem, and the coffee maker. Unplug them, wait 60 seconds, and plug them back in, starting with the modem, then the router, and finally the coffee maker.
- Re-Pair the Machine: If the machine was previously connected, try removing it from the Keurig app and re-pairing it. Follow the on-screen prompts in the app and on the coffee maker’s display to initiate the pairing process. This often involves pressing specific buttons on the machine to enter pairing mode.
- Firmware Updates: Ensure both your Keurig app and the coffee maker’s firmware are up to date. Check the app for any available updates.
Keurig App Not Responding Or Syncing
If the Keurig app isn’t controlling the machine or showing accurate status:
- Check App and Machine Connection: Ensure both the app and the coffee maker are connected to the internet. Check the Wi-Fi indicator on the coffee maker’s display.
- Force Close and Reopen App: Close the Keurig app completely (don’t just minimize it) and then reopen it.
- Log Out and Log In: Try logging out of your Keurig account within the app and then logging back in.
- Update the App: Ensure you have the latest version of the Keurig app installed from your device’s app store.
- Bluetooth Issues (if applicable): Some smart devices use Bluetooth for initial pairing or communication. Ensure Bluetooth is enabled on your smartphone or tablet.
- Server Issues: Occasionally, Keurig’s servers might be down for maintenance. Check Keurig’s official website or social media for any service announcements.
Error Messages And Codes
The K-Supreme Plus Smart may display specific error codes or messages on its screen. Knowing what these mean is crucial for effective troubleshooting.
Common Error Codes And Meanings
- “Add Water” or Water Level Indicator: This is straightforward. The water reservoir is below the minimum fill line or not seated properly. Remove, refill, and reseat the reservoir.
- “Descale” or “Clean Needed”: This indicates that mineral buildup has reached a point where it’s affecting performance or taste. Follow the descaling procedure outlined earlier. It’s important to complete the descaling cycle for the message to clear.
- “Clog” or “Check Brew Head”: This usually points to a blockage in the top or bottom needle. Use a paperclip to clear the needles as described in the “Water Not Dispensing” section.
- “Heating” or Temperature Fluctuation: If the machine displays “Heating” for an extended period or the temperature is inconsistent, it could be a heating element issue or severe scale buildup. Descaling is the first step.
- Connectivity Errors (e.g., “Wi-Fi Error,” “Connection Failed”): Refer to the “Cannot Connect to Wi-Fi” section for troubleshooting steps.
- “Priming Required”: This message might appear after the machine has been idle for a long time, after descaling, or if the water line has become completely empty. To prime the machine:
- Ensure the reservoir is filled.
- Place a large mug on the drip tray.
- Press the brew button without a K-Cup pod inserted.
- The machine will attempt to run water through its system. This may take a minute or two. Discard the hot water. The message should clear.
General Troubleshooting For Unknown Errors
If you encounter an error code not listed here, or a message that doesn’t make immediate sense:
- Consult Your Manual: Your specific model’s user manual is the best resource for deciphering error codes.
- Perform a Power Cycle: Unplug the machine for at least 60 seconds, then plug it back in. This can sometimes clear temporary glitches.
- Reset the Machine: Some Keurig models have a reset procedure. Check your manual for instructions. This might involve holding down a combination of buttons during startup.
- Contact Keurig Support: If the error persists after trying these steps, it’s time to contact the manufacturer. Have your model number and serial number ready.
Maintenance For Optimal Performance
Proactive maintenance is the most effective way to prevent most troubleshooting issues. Regular cleaning and descaling ensure your K-Supreme Plus Smart operates smoothly and delivers the best possible coffee.
Regular Cleaning Routine
- Daily: Discard used K-Cup pods immediately after brewing. Rinse the K-Cup holder assembly if visible grounds are present. Wipe down the exterior with a damp cloth.
- Weekly:
- Water Reservoir: Empty, rinse, and wipe down the inside of the water reservoir. If it’s dishwasher safe (check your manual), run it through a cycle.
- Drip Tray: Remove and wash the drip tray and its cover with warm, soapy water. Rinse and dry thoroughly before replacing.
- K-Cup Holder: Remove the K-Cup holder assembly and wash it thoroughly with warm, soapy water. Use a brush or paperclip to ensure the exit needle area is clear of grounds. Rinse and dry completely.
- Pod Platform: Wipe down the platform where the K-Cup pod rests.
Deep Cleaning And Descaling
- Monthly (or as needed): Perform a more thorough cleaning of the K-Cup holder, ensuring both the top and bottom needles are clear.
- Every 3-6 Months (or when indicated): Descale the machine using the procedure detailed earlier. The frequency depends on your water’s hardness. Using filtered water can significantly reduce the rate of scale buildup.
Pro Tip: Using Keurig’s own brand of descaling solution is generally recommended by the manufacturer to ensure compatibility and avoid potential damage to internal components. While vinegar is a common alternative, it may not be as effective and could potentially leave a lingering taste if not flushed thoroughly.
Filter Maintenance (if Applicable)
Some Keurig models come with a water filter basket in the reservoir.
- Replace Filters Regularly: If your model includes a water filter, replace it according to the manufacturer’s recommendations (typically every two months or 40 gallons). This helps reduce mineral buildup and improves water taste.
- Soak New Filters: Always soak new water filters in fresh water for about 5 minutes before inserting them into the holder to remove any loose carbon particles.
By incorporating these maintenance tasks into your routine, you can significantly minimize the likelihood of encountering common problems and extend the lifespan of your Keurig K-Supreme Plus Smart coffee maker.
Comparison: Keurig K-supreme Plus Smart Vs. Other Models
To better understand the K-Supreme Plus Smart’s place and potential issues, let’s compare it briefly with other popular Keurig models. This highlights why certain troubleshooting steps might be specific to this advanced machine.
| Feature | Keurig K-Supreme Plus Smart | Keurig K-Elite | Keurig K-Classic (K55) |
|---|---|---|---|
| **Brew Technology** | MultiStream | Standard | Standard |
| **Smart Features** | Yes (Wi-Fi App Control) | No | No |
| **Temp Control** | Yes (Multiple Settings) | Yes (6 settings) | No (Fixed temp) |
| **Strength Control** | Yes | Yes | No |
| **Brew Sizes** | 4, 6, 8, 10, 12 oz | 4, 6, 8, 10, 12 oz | 6, 8, 10 oz |
| **Water Reservoir** | 75 oz | 75 oz | 48 oz |
| **Descaling Alert** | Yes | Yes | No (Manual recommendation) |
| **Complexity** | High | Medium | Low |
As you can see, the K-Supreme Plus Smart has more sophisticated features, particularly the MultiStream technology and Wi-Fi connectivity. This means troubleshooting might involve more steps related to software, app integration, and ensuring the advanced brewing mechanism is functioning correctly, beyond the standard water flow and power checks common to all Keurig models.
For example, connectivity issues or app-syncing problems are unique to smart models like the K-Supreme Plus.
When To Call For Professional Help
While most common issues with the Keurig K-Supreme Plus Smart can be resolved with the troubleshooting steps outlined above, there are times when professional assistance is necessary.
- Persistent Error Codes: If you’ve followed all relevant troubleshooting steps for a specific error code and it continues to display, there might be an internal hardware failure.
- Visible Damage: If you notice cracks in the casing, damage to the power cord, or other physical damage, do not attempt to use the machine.
- Electrical Malfunctions: Any signs of electrical issues, such as sparking, unusual odors, or the machine tripping your circuit breaker repeatedly (after confirming the outlet is functional), warrant immediate cessation of use and professional diagnosis.
- Pump Failure: If the machine makes grinding noises but doesn’t draw water, or if it’s completely silent regarding the pump, the pump itself may have failed.
- Heating Element Failure: If the water consistently fails to heat up even after thorough descaling, the heating element might be burnt out.
- Leaks from Internal Components: Water leaking from the base or sides of the machine, not related to the reservoir or drip tray, suggests an internal plumbing issue.
In these situations, your best course of action is to contact Keurig Customer Support. They can provide further guidance, arrange for repairs, or advise on replacement options, especially if the machine is still under warranty. Remember to have your machine’s model number and serial number handy when you call.
You can typically find these details on the bottom or back of the unit.
Frequently Asked Questions
Why Is My K-supreme Plus Smart Not Connecting To Wi-fi Even Though My Internet Is Working?
Several factors could be at play. Ensure your router is broadcasting a