To troubleshoot a Shark Robot Vacuum, first, check for blockages and clean the filters. Reset the device if issues persist.
Shark Robot Vacuums are convenient tools for maintaining clean floors effortlessly. Yet, like any device, they sometimes encounter issues. Common problems include the vacuum not turning on, poor suction, or navigation errors. Regular maintenance, such as cleaning brushes and filters, often resolves these issues.
Understanding how to troubleshoot your Shark Robot Vacuum can save time and avoid unnecessary repairs. This guide provides practical steps to address common problems, ensuring your vacuum operates efficiently. Always refer to the user manual for specific instructions related to your model. By following these tips, you can keep your Shark Robot Vacuum running smoothly.
Credit: support.sharkclean.ca
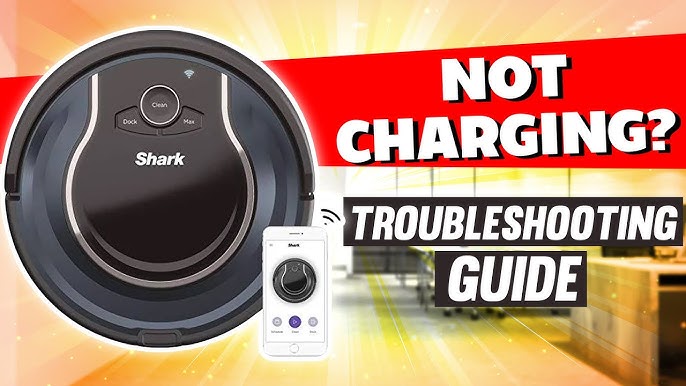
Battery Problems
Battery problems are common with Shark Robot Vacuums. Users often face issues such as not charging and short battery life. This guide helps solve these problems easily.
Not Charging
If your Shark Robot Vacuum is not charging, check the power source first. Ensure the outlet works and the charger is plugged in properly. Next, inspect the charging dock. Clean the contacts on both the dock and the vacuum.
Use a dry cloth to remove dust and debris. Sometimes, the issue might be with the battery itself. If the battery is old, it may need replacement. Shark Robot Vacuum batteries usually last 1-2 years. Look for any visible damage or signs of wear on the battery.
If everything looks fine and the vacuum still won’t charge, try resetting it. Press and hold the power button for 10 seconds. Release the button and wait for a minute. Now, try charging the vacuum again.
Short Battery Life
A short battery life can be frustrating. To extend your Shark Robot Vacuum’s battery life, follow these steps:
- Fully charge the vacuum before use.
- Avoid using the vacuum on high power mode unless necessary.
- Regularly clean the vacuum’s brushes and filters.
- Store the vacuum in a cool, dry place.
Regular maintenance is key. Clean the brushes and filters weekly. This helps the vacuum run efficiently and saves battery life.
If you still experience a short battery life, it may be time to replace the battery. Follow the manufacturer’s instructions for proper replacement.

Credit: www.ifixit.com
Navigation Issues
Shark robot vacuums are handy devices for keeping your floors clean. Yet, sometimes, they face navigation issues that can disrupt their performance. This section will help you troubleshoot common navigation problems.
Getting Stuck
If your Shark robot vacuum keeps getting stuck, you can try these solutions:
- Remove any cords, toys, or small objects from the floor.
- Ensure the vacuum sensors are clean.
- Check for loose parts or obstructions in the wheels.
Regularly check the sensors and wheels for dirt. Use a soft cloth to clean them. This keeps the vacuum moving smoothly.
Not Returning To Dock
If your Shark robot vacuum is not returning to the dock:
- Ensure the docking station is in a clear, open area.
- Check that the dock is plugged in and has power.
- Clean the docking sensors on both the vacuum and the dock.
Place the dock in an open space. Remove any obstacles around the dock. This helps the vacuum find its way back easily.
Suction Power Loss
Shark robot vacuums are great helpers. Yet, sometimes they lose suction power. This can be frustrating. The good news is, there are simple fixes. Let’s look at some common causes and how to solve them.
Clogged Filters
Filters keep the vacuum running well. But, they can get clogged. A clogged filter reduces suction power. Cleaning the filters can help.
Here’s how to clean the filters:
- Turn off the vacuum.
- Remove the filters.
- Tap the filters to remove dust.
- Rinse with water and let them dry.
- Put the filters back in place.
Clean filters improve suction power. Do this every month.
Blocked Brushes
Brushes help pick up dirt. They can get blocked by hair and debris. Blocked brushes reduce suction power. Cleaning the brushes can help.
Here’s how to clean the brushes:
- Turn off the vacuum.
- Remove the brushes.
- Cut away hair and debris.
- Wipe the brushes with a damp cloth.
- Put the brushes back in place.
Clean brushes make your vacuum work better. Do this every week.
| Issue | Solution |
|---|---|
| Clogged Filters | Clean every month |
| Blocked Brushes | Clean every week |
Keeping filters and brushes clean helps a lot. Your vacuum will run like new.
Software Glitches
Software glitches can disrupt your Shark Robot Vacuum’s performance. These issues include errors, freezes, or unresponsive controls. Fixing these glitches often involves simple steps. Here, we will discuss resetting the robot and firmware updates to resolve common problems.
Resetting The Robot
A reset can fix many software issues. Follow these steps to reset your Shark Robot Vacuum:
- Turn off the robot using the power switch.
- Wait for 10 seconds.
- Turn the robot back on.
- Press and hold the Clean button for 10 seconds.
- Release the button and wait for the robot to restart.
Resetting clears temporary bugs and refreshes the system. This simple step can solve many issues instantly.
Firmware Updates
Keeping your firmware updated is crucial. Follow these steps for updating firmware:
- Open the Shark Clean app on your phone.
- Go to Settings and select your robot vacuum.
- Check for available updates.
- If an update is available, follow the on-screen instructions.
- Ensure your robot is connected to Wi-Fi during the update.
Firmware updates often include bug fixes and new features. They improve the robot’s performance and stability. Regular updates ensure your vacuum operates efficiently.
| Step | Action |
|---|---|
| 1 | Open Shark Clean app |
| 2 | Go to Settings |
| 3 | Select your robot |
| 4 | Check for updates |
| 5 | Follow instructions |
| 6 | Ensure Wi-Fi connection |
Both resetting and firmware updates are essential. They help maintain your Shark Robot Vacuum’s efficiency. Keep these steps handy for quick troubleshooting.
Connectivity Problems
Is your Shark Robot Vacuum not connecting? Connectivity problems can be frustrating. This guide will help you solve common issues. We will focus on Wi-Fi issues and app malfunctions. Follow these steps to get your vacuum back online.
Wi-fi Issues
If your Shark Robot Vacuum has Wi-Fi issues, try these solutions:
- Check your Wi-Fi network: Ensure your network is working. Try connecting another device to the Wi-Fi.
- Restart your router: Unplug your router for 30 seconds. Plug it back in and wait for it to restart.
- Move the vacuum closer: Place the vacuum closer to the router. This helps if the signal is weak.
- Update firmware: Ensure the vacuum’s firmware is up to date.
| Issue | Solution |
|---|---|
| Weak Signal | Move vacuum closer to the router |
| Router Problems | Restart your router |
| Firmware Outdated | Update the firmware |
App Malfunctions
If the Shark Clean app malfunctions, try these steps:
- Check for updates: Ensure the app is up to date. Go to the app store and check for updates.
- Restart the app: Close the app completely. Then, reopen it and try again.
- Reinstall the app: Delete the app from your device. Reinstall it and log in again.
- Clear cache: Go to your device settings. Find the app and clear its cache.
By following these steps, you can fix most connectivity issues. Your Shark Robot Vacuum will be back in action quickly.
Error Messages
Shark Robot Vacuums are efficient and intelligent devices. But sometimes, they display error messages. Understanding these errors can help you quickly resolve issues. Below, we will discuss common error codes and how to fix them.
Common Error Codes
Your Shark Robot Vacuum may show different error codes. Here are some of the most common ones:
| Error Code | Description |
|---|---|
| E1 | Wheel problem. The vacuum can’t move properly. |
| E2 | Brushroll issue. The brushroll is stuck or blocked. |
| E3 | Cliff sensor error. The sensor needs cleaning. |
| E4 | Battery problem. The battery needs charging or replacement. |
Fixing Error Alerts
Once you know the error code, you can fix the issue. Here are steps to fix the common errors:
- E1 – Wheel Problem: Check if something is blocking the wheels. Remove any debris or hair.
- E2 – Brushroll Issue: Turn off the vacuum. Remove the brushroll and clean it.
- E3 – Cliff Sensor Error: Clean the cliff sensors with a dry cloth. Ensure they are free of dust.
- E4 – Battery Problem: Make sure the vacuum is charged. If the issue persists, consider replacing the battery.
For a more detailed guide, refer to your Shark Robot Vacuum manual. Regular maintenance can prevent many of these errors.
Maintenance Tips
Maintaining your Shark Robot Vacuum is essential for optimal performance. This guide offers tips to keep your device running smoothly. Follow these simple steps to ensure your vacuum works effectively.
Regular Cleaning
Regular cleaning prevents debris buildup and ensures efficient operation.
- Empty the dustbin after each use.
- Clean the filter weekly with water.
- Dry the filter completely before reinstalling.
- Wipe sensors and charging contacts with a dry cloth.
Parts Replacement
Replacing worn parts helps maintain your vacuum’s performance.
| Part | Replacement Frequency |
|---|---|
| Filter | Every 3 months |
| Brushroll | Every 6-12 months |
| Side Brushes | Every 6 months |
| Battery | Every 1-2 years |
Use genuine Shark parts for replacements. This ensures compatibility and longevity.
Credit: m.youtube.com
Customer Support
When dealing with issues related to your Shark Robot Vacuum, having reliable customer support is essential. Understanding how to access support and what your options are can save time and stress. Here, we dive into the key aspects of customer support for your Shark Robot Vacuum.
Warranty Information
Your Shark Robot Vacuum comes with a limited warranty. This warranty typically covers defects in materials and workmanship. The duration of the warranty can vary based on the specific model.
To check your warranty status, you can visit the Shark’s official website and enter your product details. Keeping your purchase receipt and registering your product online helps streamline warranty claims.
| Model | Warranty Period |
|---|---|
| Shark ION Robot R75 | 1 Year |
| Shark IQ Robot | 1 Year |
Contacting Support
If you encounter issues with your Shark Robot Vacuum, contacting customer support is easy. Shark’s support team is available to assist you through various channels.
- Phone Support: Call 1-800-798-7398 for immediate assistance.
- Email Support: Send an email to support@sharkclean.com.
- Live Chat: Access live chat support on the Shark website for quick help.
Before reaching out, have your model number and purchase details ready. This information helps the support team address your issue faster.
Frequently Asked Questions
Why Is My Shark Vacuum Not Charging?
Your Shark vacuum might not charge due to dirty contacts or a faulty power cord. Clean them and check connections.
How Do I Reset My Shark Robot Vacuum?
To reset your Shark robot vacuum, hold the power button for 10 seconds. This will reboot the system.
Why Is My Shark Vacuum Losing Suction?
A clogged filter or blocked brush roll can cause suction loss. Clean them to restore performance.
How Do I Clean Shark Robot Vacuum Sensors?
Gently wipe the sensors with a soft, dry cloth. Regular cleaning ensures optimal navigation and performance.
Why Is My Shark Vacuum Making Loud Noise?
A loud noise may indicate debris in the brush roll or a blockage. Check and clear any obstructions.
Conclusion
Troubleshooting your Shark robot vacuum can save time and money. Follow these tips to keep it running smoothly. Regular maintenance ensures optimal performance. Don’t hesitate to consult the user manual for detailed guidance. A well-maintained vacuum guarantees a cleaner home, making life easier.
Enjoy a hassle-free cleaning experience with these troubleshooting steps.