Check if the tube or starter is faulty. Ensure connections are secure and the ballast is working correctly.
Fluorescent lights are common in homes and offices due to their efficiency. However, they can sometimes malfunction. Troubleshooting these lights can save time and money. Common issues include flickering, dimming, or complete failure to light up. Begin by inspecting the tube and starter, as these are often the culprits.
Ensure all connections are tight and examine the ballast for any signs of damage. Replacing faulty components can usually resolve the problem. Regular maintenance can also prevent many issues. Understanding the basics of fluorescent light troubleshooting ensures a bright and well-lit environment. This guide will help you identify and fix common problems efficiently.

Common Fluorescent Light Issues
Fluorescent lights are common in homes and offices. But they can have problems. This section will help you understand and fix common issues.
Flickering Lights
Flickering lights are a frequent issue. They can be annoying and hard to ignore. Here are some common causes:
- Old Bulbs: Fluorescent bulbs wear out over time.
- Loose Connections: Ensure all connections are tight.
- Ballast Problems: The ballast may need replacement.
To fix flickering lights, try these steps:
- Check and tighten all connections.
- Replace old bulbs with new ones.
- Inspect the ballast and replace if needed.
Dim Lights
Dim lights can make a room feel dull. They usually indicate a problem. Here are some reasons why lights might be dim:
- Old Bulbs: Bulbs lose brightness over time.
- Dirty Fixtures: Dust and dirt can block light.
- Ballast Issues: A weak ballast can cause dim lighting.
To fix dim lights, follow these tips:
- Clean the fixtures and remove dust.
- Replace old bulbs with new, brighter ones.
- Check the ballast and replace if it’s weak.
Buzzing Sounds
Buzzing sounds can be very distracting. They often signal a problem with the light. Here are some common causes:
- Faulty Ballast: The ballast might be defective.
- Loose Parts: Ensure all parts are tightly secured.
- Incorrect Bulbs: Using the wrong type of bulb can cause buzzing.
To fix buzzing sounds, try these solutions:
- Secure all loose parts.
- Replace the faulty ballast.
- Use the correct type of bulb.
Essential Tools And Equipment
Fluorescent lights are common in homes and offices. Troubleshooting them can be easy if you have the right tools and equipment. Let’s dive into the essential tools needed for effective fluorescent light troubleshooting.
Voltage Tester
A voltage tester is crucial for checking electrical flow. It helps you see if the light is getting power. Always test the circuit before touching any wires. This keeps you safe from electric shocks.
- Ensures the power is off before repairs
- Helps identify faulty wiring
- Easy to use and affordable
Replacement Tubes
Sometimes the light itself is the problem. Having replacement tubes on hand can save time. Make sure to buy the right type of tube for your fixture.
- Check the tube size and type
- Remove the old tube carefully
- Install the new tube securely
Buying tubes in bulk can be cost-effective.
Ballast Checker
A ballast checker helps you test the ballast. The ballast regulates the current to the light. A faulty ballast can cause flickering or no light at all.
| Step | Description |
|---|---|
| 1 | Turn off the power |
| 2 | Disconnect the ballast |
| 3 | Use the checker to test it |
Replace the ballast if it fails the test.
With these essential tools, troubleshooting fluorescent lights becomes simpler and safer. Make sure to have a voltage tester, replacement tubes, and a ballast checker in your toolkit.
Safety Precautions
When troubleshooting fluorescent lights, safety should always be your top priority. Ensure you follow these essential safety precautions to protect yourself and those around you.
Power Off
Before starting any troubleshooting, always turn the power off. This prevents electrical shocks. Locate the circuit breaker and switch it off. Use a voltage tester to confirm there’s no power.
Protective Gear
Wear appropriate protective gear. This includes gloves, safety glasses, and long sleeves. Gloves protect your hands from glass shards. Safety glasses shield your eyes from debris. Long sleeves guard your arms against cuts and burns.
Proper Disposal
Fluorescent lights contain mercury. Dispose of them properly to avoid environmental harm. Check with local waste management services for guidelines. Use recycling facilities dedicated to hazardous materials.
| Safety Precaution | Why It’s Important |
|---|---|
| Power Off | Prevents electrical shocks and accidents. |
| Protective Gear | Protects from cuts, burns, and debris. |
| Proper Disposal | Prevents environmental contamination. |
Adhering to these safety measures ensures a safe troubleshooting process. Always prioritize safety to avoid injuries and accidents.
Credit: blog.1000bulbs.com
Flickering Light Solutions
Fluorescent lights often flicker. It can be annoying and distracting. Fixing this issue is usually simple. Let’s explore some solutions for flickering lights.
Tube Replacement
The tube in a fluorescent light can wear out. This can cause flickering. To replace the tube, follow these steps:
- Turn off the power.
- Remove the old tube.
- Insert a new tube.
- Turn the power back on.
A new tube can solve many flickering problems.
Starter Check
The starter helps the light turn on. If it’s faulty, the light may flicker. Checking the starter involves:
- Turning off the power.
- Locating the starter.
- Removing the starter.
- Inserting a new starter.
- Turning the power back on.
A working starter ensures smooth light operation.
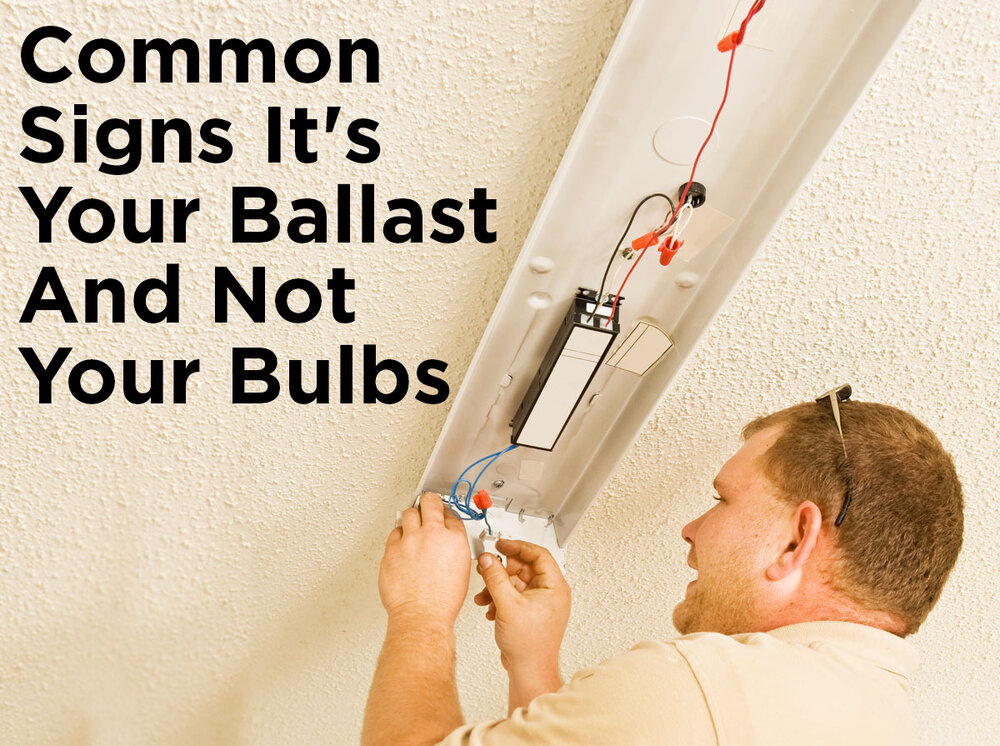
Ballast Inspection
The ballast regulates the current in the light. A faulty ballast can cause flickering. To inspect the ballast:
- Turn off the power.
- Open the fixture.
- Locate the ballast.
- Check for any visible damage.
- Replace if necessary.
- Close the fixture and turn the power back on.
Replacing a faulty ballast can fix many issues.
Fixing Dim Lights
Dim fluorescent lights can be frustrating. They make it hard to see. Fixing dim lights is often easy. Follow these steps to brighten up your space.
Tube Cleaning
Dirty tubes can cause dim light. Cleaning them can help.
- Turn off the power first. Safety is important.
- Remove the tube carefully. Avoid breaking it.
- Use a soft, dry cloth to wipe it. Remove all dust.
- Reinstall the tube. Turn on the power.
Socket Adjustment
Loose sockets can dim the light. Adjusting them can fix the problem.
- Turn off the power first.
- Check the socket ends. Make sure they hold the tube tightly.
- If loose, adjust the socket. Secure it firmly.
- Reinstall the tube. Turn on the power.
Wiring Check
Faulty wiring can cause dim lights. Checking the wiring can help.
- Turn off the power first.
- Open the fixture carefully.
- Inspect the wires. Look for any loose connections.
- If loose, tighten the connections. Use a screwdriver if needed.
- Close the fixture. Turn on the power.
These steps can help fix dim fluorescent lights. Brighten your space easily.
Addressing Buzzing Sounds
Fluorescent lights can sometimes produce an annoying buzzing sound. This sound can be distracting and unpleasant. There are several reasons why your fluorescent light may buzz. Let’s explore some common fixes to address this problem.
Ballast Replacement
The ballast is a crucial part of your fluorescent light. It regulates the current to the tubes. If it is faulty, it can cause buzzing sounds.
- Turn off the power to the light fixture.
- Carefully remove the light cover and tubes.
- Locate the ballast; it is usually a rectangular box.
- Disconnect the wires and remove the old ballast.
- Install the new ballast by connecting the wires.
- Replace the tubes and light cover.
Turn the power back on and check if the buzzing stops.
Mounting Tightening
Loose mounting can also cause buzzing sounds. Ensure all parts are tight and secure.
- Turn off the power to the light fixture.
- Inspect the screws and brackets holding the fixture.
- Tighten any loose screws or brackets.
- Check the light cover and tubes for proper placement.
Once everything is secure, turn the power back on. The buzzing should be gone.
Tube Alignment
Poor alignment of the tubes can cause buzzing sounds. Properly aligned tubes ensure smooth operation.
- Turn off the power to the light fixture.
- Remove the light cover and tubes.
- Inspect the tube sockets for any signs of wear.
- Re-seat the tubes firmly in their sockets.
- Ensure the tubes are straight and aligned.
- Replace the light cover.
Turn the power back on and listen for any buzzing sounds.
These steps should help you fix the buzzing sound in your fluorescent lights. Regular maintenance can also prevent future issues.
Preventive Maintenance Tips
Regular maintenance of fluorescent lights ensures they last longer and work better. Simple preventive steps can help avoid costly repairs. Let’s explore some effective tips.
Regular Cleaning
Clean fluorescent lights every month to remove dust and dirt. Use a soft cloth and mild detergent to clean the fixtures. Dirty lights can reduce brightness and efficiency. Make sure the power is off before cleaning. Always handle bulbs with care to avoid damage.
Scheduled Inspections
Inspect your fluorescent lights every three months. Look for signs of flickering or dimming. Check for any dark spots on the tubes. Ensure the ballast is working properly. Use a checklist to keep track of inspection dates and findings.
| Inspection Task | Frequency |
|---|---|
| Check for flickering | Every 3 months |
| Inspect tubes for dark spots | Every 3 months |
| Test ballast functionality | Every 3 months |
Timely Replacements
Replace fluorescent tubes every 12 to 18 months. Old tubes can cause flickering and reduced brightness. Always use the correct type of tube for your fixture. Dispose of old tubes properly to avoid environmental harm. Keep a spare tube handy for quick replacements.
- Replace every 12-18 months
- Use correct tube type
- Dispose of old tubes properly
- Keep spare tubes
When To Call A Professional
Troubleshooting fluorescent lights can be simple. But sometimes, calling a professional is necessary. Let’s explore when you should seek expert help.
Complex Electrical Issues
Fluorescent lights rely on intricate electrical systems. If your light fixture is flickering or not turning on, it might be due to complex electrical issues. These issues often require a professional’s expertise.
- Faulty wiring
- Ballast problems
- Circuit breaker trips
These problems can be dangerous. A professional can safely diagnose and fix them.
Persistent Problems
Some fluorescent light issues don’t go away. Even after replacing bulbs or starters, the problem might persist. This could indicate a deeper issue that needs expert attention.
| Common Persistent Problems | Potential Causes |
|---|---|
| Flickering lights | Ballast failure |
| Dim lighting | Voltage issues |
| Buzzing sound | Faulty components |
Professionals have the tools and knowledge to solve these persistent problems.
Safety Concerns
Working with electricity is risky. If you notice smoke, burning smells, or sparks, it’s time to call an expert. These safety concerns should not be ignored.
- Turn off the power immediately.
- Do not touch the fixture.
- Contact a licensed electrician.
Professionals can handle these hazards safely and efficiently.
Frequently Asked Questions
Why Is My Fluorescent Light Flickering?
Flickering can be due to a faulty starter, loose connections, or an aging bulb.
How Do I Fix A Buzzing Fluorescent Light?
Check for loose ballast, replace the bulb, or install a new ballast to reduce buzzing.
Why Won’t My Fluorescent Light Turn On?
Possible reasons include a dead bulb, faulty starter, or a bad ballast.
Can I Replace A Fluorescent Bulb With Led?
Yes, LED replacement tubes are available and more energy-efficient than fluorescent bulbs.
What Causes A Fluorescent Light To Dim?
Dimming can be due to an old bulb, failing ballast, or poor electrical connections.
Conclusion
Troubleshooting fluorescent lights can be simple with the right guidance. Follow these steps to identify and fix common issues. Regular maintenance helps extend the life of your lights. Always ensure safety by turning off power before starting. With these tips, you can keep your lighting system in top shape.