
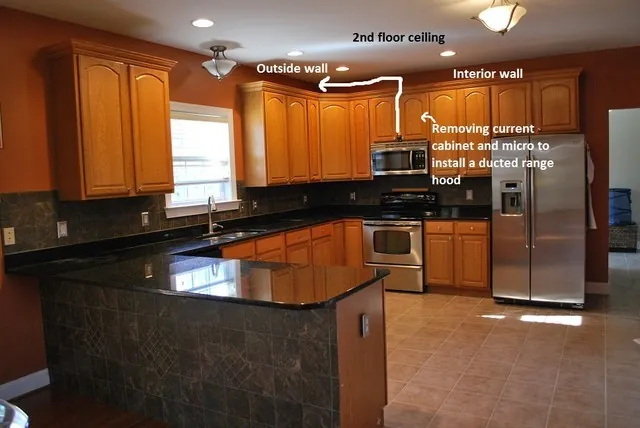
Venting a microwave on an interior wall requires routing ductwork through the wall cavity, across ceiling joists, or into an attic space to reach an exterior exit point. Because interior walls lack a direct path to the outside, you must plan a path for galvanized steel or rigid metal ducting that clears structural obstacles. This process typically involves significant demolition of drywall and potential modification of framing members, making it a project that demands careful coordination with building codes and structural safety requirements.
Key Takeaways
- Always use rigid metal ducting, as flexible plastic hoses are fire hazards and violate most residential building codes.
- Check your local municipal building codes before starting to ensure the duct diameter and path length meet safety standards.
- Plan for a professional finish by accounting for drywall patching, texture matching, and paint after the ductwork installation.
- If structural beams or load-bearing studs prevent a path, consider a recirculating microwave setup with a high-quality charcoal filter.
- Ensure that every joint in the ductwork is sealed with metal foil tape to prevent grease and moisture buildup inside your wall.
How to Vent a Microwave on an Interior Wall
To move air from an interior microwave location to the outdoors, you must transition from the unit’s top or back vent into a duct that travels horizontally through the wall or vertically through the ceiling. The most common method involves cutting through the wall behind the microwave, installing a 90-degree elbow, and running 6-inch or 7-inch diameter metal ducting through the wall studs. This venting configuration is essential for removing smoke, moisture, and odors effectively from your kitchen environment.
Tools and Materials Needed
Executing this project requires specific hardware to ensure the system is airtight and safe. You’ll need a reciprocating saw for cutting through studs, a drill with hole-saw attachments, and a HVAC ducting kit consisting of rigid pipes. Avoid using flexible foil ducts, as these can easily tear, trap grease, and become significant fire hazards. Use aluminum foil tape—not standard duct tape—to secure all connections, as it provides the necessary heat resistance and durability for long-term kitchen use.
Planning the Air Path
The efficiency of your microwave ventilation system depends heavily on the length of the duct run and the number of turns it takes to reach the exterior. Every elbow reduces the performance of the fan, meaning a shorter, straighter path is always better.
When planning your route, use a stud finder to map out the location of vertical and horizontal framing. If you hit a structural load-bearing stud, you must consult with a contractor before cutting, as compromising these members can lead to floor sagging or wall instability.
Ductwork Path Options
| Path Type | Difficulty Level | Material Requirement |
|---|---|---|
| Through Wall | Moderate | Rigid pipe, 90-degree elbow |
| Through Ceiling | High | Extended ducting, attic access |
| Through Soffit | Low | Short run, minimal damage |
Preparing the Wall Surface
Before you begin cutting, clear the area completely and turn off the power to the kitchen circuit at the breaker panel. Mark the exact dimensions of the microwave vent output on the wall.
Use a drywall saw to cut the hole, but be careful not to penetrate too deep, as you may hit electrical wiring or plumbing pipes hidden within the wall cavity. Once the hole is open, you can inspect the interior for hidden obstructions like water lines or electrical boxes that might require you to reroute the duct path.
Installing the Ductwork
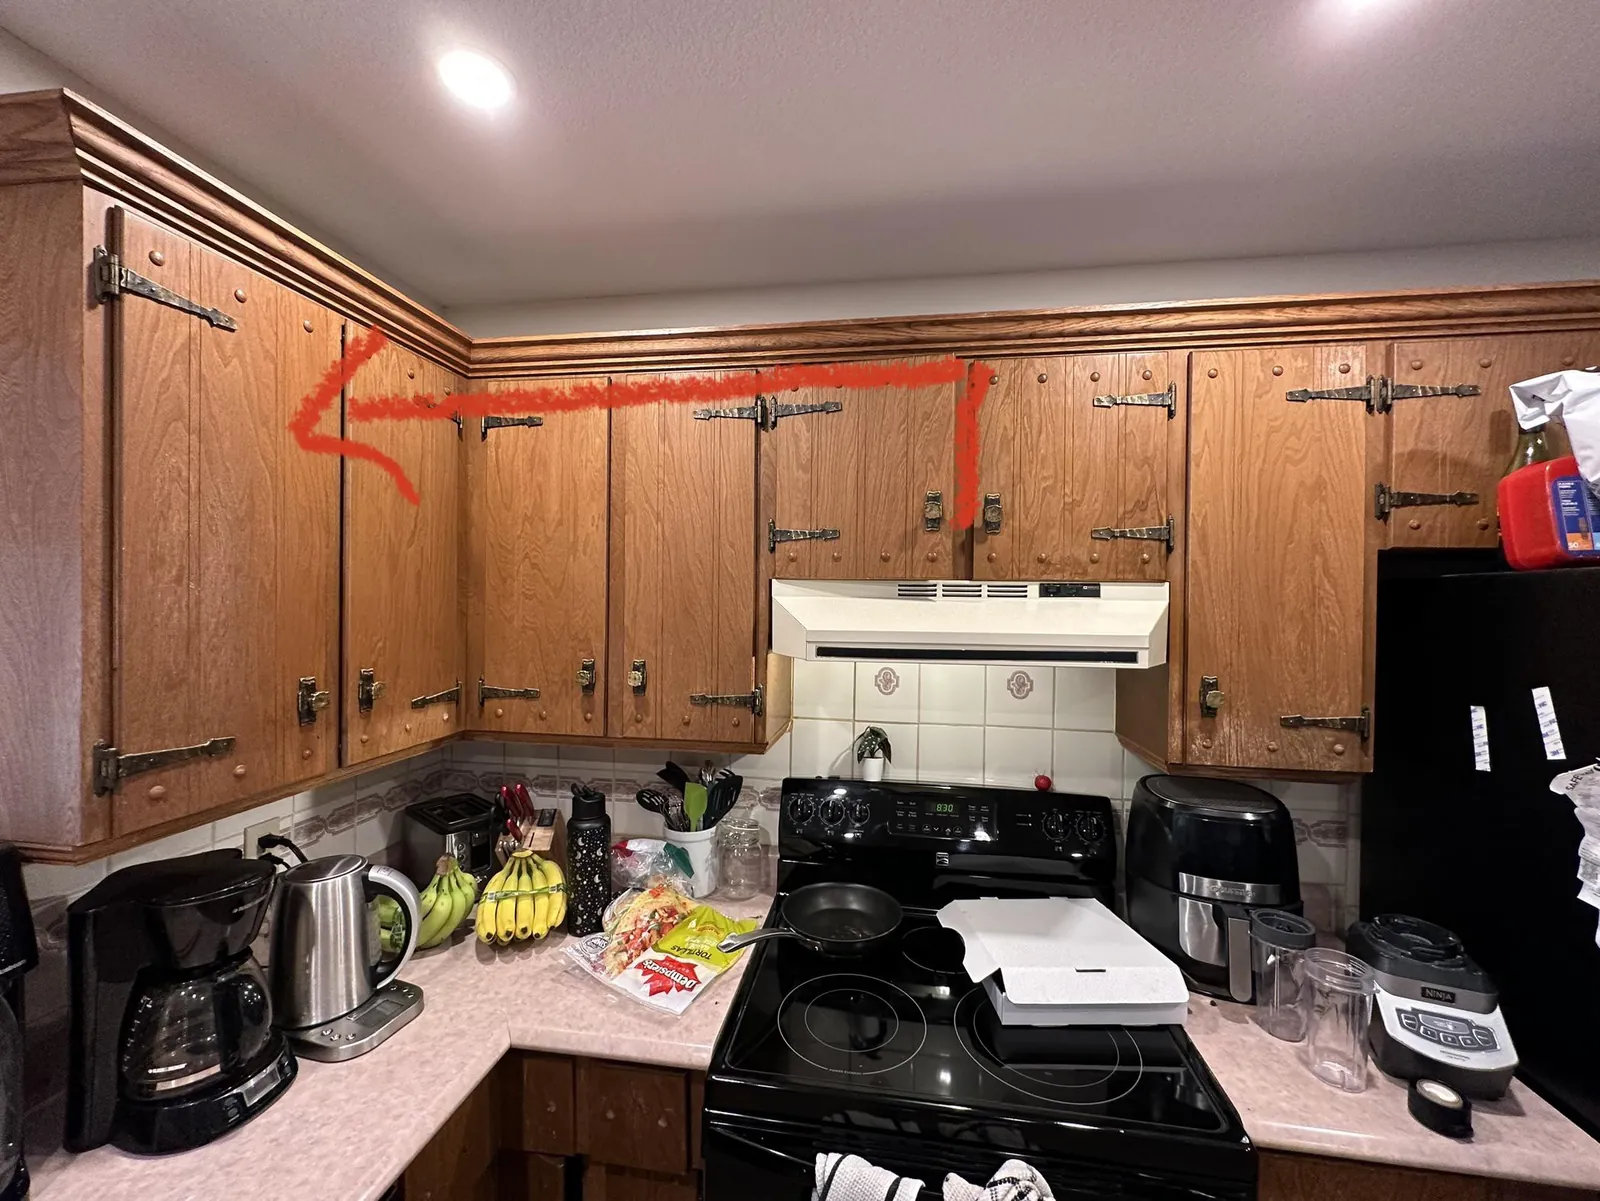
Start by attaching the transition piece to the microwave’s exhaust port. As you push the microwave into its mounting bracket, feed the ducting through the wall hole. Secure the ducting to the studs using metal pipe straps to ensure it doesn’t vibrate against the drywall, which creates noise. Every section of pipe should be fitted so that the air flow isn’t restricted; the sections should overlap in the direction of the airflow to prevent moisture from pooling at the joints.
Pipe Assembly Checklist
- Ensure the duct size matches the microwave manufacturer’s recommended diameter.
- Apply metal foil tape generously to every seam.
- Check that the exterior wall cap has a backdraft damper to prevent cold air entry.
- Verify all connections are tight before closing the wall.
Is Ventilation Essential for Microwaves?
Proper ventilation is critical for maintaining indoor air quality and preventing grease buildup on your cabinets and ceiling. Without an external vent, steam and cooking byproducts circulate back into your living space, which can lead to mold growth and lingering odors. Using a high-performance ventilation fan helps capture smoke and grease at the source.
Managing Structural Obstacles
When you encounter a stud or a header in your path, you have a few ways to proceed. First, try to shift the microwave slightly if the design allows. If you must cut through a non-load-bearing stud, you can install a “header” or “sister” the stud to maintain the wall’s integrity.
Never cut through a load-bearing member without installing a header to redistribute the weight. If the structural work seems too complex, you may need to reconsider the recirculating mode for your microwave, which uses charcoal filters to clean the air before returning it to the kitchen.
Sealing and Finishing Touches
Once the ducting is run to the exterior wall, install a weather-resistant wall cap with a screen to keep pests out. Seal the exterior gap with high-quality silicone caulk to prevent water infiltration. Back inside, patch the drywall around your new ducting using mesh tape and joint compound. After the compound dries, sand the surface smooth, apply primer, and paint to match your kitchen wall color. This final step ensures the modifications are invisible and professional in appearance.
Comparing Venting Methods
| Method | Pros | Cons |
|---|---|---|
| Exterior Venting | Removes heat and smoke | Expensive, structural work |
| Recirculating | Easy installation | Filters need frequent replacing |
| Downdraft | Specialized design | Limited microwave compatibility |
Troubleshooting Common Airflow Issues
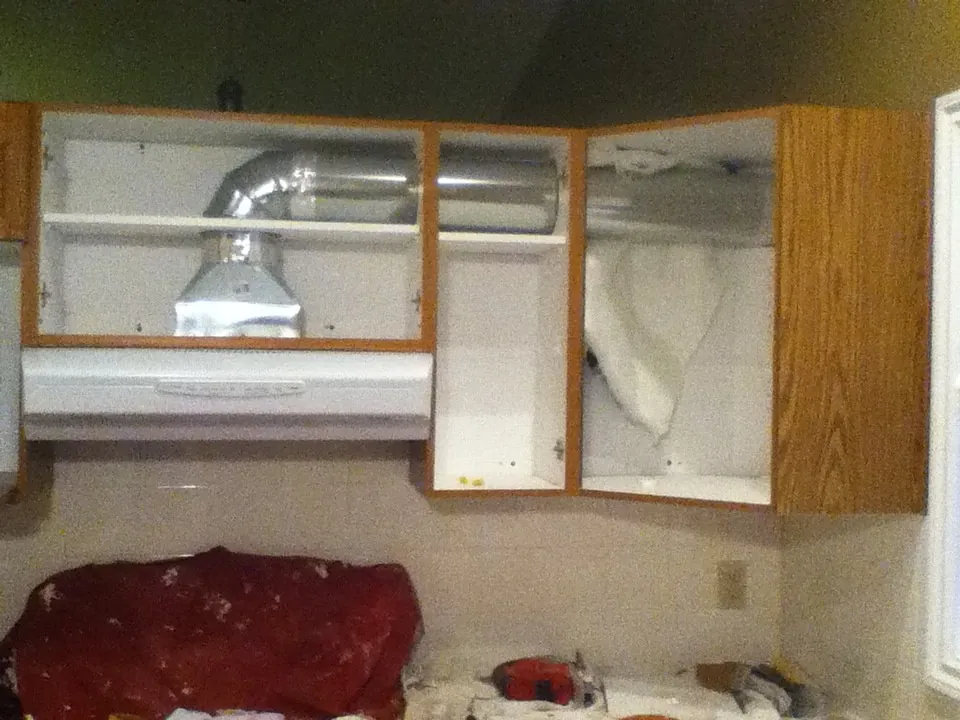
If your microwave is vented but still seems to blow air back into the kitchen, the most common culprit is a blocked exterior flap or a crushed duct. Check the exterior wall cap to ensure the damper opens freely; spiders or debris often obstruct these flaps. If the airflow is weak, check for clogged filters inside the microwave itself, which can significantly restrict air movement even if the external ducting is perfectly clear.
Maintenance Tips for Vented Units
- Clean the metal mesh grease filters every three months.
- Inspect the exterior vent cap for debris annually.
- Listen for unusual rattling sounds, which indicate loose ductwork.
- Replace the damper if it fails to close properly after use.
Related guides
Frequently Asked Questions
Can I use flexible dryer vent hose?
No, never use flexible plastic or foil dryer vent hose for a microwave. These materials aren’t heat-resistant enough for cooking exhaust and are prone to trapping grease, which creates a significant fire hazard. Always use rigid or semi-rigid galvanized steel ducting that meets local fire safety codes to ensure your kitchen remains safe and complies with residential building regulations.
How do I find out if my wall is load-bearing?
To determine if a wall is load-bearing, check the floor joists above and below the wall. Walls that run perpendicular to the joists or are aligned with a support beam in the basement are often load-bearing. If you’re uncertain, consult a structural engineer or a licensed contractor before cutting into any wall. Never assume a wall is non-structural without professional verification.
What is the maximum length for a vent run?
Most microwave manufacturers recommend a maximum duct length of 25 to 30 feet, but this distance decreases significantly with every elbow or turn. Each 90-degree turn is typically equivalent to 5 to 10 feet of straight pipe. If your total equivalent length exceeds the manufacturer’s limit, the fan will struggle to move air, leading to overheating and premature motor failure.
Do I need a permit for this work?
In many jurisdictions, cutting into walls to install ventilation requires a building or mechanical permit. Because you’re modifying the structure and the ventilation system, your local building department may want to inspect the ductwork to ensure it complies with fire safety and airflow standards. Always call your local code enforcement office to verify if a permit is required for your specific project.
Can I vent the microwave into the attic?
Venting a microwave directly into an attic is a major fire hazard and is strictly prohibited by most building codes. Moisture and grease from the kitchen can accumulate on attic insulation and wood framing, leading to mold growth and fire risks. Always terminate the ducting through the roof or an exterior wall, ensuring the vent cap is properly flashed to prevent water leaks.
Conclusion
If you have successfully planned your route and verified that your wall isn’t load-bearing, your next step is to purchase the necessary rigid metal ducting and a high-quality exterior wall cap. Start by dry-fitting your duct pieces to ensure the path is clear before you commit to cutting the drywall, and always prioritize airtight seals at every single connection point you create.