
You can often resolve common keurig coffee maker issues by performing a simple descaling process or checking the water reservoir connection. These machines typically fail to brew or lose pressure because mineral deposits block the internal needles or water lines. If your machine isn’t producing a full cup or is making loud noises, the buildup of calcium and magnesium from your tap water is the most likely culprit.
Why your machine stops working
The primary cause of brewing problems is the accumulation of scale inside the heating element and the tubing. Over time, water minerals harden into a crust that restricts flow and prevents the internal sensors from reading the correct water levels.
This buildup acts as an insulator, meaning the water doesn’t reach the temperature required for proper extraction. If your machine takes more than 90 seconds to heat up or makes a loud, grinding noise before brewing, you’re dealing with significant mineral deposits.
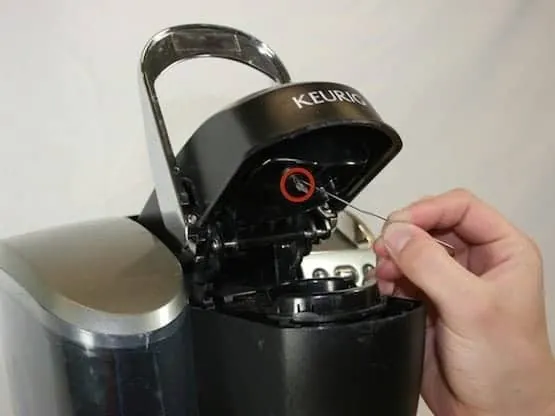
Another frequent cause involves the air intake or the exit needle. If coffee grounds get stuck in the exit needle, the machine can’t push water through the pod, leading to a “half-cup” error or a total stop. This usually happens if you use a reusable filter that’s packed too tightly or if you use a pod that has been punctured incorrectly.
Clear the needle using a thin paperclip to dislodge debris. If the flow remains erratic, the pump has likely lost its prime; run a cycle with only water to clear the air pocket.
If you notice your machine is leaking, check the water reservoir seating. Many models have a valve at the bottom that must align perfectly with the intake port. Inspect the gasket for cracks periodically, as a dry, brittle seal causes pressure loss; consult your owner’s manual for specific maintenance guidance.
Descale your brewer to remove buildup
Descaling is the most effective way to clear internal blockages caused by mineral deposits. You should perform this process every three to six months, depending on the hardness of your local water supply. If you live in an area with very hard water, you may need to do this more frequently to keep the flow consistent.
To begin, empty the water reservoir and remove any water filters. Fill the reservoir with a commercial descaling solution or a mixture of white vinegar and water. If you use vinegar, mix one part white vinegar with one part water, but note that some manufacturers recommend specific solutions to avoid lingering tastes. Place a large mug on the drip tray, lift and lower the handle without a pod, and run the brew cycle on the largest setting.
Repeat this process until the “Add Water” light turns on. Once finished, run at least 10 cycles using only fresh, plain water to rinse the internal lines. If the machine still makes a loud grinding noise after this process, the pump may be permanently damaged. This fix isn’t for machines that show an electrical error code or a blinking screen, as these indicate a failure of the internal control board rather than a blockage.
Clear the needles to restore flow
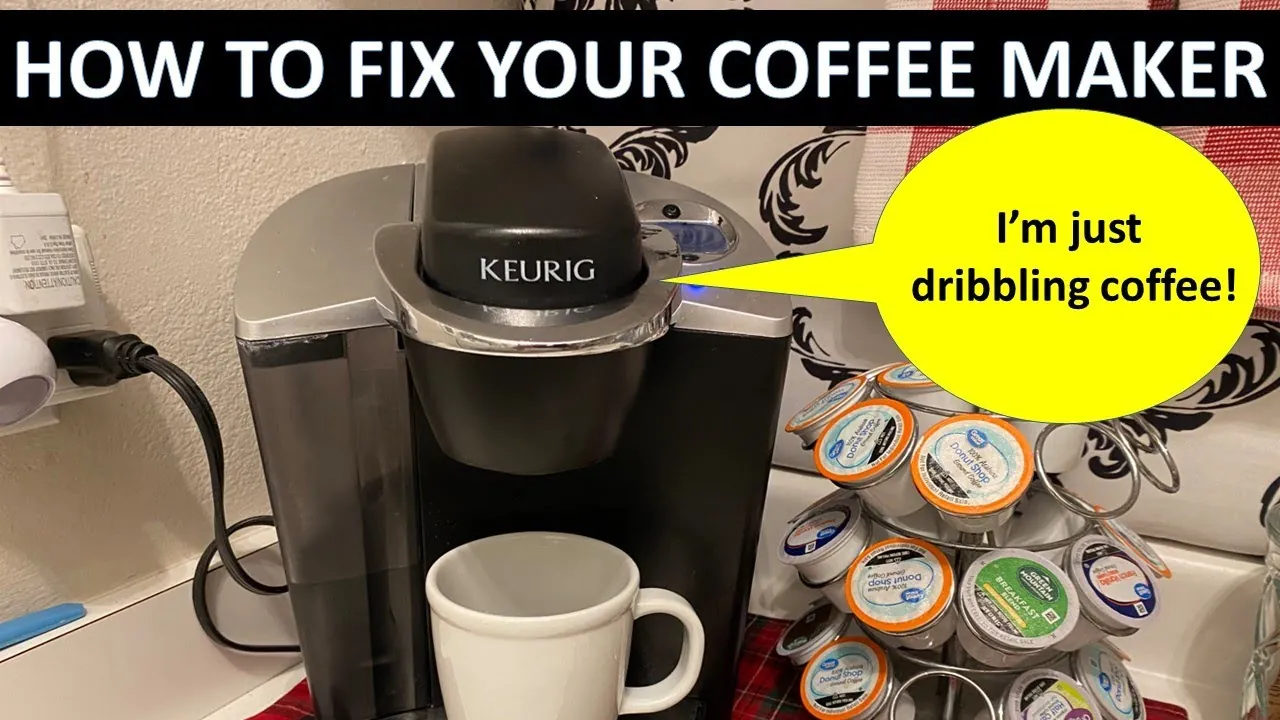
If your machine is running but no coffee comes out, the exit or entrance needle is likely clogged with coffee grounds. A clogged needle prevents the water from entering or exiting the pod, which causes the machine to stop mid-cycle. You’ll need a paperclip or a small, thin tool to clear the debris safely.
Turn off the machine and unplug it from the power outlet before you touch any internal parts. Carefully locate the needle inside the pod holder. Use your paperclip to gently poke through the needle hole, moving it up and down to dislodge any stuck coffee grounds or mineral sediment. Don’t use excessive force, as you might bend the stainless steel needle.
After clearing the needle, use a damp cloth to wipe the area clean. If you have a removable pod holder, take it out and rinse it under warm running water to ensure no stray grounds remain. Plug the machine back in and run a test brew without a pod to verify that water flows freely. If the water still doesn’t flow, the internal pump might be failing, which requires professional repair or a unit replacement.
Reset the electronics for error codes
Sometimes the machine’s software becomes unresponsive, leading to incorrect error messages or a total lack of power. A simple power reset can clear these temporary software glitches. This method works best if the lights are flashing in a pattern that isn’t documented in your manual or if the machine doesn’t react when you press the brew button.
Unplug the machine from the wall outlet and leave it disconnected for at least 30 minutes. This allows the capacitors on the control board to fully discharge. While the machine is unplugged, remove the water reservoir and ensure the contacts on the base are clean and dry. After the waiting period, plug the machine back into a dedicated outlet.
If you’re using a power strip or an extension cord, move the machine directly to a wall outlet. These brewers require a high amount of wattage during the heating cycle, and many common extension cords can’t provide enough power, which causes the machine to shut down unexpectedly.
If the error code returns immediately after the reset, the internal sensor is likely faulty. At this point, contact the manufacturer for warranty support, as replacing internal sensors isn’t a task for a home user.
Common Keurig coffee maker issues to avoid
If your machine shows a “fill tank” error despite being full, switch back to filtered tap water to restore conductivity.
Never force the lid closed. If the handle feels stiff, stop immediately. Pushing down hard often snaps the delicate plastic latch or bends the piercing needles beyond repair. A stiff lid usually indicates a misaligned pod or a buildup of coffee grounds in the needle housing.
Avoid submerging the base in water. Even a small amount of moisture inside the chassis will destroy electrical components and cause an immediate short circuit. Use only a damp, wrung-out cloth to wipe the exterior.
Ignoring the drip tray allows mold to bloom within forty-eight hours. This residue contaminates your coffee and eventually clogs the sensors near the base. Empty and rinse this tray after every use to prevent permanent internal staining.
Keep your coffee maker running smoothly
The most effective way to prevent future issues is to follow a regular cleaning schedule rather than waiting for a failure. Small, consistent actions keep the internal parts from hardening and failing.
If you live in an area with hard water, minerals will eventually calcify inside your heating element. Use a simple test: if you see white, chalky residue on your faucet aerators, your machine requires more frequent descaling; consult your owner’s manual for the recommended schedule based on your usage.
Instead, use a citric acid-based descaling solution designed specifically for coffee equipment.
If your machine takes longer than thirty seconds to begin brewing, the internal lines are already partially obstructed. Run a double-rinse cycle with fresh water immediately. If the flow rate doesn’t return to normal, the scale has hardened beyond the reach of a standard liquid treatment and requires professional servicing.
Frequently asked questions
Can I use vinegar to clean my brewer?
You can use a solution of one part white vinegar and one part water to descale your machine if a manufacturer-approved solution is unavailable. You must run enough plain water cycles afterward to remove the vinegar smell and taste. Note that specialized descaling liquids are also available if you prefer an odorless option.
How long does a descaling cycle take?
A standard descaling process takes between 30 and 45 minutes, depending on the level of buildup inside the machine. This time includes running the solution through the system and completing the necessary rinse cycles. You must remain present to refill the reservoir and swap out the mug.
Why is my machine flashing the add water light?
This light flashes because the water sensor isn’t detecting water or the reservoir isn’t seated correctly. Remove the reservoir and check that the valve isn’t blocked by debris. If the light persists after resetting the machine, the internal sensor may have failed and require a replacement.
Is it safe to use a paperclip on the needles?
It’s safe to use a paperclip to clear the needles if you have unplugged the machine first. Be very gentle, as the needles are delicate and can be easily bent. Only use the paperclip to push out debris; never try to sharpen the needle or widen the hole.
How often should I clean the pod holder?
You should rinse the removable pod holder under warm water regularly to prevent the buildup of coffee oils and stray grounds. This habit prevents the exit needle from becoming clogged over time. If you notice slow brewing or grounds in your cup, inspect the holder for any blockage.
What happens if I use a damaged pod?
If you use a dented or punctured pod, the machine may leak or water may bypass the coffee, resulting in a weak cup. A damaged pod can also spray grounds into the needle area, leading to clogs. Always check that the foil lid is smooth before inserting the pod.
Conclusion
If these quick fixes don’t get your morning cup flowing, it’s best to contact the manufacturer’s support team directly. They’ll help you determine if your device is still under warranty or if it’s time for a replacement. Don’t let a stubborn machine ruin your routine; you’ve got better things to do.