
Sub Zero 632 Ice Maker Troubleshooting begins by verifying the water supply is open and the bail wire is down. If it fails to produce ice, the cause is often a frozen inlet tube or clogged filter. If these steps don’t work, the problem likely requires professional maintenance.
Why this happens
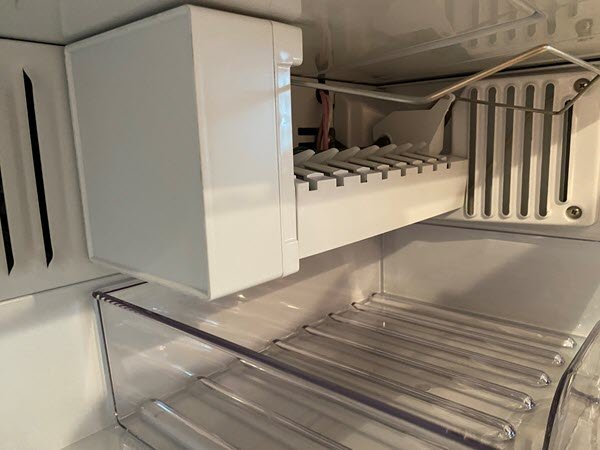
Ice production issues usually stem from a lack of water flow or a mechanical jam within the ice mold. The water inlet tube often freezes over if the refrigerator temperature is set too low, preventing water from reaching the tray. This is a common trade-off; colder settings help keep food safe but can turn the water line into a block of ice. If the water supply is clear, the internal thermostat might fail to signal the harvest cycle.
Another frequent cause is a depleted water filter. When the filter becomes clogged with sediment or mineral deposits, the water pressure drops too low for the valve to fill the mold properly. This happens because the system requires a specific pressure range to engage the solenoid. If you notice small, hollow, or misshapen ice cubes, the filter is the first thing to check. Always consult the Sub-Zero official owner’s manual for the specific maintenance intervals required for your filtration system.
Finally, the ice bin sensor or bail wire might be blocked by a stray cube. If the arm can’t drop to its lowest position, the system thinks the bin is full and stops production. This is a simple mechanical interference that costs you nothing but a few minutes of inspection. If your unit isn’t making ice, always verify the sensor is clean and unobstructed before calling for service.
Check the water supply
This fix is for users who have confirmed that the freezer is cold enough but no water enters the ice tray. First, locate the water shut-off valve, which is usually found behind the unit or under the sink. Ensure the handle is turned completely to the open position. If the valve is open but no water reaches the unit, you may have a kinked supply line behind the refrigerator. Carefully pull the unit out just enough to inspect the tubing for sharp bends.
If you find a kink, straighten it slowly to avoid cracking the plastic line. If the line is clear, the issue might be a frozen inlet tube. You can attempt to thaw this by turning off the freezer for a few hours with the door open, but don’t use a hair dryer or heat gun to speed this up, as the high heat can melt the internal components. If the unit still fails to produce water after these checks, you likely have a faulty inlet valve. Replacing this valve requires specialized tools and access to the internal plumbing; if you aren’t comfortable working with water lines, contact a licensed professional. This isn’t for someone who lacks experience with appliance repair, as a poor connection can lead to significant water damage in your home.
Replace the water filter
A restricted water filter is the most common reason for slow ice production or small, cloudy cubes. Open the grille at the top of your unit to access the filter cartridge. Turn the filter counter-clockwise to release it and pull it straight out. You’ll likely see some water drip, so have a small towel ready.
Insert the new filter, pushing it in firmly, and turn it clockwise until it locks into place. Once the new filter is installed, you must flush the system to remove trapped air. Dispense at least one gallon of water through the door dispenser if your model has one, or discard the first two batches of ice produced. If the ice maker starts producing full-sized cubes after this, the filter was the culprit. If the cubes remain small or the system stays silent, the filter housing itself might have a failed seal. This varies by model — check the label on your filter housing to ensure you have the correct replacement part. Using an off-brand filter can sometimes cause flow issues, so always stick to the manufacturer’s recommended parts.
Clear the ice bin sensor
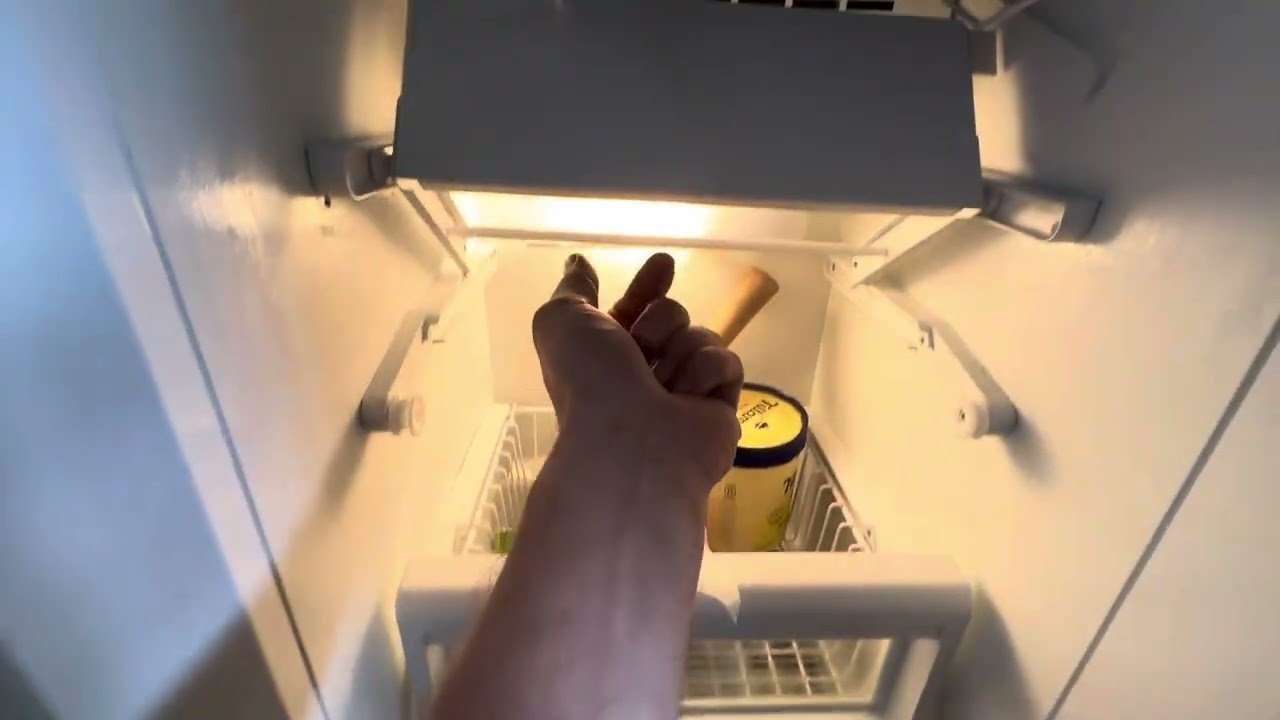
This fix is for cases where the ice maker has power but simply refuses to start the cycle. The 632 model uses a bail wire or an infrared sensor to detect when the ice bucket is full. If a cube has wedged itself against the sensor or the wire is stuck in the “up” position, the machine will remain idle.
Check the interior of the ice bin. Remove any loose cubes that might be blocking the arm or the sensor eye. If the bail wire feels stiff, gently move it up and down to ensure it travels freely. If the wire is disconnected or the sensor cover is damaged, you’ll need to replace that specific assembly. This is a straightforward task, but it requires patience to avoid snapping the plastic clips that hold the sensor in place. If you find the sensor is clean and the wire moves freely, yet the unit remains silent, the control board may have stopped sending the “harvest” signal. At this point, the repair moves beyond the reach of a typical home user. Don’t attempt to bypass the sensor or bridge the electrical connections yourself, as this can cause the ice maker to overflow and flood your freezer.
What not to do
- Don’t use a metal pick or screwdriver to chip ice away from the water inlet tube, as you’ll likely puncture the line and cause a permanent leak.
- Don’t pour hot water directly into the ice mold to “melt” a jam, because the rapid temperature change can crack the plastic housing or damage the internal sensors.
- Don’t leave the refrigerator door open for extended periods while trying to troubleshoot, as this causes the compressor to work overtime and creates more frost buildup in the freezer.
- Don’t ignore a leaking water valve, as the constant drip will eventually warp the floor and create a breeding ground for mold behind the unit.
How to stop it happening again
Preventing future ice maker issues requires a routine check of your water quality and internal temperatures. The following table highlights how to keep your system running smoothly.
| If you’re doing this | Do this instead | Why |
|---|---|---|
| Stacking ice to the brim | Keep ice level below the sensor | Prevents false “bin full” signals |
| Forcing the bin in place | Slide the bin in gently | Protects the fragile sensor arm |
| Ignoring small ice cubes | Check for water line kinks | Small cubes indicate low water pressure |
Frequently asked questions
Sub Zero 632 Ice Maker Troubleshooting: Can You DIY?
You can fix basic issues like a clogged filter, stuck bail wire, or kinked water line yourself without special tools. These tasks are safe if you follow the manual carefully. However, work on the electrical control board or water inlet valve may void your warranty or cause damage, so call a professional if simple fixes fail.
Why is my ice maker making a loud clicking sound?
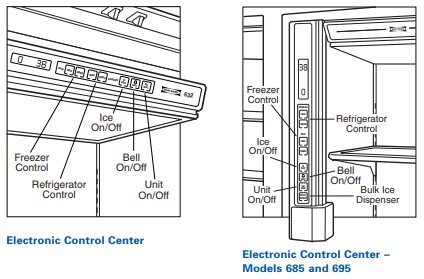
The clicking sound often indicates that the ice maker motor is trying to cycle but is being blocked by a jam. This happens when the ejector blades hit a large clump of ice or when the mold itself is frozen solid. Stop the unit immediately by raising the bail wire or turning it off at the control panel to prevent the motor from burning out.
How long does it take for a new ice maker to start working?
It takes between 12 and 24 hours for a newly installed or reset ice maker to produce the first batch of ice. The freezer must reach its operating temperature before the thermostat allows the harvest cycle to begin. Don’t be alarmed if you hear nothing for the first few hours, as the system is simply cooling down.
Is it safe to thaw the water line with a hair dryer?
No, you should never use a hair dryer or any external heat source to thaw the internal components of your refrigerator. The high heat can easily melt the plastic housing, warp the rubber seals, or trigger a thermal fuse. If you suspect a frozen line, simply turn off the unit and let it reach room temperature naturally over several hours.
What happens if I use a cheap water filter?
Using a non-compatible or poor-quality filter can restrict water flow and lead to the exact same symptoms as a clogged filter. Many generic filters don’t meet the flow rate specifications required by the Sub Zero solenoid valve. This can cause the ice maker to fail to fill, leading to hollow or small cubes, or it can cause the valve to leak internally.
Why is my ice tasting like the freezer?
Ice absorbs odors from the air if it sits in the bin for too long or if the freezer has poor airflow. Ensure your food is stored in airtight containers and check that the door seals are tight. If the problem persists, replace your water filter, as old filters can sometimes harbor trapped particles that affect the taste of the water.
Final Thoughts
If your appliance still isn’t making ice after these checks, don’t hesitate to reach out to a certified technician. They’ll have the right tools to safely inspect the internal components for you. It’s better to get expert help early so you don’t risk damaging the unit while trying to fix it yourself.
Related guides
- 10 Best Coffee Makers to Buy for a Perfect Morning Brew in 2026
- 3 Best Snow Machines for Ice Fishing: Top Picks Reviewed in 2026
- 5 Best Ice Fishing Boots for Men: Our Top Picks for Warmth in 2026