
The most effective Emacros Driveway Alarm troubleshooting involves checking battery voltage and clearing physical obstructions from the sensor’s line of sight. Most connection failures occur because batteries have drained or the infrared beam is blocked by overgrown plants. If your system stops alerting, replace the batteries with fresh alkaline cells, as low voltage often causes the wireless signal to drop. For solar-powered versions, ensure the panel has received eight hours of direct sunlight.
Emacros Driveway Alarm Troubleshooting
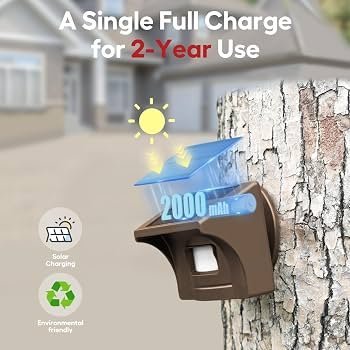
Most connection issues stem from three common environmental or hardware factors. First, the infrared sensor relies on a clear path to detect heat movement. If tall grass, spider webs, or blowing leaves cross the beam, the sensor may trigger false alarms or stop detecting actual vehicles. This varies by model — check the label on your sensor to see the specific detection width and range.
Second, distance and physical barriers significantly weaken the signal. While these units are designed for long-range wireless communication, thick concrete walls, metal siding, or dense trees can block the radio frequency. If you moved the receiver to a different room or a basement, it might be outside the effective range of the transmitter.
Third, battery degradation is the most frequent cause of intermittent performance. Even if the device shows a “power on” light, the radio transmitter often requires a higher current to send the signal to your base station. When batteries reach a certain point of discharge, the unit can no longer broadcast the alarm signal. Refer to the Emacros support center for specific voltage requirements for your model, as using the wrong battery type can cause internal circuit damage or inconsistent signal transmission. Always match the battery chemistry and capacity recommended by the manufacturer to ensure the wireless range remains stable.
Clear the path of obstructions
To fix a sensor that isn’t detecting your vehicle, you must ensure nothing blocks the infrared lens. This fix is for users whose sensor is powered on but fails to trigger the receiver when a car passes. Walk to the sensor location and remove any grass, branches, or debris within three feet of the lens. If you have a multi-zone system, ensure that the sensor is pointed at the driveway, not at a nearby tree or shrub that moves in the wind.
If the sensor is clear but still fails to alert, try moving the sensor closer to the driveway edge. If the unit detects movement after you move it closer, the original spot was likely too far for the infrared beam to reach the vehicle’s heat signature. If it still doesn’t work, check the alignment of the sensor housing. If the lens is tilted toward the ground or too high, it will miss the vehicle entirely. If you have a high-traffic area, consider using a mounting post to keep the sensor steady and level. This isn’t for users who need to monitor a massive area with a single sensor; those situations require professional-grade equipment. If you can’t get a signal after cleaning the lens and adjusting the angle, the sensor may have internal damage from moisture, which typically requires a full unit replacement.
Reset the wireless frequency
If your sensors and receiver aren’t communicating, you must re-establish the wireless handshake. This fix is for users who have confirmed the batteries are fresh but still receive no alerts. Locate the pairing button on your receiver and the corresponding button on your sensor. You’ll need to press the pairing button on the receiver first until the light flashes, then trigger the sensor manually by walking in front of it.
If you have multiple sensors, you must do this for each one individually. If you pair them all at once, the receiver may confuse the signals or fail to register the specific zone. You’ll know this worked when the receiver chirps or lights up immediately after you trigger the sensor. If the receiver remains silent, try moving the receiver to an outlet within ten feet of the sensor temporarily. If they pair at close range but fail at the actual driveway distance, the issue is external interference or range limitations. If they don’t pair even at close range, the internal antenna or transmitter module has likely failed.
Test with a known power source
When a unit seems dead, you must rule out bad batteries before assuming the device is broken. This is the fix for sensors that show no lights or activity. Remove the old batteries and test the device with a fresh pack of alkaline batteries from a new, sealed package. Don’t mix old and new batteries, as this causes voltage drops that make the device act erratically.
If the device powers on with new batteries, you have found your problem. If the device remains dead, check the battery compartment for signs of corrosion, such as white powder or green buildup on the metal contacts. If you see corrosion, use a dry cotton swab to gently wipe the contacts clean. If the metal is pitted or the wire is disconnected, don’t attempt to solder or repair the board yourself, as this voids your warranty and can cause a fire hazard. If the device still doesn’t light up after cleaning, the electronics have reached the end of their life. This varies by model — check the label on your battery door for the expected lifespan, which usually ranges from six to twelve months depending on traffic volume.
What not to do
- Don’t spray water directly on the sensor lens. High-pressure water can force moisture into the internal electronics, causing permanent shorts that no amount of drying will fix.
- Don’t use rechargeable batteries if the manual specifies alkaline. Rechargeable batteries often have a lower voltage output, which prevents the wireless transmitter from reaching the receiver.
- Don’t place the sensor behind glass or plastic windows. Infrared sensors cannot “see” through glass, and the reflection will cause the unit to trigger constantly or not at all.
- Don’t attempt to open the sensor housing. These are sealed units, and opening them will destroy the weatherproofing and void your warranty immediately.
How to stop it happening again
To keep your system running, perform a quick check regularly.
| If you’re doing this | Do this instead | Why |
|---|---|---|
| Leaving batteries until they die | Prevents signal drop-off and leaks | |
| Pointing at thick bushes | Point at a clear, open area | Prevents false triggers from wind |
| Ignoring the sensor lens | Wipe the lens with a dry cloth | Dust buildup blocks infrared signals |
| Using standard tape for mounting | Use the provided bracket/screws | Keeps the sensor stable in storms |
Frequently asked questions
Can I use the sensor in the rain?
Yes, the sensor is designed for outdoor use and can handle rain, but it shouldn’t be submerged in water. If you live in an area with extreme storms, ensure the sensor is mounted under a small overhang or in a spot where water doesn’t pool. If the unit is constantly soaked, the seals may eventually fail, leading to internal moisture buildup.
Why is my alarm triggering for no reason?
False alarms are usually caused by branches, tall grass, or pets moving in the detection zone. Ensure the sensor is pointed at the driveway and that no vegetation is within three feet of the lens. If the problem continues, adjust the sensitivity settings on your sensor if your specific model allows it.
How long do the batteries usually last?
Batteries typically last between six and twelve months, but this depends entirely on the amount of traffic. A high-traffic driveway will drain batteries much faster than a quiet one because the transmitter must send a signal every time a car passes. If you notice the range decreasing, replace the batteries immediately.
Is it safe to leave the sensor in direct sun?
Yes, the sensors are built to withstand standard outdoor temperatures and sunlight. However, if you notice the plastic housing becoming brittle or fading, it’s a sign of long-term UV exposure. If your area experiences extreme heat, try to mount the sensor where it gets some shade during the hottest part of the day.
What happens if I move the receiver too far?
If you move the receiver outside the wireless range, you’ll stop receiving alerts entirely. The signal strength depends on the number of walls and the distance between the two units. If you need more range, you’ll need to move the receiver to a central location closer to the driveway.
How do I know if the sensor is broken?
If you have installed fresh, name-brand batteries and the sensor still doesn’t trigger the receiver at close range, the unit is likely faulty. Ensure you have followed the pairing steps correctly first. If the unit is still under warranty, contact the manufacturer, as they can verify the fault and offer a replacement.
Final Thoughts
If your device still won’t signal properly after these checks, don’t hesitate to reach out to the manufacturer’s support team. They’ll help you determine if there’s a deeper hardware fault. Keeping your system updated ensures you’ll always feel secure knowing your home’s perimeter is being watched around the clock.
Related guides