
Is your Whirlpool washing machine not filling with water? Don’t let a faulty water inlet valve leave you with a half-washed load!
This common issue can be frustrating, but thankfully, troubleshooting it yourself is often easier than you think. In this guide, we’ll walk you through the simple steps to identify and fix a malfunctioning Whirlpool water inlet valve. You’ll be back to doing laundry in no time.
Why Water Enters Your Whirlpool
Water is essential for your Whirlpool washer. It cleans your clothes effectively. But how does it get inside? A special part controls this. Understanding this part helps fix problems. Let’s explore why water enters your Whirlpool.
The Valve’s Crucial Role
The water inlet valve is key. It is like a gatekeeper for water. It opens and closes as needed. The washer tells the valve when to fill. This ensures the right amount of water enters. Too little water won’t clean. Too much water can cause leaks. The valve manages this balance. It connects to your home’s water supply. It also connects to the washer tub.
Signs Of A Failing Valve
A bad valve causes issues. Your washer might not fill. It might fill too slowly. It could also overfill. Leaks near the washer are common. You might hear strange noises. A humming sound can occur. This happens when the valve tries to open. It struggles to let water through. Sometimes, water enters constantly. This is a serious problem. Check the valve for these signs.
Common Valve Leak Points
Water leaks from your Whirlpool washing machine can be frustrating. Often, the water inlet valve is the culprit. Identifying common leak points helps fix the problem fast. Let’s explore where leaks typically happen.
Hose Connections
Hoses connect to the valve. These connections can loosen. Water escapes from loose fittings. Check the hose clamps. Ensure they are tight. Worn hose washers also cause leaks. Replace old, cracked washers. A good seal stops water flow.
Internal Valve Seals
The valve itself has seals. These seals control water flow. Over time, seals can wear out. Damaged seals let water seep past. This causes a slow drip. Sometimes, debris gets trapped. Debris prevents a proper seal. Cleaning the valve may help. Replacing the valve is often needed.
Cracked Valve Body
The plastic valve body can crack. This can happen from age. Freezing temperatures can also cause cracks. A cracked body leaks water. The crack might be small. It might be a larger split. Inspect the entire valve housing. Look for any signs of damage. A cracked valve needs replacement. This is a common failure point.
Gathering Your Tools
Before you start fixing your Whirlpool water inlet valve, gather your tools. Having the right equipment makes the job easier. It saves you time. It also prevents frustration.
Essential Tools Checklist
You need a few key items. Grab a Phillips head screwdriver. A flathead screwdriver is also useful. Pliers are a must-have. Needle-nose pliers work well. A nut driver set is helpful. You might need a 1/4-inch nut driver. A voltage tester is important. Always have a towel ready. Water might spill.
Safety Precautions
Safety comes first. Always unplug the washing machine. Pull the plug from the wall socket. This prevents electric shock. Water can be dangerous. Turn off the water supply. Find the shut-off valves. These are usually behind the machine. Wear safety glasses. Protect your eyes. A sturdy step stool may be needed. Ensure it is stable.

Credit: www.lebanonembassy.se
Locating The Valve
First, find the water inlet valve. It is usually behind the washing machine. Look for the hoses connecting to it.
Finding the water inlet valve is the first step. This small part controls water flow. It sends water to your Whirlpool washer. A faulty valve stops water. Or it causes leaks. We will guide you. Let’s find this part.Accessing The Machine
You need to reach the valve. Most valves are at the back. Unplug your washing machine first. Safety is very important. Turn off the water supply too. This prevents water spills. You might need to remove the back panel. Some models have a front panel access. Check your user manual. It shows the panel location. Use a screwdriver. Remove the screws carefully. Set them aside safely. You can now see inside.Identifying The Valve Assembly
Look for the water hoses. They connect to the machine. You will see a plastic or metal part. This is the valve assembly. It has two or more connections. One connection is for the water supply. Others lead to the tub. It usually has wires attached. These wires power the valve. The valve itself is often small. It sits where the hoses meet. It may have a solenoid. This part opens and closes the valve. You found it. Great job.Inspecting The Valve
Inspect the water inlet valve carefully. Look for any visible damage or blockages. This step helps identify common Whirlpool water inlet valve issues.
This section guides you. We will inspect the water inlet valve. This is a key step. It helps find problems.Visual Check For Damage
First, look closely. See any cracks. Check for leaks. Are there any signs of wear? Look at the hoses. Ensure they are secure. They should not be kinked.Testing For Flow Issues
Next, check water flow. The valve controls this. Turn off the water supply. Disconnect the hose. Place a bucket there. Turn the water back on. Does water flow freely? If not, the valve might be blocked. Debris can cause this. You might need to clean it. Or, replace the valve.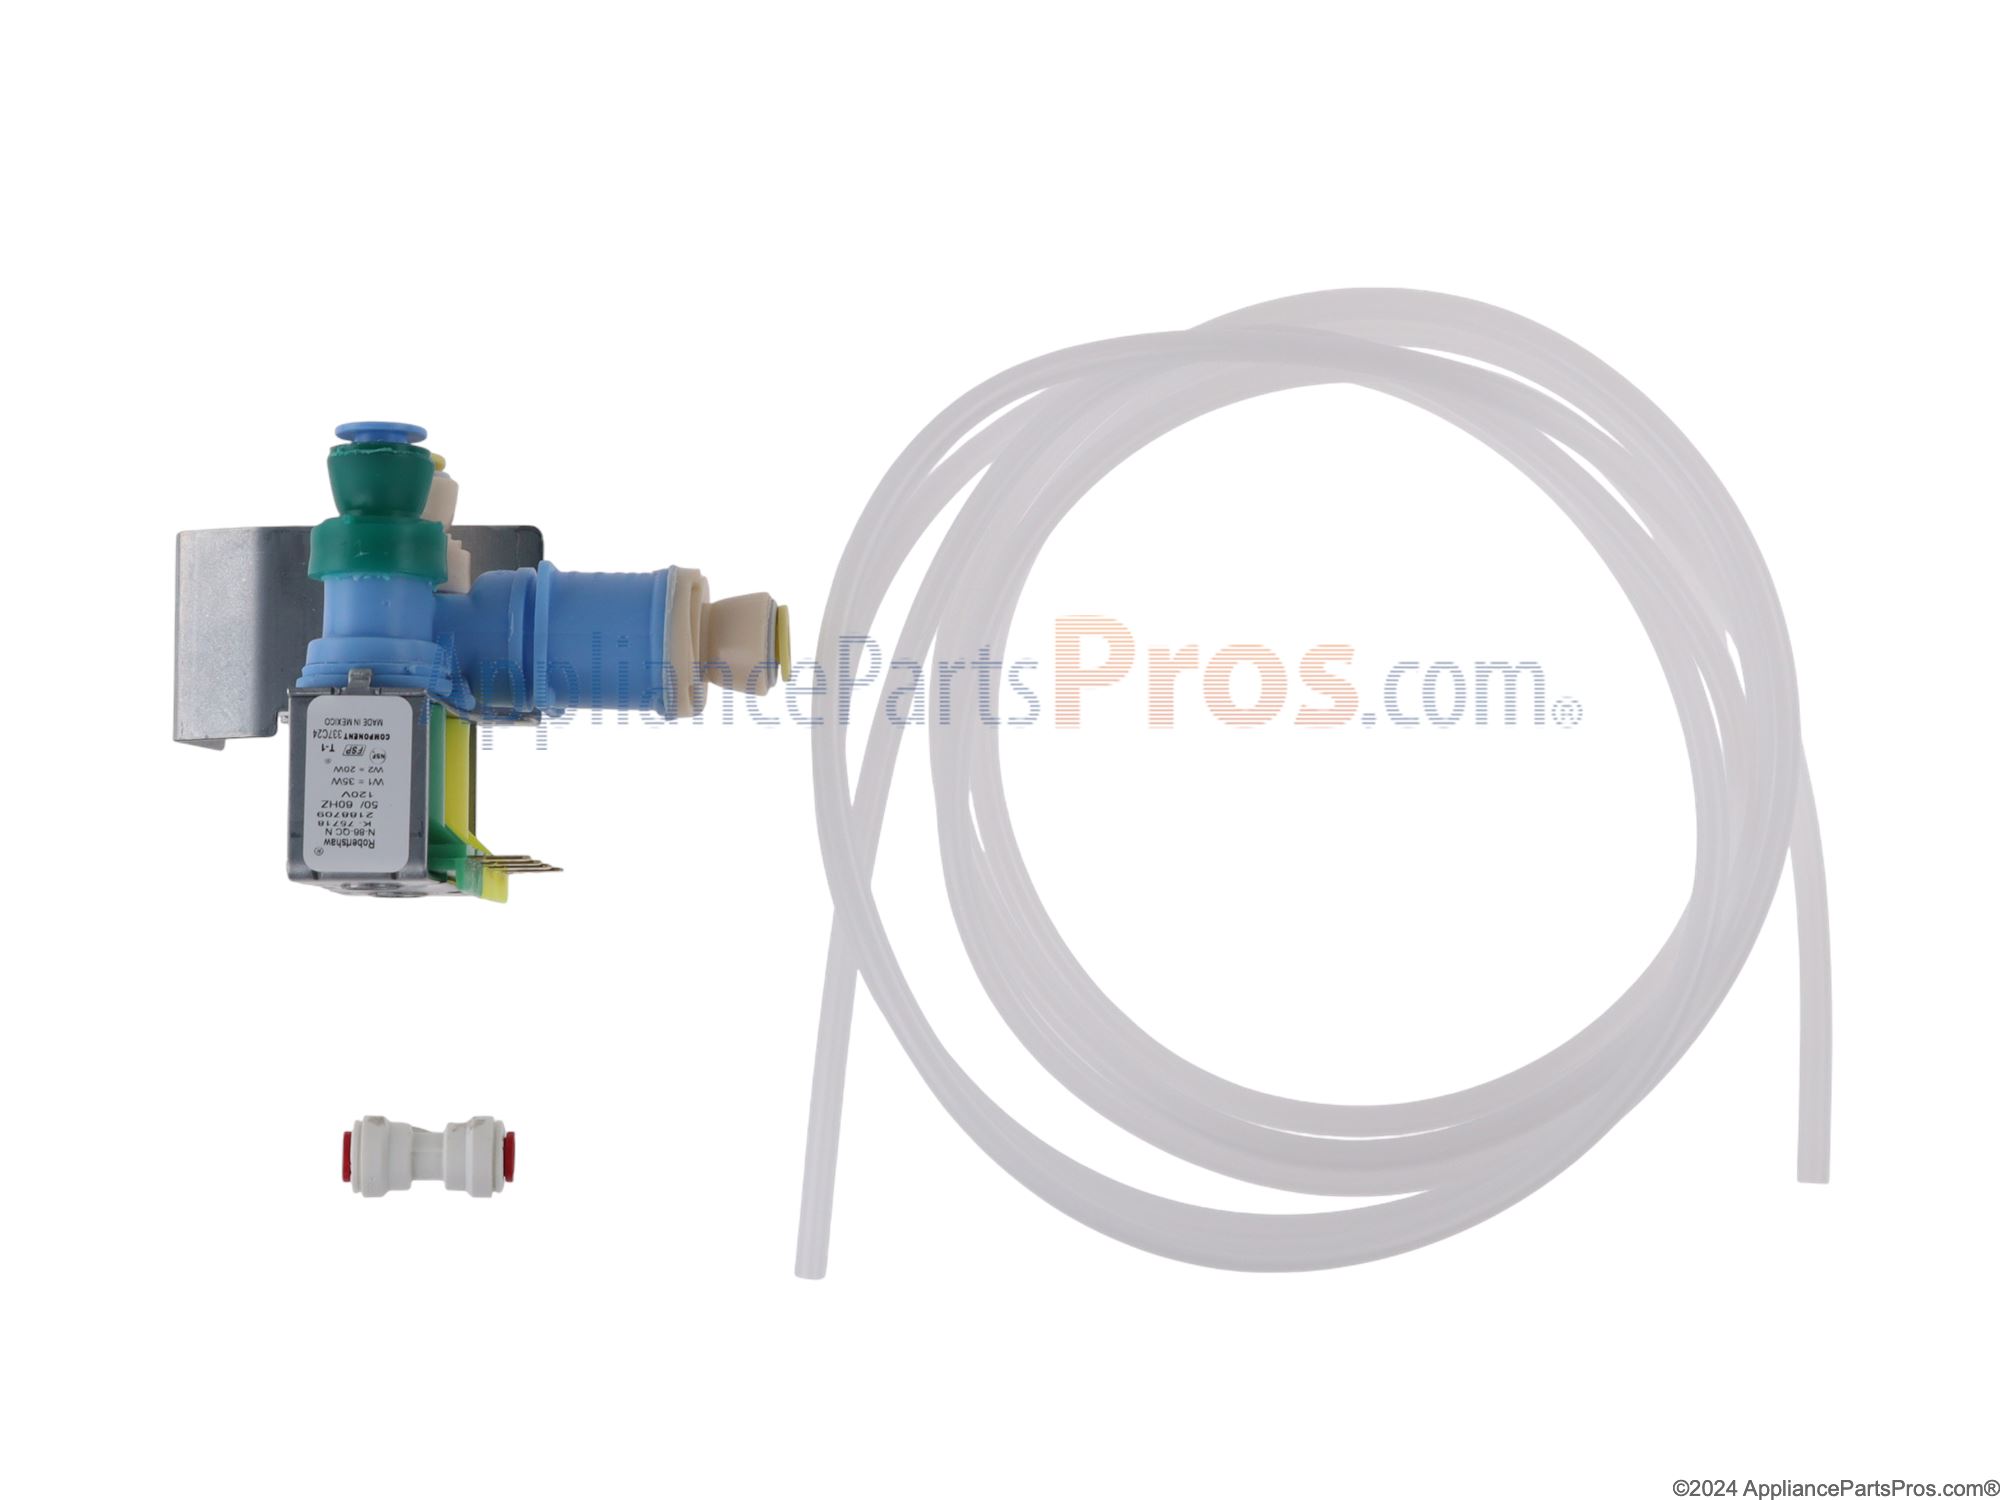
Credit: agad.gov.pl
Tightening Loose Connections
Loose connections are a common culprit. They often cause water leaks. Your Whirlpool washer needs secure connections. This section helps you fix them. It is a simple step. It solves many water issues.
Securing Inlet Hoses
Your washer has water inlet hoses. These hoses bring water inside. They connect to the wall. They also connect to the machine. Check both ends. Are they tight? A loose hose can drip. It can spray water. Gently twist the hose ends. They should not move easily. If they feel loose, tighten them. Use your hands first. Do not overtighten. You could damage the threads. A snug fit is best. This stops leaks effectively.
Checking Hose Clamps
Some hoses use clamps. These clamps hold hoses in place. They prevent water from escaping. Look at the hose clamps. Are they rusted? Are they bent? Do they look loose? You may need a screwdriver. Tighten any loose clamps. Turn the screwdriver clockwise. This makes the clamp tighter. It secures the hose better. A tight clamp stops leaks. It ensures proper water flow. Check clamps on both hoses. This simple check fixes leaks.
Replacing Damaged Hoses
Damaged hoses are common culprits. They can leak water. This stops your Whirlpool washer. Replacing them is simple. It saves you money. Let’s fix those leaky hoses.
Identifying Worn Hoses
Inspect the hoses closely. Look for cracks. See any bulges? Feel for soft spots. Is the rubber brittle? These signs show damage. Leaks can start here. Water might escape slowly. It might spray out. Check both ends of the hose. Look at the entire length.
Steps For Hose Replacement
Turn off the water supply. This is important. Find the shut-off valves. They are usually behind the washer. Disconnect the old hoses. Use a wrench. Have a bucket ready. Old water will drip out. Get new, correct hoses. Match the old ones. Connect the new hoses. Hand-tighten first. Then use the wrench. Do not overtighten. Turn the water back on. Check for leaks. You fixed it!
Addressing Valve Internal Leaks
Addressing valve internal leaks is crucial. Water can seep past seals inside. This causes constant dripping. It wastes water. It can damage your appliance. We will explore solutions.
When To Replace The Valve
Internal leaks signal a worn valve. Seals degrade over time. The valve can no longer hold water. You will see water when the machine is off. This is a clear sign. A faulty valve needs replacement. Don’t delay this repair. Continued leaks cause bigger problems.
Finding The Correct Replacement Part
Getting the right part is vital. Your washing machine model matters. Check the appliance’s model number. This is usually on the back. Or inside the door. Search online using this number. Appliance parts websites are helpful. They list compatible valves. Always verify the part number. An incorrect valve will not fit. It might not work correctly. Ensure the new valve is genuine. Or a quality compatible option.
The Valve Replacement Process
Replacing a faulty water inlet valve is manageable. This guide walks you through each step. Follow these instructions carefully. You can do this yourself. It saves time and money.
Disconnecting Power And Water
Safety first. Always unplug your washing machine. Find the power cord. Pull it from the wall outlet. Next, turn off the water supply. Look for the hot and cold water valves. These are usually behind the machine. Turn them clockwise to shut off.
Removing The Old Valve
Locate the water inlet valve. It connects to the hoses. You will see wires attached. Note where each wire goes. Take a picture if needed. Use pliers to disconnect the wire harness. Unscrew the water inlet hoses. They connect to the valve. Have a towel ready. Some water may drip out. Remove the screws holding the valve in place. Gently pull the old valve out.
Installing The New Valve
Get your new valve ready. It should match the old one. Insert the new valve. Make sure it fits snugly. Secure it with the screws. Reattach the water inlet hoses. Tighten them by hand first. Then use pliers for a firm fit. Connect the wire harness. Match the wires to their locations.
Reconnecting Hoses And Power
Turn the water supply back on. Open the hot and cold valves. Check for leaks. Look at all hose connections. Plug the washing machine back in. Restore power to the machine. Run a short cycle. Watch for proper water filling. Your machine should now work.

Credit: www.youtube.com
Testing Your Repair
You have replaced the water inlet valve. Now what? Testing your repair is crucial. It confirms your work. It prevents future problems. This step is very important.
Running A Test Cycle
Start a normal wash cycle. Choose a cold water setting. Listen for the water filling. The tub should fill steadily. There should be no unusual noises. Watch the water level rise. Make sure it stops filling. The machine should proceed to the wash. This checks valve function. It verifies water flow. It confirms the valve closes.
Checking For New Leaks
Look under the machine. Check around the valve area. Inspect all hose connections. Look for any drips. Small puddles are a bad sign. Keep watching during the cycle. Pay attention to the drain cycle too. Sometimes leaks appear later. A dry floor is a good sign. No water means success. You fixed the problem.
Preventing Future Leaks
Small leaks can become big problems. Regular checks save you trouble. Keep your Whirlpool washing machine running smoothly. Preventing leaks is key. It saves water. It saves money. It saves your floors.
Regular Maintenance Tips
Inspect hoses often. Look for cracks. Check for bulges. Feel for stiffness. Replace old hoses. Use good quality hoses. Tighten connections securely. Do not overtighten them. Clean the filter regularly. A clogged filter can strain parts. Listen for strange noises. Unusual sounds signal issues. Address them quickly.
When To Call A Professional
Some repairs are complex. You may not have tools. You may lack experience. If you see persistent drips. If the leak is large. If you feel unsure. Call a qualified technician. They have the right skills. They have the right parts. They can fix it right. Protect your appliance. Protect your home.
Frequently Asked Questions
Why Is My Whirlpool Washer Not Filling?
A faulty water inlet valve is often the culprit. The valve might be clogged or broken. Check for power to the valve first.
How To Test A Whirlpool Water Inlet Valve?
Disconnect power to the washer. Locate the valve and its wires. Use a multimeter to check for continuity. A reading of zero ohms is good.
Can A Clogged Water Inlet Valve Be Fixed?
Sometimes, a simple cleaning works. Turn off the water supply. Remove the valve and flush it out. Reinstall and test for leaks.
What Does A Bad Water Inlet Valve Sound Like?
You might hear a humming noise. Or, no sound at all. A humming could mean it’s trying to open. No sound suggests it’s completely dead.
How Long Does A Whirlpool Water Inlet Valve Last?
These valves typically last many years. Factors like water quality matter. Hard water can cause mineral buildup. Regular maintenance helps longevity.
Where Is The Water Inlet Valve Located?
It’s usually at the back. It connects to the water hoses. You’ll see wires attached to it. Consult your washer’s manual for exact placement.
Should I Replace Or Repair The Valve?
Replacement is often easier. Valves are usually inexpensive parts. A new valve ensures proper function. It’s a reliable fix.
Conclusion
Your Whirlpool water inlet valve problem is likely solved. Check for simple fixes first. A clogged screen is common. Loose hoses cause leaks. Test the valve’s electrical connection. Replace the valve if needed. Your washer will work again soon. Enjoy a functioning appliance.