If you own an RV, you know that emptying your tanks is a necessary—but often messy—task. What if you could skip those crowded dump stations and handle it all right at home?
Imagine the convenience of managing your RV waste quickly, safely, and without hassle. In this guide, you’ll discover simple, step-by-step methods to dump your RV tanks at home with confidence. Keep reading, and you’ll learn how to save time, avoid unpleasant surprises, and keep your RV in great shape for your next adventure.

Credit: www.youtube.com
Preparing Your Rv For Tank Dumping
Dumping your RV tanks at home needs some preparation. Proper steps make the process clean and easy. Preparing helps avoid spills and keeps everything safe. Follow these steps before you start dumping your tanks.
Gathering Necessary Supplies
Start by collecting all the tools you need. Get gloves to protect your hands. Carry a sewer hose designed for RV use. Bring a hose support or stand to hold the hose. Have a bucket and cleaning supplies ready. Paper towels or rags help with small spills. Keep disinfectant nearby for cleaning after dumping.
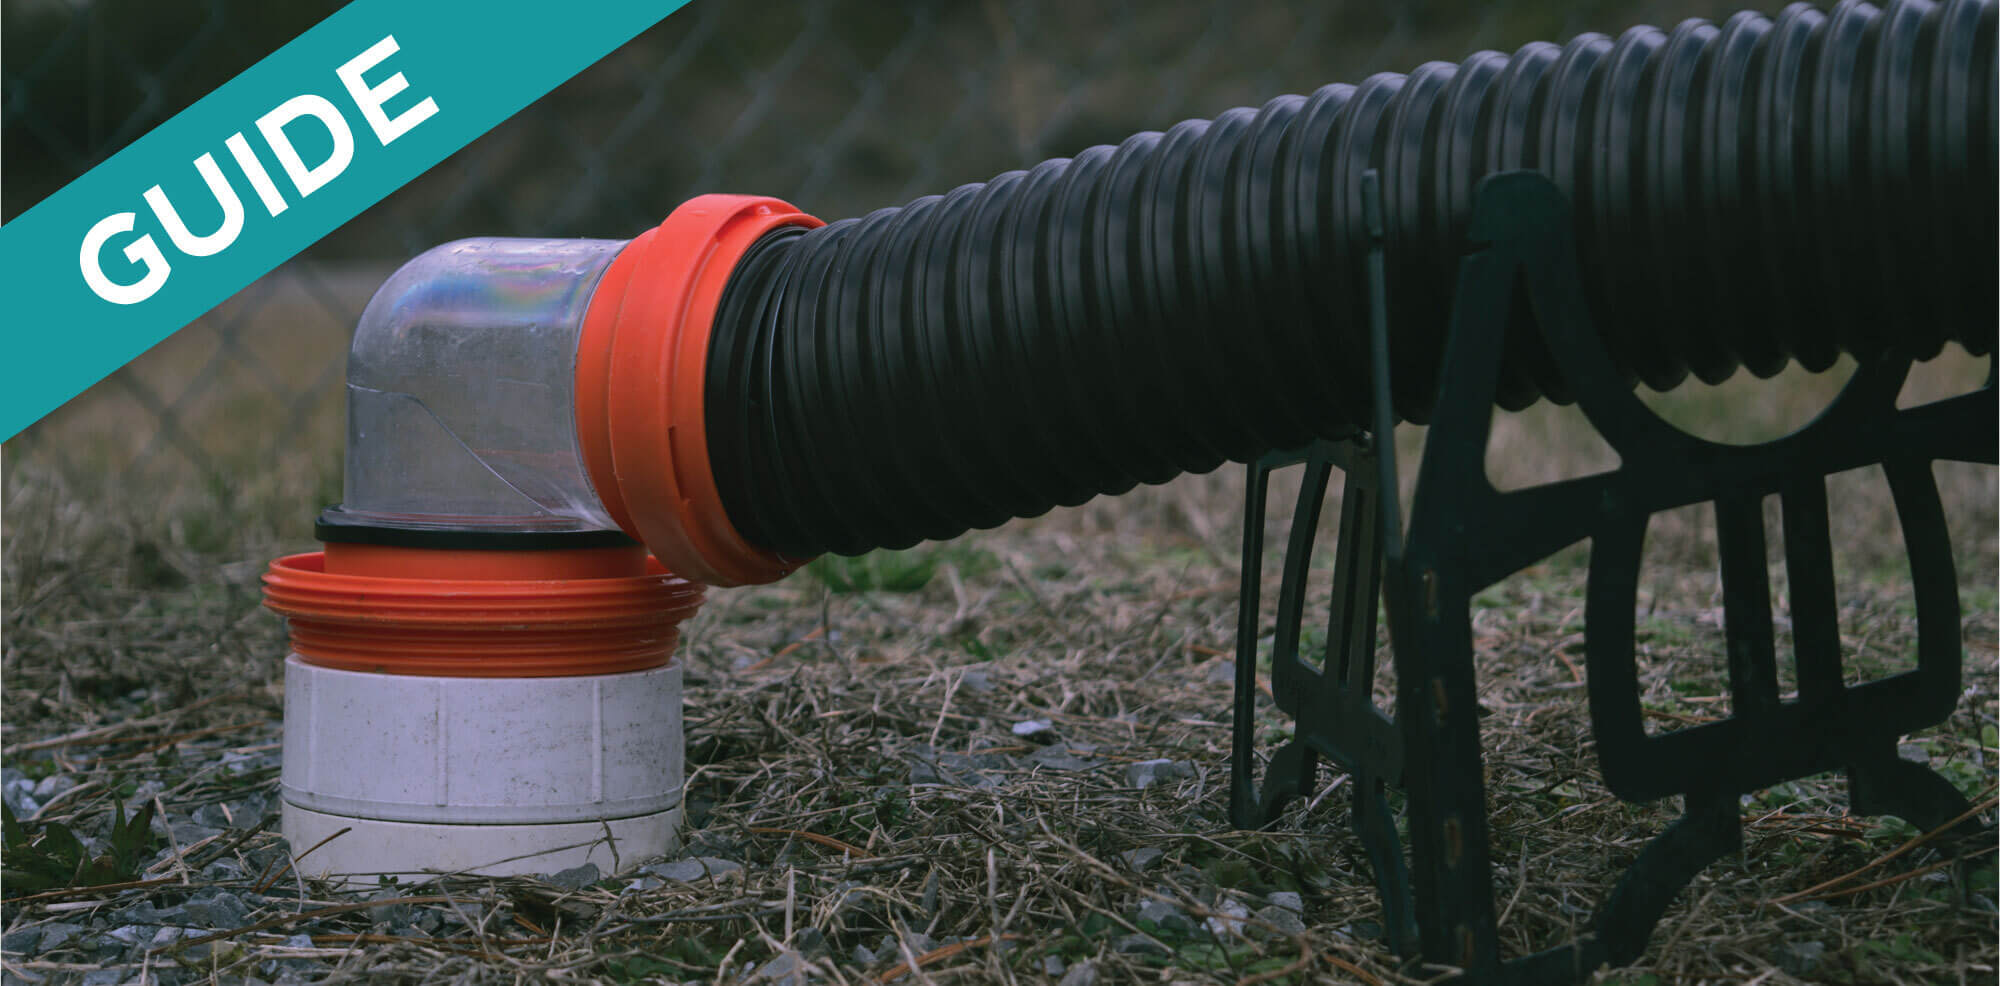
Locating Your Rv’s Dump Valves
Find the dump valves under your RV. Usually, there are two valves—one for grey water, one for black water. Check your RV manual if you are unsure. The valves often have handles or levers to open and close. Make sure you can reach them easily before connecting the hose. Knowing the valve locations speeds up the dumping process.
Ensuring Safety Precautions
Wear gloves to avoid contact with waste. Avoid touching your face during the process. Keep children and pets away from the dumping area. Make sure the sewer hose is secure to prevent leaks. Open the valves slowly to control the flow. Wash your hands thoroughly after finishing. Keep some water nearby for quick cleaning.

Credit: www.youtube.com
Setting Up Your Dumping Area
Setting up your RV dumping area at home is important for a smooth process. A well-prepared spot makes dumping easy and keeps your yard clean. It also protects the environment from damage. Follow these simple steps to prepare the right dumping area.
Choosing The Right Location
Pick a spot close to your RV for easy access. Choose a flat area to avoid spills and accidents. Make sure the location is away from living spaces. It should have good drainage to prevent water buildup. Avoid places near vegetable gardens or water sources.
Protecting The Ground And Environment
Use a heavy-duty plastic tarp or mat under the dumping hose. This prevents soil contamination and protects grass. Consider placing gravel or concrete slabs for extra protection. Always have a bucket or container ready for leaks. Clean up any spills immediately to protect the environment.
Step-by-step Tank Dumping Process
Dumping your RV tanks at home might seem tricky. Follow this simple step-by-step process. It helps keep your RV clean and odor-free. You will learn how to empty both black and gray water tanks safely. This guide uses easy words and clear steps.
Dumping The Black Water Tank
First, locate the black water tank valve under your RV. Attach a sewer hose tightly to this valve. Place the other end into your home sewer or septic cleanout. Open the black tank valve slowly. Let all the waste drain out completely. Close the valve once empty to avoid spills.
Flushing The Black Tank
Next, flush the black tank to clear leftover waste. Use a tank flushing device or a hose with a special adapter. Insert it into the black tank inlet. Turn on the water and flush until the water runs clear. This step reduces odor and prevents clogs.
Emptying The Gray Water Tank
Finally, open the gray water tank valve. Attach the sewer hose if needed. Drain the gray water into the same sewer or septic line. Close the valve after draining. This water is less harmful but still needs proper disposal.
Cleaning And Maintaining Your Rv Tanks
Cleaning and maintaining your RV tanks is key to a fresh and trouble-free RV experience. Proper care stops bad smells and keeps tanks working well. Regular maintenance saves money and avoids costly repairs. Follow simple steps to keep tanks clean and fresh.
Using Tank Cleaners And Deodorizers
Tank cleaners break down waste and prevent buildup inside tanks. Use cleaners made for RV tanks only. Pour the cleaner into the black and gray water tanks. Let it sit as directed, then flush thoroughly. Deodorizers help stop bad smells. Use a deodorizer after cleaning to keep tanks fresh.
Regular Tank Inspections
Check tanks often for cracks or leaks. Look at all seals and hoses for wear. Tighten or replace loose parts quickly. Inspect valves to make sure they open and close properly. Regular checks catch small problems before they grow.
Preventing Clogs And Odors
Flush tanks with plenty of water after each use. Avoid dumping large food scraps or grease into the tanks. Use RV-friendly toilet paper that breaks down easily. Keep vent pipes clear to allow air flow. These steps stop clogs and reduce odors effectively.
Troubleshooting Common Issues
Troubleshooting common issues helps keep your RV tank dumping smooth. Problems can slow the process or cause leaks. Knowing how to fix these issues saves time and frustration.
Dealing With Slow Drains
Slow drains often mean a blockage or buildup inside the pipes. Use a flexible plumbing snake to clear debris. Running water through the drain can also help flush it out. Avoid harsh chemicals that can damage pipes. Regular maintenance keeps drains flowing freely.
Handling Leaks And Damage
Leaks usually come from cracks or loose fittings. Inspect your tank and hoses for visible damage. Tighten any loose connections carefully. Small cracks can be sealed with RV-safe sealant. Replace damaged parts to prevent bigger problems.
When To Seek Professional Help
Call a professional if leaks are large or hard to find. Strange smells or persistent slow drains may need expert care. Avoid trying to fix serious damage alone. Professionals have the right tools and skills for tough repairs.
Credit: uniquecampingmarine.com
Tips For Safe And Eco-friendly Tank Dumping
Dumping your RV tanks at home needs care and attention. Safety and the environment should come first. Follow simple tips to keep the process safe and green. These guidelines help protect your health and nature.
Proper Waste Disposal Guidelines
Always empty your tanks into a proper sewer or septic system. Avoid dumping waste on the ground or into storm drains. Use gloves and wash hands after handling waste. Clean your hoses and connectors after use. Follow local rules for waste disposal to prevent fines.
Using Rv-friendly Products
Choose biodegradable and non-toxic cleaning products for your tanks. These products break down waste without harming the environment. Avoid harsh chemicals that can damage your septic system. Use RV-safe toilet paper that dissolves quickly. These products keep your tanks clean and eco-friendly.
Minimizing Environmental Impact
Dump tanks away from water sources to prevent pollution. Fix leaks and spills immediately to protect soil and water. Use water wisely to reduce waste volume. Store and dispose of waste safely to stop pests and odors. Small actions help keep nature clean and safe.
Frequently Asked Questions
How Do I Safely Dump Rv Tanks At Home?
Use proper gloves, connect the hose tightly, and empty black then gray tanks carefully.
What Equipment Is Needed To Dump Rv Tanks At Home?
A sewer hose, gloves, and a secure connection to the home sewer or septic system.
Can I Dump Rv Tanks Into My Home Septic System?
Yes, but only if your septic system can handle RV waste and is in good condition.
How Often Should I Empty Rv Tanks When At Home?
Empty tanks whenever they reach two-thirds full to avoid odors and backups.
What Steps Prevent Odors While Dumping Rv Tanks?
Flush tanks with water, keep valves closed until ready, and clean hoses after use.
Is It Legal To Dump Rv Tanks At Home?
Check local laws; many areas allow it if done properly and into approved systems.
Conclusion
Dumping your RV tanks at home is safe and simple. Follow the steps carefully to avoid mess or damage. Use the right tools and protect yourself with gloves. Empty tanks regularly to keep your RV fresh and clean. This process saves money and time on the road.
Keep your dumping area clean to prevent bad smells. Always check local rules before dumping. With practice, the task becomes quick and easy. Take care of your RV tanks to enjoy every trip fully.