Winter is over, and it’s time to bring your RV back to life. But how do you make sure your RV is ready for the road after months of cold storage?
If you want to avoid costly repairs and enjoy a smooth start to your adventures, knowing how to de winterize your RV is key. In this guide, you’ll learn simple steps to safely wake up your RV’s plumbing, electrical systems, and more.
Keep reading, and you’ll be back on the road faster than you think—without the headache.
Credit: deltarv.biz
Prepare Your Water System
Preparing your RV’s water system is an important step after winter. It ensures clean water and proper function. Careful attention helps avoid damage and leaks. Follow these steps to ready your water system for use.
Flush Out Antifreeze
Start by flushing out all antifreeze from the pipes. Open all faucets and let water run until clear. Flush the toilet several times to clear antifreeze there. Check all drains to ensure no antifreeze remains. This clears the system for safe drinking water.
Inspect Pipes And Tanks
Look closely at pipes for cracks or leaks. Check all water tanks for damage or wear. Tighten any loose connections to avoid leaks. Replace any worn-out parts before using the system. Clean tanks to remove dirt or debris inside.
Check Water Heater
Drain the water heater completely to remove antifreeze. Inspect the tank for rust or damage. Refill the heater with fresh water and test its heating. Make sure the pressure relief valve works properly. This keeps your water warm and safe to use.
Check The Battery And Electrical System
Checking the battery and electrical system is a key step in de-winterizing your RV. Cold weather can drain the battery and cause wiring issues. Ensuring everything works well keeps your RV safe and ready for travel.
Test Battery Charge
Start by testing the battery charge with a voltmeter. A fully charged battery reads about 12.6 volts. Anything below 12.4 volts means it needs charging. Use a battery charger or solar panel to recharge it. Replace the battery if it no longer holds a charge.
Inspect Wiring And Connections
Look closely at all wiring and connections for damage or corrosion. Cold and moisture can cause wires to crack or rust. Tighten loose connections and clean any corrosion with a wire brush. Replace damaged wires to prevent electrical shorts or failures.
Examine Appliances And Lights
Turn on all appliances and lights inside the RV. Check if they operate correctly without flickering or power loss. Test the water heater, refrigerator, and furnace for proper function. Replace blown fuses and faulty bulbs to ensure safety and comfort.
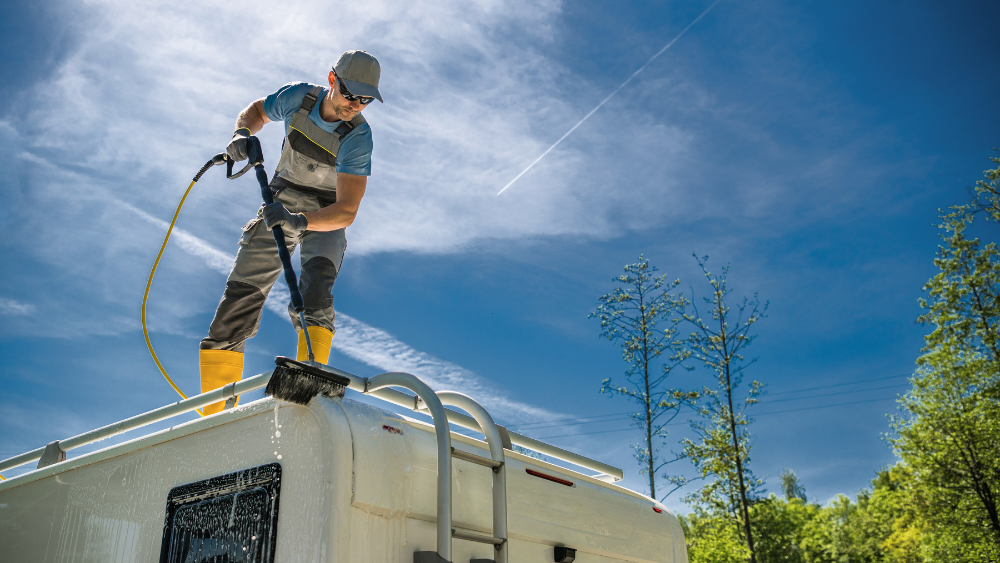
Examine The Exterior
Examining the exterior of your RV is the first key step in de-winterizing. The outside faces the cold and harsh weather. This can cause cracks, rust, or damage over time. Careful inspection helps spot problems early. Fixing small issues now prevents bigger repairs later. Take your time to check every part of the RV’s outside. This ensures your vehicle is safe and ready for travel.
Inspect Seals And Roof
Start by looking at all the seals around windows, doors, and vents. Cold weather can crack or shrink the seals. Water can get inside through damaged seals and cause leaks. Check the roof for cracks, holes, or worn spots. Use a flashlight to see hard-to-reach areas. Repair any damage to keep your RV dry and safe.
Check Tires And Suspension
Look closely at your tires for cracks or flat spots. Tires lose air pressure in cold months. Inflate them to the right level before trips. Check for uneven wear that can hurt your ride. Inspect the suspension system for rust or broken parts. Proper suspension keeps your RV stable and smooth on roads.
Clean And Lubricate Moving Parts
Clean hinges, locks, and slide-outs to remove dirt and grime. Cold weather can make parts stiff or rusty. Use a lubricant on all moving parts to keep them working well. This helps doors and compartments open easily. Regular lubrication stops parts from freezing or breaking. Your RV will feel smooth and ready for the season.

Credit: www.etrailer.com
Inspect The Interior Components
Inspecting the interior components of your RV is a key step in de-winterizing. This ensures all systems work well before your next trip. Check every part carefully. Small problems can become big if ignored.
Test The Hvac System
Turn on the heating and cooling system. Listen for unusual noises or weak airflow. Check if the thermostat responds correctly. Replace filters if dirty. Clean vents to remove dust. Confirm the system heats and cools properly.
Check For Mold And Moisture
Look inside cabinets and corners for mold spots. Mold grows in damp places after winter. Use a flashlight to spot hidden areas. Smell for musty odors. Dry any wet surfaces immediately. Use a moisture absorber if needed.
Clean And Organize Storage Areas
Empty all storage compartments. Remove dust, dirt, and debris with a cloth. Sort items and discard broken or unused gear. Arrange essentials neatly for easy access. This keeps your RV tidy and ready for travel.
Fuel And Engine Maintenance
Fuel and engine maintenance is key to getting your RV ready after winter. Proper care helps your engine run smoothly and prevents damage. This section covers important steps to prepare your fuel system and engine.
Refill Fuel Tank
Start by checking your fuel tank. Old fuel can cause problems and reduce engine performance. Drain any stale fuel if needed. Fill the tank with fresh fuel to ensure clean combustion. This step helps avoid clogs and engine issues.
Change Oil And Filters
Old oil loses its ability to protect the engine. Change the oil and replace the oil filter before using your RV again. Fresh oil keeps engine parts lubricated and cool. Also, replace the fuel and air filters to keep dirt out.
Inspect Belts And Hoses
Belts and hoses can crack or weaken over winter. Check for any signs of wear or damage. Replace any parts that look brittle or cracked. Good belts and hoses are essential for engine operation and cooling.
Safety Checks Before Hitting The Road
Before you start your RV trip, safety checks are very important. These checks help you avoid problems on the road. They keep you, your passengers, and others safe. Take time to inspect your RV carefully. Focus on brakes, lights, emergency tools, and documents. These steps ensure a smooth and safe journey.
Test Brakes And Lights
Brakes must work well. Poor brakes can cause accidents. Press the brake pedal and listen for strange sounds. Check brake fluid levels. Test all lights: headlights, brake lights, turn signals, and tail lights. Replace any broken bulbs. Good lights help other drivers see you.
Verify Emergency Equipment
Emergency tools save lives. Check your first aid kit for missing items. Ensure your fire extinguisher is charged and easy to reach. Keep road flares or reflective triangles in good condition. Carry a flashlight with fresh batteries. These items help during unexpected situations.
Review Registration And Insurance
Your paperwork must be current. Check your RV registration and license plate. Confirm your insurance covers your RV fully. Carry copies of both documents inside the vehicle. Proper papers prevent legal trouble on the road.

Credit: pleasureway.com
Frequently Asked Questions
How Do I Start De-winterizing My Rv?
Begin by flushing out antifreeze from the water system with fresh water.
What Tools Do I Need For Rv De-winterization?
Basic tools include a water hose, pump, and RV antifreeze remover.
How Long Does It Take To De-winterize An Rv?
The process usually takes 1 to 2 hours depending on your RV size.
Can I Use Regular Water To Flush The Rv Pipes?
Yes, use clean, fresh water to flush out antifreeze completely.
Should I Check The Rv Batteries During De-winterization?
Yes, inspect and recharge batteries to ensure they work properly after storage.
What Common Mistakes Should I Avoid When De-winterizing?
Avoid skipping flushing steps and not checking seals or leaks in the system.
Conclusion
De winterizing your RV prepares it for safe travel and use. Check all systems carefully. Flush out old antifreeze completely. Inspect pipes and tanks for damage or leaks. Clean and dry every part to avoid mold. Taking these steps saves money and stress later.
Enjoy your trips without worries. Start fresh and keep your RV in good shape. Simple care makes a big difference. Ready for adventure?