Your front door is the first thing guests see, and a beautiful wreath can make it stand out instantly. But what if you could create a stunning, one-of-a-kind wreath using just paper?
With DIY front door paper wreath ideas, you have the magic to transform simple materials into eye-catching decor that shows off your style. Imagine crafting something unique that brightens your entryway and impresses everyone who stops by. Ready to discover easy, budget-friendly paper wreath ideas that anyone can make?
Let’s dive in and unlock the paper magic waiting at your fingertips!
Choosing Paper For Your Wreath
Choosing the right paper for your DIY front door wreath is an important step. It affects the look, feel, and durability of your wreath. Picking the best paper helps you create a wreath that fits your style and lasts long. This section covers different paper types, colors, and tools you need for your project.
Types Of Paper To Use
Use lightweight or medium-weight paper for easy folding and shaping. Cardstock is strong and holds its shape well. Scrapbook paper offers many patterns and textures. Tissue paper creates a soft, fluffy look but is delicate. Newspaper or book pages give a vintage, rustic feel. Choose paper based on the style you want.
Color And Pattern Selection
Pick colors that match your home’s exterior or season. Bright colors add energy and catch attention. Soft pastels create a calm, welcoming look. Patterns add interest and depth. Stripes, polka dots, or florals work well. Mix solid colors with patterned paper for balance. Avoid too many colors to keep it neat.
Tools And Materials Needed
Gather scissors, glue, and a pencil for cutting and shaping. Use a ruler to measure paper pieces accurately. A hot glue gun speeds up the assembly and keeps paper secure. Floral wire or string helps attach paper pieces to the wreath base. Have a cutting mat to protect surfaces while cutting.
Credit: blog.creativememories.com
Basic Paper Wreath Techniques
Creating a paper wreath for your front door brings charm and a personal touch. Basic paper wreath techniques help you start with simple steps. You can make beautiful decorations using just paper, scissors, and glue. These techniques build the foundation for more complex designs later. Practice them, and your wreath will look neat and stylish.
Cutting And Folding Methods
Cutting paper neatly is the first step. Use sharp scissors for clean edges. Different shapes like circles, petals, or leaves create variety. Folding paper adds depth and texture. Simple folds like accordion or triangle folds make patterns. These methods give your wreath a lively, three-dimensional look.
Creating Paper Flowers
Paper flowers add beauty to any wreath. Start with simple shapes like petals and rounds. Layer petals to form full blooms. Curl edges slightly for a natural look. Use glue to fix petals firmly. Different flower types add interest and color to your wreath design.
Assembling The Base
The base holds your wreath together. Use cardboard or sturdy paper for a strong frame. Cut it into a circle or other desired shapes. Attach your cut and folded pieces around the base evenly. Glue or tape works well to secure parts. A balanced base makes your wreath sturdy and long-lasting.
Easy Paper Wreath Designs
Easy paper wreath designs bring charm to any front door. They use simple materials and basic steps. Perfect for beginners and quick projects. These wreaths add a fresh, crafty touch to your home. Each design uses paper in creative, fun ways. You can customize colors and shapes for any season or style.
Simple Circle Wreath
This wreath uses a plain circle base. Cut strips of paper and curl or fold them. Attach these paper pieces evenly around the circle. The look is clean and classic. Change paper color to match your mood or season. It’s quick to make and looks neat on any door.
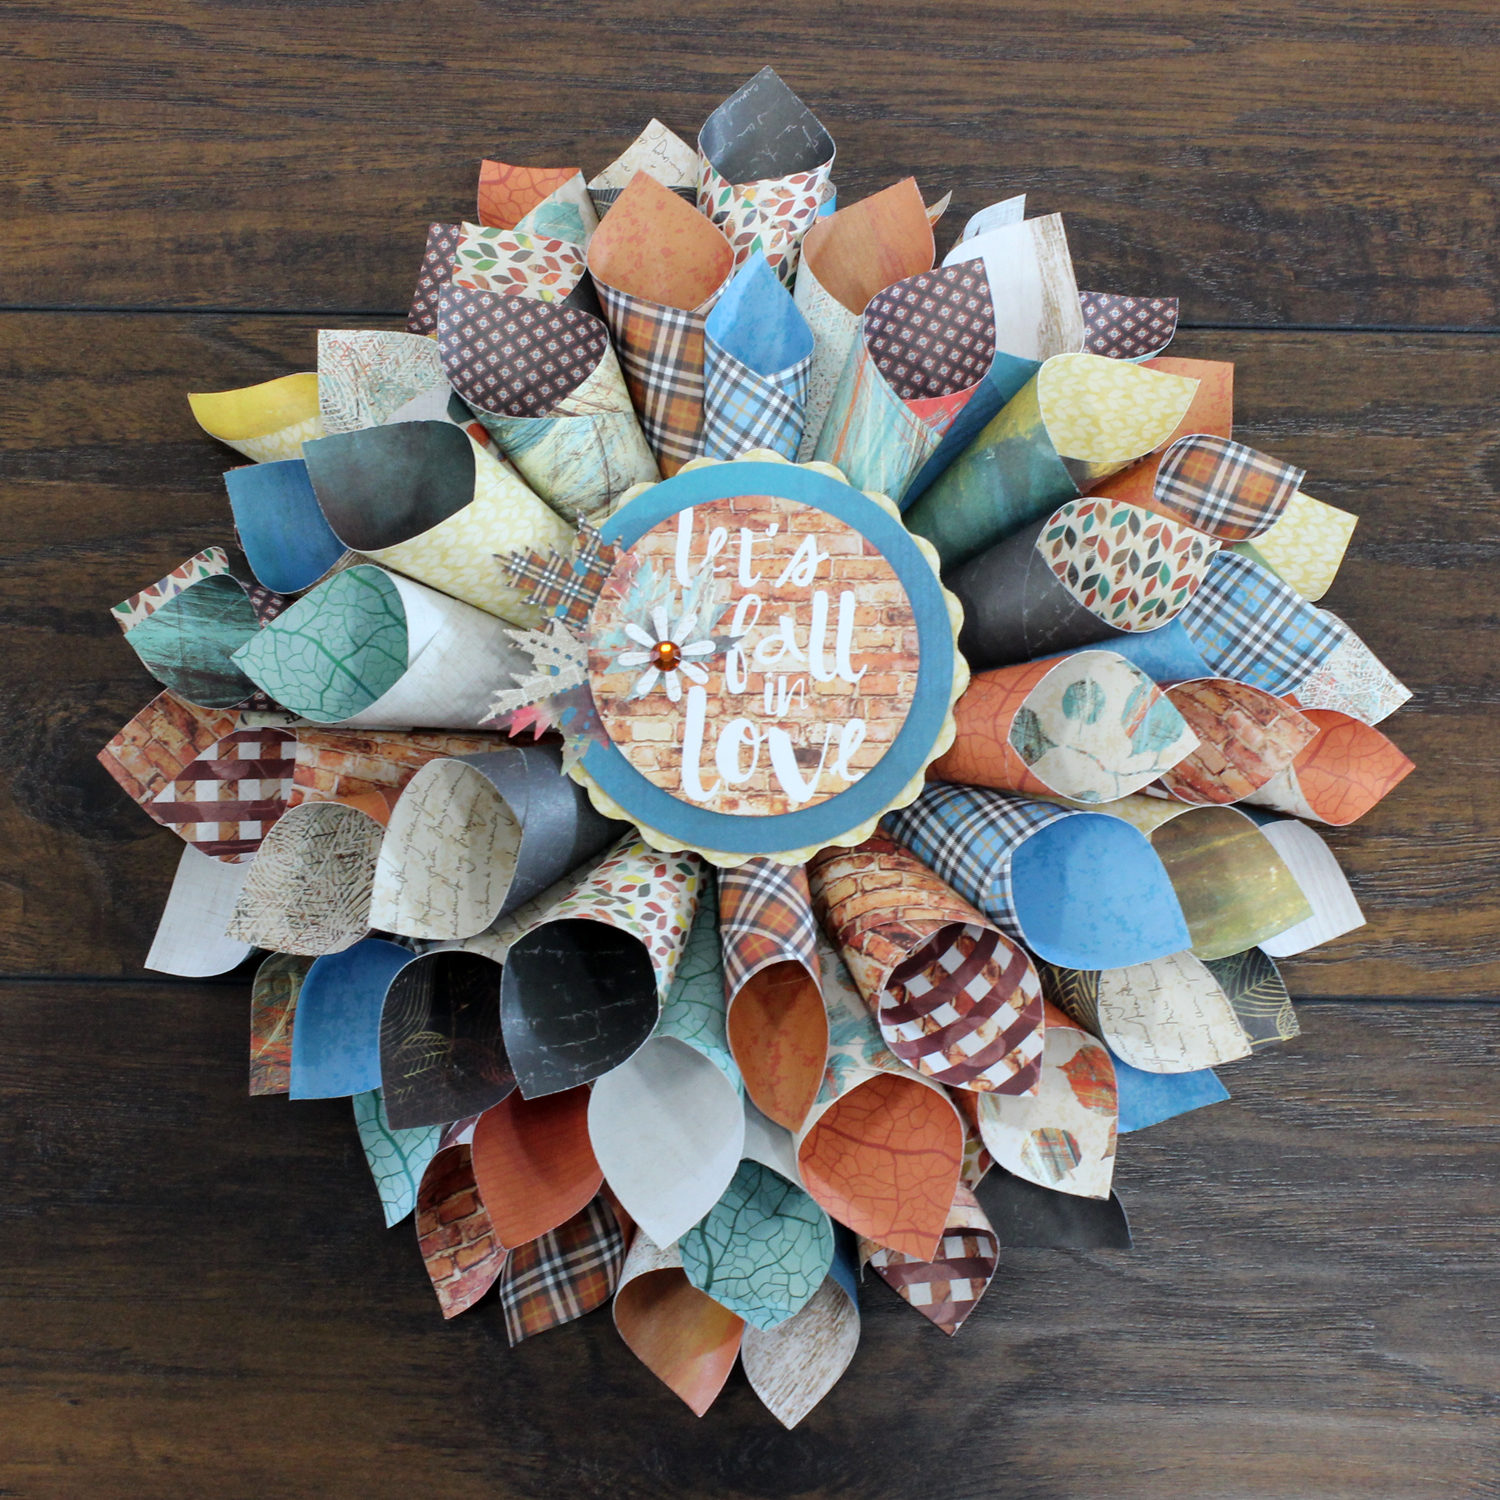
Layered Petal Wreath
Cut paper into petal shapes in different sizes. Layer these petals around a circle base. Overlap petals for a full, rich look. Use soft colors for spring or bright ones for summer. This design adds depth and texture easily. It looks like a blooming flower on your door.
Ribbon And Paper Combo
Mix paper shapes with ribbons for a festive wreath. Glue paper pieces around a base, then tie ribbons in between. The ribbons add movement and shine. Use patterned ribbons for extra style. This combo is playful and eye-catching. Great for holidays or special events.
Creative Themes And Styles
Creative themes and styles make DIY front door paper wreaths stand out. They add charm and personality to your home’s entrance. Choosing the right theme can match your mood and season. Paper wreaths offer endless options to express your creativity.
Seasonal Inspirations
Seasonal themes bring fresh vibes to your door. Use soft pastels for spring with paper flowers and leaves. Summer calls for bright colors like yellows and blues. Fall wreaths shine with paper pumpkins, leaves, and warm tones. Winter designs include paper snowflakes and cool whites. Each season offers unique colors and shapes to explore.
Holiday Specific Ideas
Holiday paper wreaths create festive moods. For Halloween, try paper bats and spooky spiders. Christmas wreaths glow with red and green paper ornaments. Valentine’s Day wreaths bloom with hearts and roses in pink and red. Easter wreaths feature pastel eggs and bunnies. Craft paper accents that celebrate each holiday’s spirit.
Modern And Minimalist Looks
Modern wreaths focus on clean lines and simple shapes. Use neutral paper colors like white, gray, or beige. Geometric shapes add a trendy touch. Minimalist wreaths avoid clutter and use fewer elements. These wreaths suit contemporary homes with subtle style. Less is more with modern paper wreath designs.
Adding Finishing Touches
Adding finishing touches to your DIY front door paper wreath brings your creation to life. These small details make your wreath unique and eye-catching. A few extra steps give your wreath a polished, professional look. Focus on embellishments, proper hanging, and care to keep it fresh.
Using Embellishments
Choose simple decorations to enhance your paper wreath. Small ribbons, buttons, or faux leaves add charm. Use glue sparingly to avoid mess. Balance colors and sizes for a neat look. Avoid heavy items that may weigh down the wreath. Personal touches like tiny paper flowers create warmth. Keep it light and easy to maintain.
Hanging And Display Tips
Select a sturdy hook or nail for hanging your wreath. Make sure the door surface is clean and dry. Use a ribbon loop or wire hanger for secure attachment. Position the wreath at eye level for best visibility. Avoid direct sunlight to prevent color fading. Consider a door wreath hanger for no nail damage. Check the wreath regularly to ensure it stays in place.
Maintaining Your Paper Wreath
Keep your wreath looking fresh with gentle care. Dust it lightly using a soft brush or cloth. Avoid moisture, which can damage paper materials. Store indoors during harsh weather or at night. Repair small tears with clear glue quickly. Replace faded or broken embellishments as needed. Proper care extends the wreath’s lifespan and beauty.

Credit: www.doodlecraftblog.com
Troubleshooting Common Issues
Creating a paper wreath for your front door is fun and rewarding. Yet, some common problems may arise. These issues can affect the wreath’s look and durability. Knowing how to fix them keeps your wreath fresh and beautiful. Below are simple tips for common troubles with paper wreaths.
Preventing Paper Damage
Paper is delicate and can tear easily. Avoid placing your wreath in direct sunlight. Sunlight fades colors and weakens paper fibers. Use a clear spray sealant to protect your wreath. Handle the wreath gently when hanging or moving it. Keep it away from pets and children who may pull on it.
Fixing Loose Elements
Loose parts make the wreath look messy. Use a hot glue gun to reattach loose pieces. Press firmly and hold for a few seconds. Add extra glue to weak spots before they fall off. Check your wreath regularly for any loose sections. This helps keep the wreath neat and intact.
Weatherproofing Tips
Paper wreaths can get damaged by rain or wind. Place your wreath under a covered porch or shelter. Use waterproof spray to add a protective layer. Avoid hanging the wreath outside during storms. Bring it indoors during bad weather for longer life. These steps keep your wreath looking good longer.

Credit: www.youtube.com
Frequently Asked Questions
What Materials Are Needed For A Diy Paper Door Wreath?
You need colored paper, scissors, glue, a wreath base, and optional embellishments like ribbons or buttons. These basics help create a vibrant, personalized paper wreath.
How Do I Make A Paper Wreath Last Longer Outdoors?
Use weather-resistant paper or laminate your design. Avoid direct rain or harsh sun to keep colors bright and prevent damage.
Can I Customize Paper Wreaths For Holidays?
Yes, you can easily change colors and shapes to match any holiday theme. This makes paper wreaths versatile for year-round decor.
What Are Quick Tips For Beginner Wreath Makers?
Start with simple shapes and basic glue. Use templates for uniform pieces. Patience and practice improve your wreath-making skills.
Conclusion
Creating a paper wreath for your front door brings charm and style. These DIY ideas are easy and fun to try. You can use simple materials found at home or craft stores. Each wreath adds a personal touch to your entrance.
Change colors and shapes to match seasons or holidays. Paper magic lets you refresh your decor anytime. Enjoy crafting and welcoming guests with your unique wreath. Start your project today and brighten your front door!