Your RV fresh water tank is the heart of your mobile home’s water supply. But when was the last time you truly cleaned it?
If you want safe, fresh water every time you turn on the tap, you need to know how to sanitize your RV fresh water tank properly. In this post, you’ll discover simple, effective steps that anyone can follow to keep your water clean and your health protected.
Stick with me, and you’ll never have to worry about bad-tasting or unsafe water again. Ready to make your next RV trip safer and more enjoyable? Let’s dive in!

Credit: blog.campingworld.com
Why Sanitize Your Rv Water Tank
Sanitizing your RV fresh water tank is essential for safe and clean water. Over time, water tanks can collect dirt, bacteria, and mold. These contaminants affect water taste and safety. Keeping your tank clean ensures fresh water on every trip. Regular sanitizing protects your health and your RV’s plumbing system.
Health Risks Of Contaminated Water
Dirty water can cause stomach pain and diarrhea. Bacteria and germs grow in unclean tanks. Drinking or using this water risks illness. Mold in the tank can trigger allergies or breathing problems. Children, elderly, and pets are more vulnerable. Preventing contamination keeps your family safe and healthy.
Benefits Of Regular Cleaning
Cleaning your tank stops bacteria and mold growth. It keeps water tasting fresh and clear. Sanitizing extends the life of your water system. Clean tanks reduce repairs and costly damages. Regular care means safe water anytime you need it. A simple task that saves time and worry on the road.
Credit: rvlife.com
Tools And Supplies Needed
Sanitizing an RV fresh water tank requires specific tools and supplies. These items help clean the tank safely and effectively. Having the right tools makes the process easier and ensures good water quality.
Gather all supplies before starting. This preparation saves time and avoids interruptions during cleaning.
Cleaning Agents And Sanitizers
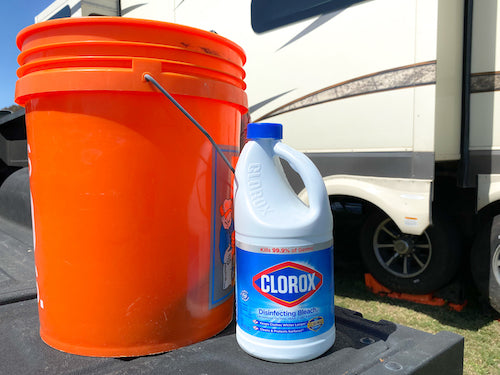
Use a mild bleach solution to kill bacteria and germs. Household bleach with no additives works best. Avoid harsh chemicals that can damage the tank. Some RV stores sell special sanitizers made for fresh water tanks. Choose products labeled safe for drinking water systems.
Protective Gear
Wear gloves to protect your hands from chemicals and dirt. Safety goggles keep your eyes safe from splashes. A mask helps avoid breathing in fumes from cleaning agents. Protective clothing prevents skin contact with harsh substances.
Additional Equipment
Use a clean bucket to mix cleaning solutions. A long-handled brush helps scrub hard-to-reach areas inside the tank. A funnel makes pouring liquids easier and cleaner. Fresh water hose or garden hose is needed to flush the tank thoroughly.
Preparing Your Rv For Cleaning
Preparing your RV for cleaning the fresh water tank is an important first step. It helps remove old water and dirt. This makes the cleaning process easier and more effective. Taking time to prepare also protects your RV’s plumbing system from damage. Follow these simple steps before sanitizing your fresh water tank.
Draining The Fresh Water Tank
Start by emptying all water from the tank. Open the drain valve or plug at the bottom of the tank. Let the water flow out completely. This clears old water and any sediment that settled inside. Check that the tank is fully empty before moving on.
Disconnecting Water Lines
Turn off the water pump and close all faucets. Find the water lines connected to the fresh water tank. Carefully disconnect these lines to avoid leaks or damage. This step stops water from flowing back into the tank. It also makes cleaning safer and more thorough.
Step-by-step Cleaning Process
Cleaning an RV fresh water tank is important for safe drinking water. Follow a clear, simple process to sanitize the tank effectively. This step-by-step guide helps keep your water clean and fresh during travels. Each step ensures thorough cleaning without harmful residue.
Mixing The Sanitizing Solution
Start by mixing household bleach with water. Use one-quarter cup of bleach for every 15 gallons of water. Stir the solution well in a clean container. This mix kills bacteria and keeps the tank safe.
Filling The Tank
Pour the sanitizing solution into the empty fresh water tank. Fill the rest of the tank with clean water. Close the tank to keep the solution inside. Let it sit for at least four hours to disinfect fully.
Flushing The System
Open all faucets inside the RV. Run water until you smell bleach at each tap. This step cleans the pipes and faucets. It removes germs that may hide in the system.
Rinsing Thoroughly
Drain the tank completely after flushing. Fill the tank with fresh water only. Run the water through all faucets until no bleach smell remains. Repeat rinsing if needed to ensure safety.
Post-cleaning Tips
After sanitizing your RV fresh water tank, proper care is key. Post-cleaning tips help keep water safe and fresh. These steps extend the life of your tank and avoid contamination.
Testing Water Quality
Test water after cleaning. Use a water test kit for bacteria and chemical levels. Taste and smell the water. It should be clear, fresh, and odorless. If water smells or tastes strange, clean the tank again.
Maintaining Tank Cleanliness
Keep the tank clean by regular flushing. Use clean water only. Avoid leaving water in the tank for long periods. Drain and refill the tank often. Clean the tank at least twice a year to prevent buildup.
Credit: rvsnappad.com
Common Mistakes To Avoid
Sanitizing an RV fresh water tank is crucial for clean and safe water. Many RV owners make mistakes that reduce the effectiveness of the cleaning process. Avoiding these common errors saves time and prevents water contamination. Understanding these pitfalls helps keep your water fresh and healthy.
Using Incorrect Sanitizers
Choosing the wrong sanitizer harms your RV water system. Some chemicals can damage pipes and tanks. Only use sanitizers made for RV fresh water tanks. Household bleach is often best, but it must be used in the right amount. Too much bleach can leave a strong smell and taste. Too little may not kill all bacteria. Always follow the sanitizer instructions carefully.
Skipping Regular Maintenance
Cleaning your water tank only once is not enough. Bacteria and algae can grow over time. Regular sanitizing keeps the water safe and fresh. Waiting too long between cleanings allows germs to multiply. This can cause illness and foul odors. Set a schedule to sanitize your tank every few months. Regular care extends the life of your water system.
Frequently Asked Questions
How Often Should I Sanitize My Rv Fresh Water Tank?
Sanitize your RV water tank at least once every three months for clean, safe water.
What Supplies Do I Need To Sanitize The Tank?
Use household bleach, clean water, a funnel, and protective gloves.
Can I Use Bleach To Sanitize The Fresh Water Tank?
Yes, bleach kills germs and bacteria effectively when used in the right amount.
How Long Should The Bleach Solution Stay In The Tank?
Let the bleach solution sit in the tank for about 4 hours.
Is It Necessary To Flush The Tank After Sanitizing?
Yes, flush with fresh water until the bleach smell is gone.
Can I Use Other Sanitizers Besides Bleach For The Tank?
Some use vinegar or special RV sanitizers, but bleach is the safest and cheapest.
Conclusion
Keeping your RV fresh water tank clean protects your health and extends tank life. Regular sanitizing stops bacteria and bad smells from growing inside. Use simple steps and safe cleaning solutions for the best results. Clean water means better taste and safer drinking.
Make sanitizing a regular habit before each trip. Your RV water system will stay fresh and ready. Safe water helps you enjoy every adventure without worry. Take a little time today for cleaner water tomorrow.