Is your toilet wobbly or not sitting flush against the floor? The problem might be your toilet flange height.
When the flange is too high, it can cause leaks, discomfort, and even damage over time. But don’t worry—you can fix this yourself. Lowering your toilet flange may sound tricky, but with the right steps, you’ll have a stable, secure toilet in no time.
Keep reading, and you’ll learn exactly how to do it the right way, saving money and avoiding common mistakes along the way.

Credit: www.reddit.com
Signs You Need To Lower The Toilet Flange
Knowing the signs that show you need to lower the toilet flange helps avoid bigger problems. The flange connects the toilet to the drain pipe. It must sit at the right height for a proper seal. If the flange is too high, it causes issues with toilet stability and leaks.
Here are clear signs that show the flange height needs fixing. Pay attention to these problems before they get worse.
Toilet Wobbles Or Rocks
A toilet that moves or rocks is a common sign. The flange may sit too high, preventing the toilet from sitting flat. This movement can break the wax ring seal. It also causes discomfort when using the toilet. Tightening bolts alone won’t fix the wobble if the flange height is wrong.
Visible Gap Between Toilet And Floor
Check for a gap between the toilet base and floor. A space means the flange is too high or uneven. This gap breaks the seal that keeps water and odors in. Over time, it can lead to damage on the floor. The toilet needs to sit flush for a strong, clean fit.
Water Leakage Around Base
Leaks at the toilet base show trouble with the flange or seal. A high flange stops the wax ring from sealing properly. Water leaks cause stains and damage to flooring. Ignoring leaks can cause mold and costly repairs. Fix the flange height to stop leaks and protect your bathroom.
Credit: www.youtube.com
Tools And Materials Required
Lowering a toilet flange requires specific tools and materials. Using the right items ensures a secure fit and prevents leaks. Prepare everything before starting the project.
Basic Plumbing Tools
Gather essential plumbing tools for the job. A wrench helps loosen and tighten bolts. A screwdriver is needed to remove old parts. A putty knife removes old wax rings. A tape measure checks flange height and space. These simple tools make the process easier.
Flange Extenders And Spacers
Flange extenders raise the flange to the correct height. Spacers can add small increments of height. Choose extenders that match your flange size. They come in plastic or metal materials. Using extenders ensures the toilet seals properly.
Sealants And Gaskets
Sealants prevent water leaks around the flange. Use plumber’s putty or silicone sealant for a tight seal. Gaskets create a cushion between parts. Wax rings are common gaskets for toilets. Pick sealants and gaskets made for plumbing use.
Preparing The Work Area
Preparing the work area is the first step in lowering a toilet flange. A clean, organized space makes the job easier and safer. You need to clear the area around the toilet. This prevents dirt and debris from spreading. Also, prepare tools and materials close by. This saves time and effort during the work.
Turning Off Water Supply
Turn off the water supply to stop water flow. Locate the shut-off valve near the toilet base. Turn it clockwise until it stops. Flush the toilet to empty the tank. This reduces water spillage during removal.
Removing The Toilet
Remove the toilet carefully to avoid damage. Start by unscrewing the nuts at the base. Lift the toilet straight up and place it on a protective surface. Use towels or cardboard to protect the floor. Set the toilet aside safely.
Cleaning The Flange And Surrounding Area
Clean the flange and nearby area thoroughly. Remove old wax and debris using a putty knife. Wipe the surface with a damp cloth. This ensures a good seal when lowering the flange. Check for damage or cracks before proceeding.

Credit: www.youtube.com
Assessing Flange Height And Damage
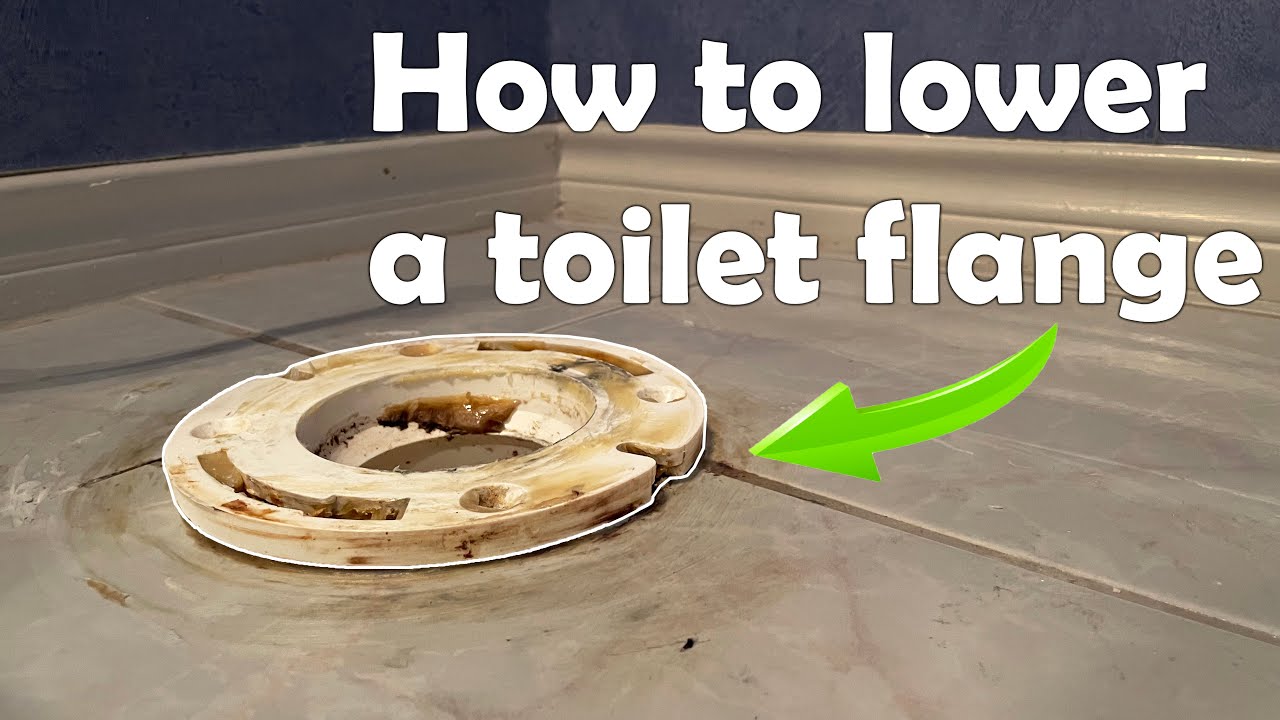
Assessing the toilet flange height and damage is the first step to lowering it properly. The flange connects the toilet to the drain pipe and holds it in place. If the flange is too high or damaged, the toilet may not seal correctly. This can cause leaks or wobbling. Carefully checking the flange helps decide the next steps.
Measuring Flange Height
Start by measuring the flange height above the finished floor. Use a ruler or tape measure for accuracy. The flange should sit slightly above the floor, about 1/4 inch. A flange too high or too low will cause problems. Note the measurement to know if lowering is needed.
Checking For Cracks Or Breaks
Look closely at the flange for any cracks or breaks. Damaged flanges cannot hold the toilet securely. Small cracks may cause leaks over time. Inspect the entire circle of the flange for weak spots. Use a flashlight if needed to see clearly.
Determining Repair Or Replacement
Decide if the flange needs repair or full replacement. Minor damage can sometimes be fixed with epoxy or flange repair kits. Severe cracks or broken sections often require a new flange. Consider the flange material and your skill level before choosing.
Lowering The Flange Step-by-step
Lowering the toilet flange is a key step in fixing a wobbly or leaking toilet. It ensures the flange sits flush with the finished floor. This process involves removing the old flange, adjusting the drain pipe, and installing a new, lower flange. Follow these steps carefully to get a solid and stable toilet base.
Removing The Old Flange
Start by turning off the water supply to the toilet. Flush to empty the tank and bowl. Disconnect the water line from the tank. Unscrew the bolts holding the toilet to the floor. Carefully lift the toilet and set it aside. Remove any wax ring residue from the flange. Unscrew the old flange from the drain pipe or floor. Clean the area around the drain pipe thoroughly.
Adjusting Or Replacing The Drain Pipe
Check the height of the drain pipe relative to the new floor level. If the pipe is too high, cut it down using a saw. Smooth the cut edges with sandpaper. If the pipe is damaged or too short, replace it with a new section. Make sure the pipe is clean and dry before proceeding. Proper pipe height is crucial for a secure flange fit.
Installing A New, Lower Flange
Choose a flange designed for the correct floor height. Position the new flange over the drain pipe. Align the flange holes with the floor screw locations. Secure the flange tightly to the floor using screws. Ensure the flange sits flat and stable. Place a new wax ring on the flange before reinstalling the toilet. Tighten the toilet bolts evenly to avoid cracking. Test for stability and leaks after installation.
Using Flange Extenders Or Spacers
Using flange extenders or spacers is a smart way to fix a toilet flange that sits too low. These parts help raise the flange height to match the finished floor level. This makes toilet installation easier and prevents leaks or wobbly toilets.
Flange extenders come in different thicknesses. You can stack multiple spacers to get the right height. This method saves time and money compared to replacing the entire flange or floor.
When To Use Extenders
Use extenders if the flange sits below the finished floor. This often happens after new flooring is added. Extenders also work when the flange is slightly damaged but still secure. Avoid extenders if the flange is cracked or unstable.
Installing Flange Spacers
Start by cleaning the flange and surrounding area. Place the spacer over the flange, lining up the bolt holes. Stack more spacers if needed to reach the right height. Secure them tightly with bolts to prevent movement. Check that the flange is level before moving on.
Sealing And Securing The Flange
Apply a bead of plumber’s putty or silicone around the spacer edges. This seals gaps and stops water leaks. Tighten the flange bolts firmly but don’t overtighten. Test for any wobbling by gently rocking the flange. Proper sealing and securing extend the flange’s life and keep the toilet stable.
Reinstalling The Toilet
Reinstalling the toilet is the final step after lowering the toilet flange. This process requires care to ensure the toilet sits correctly and works well. Proper reinstallation prevents leaks and keeps the toilet stable.
Placing A New Wax Ring
Start by placing a new wax ring on the flange. The wax ring seals the connection between the toilet and the drain pipe. Make sure the ring sits flat and centered on the flange. Avoid touching the wax with your hands to keep it clean.
Aligning And Securing The Toilet
Next, carefully lower the toilet onto the wax ring. Align the bolt holes on the toilet base with the flange bolts. Press the toilet down firmly to compress the wax ring. Tighten the bolts evenly, but do not overtighten. This keeps the toilet stable without cracking the porcelain.
Testing For Stability And Leaks
Check the toilet for wobbling by gently rocking it. Tighten bolts if the toilet moves. Flush the toilet to test for leaks around the base. Look for water pooling or dampness. Fix any leaks before using the toilet regularly.
Preventing Future Flange Problems
Preventing future flange problems helps keep your toilet stable and leak-free. Taking care of the flange can save you from costly repairs and messy damage later. Simple steps can extend the life of your toilet flange and plumbing.
Regular Maintenance Tips
Check your toilet flange regularly for cracks or loose bolts. Tighten bolts if they feel weak or wobbly. Clean around the flange area to remove dirt and grime. Replace worn-out wax rings to stop leaks. Early care prevents bigger issues down the road.
Avoiding Water Damage
Water damage often starts at the flange. Fix leaks immediately to protect your floor and subfloor. Use waterproof seals around the flange to block moisture. Keep the bathroom floor dry to prevent rot. Proper care stops water from ruining your home.
Upgrading Old Plumbing
Old plumbing parts can cause flange problems. Replace rusted or broken pipes to improve stability. Upgrade to stronger flange materials like stainless steel or PVC. New plumbing parts last longer and work better. Updating your system reduces repair needs in the future.
Frequently Asked Questions
What Is A Toilet Flange And Why Lower It?
A toilet flange connects the toilet to the drain pipe. Lowering it ensures a proper seal and prevents leaks.
How Do I Know If My Toilet Flange Needs Lowering?
If the toilet wobbles or leaks, the flange may be too high or damaged and might need lowering.
What Tools Are Needed To Lower A Toilet Flange?
You need a saw, flange spacer or extender, wax ring, screwdriver, and measuring tape to lower the flange.
Can I Lower A Toilet Flange Without Removing The Toilet?
Usually, removing the toilet is necessary to access and lower the flange safely and correctly.
How Much Does It Cost To Lower A Toilet Flange?
Cost varies but typically ranges from $50 to $150 for materials and basic labor.
Conclusion
Lowering a toilet flange can fix many bathroom problems. It helps the toilet sit correctly and stops leaks. Take your time and measure carefully before starting. Use the right tools to make the job easier. Small steps lead to a strong, lasting repair.
A well-done flange lowers stress and saves money. Keep your bathroom working smoothly with this simple fix. Try it yourself, and see the difference it makes.