Is your Hunter ceiling fan remote not working when you need it most? It’s frustrating to reach for the remote, only to find it unresponsive.
You rely on that remote to keep your room comfortable, so when it stops working, it feels like everything’s out of sync. But don’t worry—before you think about replacing the whole fan or the remote, there are simple fixes you can try right now.
You’ll discover easy steps to get your Hunter ceiling fan remote back in action quickly and without hassle. Keep reading, because the solution might be easier than you think.
Common Reasons For Remote Failure
The Hunter ceiling fan remote may stop working due to several common reasons. Knowing these reasons helps in quick troubleshooting. Most problems are simple and easy to fix. Understanding these issues saves time and avoids frustration.
Dead Or Weak Batteries
The most common cause of remote failure is dead or weak batteries. Batteries lose power over time. A weak battery may send weak signals. Replace batteries regularly to ensure proper remote function. Always use fresh, high-quality batteries for the best results.
Remote And Receiver Connection Issues
The remote and fan receiver need to communicate well. Sometimes the connection breaks or gets interrupted. This can happen after power outages or electrical surges. Resetting the fan or re-pairing the remote can restore the connection. Make sure the remote is within range of the fan.
Interference From Other Devices
Other electronic devices can interfere with the remote signal. Wireless routers, cordless phones, or microwaves cause interference. This stops the remote from working properly. Moving these devices away from the fan or remote may help. Keep the area clear of too many electronic signals.
Physical Damage To Remote
The remote control can suffer physical damage. Dropping the remote or spilling liquids can harm it. Damaged buttons or internal parts stop it from working. Inspect the remote for cracks or broken parts. If damaged, replacing the remote might be necessary.
Quick Battery Replacement Tips
Replacing the battery in your Hunter ceiling fan remote can fix many common problems. A fresh battery often restores full control quickly. Follow these simple tips to replace the battery right.
Choosing The Right Battery Type
Check the remote’s battery compartment for the correct size. Most Hunter remotes use standard coin or AAA batteries. Use the battery type recommended in the manual. Avoid mixing old and new batteries. Pick fresh batteries with a good expiration date.
Proper Battery Installation
Open the battery cover gently to avoid damage. Place the battery with the positive (+) side facing up. Make sure the battery fits snugly in the slot. Close the cover securely to keep the battery in place. Loose contacts cause remote failure.
Testing Battery Functionality
After installing the battery, test the remote by pressing any button. Check if the fan responds immediately. If not, try a new battery. Clean the battery contacts with a dry cloth if needed. This ensures a good connection for power flow.
Resetting The Remote And Fan
Resetting your Hunter ceiling fan remote and fan can fix many common problems. This process helps restore the connection between the remote and fan. It clears any errors that stop the fan from working properly. Resetting is simple and takes only a few minutes.
Steps To Reset The Remote
First, remove the battery cover from the remote. Take out the batteries and wait for 30 seconds. Press any button on the remote for 5 seconds to drain leftover power. Insert fresh batteries into the remote. Replace the battery cover. Test the remote by pressing the power button.
Resetting The Fan Receiver
Turn off power to the ceiling fan at the circuit breaker. Wait 30 seconds to ensure the fan fully powers down. Turn the power back on. Press and hold the fan’s wall control button for 10 seconds until the fan blinks. This signals the receiver has reset. Try using the remote again to see if it works.
When To Perform A Full System Reset
Perform a full system reset if the remote and fan still don’t connect. This reset clears all previous settings. Turn off the power at the breaker. Hold the remote’s power and speed buttons simultaneously for 10 seconds. Turn the power back on. Re-pair the remote to the fan following the manual’s instructions.
Checking The Remote Signal
Checking the remote signal is a key step when your Hunter ceiling fan remote stops working. The remote uses infrared (IR) signals to control the fan. If the signal is weak or blocked, the fan won’t respond. Testing the signal helps find the problem fast. It can save you time and avoid unnecessary repairs.
Using A Smartphone Camera To Test Ir Signal
Most smartphone cameras can detect infrared light. Point the remote at your phone’s camera lens. Press any button on the remote. Look at the phone screen. If you see a flashing light from the remote, the IR signal is working. No light means the remote might have dead batteries or a broken LED.
Ensuring Clear Line Of Sight
Infrared remotes need a clear path to the fan’s sensor. Make sure nothing blocks the signal. Even glass or plastic can weaken the IR beam. Keep the remote pointed directly at the fan sensor. Try standing closer to the fan. A strong line of sight improves signal strength and response.
Removing Possible Signal Blockers
Objects between the remote and fan can block the IR signal. Check for furniture, curtains, or decorations in the way. Pets or people moving around may also interfere. Remove or move these items if needed. Clearing the path helps the remote control work properly again.
Reprogramming The Remote
Reprogramming the remote is a key step to fix your Hunter ceiling fan. It helps the remote and fan communicate again. This process is simple and takes just a few minutes. Follow the steps carefully to avoid any mistakes. Reprogramming can solve common issues like unresponsive buttons or no control over the fan.
Pairing The Remote With The Fan
Start by turning off the fan and unplugging it if possible. Wait for about 10 seconds. Plug the fan back in or turn it on. Press and hold the fan’s receiver button. This button is inside the fan’s housing near the motor. Hold it until the fan lights blink. Now, press any button on your remote. The blinking lights should stop. This means the remote is paired with the fan. Test the remote by pressing different buttons. The fan should respond to each command.
Troubleshooting Pairing Issues
Sometimes pairing does not work on the first try. Check the remote’s batteries are fresh. Weak batteries can cause pairing failure. Make sure you hold the receiver button long enough. Press the remote button quickly after the lights blink. Keep the remote close to the fan during pairing. If the fan still does not respond, try resetting the fan. Turn off the power for 30 seconds and repeat the steps. These tips help fix most pairing problems.
Credit: www.hunterfan.com
Inspecting The Fan Receiver
Checking the fan receiver is important when the Hunter ceiling fan remote stops working. The receiver controls signals from the remote to the fan. If it is faulty, the fan won’t respond. This section helps you inspect the receiver step-by-step.
Understanding where to find the receiver and how to check it saves time and effort. You can fix simple problems or know if replacement is needed.
Locating The Receiver Unit
The receiver is usually inside the fan canopy. This is the cover attached to the ceiling. Turn off the power before removing the canopy. Look for a small box with wires connected to the fan’s motor. This is the receiver unit.
Visual Inspection For Damage
Look closely at the receiver for signs of damage. Check for burn marks or melted plastic. Look for loose or disconnected wires. Any damage could stop the remote from working. Clean dust or debris gently from the unit.
Replacing A Faulty Receiver
If the receiver looks damaged, replacement may be needed. Buy the exact model for your Hunter fan. Turn off power and disconnect wires carefully. Remove the old receiver and install the new one. Connect wires as before and secure the canopy. Turn the power back on and test the remote.
When To Replace The Remote
Knowing the right time to replace your Hunter ceiling fan remote can save frustration. Some problems are simple to fix. Others mean the remote no longer works properly. This section helps you spot those signs and guides you to find the right replacement remote.
Signs Of Irreparable Damage
Remote buttons stop responding completely. The remote won’t turn the fan on or off. It may lose connection frequently. Sometimes, the display or lights on the remote fail. Water damage or physical cracks can make repair impossible. Battery changes do not help these issues. The remote feels hot or smells burned.
Finding Compatible Replacement Remotes
Choose a remote that matches your fan model. Check Hunter’s official website for parts. Use the model number on your fan or old remote. Many remotes work with multiple fan types. Universal remotes are an option but check compatibility first. Avoid cheap copies that may not last. Buy from trusted sellers or stores to ensure quality.
Credit: www.hunterfan.com
Preventive Tips For Remote Maintenance
Keeping your Hunter ceiling fan remote working well saves time and frustration. Small habits help avoid common problems. Regular care makes the remote last longer and work better. Here are simple tips to keep the remote in good shape.
Regular Battery Checks
Check the remote’s batteries often. Weak batteries cause poor signal or no response. Replace batteries every few months. Always use fresh batteries of the right size. Remove batteries if you do not use the remote for a long time. This stops battery leaks and damage.
Keeping Remote Clean And Dry
Keep the remote clean to avoid button problems. Wipe it gently with a soft cloth. Never use water or strong cleaners on the remote. Avoid pressing buttons with wet or dirty hands. Store the remote in a dry place, away from moisture and spills.
Avoiding Signal Interference
Make sure no objects block the remote’s signal to the fan. Avoid using the remote near other electronics that can cause interference. Keep the remote within the fan’s range for best response. Point the remote directly at the fan sensor when using it.

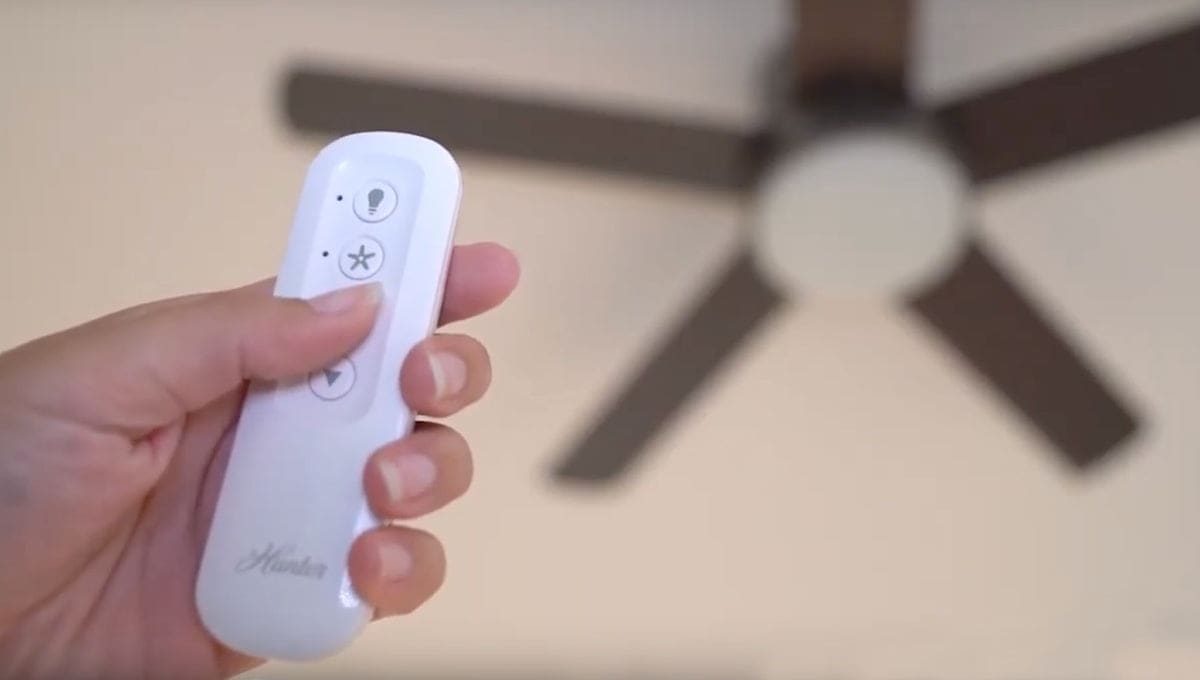
Credit: www.youtube.com
Frequently Asked Questions
Why Is My Hunter Ceiling Fan Remote Not Responding?
The remote might have dead batteries, or the fan receiver could be disconnected.
How To Reset A Hunter Ceiling Fan Remote?
Turn off the fan power, wait 30 seconds, then turn it back on to reset.
Can Interference Cause Hunter Fan Remote Issues?
Yes, other wireless devices nearby can disrupt the remote’s signal.
How To Replace Batteries In Hunter Ceiling Fan Remote?
Open the remote’s back cover and insert fresh batteries matching the required type.
What To Do If Hunter Fan Remote Still Won’t Work?
Check wiring connections or contact a professional for repair or replacement help.
Conclusion
A Hunter ceiling fan remote not working can be frustrating. Check the batteries first and replace if needed. Make sure the remote is aimed at the fan sensor. Resetting the fan or remote often solves small glitches. Clean the remote and sensor to avoid interference.
If problems persist, consult the user manual or contact support. Simple steps can save time and money. Keep your fan running smoothly with quick fixes. Don’t let a faulty remote stop your comfort. Easy solutions are just a few steps away.