Have you ever been in the middle of cooking and suddenly your GE oven displays an error code, leaving you confused and unsure what to do next? Those flashing numbers or letters aren’t just random—they’re your oven’s way of telling you something needs attention.
Understanding these error codes can save you time, prevent damage, and get your oven back to perfect working order faster. You’ll discover what common GE oven error codes mean and how you can fix them quickly and easily. Keep reading to take control of your oven and avoid unnecessary stress in the kitchen.

Credit: www.youtube.com
Common Ge Oven Error Codes
GE ovens sometimes show error codes on the display. These codes help identify problems quickly. Knowing common GE oven error codes can save time and effort. It also helps avoid unnecessary service calls. Below are some frequent error codes and their meanings.
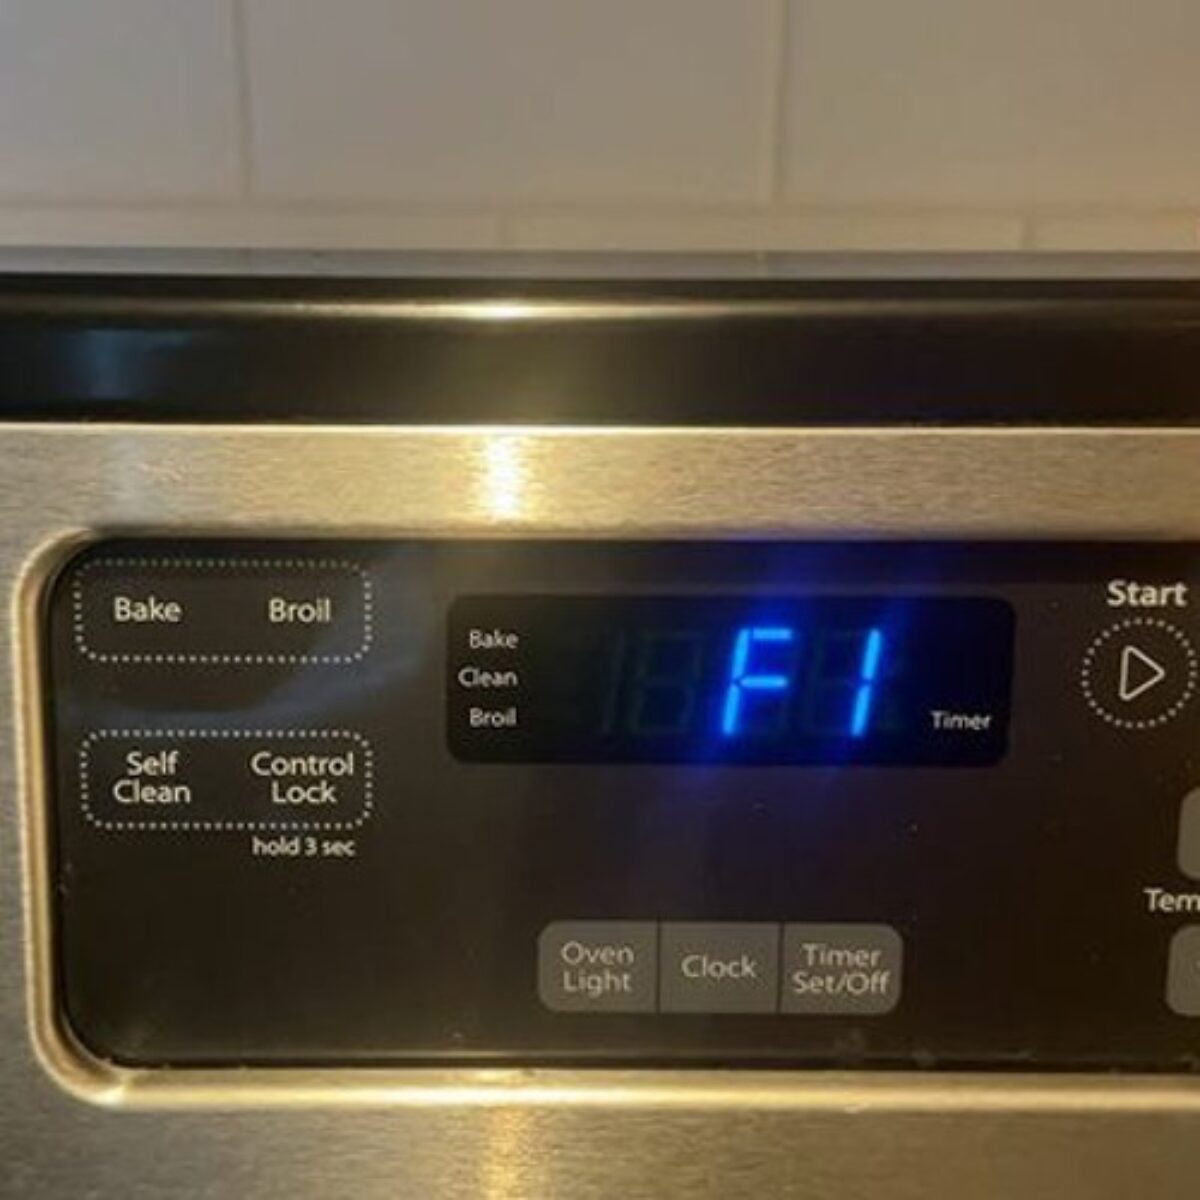
Code F1 To F5
Codes F1 to F5 usually point to control board issues. F1 means the touchpad is stuck or faulty. F2 shows a problem with the oven’s key panel. F3 and F4 relate to the keypad or control board connection. F5 signals a short in the control board. These errors often require checking wiring or replacing parts.
Code F6 And F7
F6 and F7 errors focus on temperature sensor problems. F6 means the oven temperature sensor is open or shorted. F7 shows a problem with the sensor circuit. These codes suggest checking the sensor’s wires and connections. Sometimes, the sensor itself needs replacement.
Code F8 And F9
F8 and F9 errors link to the oven’s heating system. F8 indicates a problem with the oven’s relay or heating element. F9 points to a failure in the oven’s cooling fan or its circuit. These errors need inspection of the heating parts and fan motor.
Code F10 And F11
F10 and F11 refer to communication errors. F10 means the control board does not communicate with the touchpad. F11 shows a failure in the control board or power supply. These codes require checking control board connections and power sources.

Credit: www.youtube.com
Troubleshooting Power Issues
Power issues often cause GE oven errors. These problems stop the oven from working properly. Fixing power problems can get the oven running again quickly. Follow these steps carefully to check and fix common power issues.
Resetting The Oven
Start by turning off the oven. Wait for about one minute. Turn the oven back on. This simple reset clears minor errors. It can fix the power problem fast. If the oven still does not work, try the next step.
Checking Circuit Breakers
Locate your home’s circuit breaker panel. Look for the breaker linked to the oven. If it is tripped, switch it off and on again. A tripped breaker stops power to the oven. Resetting the breaker often restores power. If the breaker trips again, call an electrician.
Inspecting Power Connections
Check the oven’s power cord and plug. Make sure they are not loose or damaged. Inspect the outlet for any signs of wear. A bad connection can cause power errors. Tighten or replace any loose parts. Only do this if you feel safe handling electrical parts.
Fixing Temperature Sensor Problems
Temperature sensor problems often cause errors in GE ovens. These sensors help keep the oven at the right temperature. When they fail, the oven may not heat properly or show error codes. Fixing these problems can restore your oven’s performance and keep your food cooking evenly.
Checking and fixing the sensor is simple with the right steps. You can test the sensor, replace it if needed, and then calibrate the oven temperature. These actions help solve sensor-related errors fast.
Testing The Sensor
Start by unplugging the oven from power. Locate the temperature sensor inside the oven cavity. Use a multimeter to check its resistance. The reading should be around 1,100 ohms at room temperature. A very high or low reading means the sensor is faulty. Replace the sensor if the test shows a problem.
Replacing The Sensor
Order the correct sensor model for your GE oven. Unplug the oven and open the back panel. Unscrew the old sensor and carefully disconnect the wires. Attach the new sensor and screw it in place. Connect the wires exactly as before. Close the panel and plug the oven back in. Test the oven to see if the error is gone.
Calibrating Oven Temperature
Sometimes the sensor is fine but the oven temperature is off. Use the oven’s control panel to adjust the temperature setting. Refer to your oven’s manual for calibration steps. This tuning helps the oven read the right temperature. After calibration, check if the oven heats correctly. Repeat if needed for accurate cooking results.
Dealing With Control Board Errors
Control board errors in GE ovens can stop your cooking plans fast. These errors often show as error codes on the display. They mean the oven’s brain has trouble controlling the functions. Fixing these errors can save time and money. Understanding how to handle control board issues is key.
Identifying Control Board Faults
Control board faults often cause strange oven behavior. The oven might not heat or respond to commands. Error codes like F1, F7, or F9 point to control board problems. Look for blinking lights or no display at all. These signs show a control board issue. Use the oven manual to match error codes with faults.
Resetting The Control Board
Resetting the control board can clear temporary errors. Turn off the oven and unplug it from power. Wait about five minutes to let the board reset. Plug the oven back in and turn it on. Check if the error code disappears. This simple step often fixes minor glitches.
When To Replace The Control Board
Persistent errors after resetting may mean the board is bad. Damaged control boards can cause constant error codes. Signs include random shutdowns or no display. If the oven still fails, replacement is needed. Contact a professional to replace the control board safely.
Handling Door And Lock Issues
Handling door and lock issues in a GE oven is important for safe and proper operation. Problems with the door or lock can stop the oven from working correctly. These issues often cause error codes to appear on the display. Understanding common door and lock problems helps fix the oven quickly and avoid bigger damage.
Door Lock Malfunctions
The door lock keeps the oven door closed during cooking. If the lock does not work, the oven may not start. Sometimes, the lock gets stuck or fails to engage. This can happen due to dirt, wear, or electrical faults. Testing the lock with a multimeter shows if it needs replacement. Cleaning the lock area can also help it work smoothly.
Latch Problems
The latch holds the door firmly shut. A broken or loose latch causes the door to open during cooking. This triggers safety error codes on the oven. Check the latch for damage or bending. Tightening screws or replacing the latch can fix the problem. Make sure the door closes tightly before using the oven.
Repairing Door Switch
The door switch signals the oven if the door is closed. A faulty switch stops the oven from heating. Test the door switch for continuity using a tester. Replace the switch if it does not work properly. This repair is simple and restores oven functions fast. Always unplug the oven before starting any repairs.
Maintenance Tips To Avoid Errors
Keeping your GE oven in good shape helps avoid error codes. Regular maintenance stops small problems from turning big. It also makes your oven last longer. Simple steps can prevent many common issues.
Regular Cleaning
Clean your oven often to prevent dirt buildup. Wipe spills right away to avoid stains. Remove food crumbs from heating elements carefully. Use mild cleaners that do not harm surfaces. A clean oven works better and avoids errors.
Inspecting Oven Components
Check the oven parts regularly for damage or wear. Look at door seals, knobs, and heating elements. Make sure the door closes tightly. Replace any broken or worn parts quickly. This keeps your oven running smoothly without error codes.
Scheduling Professional Checkups
Have a technician inspect your oven yearly. They can find hidden problems early. Professionals clean parts you cannot reach. They also test the oven’s safety and performance. Regular checkups reduce the chance of unexpected errors.
Credit: smartapplianceservices.com
Frequently Asked Questions
What Do Ge Oven Error Codes Mean?
GE oven error codes show specific problems inside your oven. They help identify issues quickly.
How To Reset Ge Oven Error Codes?
Turn off the oven power for a few minutes. Then turn it back on to reset.
What Causes F1 Or F2 Error Codes In Ge Ovens?
F1 or F2 errors usually mean a problem with the oven’s temperature sensor or wiring.
Can I Fix Ge Oven Error Codes Myself?
Simple fixes like resetting or checking connections can be done at home. Complex issues need a technician.
Where To Find Ge Oven Error Code List?
The oven manual or GE’s official website has a full list of error codes and meanings.
Conclusion
Understanding GE oven error codes helps fix issues faster. These codes tell you what needs attention. You can save time by knowing their meaning. Always check the manual for specific code details. Simple steps can solve common problems at home.
Don’t ignore error messages; they protect your oven. Keep your appliance working well with quick action. This guide makes your oven troubles less stressful. Stay calm and use the right solution every time. Your oven will run smoothly and safely again.