Imagine this: Your Roomba is whirring around your home, making life a little easier. But suddenly, it’s not performing like it used to.
The culprit? A clogged filter. Just like your lungs need fresh air, your Roomba needs a clean filter to work efficiently. If you’ve noticed your little cleaning buddy isn’t picking up as well as it used to, it might be time to show that filter some love.
Don’t worry, cleaning it isn’t a chore. In fact, it’s surprisingly simple and fast. By learning how to clean a Roomba filter, you’ll not only extend its lifespan but also ensure your home stays as clean as you like it. Curious about how to do it right? Keep reading to discover the straightforward steps that will have your Roomba running like new again.
Tools And Materials Needed
Cleaning your Roomba filter is essential for maintaining its performance. To do it right, you need the right tools and materials. Proper preparation ensures effective cleaning and extends your Roomba’s life. Below is a list of everything you’ll need to make this task quick and easy.
Soft Brush
A soft brush helps remove dust and debris from the filter. Choose a brush with gentle bristles. This prevents damage to delicate parts. A toothbrush can work well.
Compressed Air Can
Use compressed air to blow out trapped dust. It reaches corners a brush can’t. Hold the can upright for best results. Short bursts work better than continuous sprays.
Microfiber Cloth
A microfiber cloth is perfect for wiping surfaces. It picks up fine particles effectively. Ensure the cloth is dry. Wet cloths may damage the filter.
Protective Gloves
Wear gloves to protect your hands from dirt. They also prevent oils from transferring to the filter. Choose gloves that fit well. This ensures a firm grip on parts.

Credit: homesupport.irobot.com
Safety Precautions
Cleaning a Roomba filter keeps it running smoothly and efficiently. Safety is key during this task. Taking the right precautions protects both you and your Roomba. Follow these guidelines for a safe cleaning experience.
Turn Off And Unplug The Roomba
Always power off the Roomba before cleaning. Unplug it from the charging station. This ensures no accidental startups. It keeps you safe from moving parts.
Wear Protective Gear
Dust from the filter can irritate skin and eyes. Wear gloves and goggles for protection. This minimizes contact with dust and debris.
Avoid Using Water On Electrical Parts
Keep water away from the Roomba’s electrical components. Only the filter should be rinsed if needed. Ensure the filter is dry before reassembling.
Work In A Well-ventilated Area
Dust can be harmful if inhaled. Clean the filter in a space with good airflow. This helps disperse any airborne particles.
Handle Filters Gently
Filters are fragile and can tear easily. Handle them with care. Avoid using excessive force when cleaning.
Check For Damages
Inspect the filter for wear or damage. Replace it if you notice tears or holes. A damaged filter won’t perform well.
Accessing The Roomba Filter
Cleaning your Roomba filter regularly ensures optimal performance and longevity. Accessing the Roomba filter is a simple task that anyone can do. Follow these steps to access and clean the filter efficiently.
Turning Off The Roomba
Begin by turning off your Roomba. This prevents any accidental start-up. Find the power button on top of the device. Press and hold until the Roomba shuts down completely. A shut-down Roomba is safe to handle.
Locating The Filter Compartment
The filter compartment is usually located at the back of the Roomba. Look for a small door or latch. Open it gently to access the filter inside. Some models have a button to release the compartment. Press this button if available.
Once open, you can see the filter. Remove it carefully for cleaning. Knowing the filter’s location helps in regular maintenance.
Credit: www.youtube.com
Removing The Filter
Discover the essential steps to clean a Roomba filter effectively. Proper maintenance ensures optimal vacuum performance and prolongs its lifespan. Regular cleaning prevents blockages and improves air quality in your home.
Keeping your Roomba in top shape requires regular maintenance, and removing the filter is a key part of this process. You might be surprised at how much dust and debris can accumulate in this small part. Properly cleaning your Roomba filter not only ensures a thorough clean of your floors but also extends the life of your device. Let’s dive into the simple steps needed to effectively remove and clean your Roomba filter.Opening The Filter Compartment
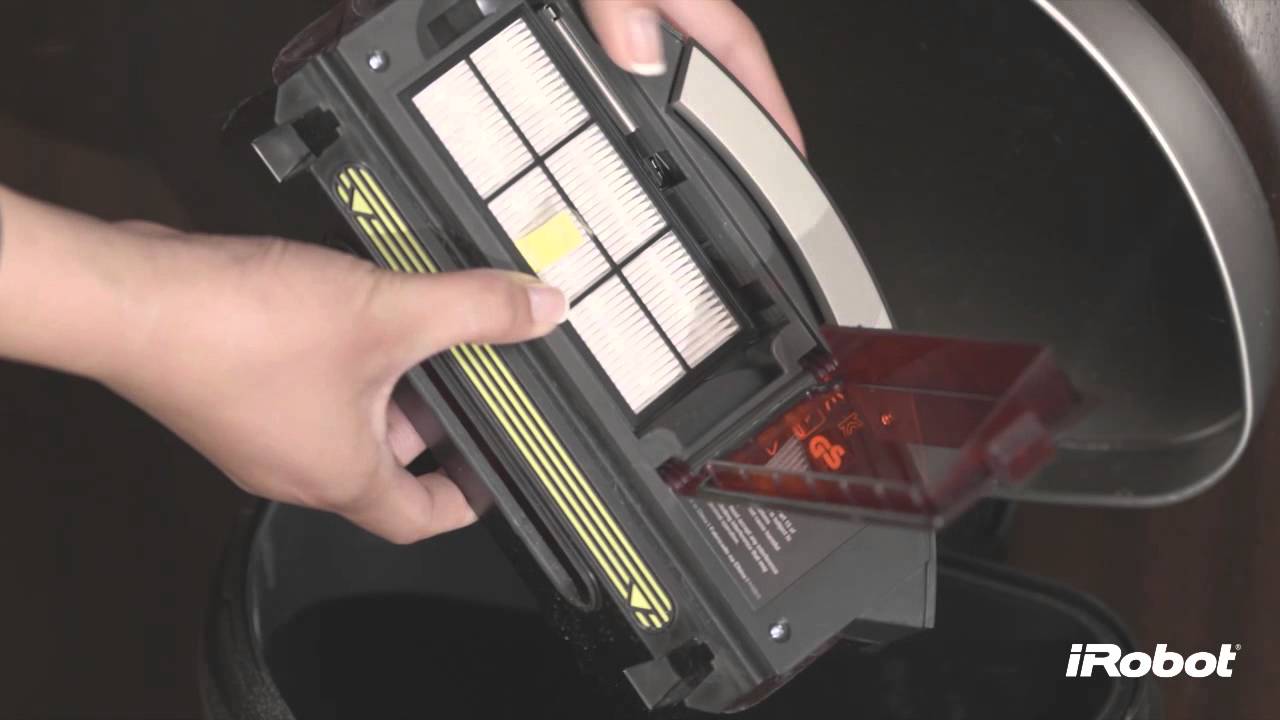
First, locate the filter compartment on your Roomba. It’s usually situated on the side or the back, depending on the model. A simple press of a button or a gentle pull is often all it takes to access the filter area. Use both hands for stability if the compartment feels a little stiff. Has your Roomba been working overtime? If so, the filter area might be slightly clogged, so proceed with care.Extracting The Filter
Once the compartment is open, you’ll see the filter sitting snugly inside. Pull it out gently, ensuring not to tilt it excessively. Tilting might cause the trapped dust to spill back into the Roomba, undoing your hard work. With the filter in hand, inspect it for any obvious clogs or debris. Shake it over a trash can to remove loose particles. Have you noticed a decrease in your Roomba’s performance lately? A quick filter check could reveal the root of the problem. Remember, routine cleaning of the filter not only boosts performance but also keeps your living space cleaner. Do you find yourself procrastinating on Roomba maintenance? Set a reminder, and your future self will thank you!Cleaning The Filter
Cleaning the filter of your Roomba is crucial for its performance. A clean filter ensures your Roomba picks up dust and debris effectively. Regular maintenance keeps your device running smoothly and extends its life. Follow these simple steps to clean your Roomba filter efficiently.
Dusting Off The Filter
Start by removing the filter from your Roomba. Tap it gently over a trash can to remove loose dust and debris. Use a soft brush to clean off remaining particles. Avoid using sharp objects that could damage the filter.
Washing The Filter (if Applicable)
Some filters are washable. Check your Roomba’s manual to confirm if yours is. Rinse the filter under cold water to remove trapped dirt. Let it dry completely before reinserting. Never use soap or detergent, as they can damage the filter.
Drying The Filter
Cleaning your Roomba filter is an essential part of maintaining its efficiency. Once you’ve washed the filter, the next critical step is drying it properly. A damp or wet filter can hinder your Roomba’s performance and may even cause damage. Drying the filter is more than just leaving it out; it requires attention to detail and a bit of patience. But how exactly should you dry it to ensure optimal performance? Let’s dive into the practical steps and insights for drying your Roomba filter effectively.
How Long Should You Wait?
Patience is key when drying your Roomba filter. It’s not just about waiting; it’s about ensuring it’s completely dry. Depending on the humidity in your environment, you might need to wait longer. A minimum of 24 hours is a good rule of thumb. Have you ever rushed this process and found your Roomba not working as efficiently? It’s worth the wait to ensure a dry filter.
Natural Air Vs. Heat
Choosing between natural air drying and using heat can be a dilemma. Natural air drying is safer, eliminating the risk of damaging the filter. Lay it flat on a towel and let the air do its magic. You might be tempted to use a hairdryer for a quicker result, but think twice. Excessive heat can warp or damage the filter material, compromising its performance.
Placement Matters
Where you place your filter for drying can influence the drying time and effectiveness. Opt for a well-ventilated area with good airflow. Avoid closed spaces like cabinets where moisture tends to linger. Have you ever left something to dry in a damp basement only to find it still wet hours later? Open spaces facilitate quicker drying.
Preventing Mold And Mildew
Ensuring your filter is completely dry is crucial to prevent mold and mildew. These can lead to unpleasant odors and reduce your Roomba’s efficiency. Check the filter’s crevices and folds for any residual moisture. Are there spots that seem to dry slower? A quick check can save you from long-term issues.
Once your filter is dry, it’s time to reinstall it in your Roomba. Ensure it fits snugly back into place. A misaligned or damp filter can result in decreased suction power. Have you ever noticed your Roomba leaving dirt behind after cleaning? Ensuring a dry and properly installed filter is a simple way to enhance performance.
Now, as you embark on the journey of drying your Roomba filter, remember to take your time. Proper drying is not just a step but a crucial part of maintaining your Roomba’s efficiency. Does your Roomba’s performance change after drying the filter thoroughly? Share your experiences and insights below!
Reinstalling The Filter
Reinstalling the filter in your Roomba is a crucial step to ensure it operates efficiently. A clean filter means your Roomba can do its job without any hiccups. But what happens if you don’t reinstall it properly? You might find your Roomba struggling to pick up dirt, or worse, it might end up damaging your machine. Let’s dive into how you can easily put the filter back in place and secure it to keep your Roomba performing at its best.
Placing The Filter Back
Start by taking the clean filter and aligning it with the slot in your Roomba. It’s a simple action, but crucial for the machine’s performance. If you’ve ever tried placing the filter in a rush, you know how easy it is to misalign it. Take a moment to ensure it slides in without resistance.
Notice how your Roomba has a snug fit for the filter? This is by design. It’s meant to keep the filter in place, reducing chances of dust escaping. If you hear a click, that’s your assurance that the filter is positioned correctly. Have you ever missed that click? It’s like a signal that your Roomba is ready to tackle the next cleaning session.
Securing The Compartment
Once the filter is in place, you need to secure the compartment. This step is often overlooked, but it’s essential. Think of it as locking a door after closing it. Without securing the compartment, you risk the filter coming loose during operation.
Check the latch or cover that holds the filter. It should close firmly, with no gaps. Have you ever left it slightly open? You might notice a decrease in performance, as dust can escape. Ensuring the compartment is tightly sealed keeps your Roomba running smoothly.
Take a moment to inspect the compartment for any debris. Even a small piece can obstruct the closing process. By keeping this area clean, you extend the life of your Roomba and maintain optimal performance. Have you ever thought about how a small detail can make a big difference?
Reinstalling the filter with care not only keeps your Roomba efficient but also saves you from future headaches. This simple maintenance tip can make your cleaning routine much smoother. How often do you check your Roomba’s filter? A few minutes of attention can lead to spotless floors and a happy Roomba. Isn’t that worth it?

Credit: www.tiktok.com
Maintenance Tips
Maintaining your Roomba ensures its efficiency and longevity. Proper care keeps it running smoothly. Regular maintenance prevents dirt buildup and ensures optimal performance. One crucial part of maintenance is cleaning the filter.
Filters trap dust and allergens. Keeping them clean is essential. This guide provides simple tips to maintain your Roomba filter effectively.
Frequency Of Cleaning
Clean the Roomba filter once a week. More frequent cleaning is needed in dusty areas. Regular cleaning prevents clogging and maintains suction power. A clean filter prolongs the robot’s life. Follow these simple steps for consistent results.
Signs Of Filter Replacement
Check the filter for wear and tear. A dirty filter reduces performance. If suction decreases, inspect the filter. Replace it if it’s discolored or damaged. Regular checks prevent unexpected breakdowns.
A fresh filter ensures efficient cleaning. Always use genuine parts for replacements. This maintains the warranty and quality of your Roomba.
Frequently Asked Questions
How Often Should I Clean My Roomba Filter?
Clean the Roomba filter once every week. It ensures better performance and longevity.
Can I Wash A Roomba Filter With Water?
No, avoid washing Roomba filters with water. It may damage them. Use a dry cloth or brush instead.
Why Is My Roomba Filter Important?
Roomba filters trap dust and allergens. They maintain air quality. Clean filters ensure efficient cleaning.
How Do I Access The Roomba Filter?
Locate the filter compartment. Usually near the dustbin. Follow the manual for specifics.
What Tools Do I Need To Clean A Roomba Filter?
Use a small brush or soft cloth. Gently remove dust and debris. Avoid harsh tools.
Conclusion
Cleaning your Roomba filter is simple and essential. It keeps your Roomba efficient. Regular cleaning extends the filter’s life. Remove the filter carefully. Tap it gently to release dust. Rinse with water if needed. Let it dry completely before reinserting.
Use a soft brush for stubborn dirt. Avoid harsh chemicals. Clean the filter every few weeks. This ensures optimal performance. A clean filter means a cleaner home. Follow these steps to maintain your Roomba. Happy cleaning!