A leaky bathtub faucet can be more than just an annoyance. It can lead to higher water bills, potential water damage, and that constant drip-drip sound can make it hard to relax in your own home.
If you’ve been putting off fixing it because it seems too complicated, you’re not alone. But here’s the good news: you don’t need to be a plumbing expert to fix a leaky bathtub faucet with one handle. In this guide, we’ll walk you through the simple steps to tackle this common household problem.
You’ll not only save money but also gain the satisfaction of a job well done. Ready to put an end to that pesky leak once and for all? Let’s get started.
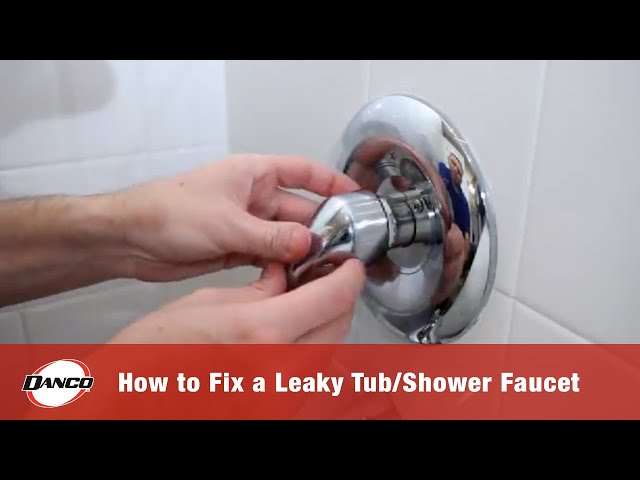
Credit: www.danco.com
Identifying Faucet Type
Recognizing your faucet type is essential for fixing a leaky bathtub faucet with one handle. Identify whether it’s a ball, cartridge, or ceramic-disk faucet. This knowledge helps in choosing the right repair parts and tools, ensuring an efficient fix.
Identifying the type of faucet you have is a crucial first step in fixing a leaky bathtub faucet with one handle. This step can save you a lot of time and frustration. Understanding your faucet type ensures you have the right tools and replacement parts on hand.Types Of Single-handle Faucets
Single-handle faucets generally come in three types: ball, cartridge, and ceramic disk. Each type has distinct features. Recognizing these features can lead you to the right repair strategy. Ball faucets use a ball joint to control water flow and temperature. They’re common in older homes. If your faucet has a rounded ball on the end of the handle, it’s likely a ball faucet. Cartridge faucets have a movable stem cartridge that moves up and down to control flow. These are popular due to their smooth operation. Look for a straight, up-and-down movement in the handle. Ceramic disk faucets are known for their durability and smooth turning action. If your faucet has a wide, cylindrical body, it might be a ceramic disk.How To Identify Your Faucet Type
Start by examining the handle and spout. Is it rounded, straight, or wide? This can give you your first clue. Next, remove the handle and take a look at the mechanism inside. Ball faucets have a ball mechanism, while cartridge types have a cartridge. Ceramic disk types have a pair of ceramic disks. It might sound daunting, but once you get the hang of it, identifying the type becomes second nature. Imagine the satisfaction of knowing exactly what you’re dealing with before you even start.Why Identifying The Faucet Type Matters
Knowing your faucet type helps you buy the correct parts. It also guides you in selecting the right tools. Have you ever tried fixing something only to realize you don’t have the right screwdriver? Identifying the faucet type prevents that hassle. It also helps you follow the right repair steps, minimizing trial and error. This keeps the project quick and efficient.Tools You’ll Need Based On Faucet Type
For ball faucets, you’ll need an Allen wrench, a flathead screwdriver, and possibly a ball faucet repair kit. Cartridge faucets often require a cartridge puller tool. A Phillips screwdriver and plumber’s grease might also be necessary. Ceramic disk faucets require a bit more care. A strap wrench, gentle hand tools, and a replacement disk are usually needed.Personal Insight: When I First Fixed A Faucet
When I first attempted to fix my leaky bathtub faucet, I didn’t know the importance of identifying the faucet type. I spent hours trying to force a cartridge into a ball faucet. You don’t need to go through that. By correctly identifying the type, you’ll save time and avoid unnecessary frustration. So, take a moment to examine your faucet before you start. It will make all the difference in your repair journey.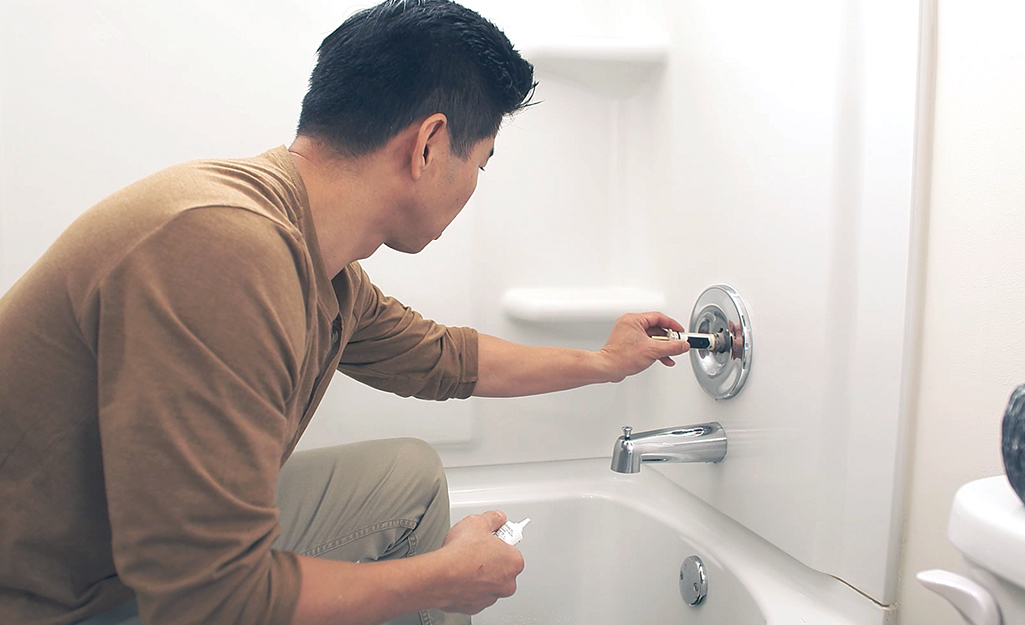
Credit: www.homedepot.com
Gathering Necessary Tools
Fixing a leaky bathtub faucet with one handle can seem daunting. But with the right tools, the task becomes manageable. Before diving into the repair, gather the necessary tools. This ensures a smooth and efficient process. Having everything you need within reach prevents unnecessary interruptions.
1. Gather A Screwdriver
A screwdriver is essential for removing the faucet handle. Most faucet handles use a Phillips-head screwdriver. Check your faucet type to ensure you have the correct size. It’s a simple tool but crucial for the task.
2. Use An Adjustable Wrench
An adjustable wrench helps loosen nuts and bolts. It’s versatile and fits various sizes. This tool is necessary for disassembling parts of the faucet. Make sure it’s adjustable for better ease of use.
3. Bring A Faucet Handle Puller
Sometimes handles get stuck and need a faucet handle puller. This tool gently removes the handle without damage. It’s handy when the handle won’t budge with a screwdriver. Consider it essential for stubborn handles.
4. Have A Plumber’s Grease
Plumber’s grease lubricates faucet parts, ensuring smooth operation. It helps prevent future leaks by sealing parts tightly. Apply it on O-rings and other moving parts. Keep some handy for reassembly.
5. Acquire Replacement Parts
Leaky faucets often need new washers, O-rings, or cartridges. Identify the faulty part before buying replacements. Take the old part to a store for an exact match. Having replacements ready speeds up the repair.
6. Use A Bucket Or Towel
A bucket or towel catches any water from the faucet. It prevents mess and keeps your workspace dry. This is especially useful during disassembly. Place it under the faucet to avoid water spills.
Shutting Off Water Supply
Start by shutting off the water supply to prevent further leaks. This step is crucial for fixing a leaky bathtub faucet with one handle. Ensure the faucet is dry before proceeding to replace any worn-out parts.
Shutting off the water supply is crucial when fixing a leaky bathtub faucet. This step ensures no water flows while you work. It prevents water damage and keeps your workspace dry. Understanding how to turn off the water is simple. It’s essential before starting any plumbing repairs. Follow these steps to shut off the water supply effectively.Locate The Main Water Valve
Find the main water valve in your home. It is often near the water meter or basement. Some homes have valves behind the bathtub. Knowing its location saves time.Turn Off The Valve
Turn the valve clockwise to shut off the water. This stops the flow to the faucet. Use a wrench if the valve is hard to turn. Confirm by checking if water stops.Test The Faucet
Once the valve is off, test the faucet. Turn the handle to ensure no water flows. This confirms the water is completely shut off.Drain Remaining Water
Open the faucet to drain any remaining water. This step is vital before disassembly. It prevents spills and keeps the area dry. Each step ensures a safe and efficient repair process. Understanding these basics prepares you for the task ahead.Removing The Faucet Handle
Removing the faucet handle is the first step in fixing a leaky bathtub faucet with one handle. This might seem daunting, especially if you’ve never tackled a plumbing project before. But with the right tools and a bit of patience, it’s simpler than you think. Let’s break it down into easy-to-follow steps so you can tackle this problem head-on and save yourself a potentially costly call to the plumber.
Locating Handle Screws
Start by taking a close look at your faucet handle. Often, the screws that hold the handle in place are hidden under a decorative cap or faceplate. Gently pry off the cap with a flathead screwdriver or a small knife. Be cautious to avoid scratching or damaging the surface.
Once the cap is removed, you’ll typically find a screw that secures the handle to the faucet body. Sometimes, the screw is located on the side of the handle or beneath it. If you’re unsure, consult the faucet’s manual or look up the model online for guidance. Isn’t it amazing how a little detective work can reveal hidden components?
Using The Right Screwdriver
Using the correct screwdriver is crucial. This ensures you don’t strip the screw head, making it difficult to remove. A Phillips head or flathead screwdriver usually does the trick, but double-check your screw type first.
If you’ve ever tried using the wrong tool, you know it’s frustrating and often counterproductive. A screwdriver that fits snugly will give you better leverage and control. It’s these small details that can make a big difference in your DIY efforts.
As you remove the screw, keep in mind where you place it. A small bowl or magnetic dish can prevent it from getting lost. This simple organization tip can save you time and stress later. Isn’t it satisfying to know you have everything under control?
Now you’re ready to move on to the next step in your faucet repair journey. Reflecting on this process, what other household repairs could you tackle with the right approach and tools?
Inspecting The Cartridge
Fixing a leaky bathtub faucet starts with inspecting the cartridge. The cartridge is key to controlling water flow and temperature. Over time, it may wear out, causing leaks. Carefully checking it can save water and prevent further damage.
Start by turning off the water supply. Remove the faucet handle to access the cartridge. Use a screwdriver if needed. Once exposed, look closely at the cartridge for any visible issues.
Signs Of Wear
Look for common signs of wear on the cartridge. Cracks, mineral buildup, or discoloration can indicate problems. A worn-out cartridge may also feel loose or have difficulty moving. Such signs mean the cartridge needs replacement.
Types Of Cartridges
Different faucets use different cartridges. Identify the type your faucet uses. Some common types include ceramic disc, ball, and compression cartridges. Knowing the type helps in finding the right replacement.
Check your faucet’s manual or look online for specifications. This information ensures you purchase the correct cartridge. Replacing with the right type prevents future leaks.
Replacing The Cartridge
Replacing the cartridge may stop a leaky bathtub faucet with one handle. Shut off water supply first. Remove the handle and unscrew the cartridge. Install a new one, ensuring a proper fit. Reassemble the handle, then turn the water back on to check for leaks.
Replacing the cartridge in a leaky bathtub faucet is a common fix. It’s a straightforward task that can save water and money. First, gather tools like a wrench and screwdriver. A new cartridge is essential for the repair. Let’s dive into how to choose and install the right replacement.Choosing The Right Replacement
Identify the faucet brand and model. This information helps find the correct cartridge. Visit a hardware store with details for assistance. Check compatibility before purchase. Match the new cartridge with the old one. Ensure it fits perfectly to avoid leaks. Quality matters, so choose a durable cartridge.Installing The New Cartridge
Turn off the water supply to the faucet. Use a wrench to remove the faucet handle. Locate and remove the old cartridge. Clean the area before installing the new one. Insert the new cartridge carefully. Make sure it’s aligned properly. Secure it with screws if needed. Reattach the handle and tighten it. Turn the water back on and test the faucet. Check for leaks to confirm the fix worked.Reassembling The Faucet
Reassembling the faucet is an important step in fixing a leaky bathtub faucet. After replacing worn parts, it’s time to put everything back together. Proper reassembly ensures the faucet functions well and doesn’t leak. The process involves careful attention to each component. Follow these steps to secure the handle and test for leaks.
Securing The Handle
Begin by placing the handle back onto the valve stem. Make sure it aligns properly. Insert the screw through the handle and into the stem. Tighten it using a screwdriver. Ensure it’s secure, but avoid overtightening. This prevents damage to the handle or stem. Check if the handle moves smoothly without resistance. If it feels tight, loosen the screw slightly and adjust.
Testing For Leaks
Turn on the water supply to test the faucet. Observe the faucet closely for any leaks. Let the water run for a few minutes. Check around the handle and spout area. If you see no leaks, your repair is successful. If leaks persist, recheck the assembly. Ensure all components are installed correctly. Adjust and tighten parts as needed.
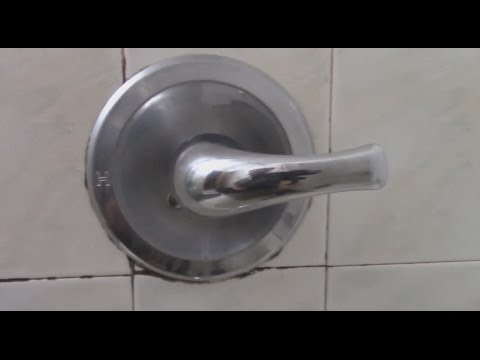
Credit: www.youtube.com
Preventive Maintenance Tips
Fixing a leaky bathtub faucet with one handle saves water and reduces bills. Start by turning off the water supply. Then, replace the worn-out washer or cartridge to stop the drip. Regular checks can prevent future leaks and keep your bathroom in top condition.
Preventive Maintenance TipsPreventive maintenance can be your best friend when it comes to keeping your bathtub faucet in top condition. Regular attention can help you avoid those unexpected leaks and save money on repairs. Let’s dive into some practical tips to keep your faucet functioning smoothly.Regular Checks
Regular inspections are key to preventing leaks. Schedule a quick check every month to look for any signs of wear or minor leaks in your faucet. This proactive approach means you catch issues early, before they turn into costly repairs. Keep an eye on the handle’s movement. A handle that’s loose or hard to turn may signal underlying problems. Tighten any loose screws and ensure the handle turns smoothly without much resistance.Cleaning Recommendations
Cleaning your faucet regularly can prevent mineral buildup, which is a common cause of leaks. Use a mild cleaner and a soft cloth to wipe away soap scum and hard water deposits. This simple habit can extend the life of your faucet. If you notice stubborn mineral deposits, consider using a vinegar solution. Soak a cloth in vinegar, wrap it around the affected area, and let it sit for a few hours. Afterward, wipe it clean, and your faucet will look as good as new. What happens if you ignore these cleaning tasks? The buildup can damage seals and gaskets, leading to leaks. So, a little cleaning effort can go a long way in preventing more serious issues. Adopting these preventive maintenance tips can save you time, money, and frustration. Why wait for leaks to catch you off guard? Start integrating these easy steps into your routine, and enjoy a hassle-free bathroom experience.Frequently Asked Questions
How Do I Identify A Leaky Bathtub Faucet?
Check for dripping water. Listen for hissing sounds. Look for water stains around the faucet.
What Tools Are Needed To Fix A Leaky Faucet?
You need a wrench, screwdriver, and replacement parts. Ensure you have plumber’s tape handy.
Can I Fix A Leaky Faucet Myself?
Yes, you can fix it yourself. Follow simple steps. Be patient. Save money by doing it yourself.
How Do I Stop A Faucet From Leaking?
Turn off water supply. Replace worn-out washers or cartridges. Tighten loose fittings. Test for leaks.
How Long Does It Take To Fix A Leaky Faucet?
It usually takes 30 minutes to an hour. Depends on experience. Prepare tools and parts beforehand.
Conclusion
Fixing a leaky bathtub faucet with one handle is simple. Follow the steps carefully. Turn off the water supply first. Then, remove the faucet handle. Check for worn-out washers or seals. Replace them if needed. Reassemble the parts properly. Turn on the water and test for leaks.
A dry bathroom means success. Regular maintenance prevents future leaks. Save water and money. Keep your faucet in top shape. Enjoy a drip-free bathroom. Now, you can fix leaks with confidence. Happy plumbing!