You’re standing in your kitchen, dreaming of a space that exudes elegance and functionality. Imagine the stunning transformation that beautifully installed kitchen cabinets with crown molding can bring to your home.
Not only do they elevate the aesthetic, but they also add a touch of sophistication that captivates anyone who steps into your kitchen. The good news? You don’t need to be a seasoned carpenter to achieve this look. With the right guidance, tools, and a bit of patience, you can master the art of installing kitchen cabinets with crown molding yourself.
As you read through this article, you’ll discover straightforward steps that demystify the installation process. You’ll learn tips that professionals use to ensure a seamless finish, and you’ll feel empowered to tackle this rewarding DIY project. Each section will guide you closer to creating the kitchen of your dreams, all while saving you money and boosting your home’s value. Ready to transform your kitchen? Let’s dive in and explore how you can achieve this remarkable upgrade.
Tools And Materials
Installing kitchen cabinets with crown molding enhances your kitchen’s elegance. Proper tools and materials ensure a smooth installation process. This guide outlines the essentials for your project.
Tools You Will Need
Gather the right tools before starting. A tape measure ensures accurate measurements. A pencil marks precise points. Use a stud finder to locate wall studs for secure cabinet mounting.
A drill with bits helps create holes for screws. A level ensures your cabinets and molding align perfectly. Use a miter saw for cutting molding at precise angles.
Have a screwdriver on hand for tightening screws. A nail gun can speed up attaching molding. Sandpaper smooths edges for a polished finish.
Essential Materials
Select high-quality materials for durability. Choose cabinets that fit your kitchen space. Crown molding adds an elegant touch above cabinets.
Wood glue strengthens joints and secures molding. Use screws and nails to attach cabinets and molding. A cabinet filler helps fill gaps between cabinets and walls.
Paint or stain protects and beautifies your wood surfaces. Caulk seals gaps between molding and walls. It provides a seamless look.
Safety Equipment
Wear safety glasses to protect your eyes from debris. Use ear protection if using loud tools. Gloves provide a secure grip and protect your hands.
Ensure your workspace is well-lit. Keep a first aid kit nearby for minor injuries. Prioritize safety throughout the project.
Credit: www.younghouselove.com
Preparing The Space
Prepare the kitchen by clearing the workspace and gathering necessary tools for installing cabinets with crown molding. Ensure walls are clean and level to support cabinet alignment. Organize materials and plan the layout for a seamless installation process.
Preparing your kitchen space for installing cabinets with crown molding is a critical step that can make or break the entire project. Think of it as setting the stage for an important performance. Without the right preparation, even the most beautifully crafted cabinets may not fit well or look as good as they should. So, how do you ensure a seamless installation? Let’s dive into the key areas you need to focus on.Measuring And Planning
Start by measuring your kitchen space with precision. Use a reliable tape measure to determine the height, width, and depth of the area where the cabinets will be installed. Double-check these measurements to avoid costly mistakes. Consider the height of the crown molding as well. It should complement the room’s dimensions without overwhelming the space. A detailed plan, noting every measurement, will guide you through the installation process. Creating a sketch or a digital model can help visualize the layout.Clearing The Area
Before you bring in the cabinets, ensure the area is clear and clean. Remove any existing fixtures or appliances that might obstruct your work. This not only makes the installation easier but also ensures your cabinets fit perfectly. Think about the tools and materials you’ll need during installation. Organize them in a designated space for easy access. Doing so minimizes interruptions and keeps the process flowing smoothly. Have you ever tried installing something only to realize you didn’t have enough room to work? Clearing the area prevents this common headache and sets you up for success.Installing Base Cabinets
Installing base cabinets in your kitchen is a crucial step that lays the foundation for your kitchen’s functionality and aesthetics. Whether you’re a DIY enthusiast or a homeowner looking to save some cash, this task can be both rewarding and challenging. Imagine the satisfaction of seeing your kitchen transform as you position each cabinet perfectly, ready to support all your culinary adventures.
Positioning The Cabinets
Start by identifying the layout of your kitchen. Measure the space meticulously to ensure each cabinet fits snugly. A helpful tip is to use painter’s tape to mark the outline of the cabinets on the floor. This visual guide will help you avoid errors.
Consider starting with the corner cabinet. It acts as a reference point for the rest. Aligning it correctly ensures the entire row of cabinets will be straight. Remember, slight misalignments can cause big issues down the line, like gaps or difficulty in installing the countertop.
Are you wondering how to keep everything level? Use a spirit level frequently as you position each cabinet. This tool is your best friend in ensuring a professional finish. A level base cabinet means a level countertop, and a level countertop means seamless installation of other kitchen elements.
Securing To The Wall
Once your cabinets are positioned, securing them is the next step. Identify the studs in your wall using a stud finder. These studs will provide the necessary support for your cabinets. If you’re unsure, gently tap the wall and listen for a solid sound, indicating a stud.
Use screws designed for cabinetry, not just any regular screws. They offer the strength and durability required to hold the cabinets firmly. When screwing into the wall, ensure you’re hitting the stud, not just drywall. Missing the stud can lead to cabinets that aren’t secure, affecting the overall stability.
As you secure the cabinets, check their alignment. Adjust as needed to maintain a straight line. A small shim can correct minor imperfections, helping the cabinets sit flush against the wall.
Installing base cabinets might seem like a daunting task, but with the right approach, it can be manageable and rewarding. Have you ever wondered why some kitchens feel more spacious and efficient than others? The secret often lies in the precision of cabinet installation. What will your kitchen’s story be?
Credit: www.cravingsomecreativity.com
Installing Wall Cabinets
Installing kitchen cabinets with crown molding adds elegance to any space. Begin by securing the wall cabinets firmly. Attach the crown molding on top with care, ensuring seamless alignment for a polished look.
Installing wall cabinets is a crucial step in giving your kitchen a polished and functional look, especially when you’re adding crown molding. This process might seem daunting, but with the right approach, you can transform your space efficiently. Let’s dive into the essential steps to get those cabinets up and ready, ensuring they align perfectly with your vision.Marking The Wall
Before you start mounting, you’ll need to create a blueprint on your wall. Use a pencil and a level to mark where the top of each cabinet will sit. Remember, precision is key here; this will guide you in aligning your cabinets perfectly. Measure the height of the wall cabinets and mark the bottom edge on the wall. Double-check these marks with a tape measure to ensure accuracy. This is where your cabinets will rest, so it’s worth taking the extra time to get it right. Think about the layout of your kitchen. Are you accounting for all appliances and other fixtures? A miscalculation now can lead to an awkward fit later. Take a moment to visualize the finished look.Mounting The Cabinets
Once your wall is marked, it’s time to mount the cabinets. Start by attaching a temporary ledger board beneath your bottom line to support the cabinets as you install them. This simple trick makes the job much easier and ensures your cabinets remain level. With the help of a friend, lift the first cabinet into place and secure it to the wall studs using screws. Be sure these are long enough to hold the weight of the cabinets and any contents you might store inside. Use a level to check each cabinet as you go. Secure each cabinet to the next one as you move along the wall. This ensures stability and creates a seamless look. Once all cabinets are mounted, remove the ledger board and admire your handiwork. You’re one step closer to a kitchen that’s both beautiful and functional. Have you considered how the crown molding will complement your cabinets? Visualize the complete picture as you work. Your attention to detail now will make for a stunning kitchen later.Adding Crown Molding
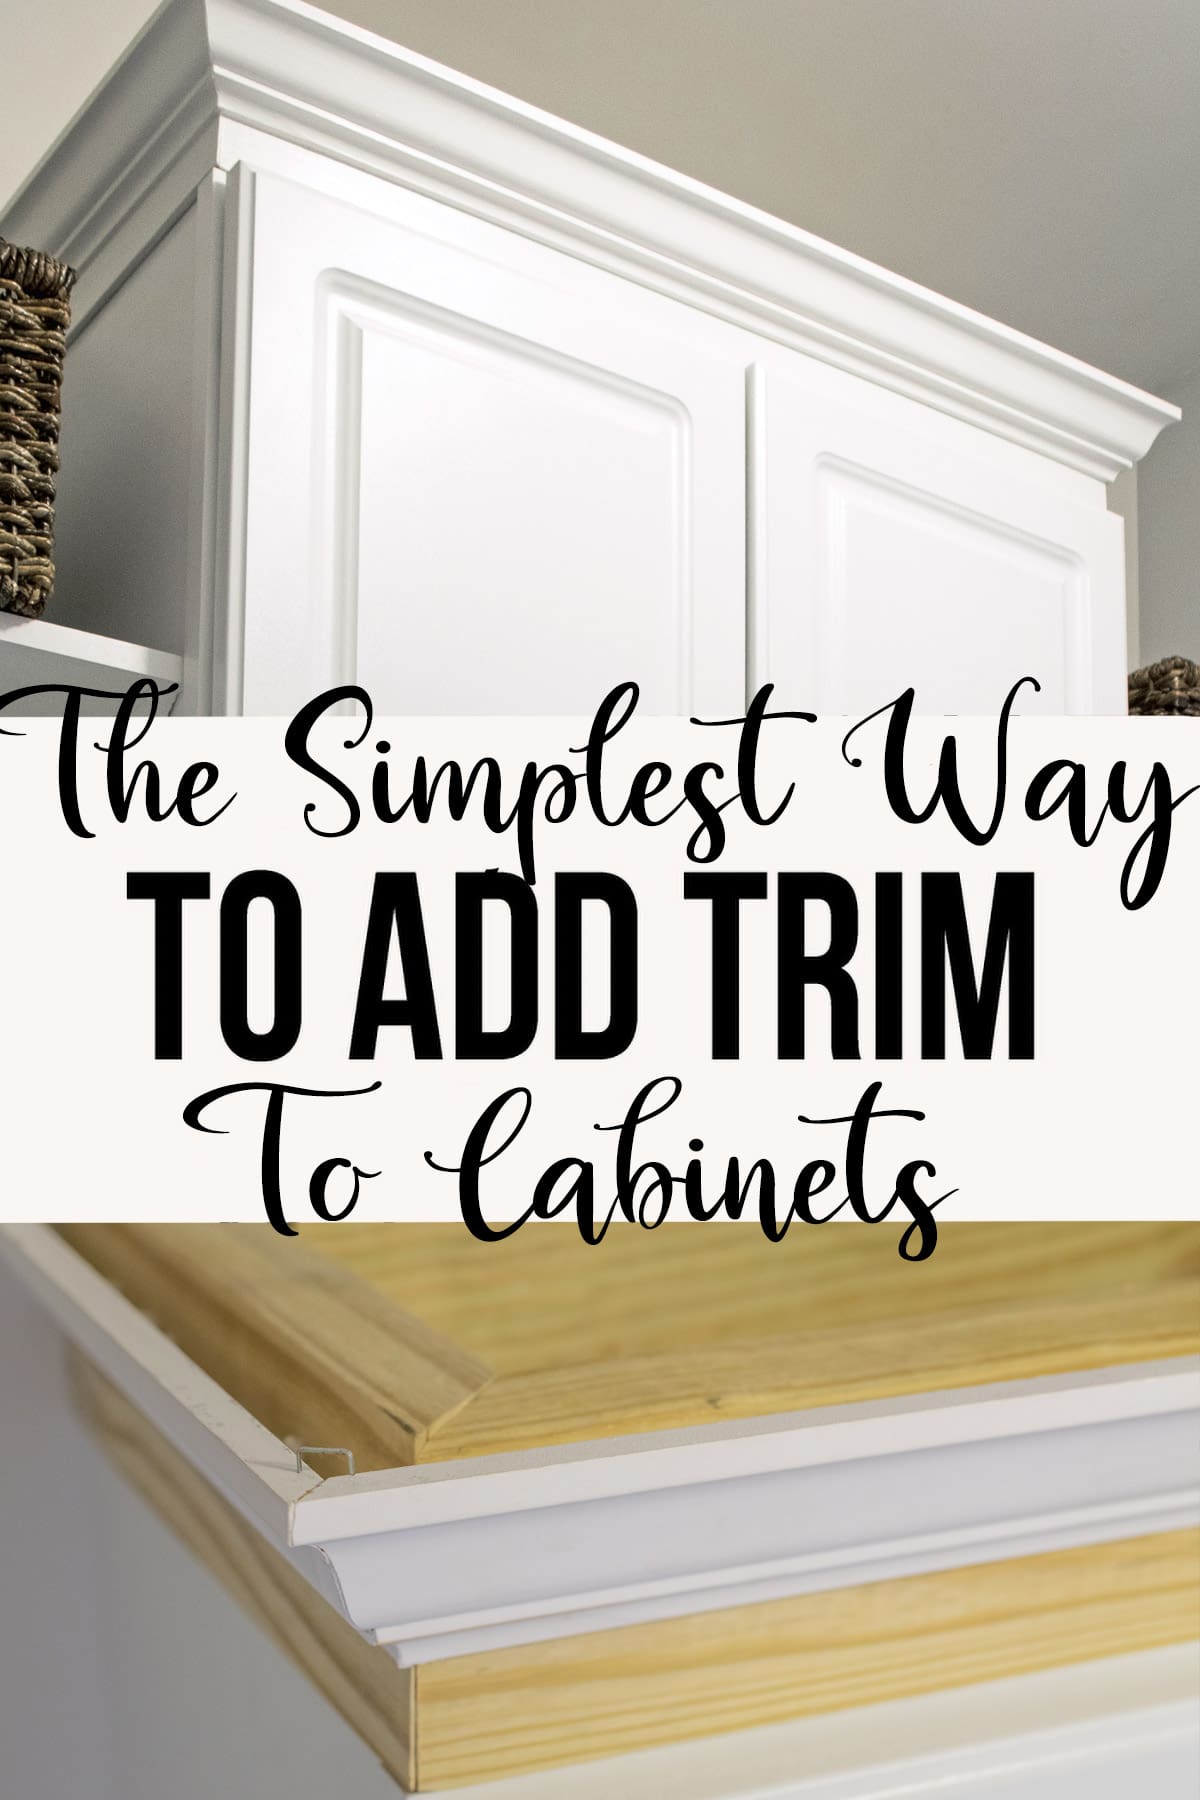
Transform your kitchen by learning to install cabinets with crown molding. This elegant touch adds style and sophistication. Follow simple steps to fit crown molding perfectly, enhancing your kitchen’s overall appeal.
Adding crown molding to your kitchen cabinets can elevate the overall aesthetic and add a touch of elegance. It’s an excellent way to give your kitchen a custom look. However, the process might seem daunting if you’ve never done it before. With a few tools and some patience, you can achieve a professional-looking finish. Let’s dive into the steps to help you add crown molding seamlessly to your kitchen cabinets.Cutting The Molding
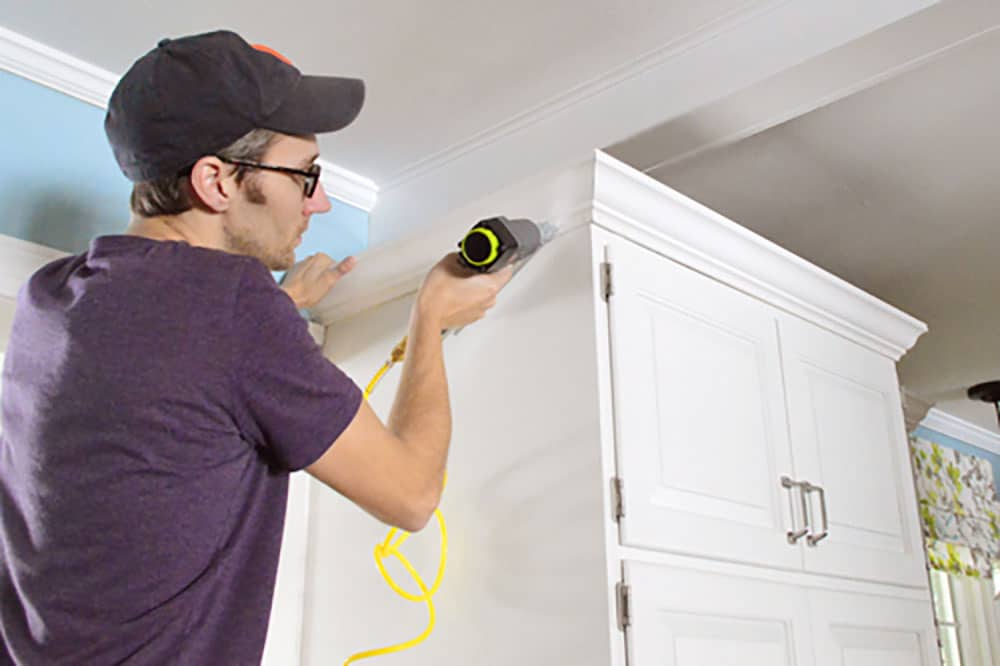
Cutting the crown molding accurately is crucial to ensure a perfect fit. Measure the length of the cabinets where you want the molding to go. Add a little extra to account for any mistakes or adjustments you might need to make. Use a miter saw for precise cuts. Set it at a 45-degree angle to cut the ends of the molding. If you’re new to this, practice on scrap pieces first to get comfortable with the angle and saw. Always wear safety goggles and gloves while cutting. It’s better to be safe than sorry. Double-check your measurements before making any cuts to avoid wasting material.Attaching The Molding
Once your pieces are cut, it’s time to attach the molding to the cabinets. Begin by applying a thin line of wood glue along the edge of the cabinet where the molding will sit. This will help hold it in place before you nail it down. Use a nail gun to attach the molding securely. Start from one end and work your way to the other, ensuring that the molding is aligned correctly as you go. If you don’t have a nail gun, small finishing nails and a hammer will work too. Check for gaps between the molding and the cabinet. If you find any, fill them with a wood filler that matches your molding’s color. This will give it a seamless appearance and make it look professionally done. Adding crown molding requires patience and precision. Have you ever tackled a project that seemed challenging at first, but became easier as you went along? With these steps, you’ll find that installing crown molding isn’t as difficult as it seems. You’ll be amazed at how this small addition can transform your kitchen.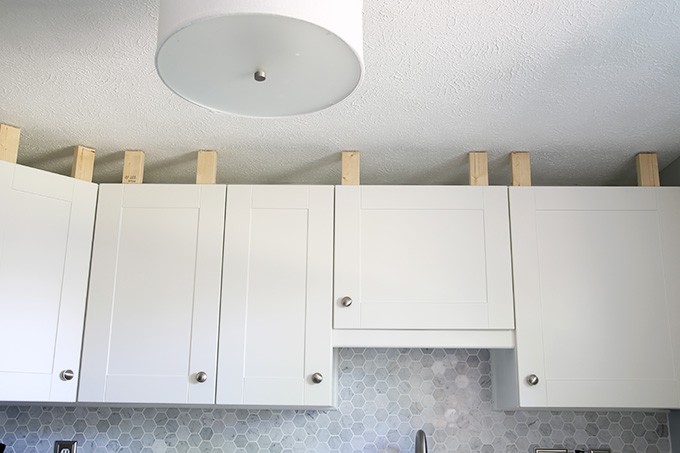
Credit: justagirlandherblog.com
Finishing Touches
After installing kitchen cabinets with crown molding, the final step is crucial. This stage ensures your cabinets not only look good but function well. Attention to detail here will make all the difference in the overall appearance and utility of your kitchen.
Aligning Doors And Drawers
Start by checking the alignment of cabinet doors and drawers. Misaligned doors can cause issues. They might not close properly or open smoothly. Use a screwdriver to adjust hinges. Align the doors so they sit evenly and open easily. Ensure the drawers glide smoothly, with no sticking.
Inspecting For Gaps
Gaps can ruin the clean lines of your cabinets. Look closely where the crown molding meets the ceiling. Ensure there are no visible gaps. Use caulking to fill any spaces, creating a seamless finish. Check the corners and edges of cabinets. Make sure they fit snugly against walls. Gaps can be fixed with trim or filler pieces. This attention to detail enhances the kitchen’s aesthetic.
Troubleshooting Common Issues
Installing kitchen cabinets with crown molding can elevate the aesthetics of your kitchen, giving it a polished and elegant look. However, the process is not always as straightforward as it seems. You might encounter some common issues that can be frustrating if you’re not prepared. Let’s dive into how you can troubleshoot these problems effectively.
Dealing With Uneven Walls
Uneven walls are a common obstacle when installing kitchen cabinets. They can make it difficult to align the cabinets properly, leading to gaps or misalignments.
First, assess the extent of the unevenness. Use a level to check if the wall is uniformly flat. If there are slight inconsistencies, shims can be your best friend. These thin pieces of material can help you balance the cabinets, ensuring they sit flush against the wall.
Consider the impact of uneven walls on your crown molding installation. You might need to adjust the molding to compensate for any irregularities. This may involve trimming the molding or using caulk to fill in any gaps.
Have you ever faced this challenge? It’s often a surprise, but tackling it head-on with the right tools can make a world of difference.
Adjusting Misaligned Cabinets
Misalignment can be a headache, especially if you’re striving for that perfect, seamless look. Cabinets that don’t line up can throw off the entire aesthetic.
Start by ensuring the base cabinets are installed correctly. Double-check the measurements and angles. Sometimes, a simple adjustment in positioning can solve the issue.
If the cabinets still appear misaligned, check the hinges and screws. Tightening or loosening them might give you the flexibility needed to adjust the alignment.
Is there a part of your kitchen that always seems to give you trouble? Remember, patience and precision are key. Small tweaks can often lead to big improvements.
As you troubleshoot these common issues, remember that every problem has a solution. With patience and the right approach, you can achieve the flawless kitchen cabinet installation you envisioned.
Maintenance Tips
Installing kitchen cabinets with crown molding adds elegance to your space. Keeping them in good shape requires regular maintenance. Proper care extends their lifespan and keeps them looking new. This section offers practical tips for maintaining your cabinets with crown molding.
Regular Cleaning
Dust your cabinets weekly to prevent buildup. Use a soft, dry cloth for best results. For deeper cleaning, mix mild soap with warm water. Dampen a cloth and gently wipe the surfaces. Avoid soaking the molding, as excess moisture can damage the wood. Rinse with a clean cloth and dry immediately.
Handling Repairs
Inspect your cabinets and molding for damage often. Look for loose or cracked molding. If you find loose sections, reattach them with wood glue. For minor scratches, use a touch-up marker matching the cabinet color. Deep cracks or significant damage may need professional repair.
Frequently Asked Questions
How Do I Measure For Crown Molding?
Measure the length of each cabinet. Add extra for corners. Use a tape measure for accuracy.
What Tools Are Needed For Cabinet Installation?
You need a drill, screws, level, measuring tape, and saw. Basic tools will suffice.
Can I Install Cabinets Alone?
Yes, but it’s easier with help. Cabinets are heavy. Assistance ensures safety.
How Do I Cut Crown Molding For Corners?
Use a miter saw. Set it at a 45-degree angle. Practice cuts on scrap wood first.
What Is The Easiest Way To Align Cabinets?
Use a level. Ensure cabinets are straight. Adjust as necessary before securing with screws.
Conclusion
Installing kitchen cabinets with crown molding transforms your space beautifully. Start with accurate measurements. Precision is key for a seamless fit. Use quality tools for a professional finish. Secure cabinets firmly to ensure safety. Crown molding adds elegance and depth.
It’s worth the effort. Follow each step carefully. Mistakes can be costly. Practice patience for best results. Double-check alignments for a flawless appearance. Enjoy your revamped kitchen. Your hard work pays off. A stylish kitchen enhances your home’s value. Share your success with friends.
They might try it too. Happy renovating!