Are you tired of the constant drip, drip, drip coming from your shower? A leaky single handle shower faucet can be more than just an annoyance; it can lead to higher water bills and even water damage over time.
But here’s the good news: you don’t need to be a plumbing expert to fix it yourself. Imagine the satisfaction of resolving this issue without waiting for a professional or dealing with the inconvenience of scheduling a repair. In this guide, we’ll walk you through the straightforward steps to get your shower back to working perfectly, saving you time and money.
Let’s dive into the process and silence that pesky leak for good.
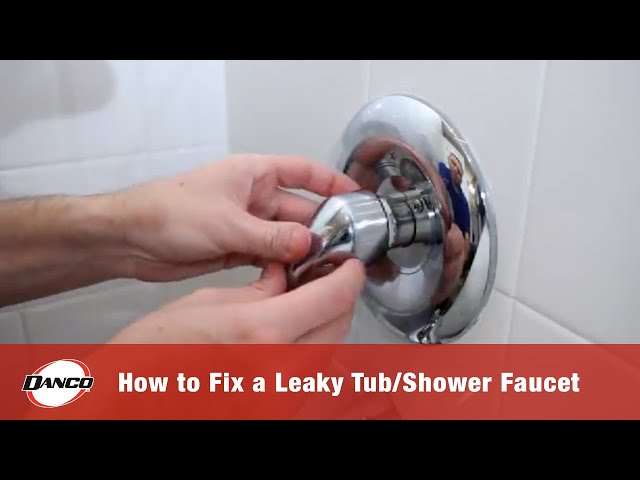
Credit: www.danco.com
Tools And Materials Needed
Fixing a leaky single handle shower faucet can save water and money. Knowing the right tools and materials is crucial. With these, the process becomes straightforward and efficient.
Tools You Will Need
Gathering the proper tools is the first step. A Phillips and flathead screwdriver are essential. You also need an adjustable wrench for loosening nuts. A set of Allen wrenches is useful for handle screws. Needle-nose pliers help with removing small parts. Don’t forget a utility knife for any caulking removal.
Materials Required
Beyond tools, you need specific materials. New washers or O-rings are often required. Purchase a replacement cartridge if necessary. Plumber’s tape is useful for creating a tight seal. A small cloth or towel helps with cleanup.
Safety Equipment
Safety should always be a priority. Wear safety goggles to protect your eyes. Gloves protect your hands from sharp edges. Keep a flashlight handy to see clearly in dark areas.
Optional Supplies
Consider having a small container nearby. It helps keep small parts organized. A lubricant can assist with stubborn screws. It’s optional but helpful.
Safety Precautions
Fixing a leaky single handle shower faucet is not just a task. It involves handling tools and working with plumbing. Safety precautions are crucial to avoid accidents or injuries. Following these precautions ensures a smooth and safe repair process.
Wearing Protective Gear
Always wear safety goggles to protect your eyes. Gloves are essential to prevent cuts and bruises. A dust mask can keep away dust and debris.
Before starting, turn off the water supply. This prevents water from gushing out unexpectedly. It also helps in reducing water wastage.
Using Proper Tools
Use the right tools for the job. Avoid makeshift solutions. This keeps you safe and makes the repair process efficient.
Ensuring A Dry Working Area
Ensure the working area is dry. Wet surfaces can lead to slips and falls. Use a towel to wipe any water spills immediately.
Understanding The Faucet Structure
Get familiar with the faucet parts. Knowing the structure helps avoid unnecessary damage. Refer to the manual if needed.
Checking For Electrical Hazards
Ensure there are no electrical outlets nearby. Water and electricity are a dangerous combination. Be cautious to avoid any shocks.
Turning Off Water Supply
Shut off your home’s water supply before fixing a leaky single-handle shower faucet. This prevents water damage during repairs. Ensure all faucets are off to avoid pressure build-up.
Turning off the water supply is crucial when fixing a leaky single handle shower faucet. If you skip this step, you might end up with more than just a leaky faucet—water could flood your bathroom, causing a real mess. Imagine the frustration of trying to fix a problem while making it worse; it’s enough to make anyone feel overwhelmed.Understanding Your Water Supply
Before you start, take a moment to identify where your water supply is located. Typically, you’ll find the main shut-off valve near your water meter or in your basement. It’s essential to be aware of this even if you’re not planning to fix anything right now—it could save you in future emergencies.Locating The Shut-off Valve
The shut-off valve is often tucked away in a corner, perhaps under the sink or behind the shower. You might have to move a few items to get to it. Once you locate it, make sure it’s easily accessible. If it’s hard to turn, consider using a wrench or seeking help.Turning Off The Water
When you’re ready, twist the valve clockwise to stop the water flow. This might take a little force, so don’t be afraid to apply some pressure. You’ll know it’s off when the water stops running. This simple action prevents further leaks while you work on repairs.Testing The Shut-off
After turning off the water, test your faucet to ensure no water comes through. This is a vital step. If you still see water, the valve may not be completely closed. Double-check its position. Remember, safety first—always ensure water is off before proceeding.Personal Insight
I remember the first time I tackled a leaky faucet. I was so eager to fix it that I forgot to turn off the water supply. My bathroom turned into a mini swimming pool, and I learned my lesson the hard way. Don’t rush—taking your time with these steps can save you from a similar mishap. Turning off the water supply is not just a technical step; it’s about ensuring peace of mind. Knowing you’ve taken the right precautions allows you to focus on solving the problem effectively. Wouldn’t it be great if fixing every household issue started with such a straightforward action?Removing The Faucet Handle
Fixing a leaky single handle shower faucet starts with removing the handle. This step may seem daunting, but it’s straightforward with guidance. Handling this task with care ensures no further damage. Let’s break down the process into simple, manageable steps.
Identifying The Handle Type
Determine your faucet handle type before starting. Handles vary in design and removal methods. Common types include lever and knob handles. Knowing the type helps in using the right tools.
Gathering The Necessary Tools
Prepare the tools required for the task. A screwdriver, Allen wrench, and a flashlight are essential. Having a cloth handy helps protect surfaces and catch small parts.
Turning Off The Water Supply
Locate and turn off the water supply. This prevents water flow during the repair. Turn the valve clockwise to shut off the water completely. Confirm the water is off by turning the faucet handle.
Removing The Handle Cap
Begin by removing the handle cap. Use a flathead screwdriver for this task. Gently pry the cap off to expose the screw beneath. Be cautious to avoid scratching the surface.
Unscrewing The Handle
Once the cap is removed, unscrew the handle. Use an appropriate screwdriver or Allen wrench. Turn the screw counterclockwise to loosen it. Keep all screws safe for reassembly.
Detaching The Handle
Gently pull the handle away from the wall. If it’s stuck, wiggle it slightly to loosen. Avoid using excessive force to prevent damage. Place the handle and screws aside for later use.
With the handle removed, you’re ready for the next repair steps. Each action brings you closer to fixing the leak.
Accessing The Cartridge
Start by turning off the water supply. Then, remove the shower handle to access the cartridge. This step is crucial for fixing a leaky single handle shower faucet.
Accessing the cartridge in your single handle shower faucet is a crucial step to stop that annoying drip. Before you can replace or repair the cartridge, you need to get to it. This process might seem daunting, but with the right guidance, you can handle it like a pro. Imagine the satisfaction of fixing that leak yourself—it’s easier than you think! Let’s break it down step by step so you can tackle this task with confidence.Unscrewing The Escutcheon Plate
To start, you’ll need to remove the escutcheon plate. This is the decorative plate that covers the shower valve. First, shut off the water supply to avoid any unwanted surprises. Grab a screwdriver and remove the screws holding the escutcheon plate in place. If the plate seems stuck, gently wiggle it until it comes loose. Remember, patience is your friend here. Once the plate is off, you’ll see the valve assembly. It’s a little like opening a treasure chest—only this time, your treasure is a working shower. Have you ever thought about how much money you could save by fixing this yourself?Extracting The Cartridge
Now comes the exciting part—extracting the cartridge. Use a cartridge puller if it’s available; it makes the job a lot easier. If not, a pair of pliers will do. Carefully pull the cartridge straight out. You might face some resistance, but keep at it. This is where your effort pays off. Take a moment to inspect the cartridge. Is it damaged or simply worn out? Understanding its condition helps you decide whether to replace it or clean it. How many times have you overlooked simple fixes thinking they were complicated? Sometimes, a little cleaning might be all it needs. Once you’ve extracted the cartridge, you’re ready to move on to the next steps. You’re on the path to a leak-free shower, and it feels good, doesn’t it?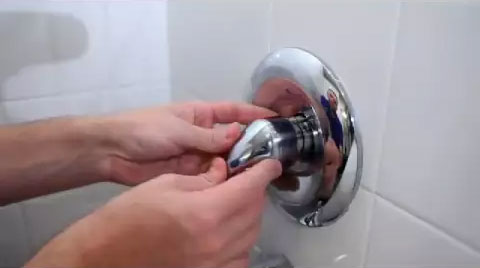
Credit: www.danco.com
Inspecting The Cartridge
Inspecting the cartridge is crucial for fixing a leaky single handle shower faucet. Begin by turning off the water supply. Remove the handle to access the cartridge and examine it for wear or damage. Replace any faulty parts to prevent leaks and restore proper function.
Inspecting the cartridge is a crucial step in fixing a leaky shower faucet. This small part regulates the flow and mix of water. A faulty cartridge often leads to leaks. Proper inspection can save you from costly repairs. This guide will help you understand how to check the cartridge correctly.Identifying Cartridge Type
Different faucets use different cartridges. Knowing your cartridge type is essential. Look for model numbers or brand names on your faucet. If unsure, consult your manual or search online. This ensures you buy the right replacement if needed.Removing The Handle
First, turn off the water supply. Then, remove the faucet handle. Usually, a screw holds it in place. You might need an Allen wrench or screwdriver. Keep these tools handy. Once the screw is removed, gently pull off the handle. After removing the handle, access the cartridge. You may see a collar or cap covering it. Unscrew or unclip these parts. Be careful not to damage them. They protect the cartridge and help keep it secure.Inspecting For Damage
Look closely at the cartridge for signs of wear. Cracks or breaks mean you need a replacement. Also, check for mineral build-up. Cleaning might solve minor issues. Use a soft brush or cloth to remove debris.Testing The Cartridge
Reassemble the faucet temporarily to test the cartridge. Turn on the water supply. Check for leaks or drips. If problems persist, consider replacing the cartridge. Testing ensures everything works before full reassembly.Replacing The Cartridge
Replacing the cartridge in a single handle shower faucet can stop leaks. It is a straightforward process if you have the right tools. This task doesn’t require professional skills. With a little patience, you can fix it yourself.
Step 1: Gather Your Tools
You’ll need a few basic tools. A screwdriver, pliers, and a replacement cartridge are essential. Make sure the replacement cartridge fits your faucet model. Check the packaging or manual for details.
Step 2: Turn Off The Water Supply
Before starting, turn off the water supply. Look for the valve near your shower. Twist it clockwise to stop the water flow. This prevents water damage while you work.
Step 3: Remove The Faucet Handle
Use a screwdriver to remove the handle. Locate the screw under the decorative cap. Pry off the cap with a flathead screwdriver. Unscrew and gently pull the handle off.
Step 4: Extract The Old Cartridge
Once the handle is off, you’ll see the cartridge. Use pliers to grip the cartridge stem. Pull it straight out. It may require some force if it’s stuck.
Step 5: Install The New Cartridge
Insert the new cartridge into the faucet body. Align it properly with the slots inside. Push it in firmly until it clicks into place.
Step 6: Reassemble The Faucet
Reattach the faucet handle. Secure it with the screw you removed earlier. Replace the decorative cap to cover the screw.
Step 7: Restore The Water Supply
Turn the water supply back on. Twist the valve counterclockwise to resume water flow. Test the faucet for leaks by turning it on and off.
Reassembling The Faucet
Fixing a leaky single handle shower faucet requires careful reassembly. Start by aligning all components properly. Tighten screws and nuts securely to prevent future leaks.
Reassembling a leaky single handle shower faucet requires patience and precision. Once you’ve identified and replaced the faulty parts, it’s crucial to put everything back correctly. This ensures the faucet functions smoothly and prevents future leaks. Follow these steps to reassemble your faucet with confidence.Step 1: Align The Cartridge
Ensure the cartridge is positioned correctly. It should fit snugly in the valve body. Misalignment can lead to further leaks. Check the alignment marks, if available, and adjust accordingly.Step 2: Secure The Retaining Clip
Slide the retaining clip back into place. It holds the cartridge firmly. Use needle-nose pliers for better grip. Ensure it snaps securely, preventing any movement.Step 3: Reattach The Faucet Handle
Place the handle back onto the cartridge stem. Align it properly with any notches. Fasten the screw using a screwdriver. Ensure it’s tight but not overtightened.Step 4: Install The Escutcheon Plate
Position the escutcheon plate against the wall. Secure it with screws if required. Ensure it sits flush to prevent water seepage. This adds a finished look to the faucet.Step 5: Turn On Water Supply
Slowly turn on the water supply. Check for any leaks around the faucet. If leaks persist, recheck the cartridge alignment. Proper reassembly ensures a leak-free shower experience. Reassembling a faucet may seem daunting. With these steps, it becomes manageable. Enjoy your newly fixed shower faucet without worry.Testing For Leaks
Detecting leaks in a single handle shower faucet is crucial. Start by turning off the water supply to inspect the faucet closely. Replace worn-out washers or seals with new ones to stop the water from dripping. This simple fix saves water and prevents damage over time.
Fixing a leaky single-handle shower faucet might seem daunting, but testing for leaks can be straightforward. This crucial step helps identify where the water is escaping, enabling you to focus your repair efforts effectively. Whether you’re a DIY enthusiast or a complete novice, understanding how to test for leaks can save you both time and frustration.Step 1: Turn Off The Water Supply
First, ensure the water supply to your shower is turned off. Locate the shut-off valve, often found behind a panel near the shower or in the basement. Turning off the water prevents further leakage and makes the testing process safer and more manageable.Step 2: Remove The Handle And Trim
Carefully remove the handle and trim of the shower faucet using a screwdriver. Keep all screws and small parts in a safe place to avoid losing them. This step exposes the valve, allowing you to inspect for potential leak points.Step 3: Examine The Valve For Damage
With the valve exposed, check for visible signs of wear or damage. Look for cracks, corrosion, or loose fittings that might be causing the leak. A tiny crack might seem insignificant, but it can lead to significant water loss over time.Step 4: Conduct A Water Flow Test
Turn the water supply back on slightly and observe the valve. Watch closely for any water escaping from areas it shouldn’t. If water seeps out, you’ve likely found your leak source. A friend once told me how he traced a leak to a tiny gasket simply by watching the water flow closely.Step 5: Document Your Findings
Take notes or photos of any issues you discover. This documentation will help if you need to consult a professional or when purchasing replacement parts. It ensures you don’t miss any critical details when reassembling your faucet.Step 6: Reflect On The Process
After testing, consider what you’ve learned about your shower faucet’s condition. Were there multiple leaks, or was it a single issue? Reflecting on this can inform your next steps and help you prevent future leaks. Testing for leaks may reveal unexpected insights about your shower system. Have you discovered more about your plumbing than anticipated? Share your thoughts or experiences in the comments below, and let’s learn together.Tips For Maintenance
Maintaining a single handle shower faucet is crucial for preventing leaks. Regular care ensures your faucet operates smoothly and lasts longer. Simple maintenance tips can save money and reduce the need for repairs. Discover how easy it is to keep your shower faucet in top shape.
Inspect For Mineral Buildup
Hard water can cause mineral deposits on your faucet. Inspect the area around the handle regularly. Use vinegar to remove buildup. Soak a cloth in vinegar and wrap it around the faucet. Leave it for an hour, then wipe clean. This helps prevent corrosion and keeps the faucet functioning well.
Check The O-rings
O-rings can wear out over time. They are small rubber rings inside the faucet. If your faucet drips, inspect these rings. Replace them if they’re cracked or damaged. This simple fix can stop leaks. Always keep spare O-rings handy for emergencies.
Lubricate Moving Parts
Friction can cause parts to wear out. Use plumber’s grease to lubricate moving parts. Apply a small amount around the handle and cartridge. This keeps the faucet turning smoothly. Regular lubrication can extend the life of your faucet.
Tighten Loose Screws
Loose screws can cause instability in your faucet. Check all screws regularly to ensure they are tight. Use a screwdriver to secure them properly. Loose screws can lead to bigger problems if ignored. Tightening them is a quick and easy maintenance task.
Replace Worn Out Parts
Parts like washers and seals can wear out. Inspect them during regular maintenance checks. Replace any worn-out pieces immediately. This prevents leaks and keeps your faucet working efficiently. Keep spare parts available for quick replacements.
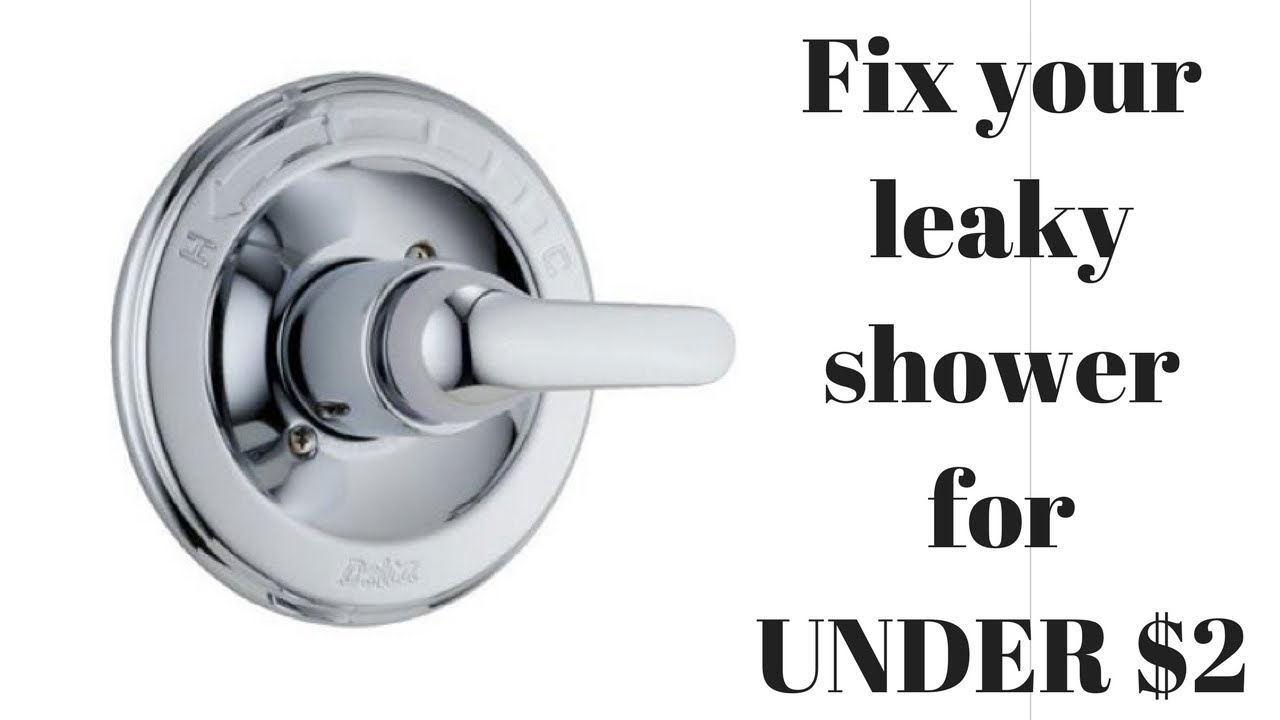
Credit: www.youtube.com
Frequently Asked Questions
How Do I Identify A Leaky Shower Faucet?
Check for dripping water when the faucet is off. Listen for constant water sounds.
What Tools Are Needed To Fix A Leaky Faucet?
You need a wrench, screwdriver, and replacement parts. These tools help with disassembly and reassembly.
Can I Fix The Leak Myself Without A Plumber?
Yes, you can fix it. Follow step-by-step guides. Use basic tools and replacement parts.
Why Does My Single Handle Faucet Leak?
Worn-out washers or seals cause leaks. Mineral build-up can damage parts. Regular maintenance prevents issues.
How Long Does It Take To Fix A Leaky Faucet?
Repairing takes about 30 minutes. Time varies with experience. Gather all tools and parts first.
Conclusion
Fixing a leaky shower faucet is simpler than you think. Follow the steps. You’ll save water. Reduce bills too. Start by gathering necessary tools. Turn off the water supply. Disassemble the handle carefully. Check for damaged parts. Replace faulty washers and O-rings.
Reassemble with precision. Test for leaks by turning on the water. A dry bathroom means success. Regular maintenance prevents future leaks. Keep an eye on wear and tear. Enjoy a leak-free shower. A little effort goes a long way. You’ve got this.
Stay proactive. Your shower will thank you.