Are you dreaming of a kitchen makeover that balances style with durability? Imagine transforming your space with sleek, modern concrete countertops that you crafted yourself.
It’s not just a way to personalize your kitchen, but also an opportunity to add a touch of artistry to your home. Concrete countertops are not only trendy but also incredibly resilient, offering a unique blend of aesthetics and functionality.
If you’ve ever thought about diving into a DIY project that will leave a lasting impression, you’re in the right place. This guide will walk you through the simple steps to make your own concrete kitchen countertops, tailored to your tastes and needs. Curious about how you can turn a few bags of concrete into a stunning kitchen centerpiece? Let’s get started!
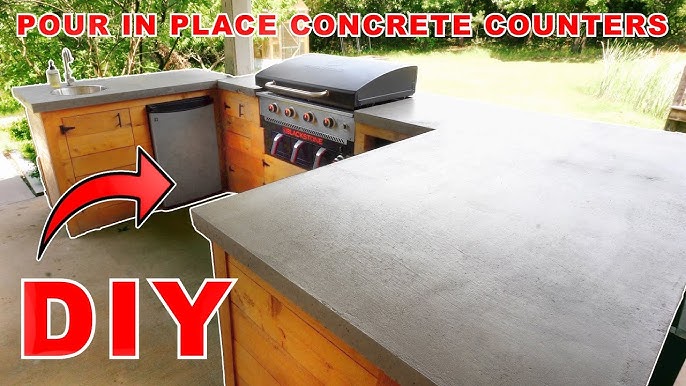
Credit: m.youtube.com
Benefits Of Concrete Countertops
Concrete kitchen countertops offer a unique blend of style and functionality. They are gaining popularity among homeowners for their distinct advantages. Discover why concrete countertops might be the ideal choice for your kitchen.
Durability
Concrete countertops are incredibly strong. They withstand daily wear and tear easily. You won’t worry about chips or scratches. Their robust nature makes them ideal for busy kitchens.
Customizable Design
Concrete offers endless design possibilities. You can choose colors, textures, and finishes. Personalize your kitchen to match your taste. It’s like having a blank canvas for your creativity.
Heat Resistance
Concrete handles heat well. Place hot pots directly on the surface. No fear of damage from high temperatures. This makes cooking more convenient.
Easy Maintenance
Maintaining concrete countertops is simple. Regular sealing keeps them looking new. Cleaning is hassle-free with mild soap and water. Spend less time worrying about upkeep.
Eco-friendly Option
Concrete is a sustainable choice. It uses natural materials in production. Choosing concrete reduces your environmental footprint. It’s a conscious choice for eco-aware homeowners.
Unique Aesthetic
Concrete adds a unique touch to any kitchen. It provides a modern and sleek look. Enjoy a stylish and sophisticated space. Your kitchen becomes a conversation starter.
Tools And Materials Needed
Creating concrete kitchen countertops involves gathering key tools and materials. Essential items include concrete mix, sealant, and molds. Tools such as trowels, mixers, and safety gear are crucial for smooth execution.
Creating concrete kitchen countertops is an exciting project that requires a specific set of tools and materials. Whether you’re a DIY enthusiast or a homeowner looking to add a personal touch to your kitchen, knowing exactly what you’ll need can make the process smoother and more enjoyable. As you gear up for this venture, consider how each tool and material plays a crucial role in achieving that sleek, modern look.
Essential Tools For The Job
To start, you’ll need basic tools that might already be in your garage or toolbox. A concrete mixer is key for ensuring your concrete is properly blended. If you don’t have one, renting is a viable option.
A trowel is essential for smoothing the surface. A good-quality trowel will help you achieve a professional finish.
A sander will aid in polishing the countertop once it’s cured. This step is crucial for achieving a smooth and glossy surface.
Must-have Materials
The core material is, of course, concrete mix. Opt for a high-strength mix for durability. You might be surprised at the variety available, so choose one that suits your desired finish.
Reinforcement materials like wire mesh or rebar are necessary for strength. They prevent cracking and ensure longevity.
Sealants are vital for protecting the surface from stains and water damage. Pick a high-quality sealant to safeguard your hard work.
Safety Gear
Don’t overlook safety gear. Concrete work can be messy and hazardous. Gloves are crucial to protect your skin from the harsh mix.
Safety goggles and a dust mask will shield you from dust and debris. Safety should always be a priority.
Additional Supplies
Consider molds for shaping your countertop. Molds define the final shape and dimensions. Custom molds can make your countertop uniquely yours.
Pigments are optional but offer a chance to personalize. Adding color can turn a simple concrete surface into a stunning focal point.
Practical Tips And Insights
Reflect on the space you’re working with. Will your tools fit comfortably? Is your workspace well-ventilated?
Do you have enough time to dedicate to curing? Concrete needs patience and proper timing to set perfectly.
Have you thought about the maintenance? A well-made concrete countertop is low maintenance, but regular sealing keeps it pristine.
Embarking on creating concrete kitchen countertops is a journey filled with learning and creativity. Are you ready to transform your kitchen with your own hands?
Preparing The Work Area
Clear the space for safety and efficiency. Ensure all tools and materials are within reach. This helps prevent delays and accidents while working.
Embarking on the journey to create your own concrete kitchen countertops is exciting and rewarding. However, the success of this project heavily depends on how well you prepare your work area. Getting this initial step right sets the tone for the rest of your DIY adventure. Proper preparation ensures safety and efficiency, saving you from potential headaches down the road.
Clearing And Cleaning The Space
Begin by decluttering the area where you’ll be working. Move any kitchen appliances, utensils, and personal items away from the workspace. This not only gives you ample room to maneuver but also protects your belongings from dust and debris.
Once the area is clear, thoroughly clean the surfaces. Use a damp cloth to wipe away dust, grease, or any residues. A clean space ensures that your concrete mixture adheres properly, giving your countertops the durability they need. It’s surprising how a simple task like cleaning can make a significant difference in your project’s outcome.
Setting Up A Safe Work Environment
Safety should be your top priority. Make sure the area is well-ventilated to avoid inhaling concrete dust. Open windows or use fans to maintain airflow.
Equip yourself with safety gear such as gloves, goggles, and a mask. These protect you from potential hazards like chemical irritations or injuries. I remember my first attempt at DIY concrete work, and how I underestimated the need for gloves. Let’s just say, it’s an experience I wouldn’t want you to repeat.
Lastly, check your tools and equipment. Ensure they are in good working condition. Faulty tools can lead to accidents and delays. Are your tools reliable and ready for use?
By preparing your work area with these steps, you set a solid foundation for your concrete countertop project. It’s all about creating a safe, organized, and functional space that enhances your DIY experience. Are you ready to start?
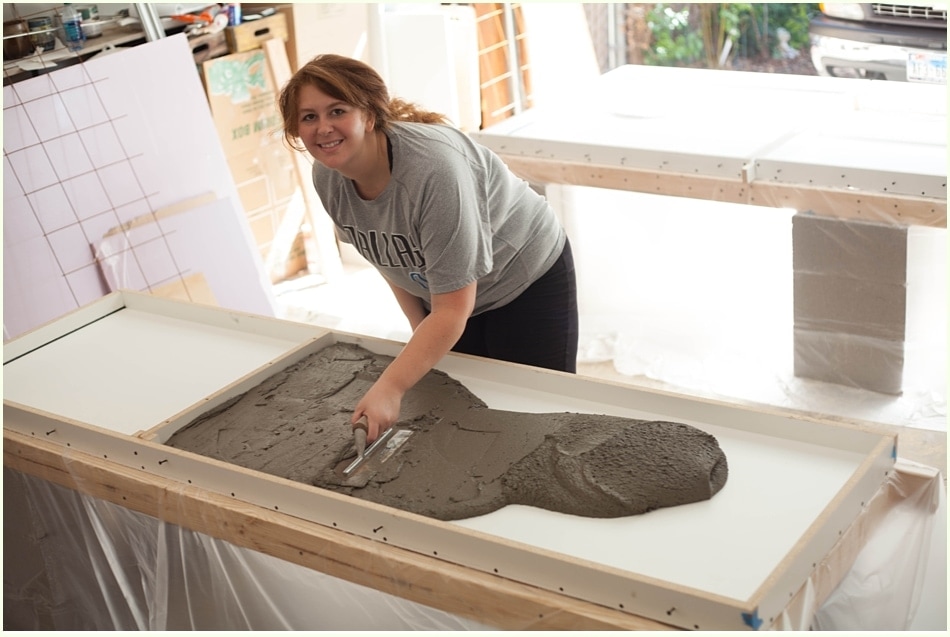
Credit: www.runtoradiance.com
Design And Planning
Design and planning are crucial steps in creating concrete kitchen countertops. These steps shape the functionality and style of your kitchen. Thoughtful planning ensures the countertops fit seamlessly into the overall design.
Choosing The Right Design
Consider the style of your kitchen. Concrete offers flexibility in design. Do you prefer a modern look or a rustic feel? Each style impacts the choice of color and texture. Smooth finishes give a sleek appearance. Textured surfaces add character and depth. Custom edges can enhance the design. Decide on the overall vibe you want.
Measuring And Marking Dimensions
Accurate measurements are essential for a perfect fit. Measure the length and width of your space. Note the depth needed for your countertops. Use a measuring tape for precision. Mark dimensions clearly with chalk or pencil. Double-check your measurements. This ensures the concrete fits properly.
Building The Mold
Creating concrete kitchen countertops starts with building a sturdy mold. Use wood to form the desired shape. Ensure corners are smooth for a neat finish.
Building the mold for your concrete kitchen countertops is a pivotal step in the DIY process. This stage determines the final shape and size of your countertop, so precision is key. Whether you’re aiming for sleek modern lines or something more rustic, the mold sets the foundation.
Selecting The Mold Material
Choosing the right mold material is crucial for your project’s success. Melamine board is a popular choice because it’s smooth, inexpensive, and readily available at most hardware stores. If you want a polished finish, consider using acrylic or laminate sheets for a slick surface.
Think about how each material will interact with concrete. Plywood may work for a rustic finish, but it can absorb water and warp over time. If you’ve used a particular material before and had success, maybe it’s worth revisiting that choice.
Constructing The Mold Frame
The mold frame is like a cookie cutter for your countertop, and constructing it requires accuracy. Begin by measuring your countertop space and cutting the mold material to size, leaving a bit of extra space for sanding down.
Use screws instead of nails to join the pieces, as they provide a stronger hold. Double-check your corners with a carpenter’s square. A small mistake here could mean a misaligned countertop later.
Are you someone who loves to add a unique touch? Consider adding inserts or curves to your mold frame for distinctive edges. It’s your kitchen, after all—why not make it uniquely yours?
Sealing The Mold
Sealing the mold is essential to prevent concrete from sticking to the surface and ruining your hard work. Use silicone caulk to seal the joints and any gaps in the mold. This creates a waterproof barrier that ensures a clean release after the concrete sets.
Apply the silicone generously and smooth it out with a finger or tool, ensuring it fills every nook and cranny. Allow it to dry thoroughly before pouring the concrete. Have you ever skipped this step? It can lead to a messy cleanup and a less-than-perfect finish.
Sealing also allows you to include creative design elements like inlays or textures. Think about how you want your countertop to stand out and integrate those ideas at this stage.
Mixing The Concrete
Creating concrete kitchen countertops involves mixing cement, sand, and water. Add gravel for extra strength. Stir until smooth and pour into molds for a sleek, durable finish.
Mixing the concrete is a crucial step in creating stunning kitchen countertops. This process lays the foundation for durability and aesthetic appeal. Whether you’re aiming for a sleek modern look or a rustic charm, getting the mix right is key. You’ll be amazed at how the texture and color can transform your kitchen.
Choosing The Right Concrete Mix
Picking the perfect concrete mix can feel like choosing the right ingredients for a delicious recipe. You want something that will withstand daily use and look fantastic. Portland cement is a popular choice due to its strength and versatility. You might also consider mixes that include polymer additives for added flexibility.
A friend once used a mix with added polymer for her kitchen, and it’s still holding up beautifully after years of use. So, what’s your priority? Strength, appearance, or both?
Adding Color And Texture
Color and texture can turn your concrete countertop into a masterpiece. You can add pigments directly into the mix to achieve the desired hue. Imagine a soft gray that complements stainless steel appliances or a bold black that makes a statement.
Textures are just as vital. Think about using aggregate materials like small stones or glass pieces. These can be added to the mix to give the surface a unique look and feel. I once tried adding crushed glass to a countertop mix, and the subtle sparkle was a delightful surprise.
Adding color and texture is your chance to personalize your kitchen. What vibe are you aiming for? A smooth finish or a gritty texture?
Pouring The Concrete
Creating your own concrete kitchen countertops can be a rewarding project, adding a unique and personal touch to your kitchen. The process involves several steps, and one of the most crucial is pouring the concrete. Ensuring the mixture is poured correctly will not only affect the appearance but also the durability of your countertops. Let’s dive into some techniques and tips to make sure you achieve a smooth and flawless finish.
Pouring Techniques
Start by ensuring your mold is clean and properly assembled. A snug fit will prevent leaks and ensure a uniform thickness. When you pour the concrete, do it gradually. This helps avoid trapping air bubbles that can weaken the structure. Consider dividing the mix into manageable batches for more control.
Use a scoop or a trowel to guide the concrete into corners and edges. This ensures every nook is filled and minimizes the need for patching later. Don’t rush—taking your time here saves trouble down the line. Have you ever rushed a project only to redo parts of it?
Vibrating The Mold
Vibrating the mold is essential to eliminate air pockets. These pockets can cause voids and weaken your countertop. Use a rubber mallet or a handheld sander to gently vibrate the mold. This encourages the concrete to settle into all areas.
Be consistent but gentle with your vibrations. Too much force can cause the mold to shift, leading to uneven surfaces. If you notice air bubbles rising, you’re on the right track. Ever wondered why some countertops look flawless while others appear rough?
As you continue, observe the surface. A smooth top means the concrete is settling properly. Adjust your technique based on what you see. What techniques have you tried that resulted in a perfect finish?
Pouring concrete for your kitchen countertop is a skill that improves with practice. By focusing on technique and being attentive to detail, you can create a stunning centerpiece for your kitchen. Remember, a steady hand and patience will lead you to success.
Curing And Finishing
Proper curing and finishing ensure durability for concrete kitchen countertops. Moisture must be controlled during the curing process. Smooth finishing adds aesthetic appeal and makes countertops easy to clean.
Creating a concrete kitchen countertop is a rewarding project. The curing and finishing process is crucial. It ensures durability and a smooth surface. This phase brings your countertop to life. Proper curing and finishing enhance the beauty and strength of concrete. Let’s delve into the essential steps.
Curing Time And Conditions
Concrete needs time to cure properly. Curing usually takes about 28 days. During this period, keep the surface moist. Moisture helps concrete harden and gain strength. Cover the countertop with plastic sheeting. This retains moisture. Check the temperature regularly. Ideal curing temperature is between 50°F and 75°F. Avoid direct sunlight and drafts. These can cause cracks and weaken the surface.
Sanding And Polishing
Once cured, it’s time to sand the surface. Start with coarse grit sandpaper. This removes rough edges and imperfections. Gradually move to finer grits. This process smoothens the surface. Next, polish the countertop. Use a concrete polisher for best results. Polishing adds shine and highlights the natural beauty. Apply a concrete sealer after polishing. This protects the surface from stains and scratches. Sealing also enhances the countertop’s appearance. Follow the manufacturer’s instructions for the best results.
Sealing The Countertop
Sealing the countertop protects your concrete kitchen surface from stains and scratches. Apply a food-safe sealant evenly for best results. This ensures a durable, easy-to-clean finish, enhancing the kitchen’s overall appearance and functionality.
Sealing your concrete kitchen countertop is crucial. It protects against stains and water damage. The right sealant enhances durability and longevity. Proper sealing also adds a sleek finish. This section explores sealant choices and application tips.
Choosing The Right Sealant
Selecting the right sealant is vital. Some sealants offer glossy finishes. Others provide a matte look. Consider the countertop’s exposure to heat. High-performance sealants withstand temperature changes. Check for food-safe sealants. These ensure safety in food preparation areas.
Understand the sealant’s durability. Long-lasting sealants reduce the need for frequent reapplication. Assess the ease of application. Some sealants are user-friendly. Others may require professional help. Read product reviews. They offer insights into performance and reliability.
Application Techniques
Applying the sealant correctly is important. First, clean the countertop thoroughly. Remove dust and debris. Follow the sealant’s instructions. Each product may have different guidelines. Use a brush or roller for application. Ensure even coverage.
Apply the sealant in thin layers. Allow each layer to dry. This prevents bubbles and streaks. Drying time varies by product. Check the packaging for details. Maintain proper ventilation during application. Good airflow helps the sealant cure.
Avoid using the countertop immediately after sealing. Allow sufficient curing time. This ensures the sealant sets properly. Follow up with regular maintenance. Reapply the sealant as needed. This keeps your countertop looking fresh.
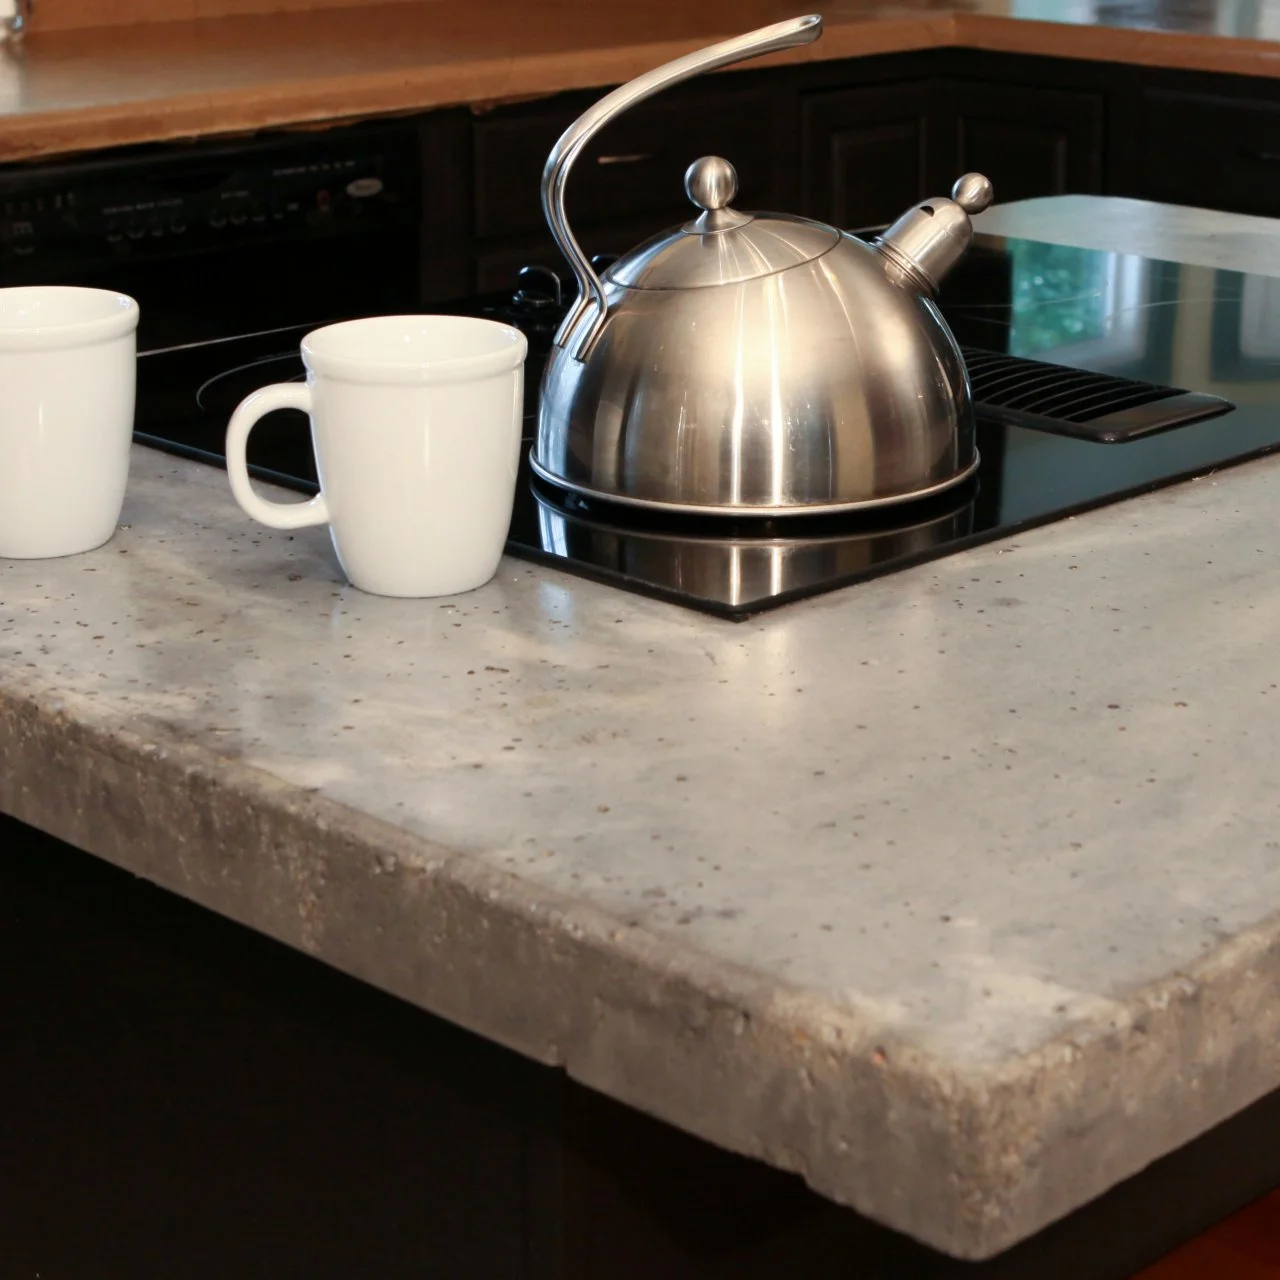
Credit: www.hgtv.com
Installing The Countertop
Installing your concrete kitchen countertop can be a fulfilling task. With precision, the result is both functional and stylish. This process requires careful handling and securing. Follow these steps to ensure success.
Transporting The Countertop
Transporting the countertop requires careful planning. Concrete is heavy and can crack easily. Use a dolly or cart for moving. Always have extra hands to help. Secure the countertop with straps during transport. This prevents slipping or shifting. Protect edges with foam or padding to avoid damage.
Securing In Place
Once in position, securing the countertop is crucial. Place the countertop gently on the cabinets. Check alignment and adjust if needed. Use a level to ensure even placement. Apply silicone caulk to the edges for stability. Fasten the countertop with brackets underneath. These hold it firmly in place.
Check for any gaps between the countertop and walls. Fill gaps with caulk for a seamless finish. Let the caulk dry before using the countertop. This ensures a strong bond and prevents moisture damage.
Maintenance Tips
Ensuring your concrete kitchen countertops remain stunning involves regular sealing to prevent stains. Clean spills promptly using a mild soap solution. Avoid placing hot pots directly on the surface to reduce the risk of cracks. Regular maintenance keeps your countertops looking fresh and durable for years.
Concrete kitchen countertops offer a unique and stylish look. But maintaining their beauty requires regular care. Proper maintenance extends their lifespan and keeps them looking fresh. Here are some essential tips to help you care for your concrete kitchen countertops.
Cleaning Methods
Cleaning concrete countertops is simple. Use a mild dish soap mixed with warm water. Gently wipe the surface with a soft cloth. Avoid harsh chemicals or abrasive sponges. They can damage the sealant and surface. For stubborn stains, a mixture of baking soda and water works well. Apply it on the stain and let it sit for a few minutes. Then, gently scrub and rinse with water.
Repairing Minor Damages
Minor chips or cracks can occur over time. Repair them quickly to prevent further damage. Use a concrete patching compound for small repairs. Clean the area first. Then, apply the compound with a putty knife. Smooth it out until even with the surface. Let it dry completely. For deeper cracks, consider professional help. Regularly inspect your countertops for any signs of damage. Early detection makes repairs easier and less costly.
Frequently Asked Questions
What Materials Do I Need For Concrete Countertops?
You need cement, sand, gravel, water, and reinforcement mesh. These basics form the concrete mix for countertops.
How Long Does Concrete Take To Cure?
Concrete usually takes 28 days to fully cure. Initial setting happens within 24 to 48 hours.
Can I Customize Concrete Countertop Colors?
Yes, you can add pigments to the mix. Use powdered or liquid pigments for different colors.
Is Sealing Concrete Countertops Necessary?
Sealing is important to protect against stains and moisture. It enhances durability and maintains appearance.
How Do I Maintain Concrete Countertops?
Clean with mild soap and water. Avoid harsh chemicals. Regular sealing helps keep the surface in good condition.
Conclusion
Creating concrete kitchen countertops is a rewarding project. The process is simple to follow. You can craft durable and stylish surfaces. Personalize them to match your style. Concrete offers a unique aesthetic. It’s both modern and rustic. Plus, it’s cost-effective.
With patience and care, your kitchen gains a fresh look. Enjoy your new countertops, and remember the effort that went into making them. Share your experience with friends and family. Inspire others to try this creative project. Your kitchen will be a place of pride and beauty.