Installing kitchen cabinet handles might seem like a small task, but it can make a big difference in your kitchen’s overall look and feel. Whether you’re upgrading your space or simply refreshing the existing design, this simple DIY project can transform your kitchen without breaking the bank.
Imagine the satisfaction of admiring your work every time you reach for a cabinet. You can achieve that with just a few tools and some patience. Are you ready to give your kitchen that stylish, polished look? This guide will walk you through each step, ensuring you install your kitchen cabinet handles with ease and precision.
Don’t miss out on these insider tips that will make the process quick and hassle-free. Let’s dive into the details and get your kitchen looking its best!
Credit: truepositiontools.com
Choosing The Right Handles
Selecting the perfect handles can enhance your kitchen’s look. Begin by measuring the cabinet holes accurately. Ensure secure attachment with screws for a lasting finish.
Choosing the right handles for your kitchen cabinets can transform your space. The handles add functionality and enhance the kitchen’s look. Many factors come into play when selecting the perfect handles. Let’s explore some key considerations.Material Options
Handles come in various materials like metal, wood, and ceramic. Metal handles offer a modern look. They are durable and easy to clean. Wood handles bring warmth and a classic touch. They’re perfect for traditional kitchens. Ceramic handles add charm and a unique style. Choose a material that suits your kitchen’s theme.Style Considerations
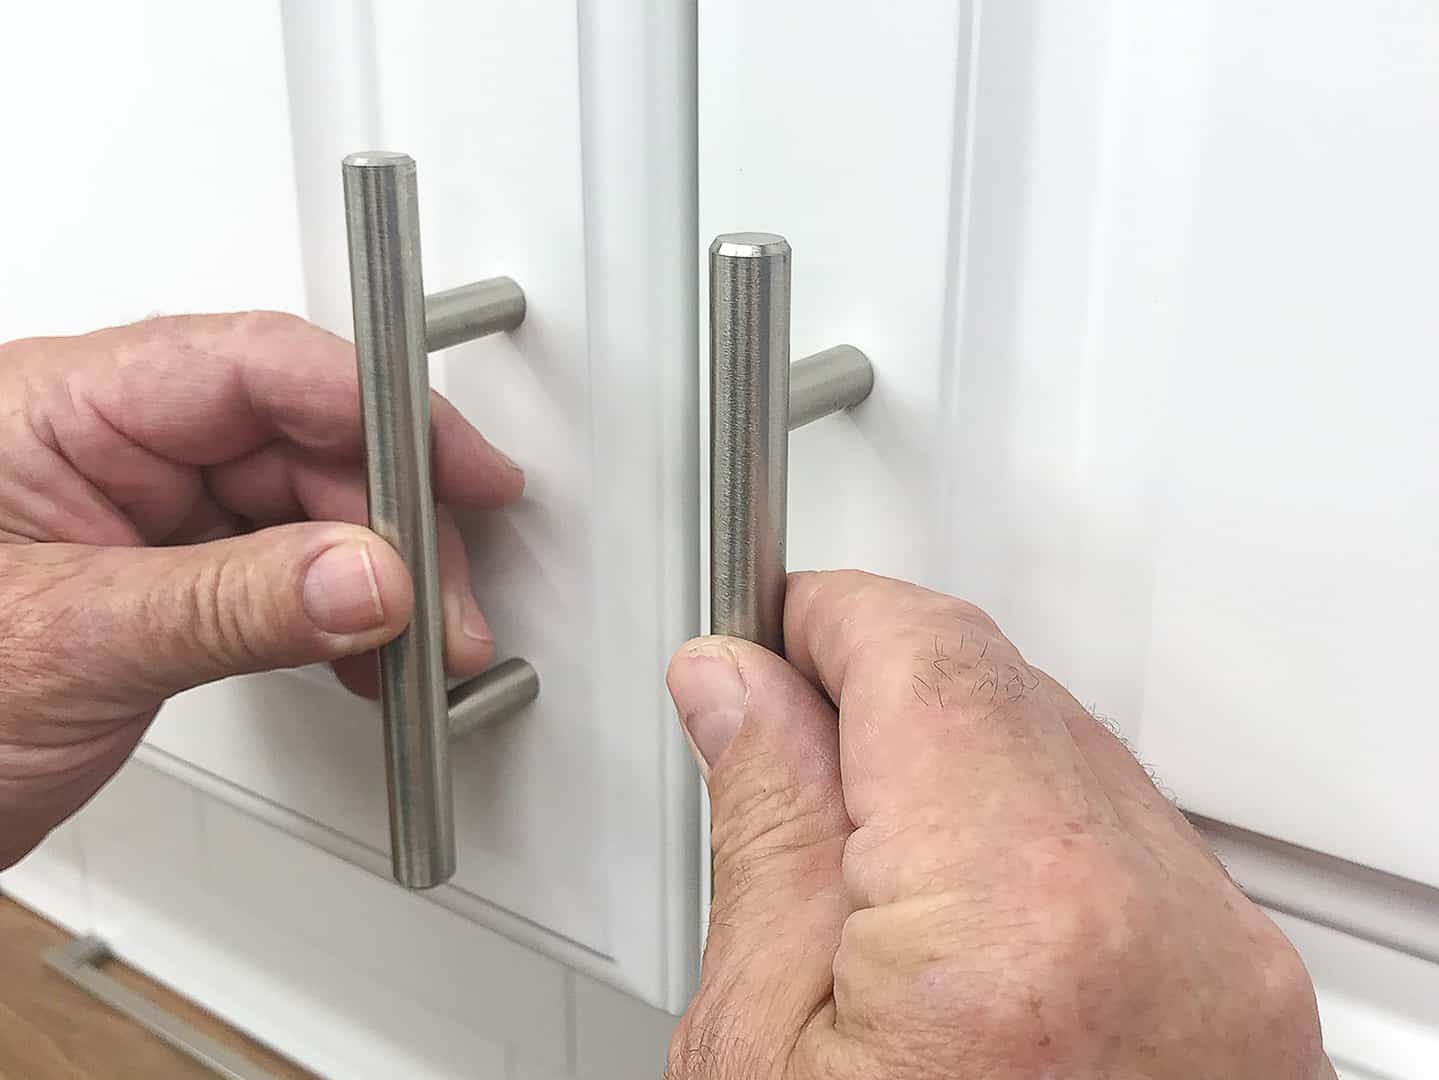
The style of the handle affects the overall kitchen vibe. Sleek, straight handles offer a contemporary feel. Ornate designs suit vintage or rustic kitchens. Color is crucial, too. Match the handle color with your kitchen palette. This ensures cohesion and harmony.Size And Fit
Handle size matters for comfort and function. Larger handles suit big cabinet doors. They offer a firm grip. Smaller handles work well on compact spaces. Measure your cabinets before buying. This ensures the handles fit perfectly. A proper fit avoids installation issues.
Credit: www.youtube.com
Gathering Necessary Tools
Gathering necessary tools is essential for installing kitchen cabinet handles. Prepare a screwdriver, measuring tape, and drill for precise placement. Ensure all tools are in reach for a smooth installation process.
Gathering the necessary tools is the first step in installing kitchen cabinet handles. Having the right tools ensures a smooth and efficient installation process. You save time and avoid frustration. It’s crucial to know what tools you need before starting. This preparation makes the job easier and more precise. Let’s explore the tools required for this task.Basic Tools List
A few essential tools are needed for installing cabinet handles. You will need a drill. It helps in creating holes for the screws. Screwdrivers are necessary. They help in fastening the screws securely. Measuring tape ensures accurate placement of handles. Marking pencils guide you in drilling the right spots. These basic tools are often found at home.Optional Tools For Precision
Optional tools can enhance precision in your installation. A level ensures handles are straight. It prevents uneven alignment. Templates can guide drilling and screw placement. They offer accurate measurements. A center punch marks drill locations effectively. It avoids slipping and misalignment. These tools are not mandatory but helpful. They add finesse to your work.Preparing Cabinets For Installation
Carefully measure and mark cabinet handle positions for accurate installation. Drill pilot holes to ensure proper alignment and fit. Secure handles tightly to prevent wobbling, ensuring a smooth finish.
Installing kitchen cabinet handles can transform your space, giving it a fresh and updated look. But before you dive into the installation process, it’s crucial to prepare your cabinets. Proper preparation ensures that your handles are installed securely and evenly, giving your kitchen a professional finish. Let’s dive into the essential steps of preparing your cabinets for this satisfying DIY project. ###Cleaning Surfaces
Before anything else, clean the surfaces of your cabinets. Dust and grease can accumulate over time, especially in kitchens. Use a gentle cleaner and a soft cloth to wipe down the areas where you plan to install the handles. This ensures a smooth surface, allowing the handles to adhere better. Imagine skipping this step and ending up with handles that feel loose or uneven. Cleaning might seem like a small task, but it’s foundational to a successful installation. Plus, it’s an excellent opportunity to give your cabinets a thorough clean. ###Marking Drill Points
Once your surfaces are clean, it’s time to mark where your handles will go. Use a pencil and a ruler to measure and mark the exact drill points. Consistency is key, so ensure each handle is placed at the same height and distance from the cabinet edge. You might wonder how to get this right every time. Consider using a template or jig, which can be a lifesaver for ensuring uniformity. If you’ve ever drilled without marking first, you know how frustrating it can be to have misaligned handles. Taking the time to mark drill points can save you from unnecessary do-overs and holes in your cabinetry. Preparing your cabinets might not be the most exciting part of installing handles, but it’s crucial. Without clean surfaces and precise markings, you risk a less-than-perfect outcome. So, are you ready to prep your cabinets for a fresh new look?Drilling Holes
Installing kitchen cabinet handles can be a straightforward task if you know where to start. Drilling holes is a crucial step that requires precision and attention. It’s not just about making holes; it’s about making them in the right spot. This is where your careful planning comes into play, ensuring that every handle aligns perfectly with the others.
Using A Template
Using a template can save you a lot of time and stress. It’s like having a guide that shows you exactly where to place each drill hole. Templates are usually made of sturdy materials like plastic or metal, and they come with pre-marked holes for different sizes and styles of handles.
When I first installed cabinet handles, I skipped the template. Big mistake. My holes were slightly off, and I had to redo several of them. A template ensures consistency across all cabinets. You simply align it with the edge of the door and mark where the drill should go. It’s a simple trick that brings professional results.
Drill Techniques
Drilling isn’t just about putting the drill to the wood and pulling the trigger. It’s about control and precision. Your drill technique can make or break your cabinet installation. Start by ensuring your drill bit is the correct size for the screws you’ll be using. Double-check this; nothing is worse than a wobbly handle.
Hold the drill steady and start with a slow speed. This prevents the wood from splintering and gives you more control. If you’ve ever drilled too fast and ended up with a mess, you know the importance of starting slow. Gradually increase the speed as the bit penetrates deeper.
Consider what happens if you drill too aggressively. You might damage the cabinet surface or even make crooked holes. A gentle, steady approach is always best. Are you ready to try these techniques and see how much they improve your installation?
With these tips, drilling holes for your kitchen cabinet handles becomes less daunting. Remember, the key is precision and patience. Use a template to guide your placement and apply steady drill techniques to ensure clean, accurate holes. Have you tried these methods before? If not, now’s the time to give them a shot and see the difference they make!
Attaching Handles
Easily enhance your kitchen’s look by installing cabinet handles. Measure and mark the drilling spots carefully. Align the handle, drill the holes, and screw it securely in place. Enjoy a fresh and functional kitchen with these simple steps.
Attaching handles to your kitchen cabinets can transform your space, adding a personal touch to your decor. This simple DIY task can save you the cost of hiring a professional, and it’s a satisfying project to complete. With the right approach, you’ll have your handles attached and your kitchen looking refreshed in no time. ###Aligning Handles
Proper alignment is crucial for a polished look. Begin by measuring the exact position where each handle will be placed. Use a template or jig to maintain uniformity; these tools can be purchased at any hardware store and are worth the investment. Ensure the handles are level by using a spirit level or a reliable leveling app on your smartphone. A crooked handle can be frustrating every time you open a cabinet. If your cabinets have a unique shape or design, take extra care to adjust your measurements accordingly. ###Securing Screws
Once you’ve aligned the handles, it’s time to secure them. Start by drilling pilot holes to make the process easier and prevent the wood from splitting. Use a drill bit slightly smaller than the screw to create a snug fit. When inserting screws, keep a steady hand. Over-tightening can damage the cabinet or strip the screw. If you’re installing handles on a drawer, make sure the screws don’t protrude on the inside, as this can catch and damage items in the drawer. Have you ever noticed how a loose handle can make a cabinet feel less sturdy? Ensuring each screw is firmly secured will enhance the functionality and longevity of your cabinets. Remember, the attention to small details can make a big difference in your kitchen’s overall appearance.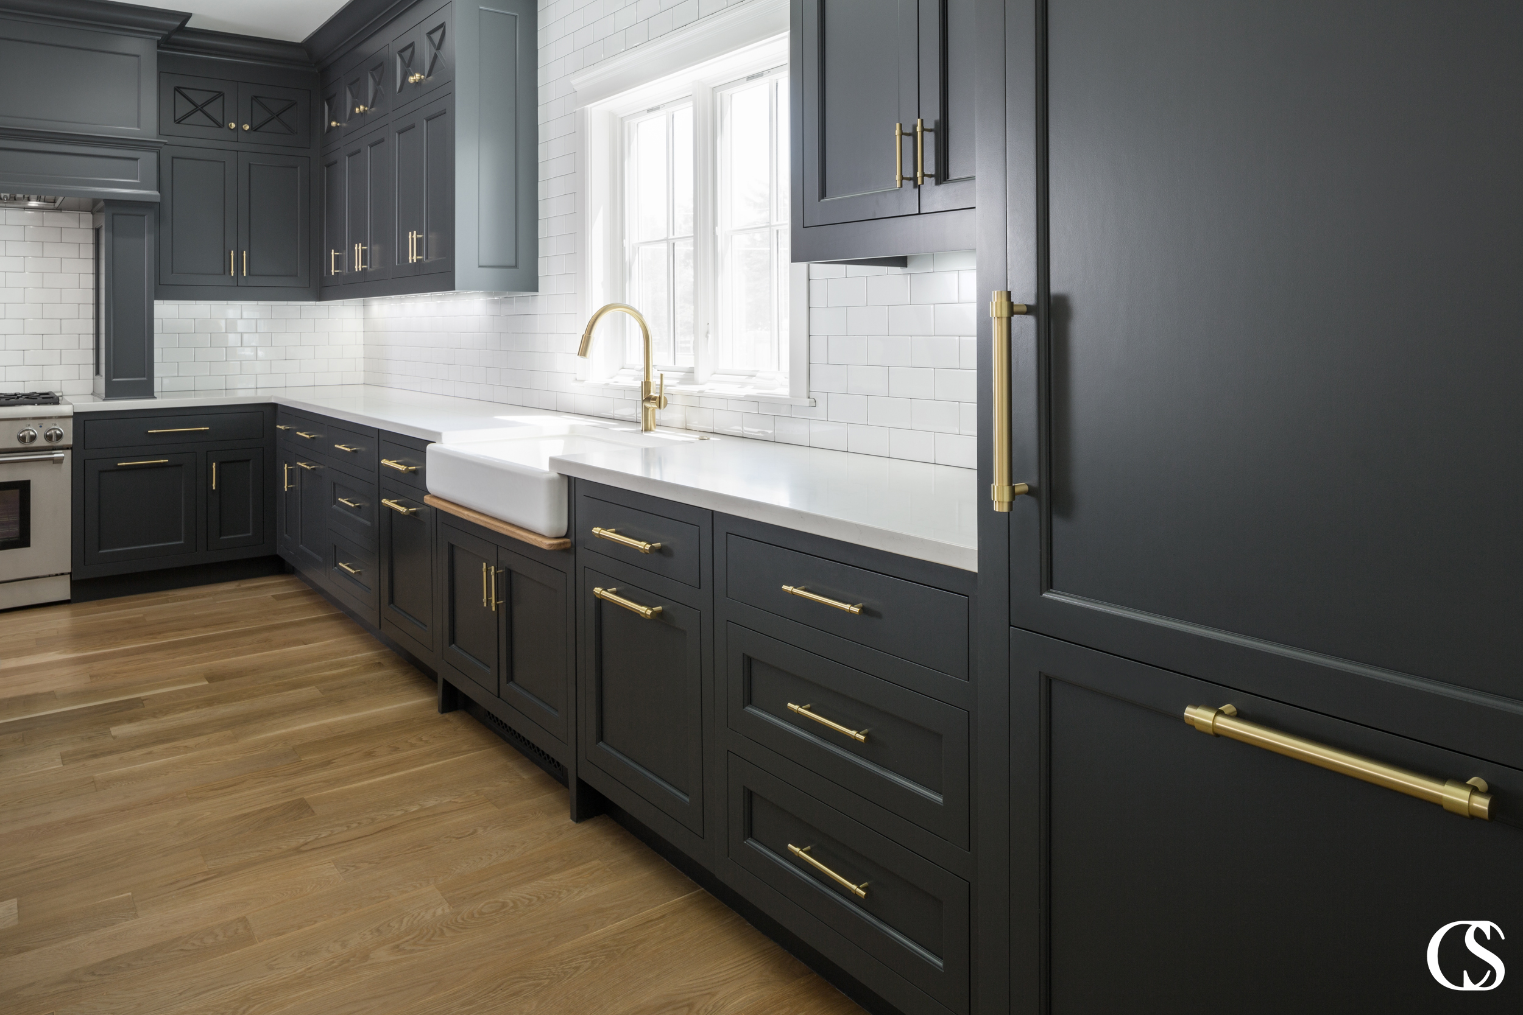
Credit: www.christopherscottcabinetry.com
Final Adjustments
Ensure your kitchen cabinets look perfect by aligning each handle properly. Check the spacing between handles for uniformity. Tighten screws securely to prevent wobbling.
When you’ve reached the final stage of installing your kitchen cabinet handles, you might feel a rush of excitement. The hardest part is over! Now it’s time to make sure everything is perfectly aligned and securely fitted. This final adjustment phase ensures that your cabinet handles look professional and function smoothly. It’s the small details that truly elevate the look of your kitchen.Checking Alignment
Stand back and take a look at your cabinet handles. Do they line up evenly across all your cabinets and drawers? Misaligned handles can be an eyesore and diminish the sleek appearance of your kitchen. Use a ruler or a level to double-check that each handle is perfectly aligned. Even a small discrepancy can be noticeable. If you find any that are slightly off, don’t hesitate to adjust them. Ask yourself: Would a guest notice if they were off-center? If the answer is yes, make those corrections now. It’s worth the effort for that flawless finish.Tightening Screws
Once alignment is spot-on, ensure each screw is tightened properly. Loose screws can cause handles to wobble or come off with use, which can be frustrating. Grab a screwdriver and give each screw a firm turn. Make sure they’re secure but be careful not to overtighten, as this can strip the screw or damage the cabinet surface. Consider this: How often do you tug on a cabinet handle without thinking? A secure handle means no worries about it coming loose over time. It’s a small step that ensures long-lasting durability. As you complete these final adjustments, reflect on the transformation you’ve made. Each handle adds to the functionality and aesthetic of your kitchen. With everything aligned and tightened, you’re ready to enjoy your refreshed space.Maintenance Tips
Installing kitchen cabinet handles requires precision and care. First, measure the placement accurately to ensure symmetry. Use a drill to make holes and attach handles securely, enhancing both functionality and style.
Maintaining your kitchen cabinet handles is crucial for keeping your kitchen looking fresh and functional. While installing new handles can breathe life into tired cabinets, ongoing care ensures they stay in top condition. Think about how often you touch these handles. They’re bound to collect grime and grease over time. Proper maintenance not only extends their life but also enhances your kitchen’s overall appeal. ###Cleaning Handles
Regular cleaning is essential. It’s simple yet effective. Use a soft cloth dampened with mild soap and water to wipe down the handles weekly. Avoid harsh chemicals that can tarnish or damage the finish. Have you ever been surprised by a sticky handle while reaching for a snack? Consistent cleaning prevents this unpleasant surprise. Also, if your handles are made of metal, consider using a specialized cleaner for a polished finish. ###Periodic Checks
Just as you wouldn’t ignore a squeaky door, don’t overlook loose handles. Every few months, check if your cabinet handles are secure. Use a screwdriver to tighten any loose screws. Do you notice any wobbling when you pull a drawer? Fixing it sooner rather than later prevents bigger issues. Also, inspect for any signs of rust or wear. Addressing these early can save you from the hassle of replacement. Incorporate these maintenance tips into your routine. This ensures your kitchen remains a pleasant place to cook and gather. What’s your go-to tip for keeping your kitchen hardware in great shape? Share your thoughts in the comments!Frequently Asked Questions
What Is The 1/3 Rule For Cabinet Pulls?
The 1/3 rule for cabinet pulls suggests placing handles one-third from the cabinet edge. This ensures aesthetics and functionality, allowing easy access and a balanced look. Adjust based on cabinet size and personal preference for best results.
Where Should Handles Be Placed On Kitchen Cabinets?
Place handles horizontally on drawers and vertically on cabinet doors. Position them close to the opening edge. Ensure consistent alignment and spacing for a balanced look. Handles should be comfortable to grip and functional, enhancing accessibility. Prioritize aesthetics and practicality in your choice and positioning for optimal kitchen design.
How Do You Accurately Install Cabinet Handles?
Measure the cabinet door’s center and mark the drill points. Use a template for precision. Drill holes carefully, ensuring alignment. Attach handles with screws, checking for tightness. Verify all handles are level and secure.
What Is The Rule Of Thumb For Cabinet Pulls?
Cabinet pulls are typically centered on the drawer front. For doors, place pulls vertically, aligning them with the door’s frame. Ensure balance and accessibility by positioning them approximately 2 to 3 inches from the edge. Always choose a size proportional to the cabinet’s dimensions for aesthetics and functionality.
How Do I Measure For Cabinet Handles?
Use a ruler or tape measure. Measure the distance between screw holes. Choose handles that match this measurement.
Conclusion
Installing kitchen cabinet handles is simple with the right steps. Measure carefully. Drill holes in the correct spots. Attach handles securely. This gives your kitchen a fresh look. You can do it yourself easily. No need for special skills or tools.
Just follow each step. Your kitchen will look new in no time. Enjoy the satisfaction of a job well done. Share your success with friends and family. They might want to try it too. Transform your kitchen with stylish handles.
It’s a small change with big impact. Feel proud of your handiwork.