Are you tired of dealing with a leaky or clogged kitchen sink? Installing a new sink strainer can be an easy fix, especially when it comes to sturdy cast iron sinks.
Imagine the satisfaction of knowing that your kitchen’s plumbing is in perfect shape, and the relief of not having to deal with any more water flow issues. In this guide, you’ll discover the simple steps to install a kitchen sink strainer on cast iron, and the best part is, you won’t need to call a plumber.
With clear instructions and helpful tips, you can tackle this DIY project with confidence. Keep reading to learn how you can enhance your kitchen’s functionality and make your daily chores more efficient.

Credit: www.youtube.com
Tools And Materials Needed
Gather a wrench, plumber’s putty, and a screwdriver. Have a rubber gasket and Teflon tape handy. Ensure you also have a bucket for water spills.
Installing a kitchen sink strainer on a cast iron sink might seem like a challenging task, but with the right tools and materials, you can make it straightforward and hassle-free. Whether you’re replacing an old strainer or setting up a new sink, having everything you need on hand will save you time and prevent frustration. Imagine reaching the final step only to realize you’re missing a key tool—let’s avoid that scenario together. ###Tools You’ll Need
To start off, you’ll need a few essential tools. Adjustable wrench is crucial to tighten the nuts securely. A screwdriver will help you handle small screws that may be part of the installation process. Don’t forget a putty knife for applying plumber’s putty, ensuring a tight seal. Have you ever tried using your bare hands to tighten something, only to realize you needed a wrench? Keep these tools nearby to avoid such pitfalls. ###Materials Required
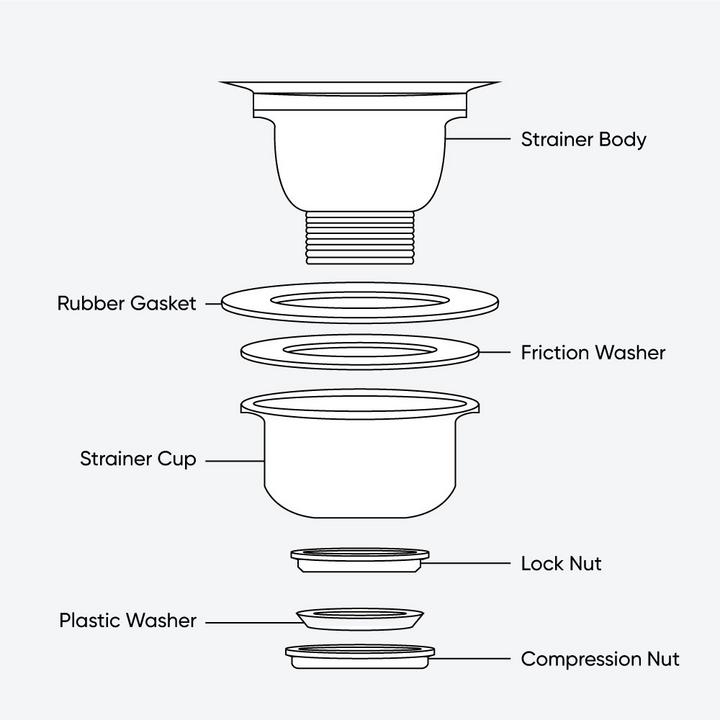
Gathering the right materials is just as important as having the right tools. Plumber’s putty is indispensable for creating a watertight seal around the strainer. Rubber gasket often comes with the strainer, but double-check its presence. If you’re wondering why a gasket is necessary, think about the frustration of leaking water under your sink. A strainer assembly set, which includes the strainer body and basket, is obviously essential. Ensure all components are in the box before you start. ###Optional Accessories
You might consider some optional accessories to make your installation smoother. Plumber’s tape can be useful for securing threaded connections. Silicone sealant provides extra security against leaks, especially if plumber’s putty doesn’t suffice. Have you ever wished for an extra layer of protection against water leaks? These accessories can offer that peace of mind. ###Safety Gear
Safety should never be overlooked. Safety goggles protect your eyes from accidental splashes or debris. Gloves will keep your hands clean and safe from rough surfaces or sharp edges. You might be tempted to skip safety gear, but ask yourself: is it worth the risk? Are you ready to tackle this project with confidence? Having these tools and materials prepared means you’re already halfway to success. Each tool and material plays a vital role in ensuring your installation is smooth and efficient. So, grab your wrench and get started!Preparing The Workspace
Preparing your workspace is crucial for installing a kitchen sink strainer on cast iron. A well-organized area saves time and reduces stress. It also minimizes mistakes during the installation process. Begin by clearing the area and gathering necessary tools. This ensures a smooth workflow and helps you focus on the task at hand.
Clearing The Area
Start by removing any items under the sink. This includes cleaning supplies and trash bins. Ensure the space is clear and accessible. A tidy area prevents accidents and makes it easier to maneuver. Wipe down the surfaces to remove dust and debris. A clean space is essential for a clean installation.
Gathering Necessary Tools
Gather all the tools you will need for the installation. Common tools include a wrench, pliers, and a screwdriver. Check for a putty knife and plumber’s putty as well. Having everything at hand saves time and frustration. Double-check the list to ensure nothing is missing. With tools ready, you can focus fully on the installation process.
Removing The Old Strainer
Replacing the strainer on a cast iron sink may seem daunting. With the right tools, it’s straightforward. First, you need to remove the old strainer. This process involves loosening parts and detaching the strainer body. It’s crucial to follow each step carefully. Ensure you have all necessary tools ready. A wrench and pliers are essential. Keep towels nearby to catch any spills.
Loosening The Locknut
The locknut secures the strainer underneath the sink. Use a wrench to loosen it. Turn the wrench counterclockwise. This action will gradually unscrew the locknut. Sometimes, these nuts are very tight. Applying penetrating oil can help. Wait a few minutes for the oil to work. Once loosened, remove the locknut completely.
Detaching The Strainer Body
After removing the locknut, detach the strainer body. Push the strainer up from below. If it’s stuck, use pliers to gently wiggle it. Careful not to damage the sink. Slowly, the strainer will come loose. Lift it out from above the sink. Clean the area thoroughly. Remove any debris or old sealant. This ensures a smooth fit for the new strainer.
Cleaning The Sink Surface
Installing a kitchen sink strainer on cast iron requires cleaning the sink surface thoroughly. Begin by removing debris and stains with mild soap. Ensure a smooth, dry surface to prevent leaks and ensure proper installation.
Cleaning the sink surface is an essential step when installing a kitchen sink strainer on a cast iron sink. Ensuring a clean and dry surface not only facilitates a smooth installation but also enhances the longevity of your strainer. You wouldn’t want to go through the hassle of fixing leaks just because you skipped a little cleaning, would you? This is where attention to detail pays off. Let’s dive into the steps to make sure your sink is ready for a flawless installation.Removing Debris And Old Putty
Begin by inspecting the sink area for any leftover debris or residue. It’s surprising how much gunk can accumulate around your sink over time. Use a scraper or putty knife to carefully remove old putty around the drain opening. Be thorough but gentle—you don’t want to scratch the surface. Once the old putty is cleared, use a damp cloth to wipe away any remaining bits of dirt. You’ll be amazed at how much brighter your sink looks with just this simple cleaning.Drying The Sink Area
After cleaning, it’s crucial to dry the sink area completely. A small oversight here could lead to moisture trapped beneath the new strainer, causing potential issues. Grab a clean, dry towel and pat down the area around the drain. Make sure to reach into all the little crevices. If you’re short on time, a hairdryer can speed up the drying process. Just be mindful of the heat settings to avoid any damage to the cast iron surface. Taking the time to clean and dry your sink might seem tedious, but it’s an investment in a hassle-free installation. Have you ever thought about how much a small detail can impact a DIY project? This simple preparation step can save you from future headaches and repairs. Remember, a successful installation starts with a clean slate—or in this case, a clean sink!Installing The New Strainer
Replacing a kitchen sink strainer on a cast iron sink can seem daunting. But with clear steps, it’s manageable. This section guides you through installing the new strainer. Follow each step for a successful installation.
Applying Plumber’s Putty
Start with a small amount of plumber’s putty. Roll it into a rope shape. The length should fit around the strainer’s lip. Press the putty around the underside of the strainer’s lip. This forms a watertight seal. Make sure the putty is even. Uneven putty can cause leaks later.
Positioning The New Strainer
Place the strainer into the sink’s drain hole. Press it firmly into place. The putty should squeeze out from the edges. This is a good sign. It means the seal is tight. Under the sink, attach the gasket and nut. Tighten the nut with a wrench. Ensure the strainer doesn’t move. Excess putty can be wiped away easily.
Credit: www.signaturehardware.com
Securing The Strainer
Installing a kitchen sink strainer on cast iron requires careful alignment. Start by placing the strainer gasket over the sink’s drain hole. Ensure it’s centered, then secure with a locking nut underneath the sink, tightening until snug.
Securing the strainer is a crucial step in installing a kitchen sink strainer on cast iron. Ensuring it is tightly secured will prevent leaks and contribute to the longevity of your sink. This task may seem daunting, but with the right tools and guidance, you can achieve a secure fit that withstands daily use.Tightening The Locknut
The locknut plays a vital role in keeping the strainer firmly attached to the sink. Begin by placing the strainer into the sink’s drain hole, ensuring it fits snugly. Use a wrench to tighten the locknut located beneath the sink. Turn it clockwise, applying consistent pressure to avoid overtightening. You’ll know you’ve achieved a secure fit when the strainer remains in place without wobbling. Pause occasionally during tightening to check if the strainer is level with the sink surface. This ensures even pressure distribution and helps prevent future leaks.Ensuring A Watertight Seal
A watertight seal is essential to prevent water from seeping through and causing damage. Before you tighten the locknut completely, apply a bead of plumber’s putty around the underside of the strainer flange. Press the strainer firmly into the sink to evenly distribute the putty. Tightening the locknut will compress the putty, creating a barrier that keeps water at bay. After securing the locknut, remove any excess putty that squeezed out during the process. This not only creates a neat finish but also assures a clean seal.Have you ever installed a strainer only to find it leaking later? Revisiting these steps might reveal a missed detail. Paying close attention to the locknut and seal can save you from potential headaches down the line. Consider sharing any tips or tricks you’ve discovered during your own installations. Your insights could be the key to someone else’s successful project.
Reattaching Plumbing Connections
Connecting a kitchen sink strainer to cast iron requires patience and precision. Ensure all parts fit snugly and check for leaks before tightening. Follow simple steps to secure a perfect fit that prevents water damage and keeps your kitchen clean.
Reattaching plumbing connections after installing a kitchen sink strainer on cast iron can seem daunting, but it’s simpler than you might think. Once you’ve secured the strainer, the next step involves reconnecting the plumbing to ensure everything flows smoothly. By focusing on alignment and security, you can prevent leaks and ensure efficient water drainage.Aligning The Drain Pipe
Proper alignment of the drain pipe is crucial. If the pipes aren’t aligned, you risk leaks and poor drainage. Start by checking the position of your drain pipe relative to the sink strainer. Adjust the pipe so it fits snugly under the strainer. Imagine it like a puzzle piece, fitting perfectly into place. You might need to make slight adjustments, especially if you’ve moved the strainer. Use your fingers to guide the pipe into the right spot. Feel for any gaps or misalignments. A well-aligned pipe is your first defense against leaks.Securing With Slip Nuts
Once the pipe is aligned, securing it with slip nuts is your next step. These nuts hold the pipe in place and prevent it from moving. Thread the slip nuts onto the pipe, ensuring they are tight. They should grip the pipe firmly without causing damage. Consider using a wrench for extra security. A tight connection means less risk of leaks. Be cautious not to overtighten. Too much force can damage the pipe or the nut. Find a balance between tightness and flexibility. Have you ever tightened a nut only to find it’s not secure enough? It’s all about finding that sweet spot where everything holds without strain. Reattaching plumbing connections is all about precision and care. With these steps, you’ll have a kitchen sink strainer that works efficiently and reliably.Testing For Leaks
Installing a kitchen sink strainer on cast iron involves checking for leaks around the edges. Ensure a tight fit to prevent water seepage. Proper installation keeps your kitchen dry and clean.
After successfully installing your kitchen sink strainer on a cast iron sink, it’s crucial to test for leaks. Even a small leak can cause significant water damage over time. Taking a few moments to ensure everything is watertight will save you from future headaches and costly repairs. This stage is not just about confirming your installation skills; it’s about ensuring peace of mind whenever you use your sink. Let’s dive into how you can perform this essential check. ###Running Water Through The Sink
First, you need to run water through your sink to test the new installation. Turn on the faucet and let the water flow directly into the sink for a few minutes. Use both hot and cold water to ensure the strainer can handle different temperatures without leaking. As you observe, pay close attention to the area around the strainer. Is there water pooling or seeping where it shouldn’t be? Even if it looks good initially, let the water run for a bit longer. This helps identify any slow-forming leaks that might not be immediately visible. ###Checking For Drips And Adjustments
Once you’ve run water through the sink, it’s time to check underneath for any drips. Use a flashlight to inspect the area under the sink carefully. Are there any droplets forming along the joints or connections? If you spot any drips, don’t panic. This is quite common and can often be fixed by tightening the connections. Use your wrench to gently tighten the locknut or any loose parts. Be cautious not to overtighten, which can damage the fittings or the sink itself. After making adjustments, run the water again. Repeat the process of checking for drips to ensure that your adjustments have resolved the issue. Have you ever thought about how these little checks can extend the life of your kitchen sink? Paying attention now prevents future inconveniences. Your kitchen sink is not just a functional part of your home; it’s also a place where you create meals and memories. Making sure it’s in top shape is always worth the effort.Finishing Touches
Installing a kitchen sink strainer on a cast iron sink is a rewarding task that enhances both functionality and aesthetics. Once you’ve secured the strainer, it’s time for the finishing touches. These steps ensure your installation not only looks great but works perfectly. Let’s dive into the final details that make all the difference.
Cleaning The Area
Before you admire your handy work, take a moment to clean the area around the sink. Residue from sealants and other materials can make the sink look messy. Use a gentle cleaner suitable for cast iron to wipe away any excess.
A clean sink not only shines but also prevents any potential damage from leftover materials. Imagine the satisfaction of seeing a spotless sink that complements your kitchen’s beauty. A quick wipe down can transform the whole space.
Ensuring Proper Functionality
Now, test the strainer to make sure it’s working as intended. Run water to check for any leaks or unusual noises. A properly installed strainer should hold water and drain smoothly without issues.
If you notice anything amiss, don’t worry. Adjustments are sometimes necessary. Tighten any loose parts and ensure the seal is intact. Addressing these concerns now saves you from headaches later.
Think about the convenience of a fully functional sink. How often do you use your kitchen sink daily? Ensuring everything works perfectly enhances your kitchen experience immensely. Do you feel prepared to tackle any adjustments needed?
Every small detail counts when installing a kitchen sink strainer. The finishing touches bring your hard work to fruition, leaving you with a kitchen fixture that is both reliable and visually appealing. Are you ready to enjoy your newly installed sink strainer?
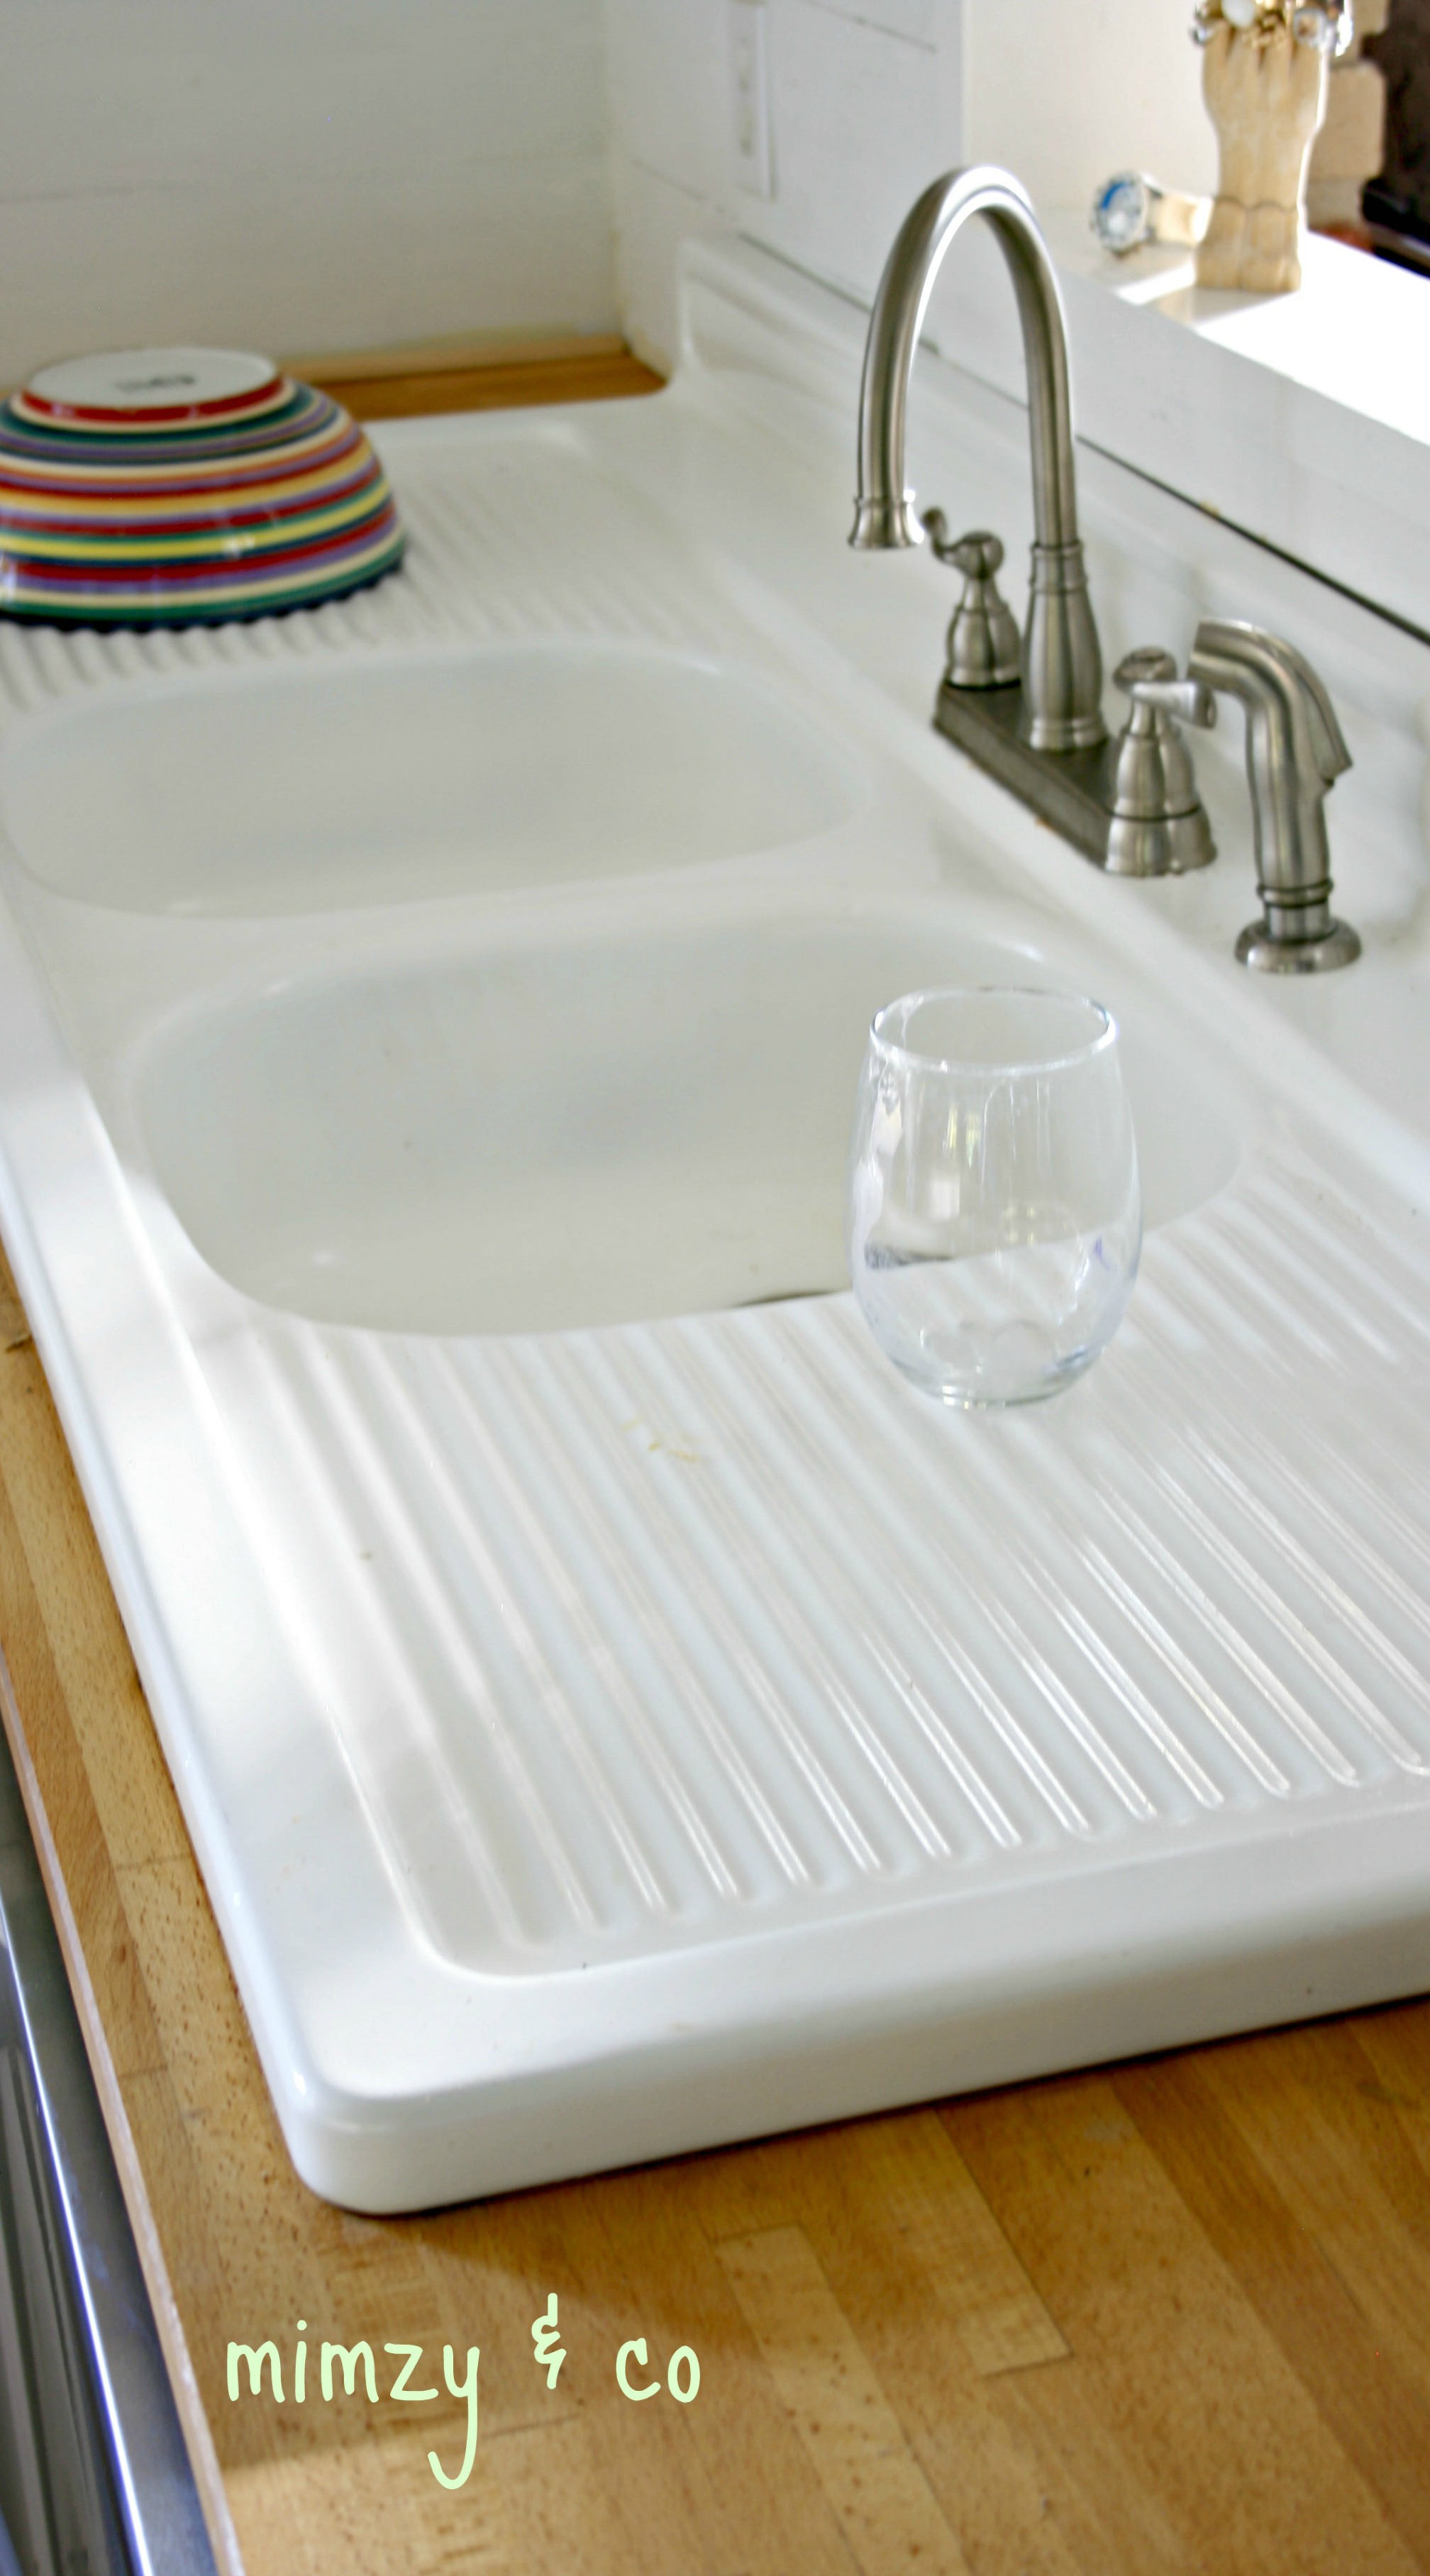
Credit: mimzyandcompany.com
Frequently Asked Questions
Where Does The Rubber Gasket Go On A Sink Strainer?
The rubber gasket fits between the sink and the strainer’s metal flange. It creates a watertight seal. Ensure it’s positioned correctly before tightening the strainer nut. This prevents leaks and ensures proper drainage.
How Tight Should Sink Strainer Be?
Tighten the sink strainer until it’s snug but not overly tight. Ensure it effectively seals without causing damage. A secure fit prevents leaks but allows easy removal for cleaning. Over-tightening can lead to potential damage or difficulty in removal. Regular checks help maintain an optimal fit.
Do You Need Plumbers Putty To Install A Kitchen Sink?
Plumber’s putty is not always required for kitchen sink installation. Some sinks use rubber gaskets or silicone sealants. Check your sink’s installation instructions for specific requirements. Using the right sealant ensures a secure, leak-free fit. Proper installation prevents future issues and prolongs the sink’s lifespan.
How To Snake A Kitchen Sink Drain?
To snake a kitchen sink drain, insert the snake into the drain until resistance is felt. Rotate the handle to break up the clog. Gradually pull the snake out while continuing to rotate. Clean the snake and test the drain flow.
Repeat if necessary for stubborn clogs.
How Do I Remove An Old Sink Strainer?
Loosen the screws. Twist and pull to detach. Lift the strainer from the drain.
Conclusion
Installing a kitchen sink strainer on cast iron is simple. Follow the steps carefully. Gather the right tools and materials first. Clean the area before starting the installation. Secure the strainer tightly to avoid leaks. Check for any water leakage afterward.
These steps ensure a proper fit. Anyone can manage this task with patience. Remember, a well-installed strainer prevents drainage issues. Enjoy a fully functional kitchen sink. Regular maintenance keeps it working well. Practice makes perfect. Your kitchen projects get easier over time.
Happy installing!