Are you struggling with low water flow from your pull down faucet? The culprit might be a clogged aerator.
Removing it could be the simple solution you need. You might be thinking, “How do I even start? ” Don’t worry; you’re not alone, and we’re here to guide you through the process. This task might seem daunting at first, but with a few easy steps, you’ll be able to fix your faucet and enjoy a steady stream of water again.
Imagine the satisfaction of solving the problem yourself, saving money, and avoiding unnecessary frustration. Keep reading to uncover the secrets to removing the aerator from your pull down faucet effortlessly. Your kitchen will thank you!
Credit: www.youtube.com
Tools Needed
Removing the aerator from a pull-down faucet requires the right tools. Using these tools correctly ensures the process is smooth and damage-free. Let’s explore the essential tools needed for this task.
1. Adjustable Wrench
An adjustable wrench is crucial for loosening the aerator. Its adjustable jaw fits different sizes, making it versatile. Ensure the grip is firm to avoid slipping.
2. Pliers
Pliers offer a strong grip for stubborn aerators. They help twist off tight fittings with ease. Use a gentle touch to prevent scratches.
3. Rubber Gloves
Rubber gloves provide a better grip and protect your hands. They also prevent slipping, ensuring safety during the task.
4. Soft Cloth Or Towel
A soft cloth or towel wraps around the aerator to prevent scratches. It acts as a cushion between the tool and the faucet.
5. Screwdriver
A screwdriver may be needed for removing screws. Choose the right size to fit securely in the screw head. This prevents stripping and damage.
6. Vinegar And Brush
Vinegar is used for cleaning the aerator after removal. A brush helps scrub away dirt and mineral deposits. This ensures the aerator is clean before reinstallation.
Credit: assist.kohler.com
Safety Precautions
Removing an aerator from a pull-down faucet might seem simple. Yet, safety is crucial. A few precautions can prevent damage or injury. This guide will help ensure a smooth process.
Wear Protective Gloves
Use gloves to protect your hands from sharp edges. They also provide a better grip on tools and parts.
Turn Off Water Supply
Before starting, turn off the water supply. This prevents unexpected leaks or water sprays. Ensure both hot and cold water lines are off.
Use Proper Tools
Using the right tools is essential. A slip-joint plier and a soft cloth work well. The cloth prevents scratches on the faucet finish.
Check For Loose Parts
Ensure that no parts are loose before starting. Tighten any loose connections. This helps maintain faucet stability during the process.
Avoid Excessive Force
Apply gentle force when removing the aerator. Excessive pressure can damage the faucet or threads. If stuck, try soaking the aerator in vinegar.
Inspect For Wear And Tear
Once removed, inspect the aerator for damage. Replace it if it’s worn out. A damaged aerator can affect water flow.
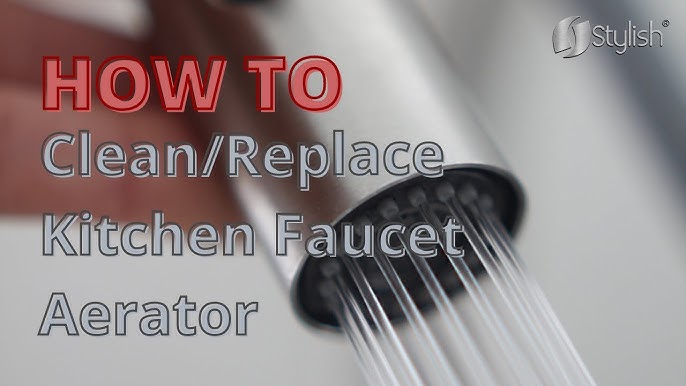
Locating The Aerator
Finding the aerator on a pull-down faucet often requires inspecting the spout’s tip. It might be hidden behind a small screen or mesh. Carefully unscrew or detach it using a wrench or pliers, ensuring you don’t damage the threads.
Locating the aerator in a pull-down faucet can seem a bit daunting, especially if you’re not familiar with faucet parts. However, it’s a straightforward task once you know what you’re looking for. The aerator is a small piece that screws into the faucet head, and it’s crucial for controlling water flow and reducing splashing. ###Understanding The Role Of The Aerator
The aerator is like the unsung hero of your faucet. It mixes air with the water to create a smooth and splash-free stream. If you notice that your water flow is uneven or weak, the aerator might be clogged. Knowing this helps you focus on locating and cleaning it. ###Identifying The Aerator’s Location
The aerator is usually found at the tip of the pull-down faucet head. It’s often hidden behind a small screen or cap. To spot it, extend your faucet to its full length and inspect the area where water exits. You might notice a small, round piece with tiny holes. ###Signs That Point To The Aerator
If your faucet is spraying water in odd directions or making strange noises, these could be signs of a clogged aerator. Another indicator is a reduction in water pressure. These clues can lead you straight to the aerator, urging you to take a closer look. ###Tools You Might Need
You might wonder what tools are required to remove the aerator. Generally, a simple pair of pliers or a wrench will do the trick. Some aerators can even be unscrewed by hand. Keep a cloth handy to avoid scratching the faucet surface. ###Personal Insight: The First Time I Found It
When I first tried to locate the aerator in my pull-down faucet, I was stumped. After a bit of research and a few attempts, I finally saw that small piece I had overlooked. This taught me the importance of patience and careful observation. If I could do it, so can you. ###Have You Checked The Manual?
The faucet manual can be a goldmine of information. It often provides diagrams that show exactly where the aerator is located. If you’re struggling to find it, the manual might just be the guide you need. ###Final Thoughts: Why Locating The Aerator Matters
Finding the aerator is the first step towards fixing water flow issues. It empowers you to clean or replace it, improving your faucet’s performance. Are you ready to tackle this small yet impactful task?Credit: assist.kohler.com
Removing The Aerator
Removing the aerator from a pull-down faucet might seem challenging. The aerator controls water flow and helps prevent splashing. Sometimes, debris builds up, causing reduced water flow. Knowing how to remove the aerator can help solve these issues.
Loosening With Pliers
Pliers are a handy tool for loosening the aerator. Wrap the aerator with a cloth to prevent scratches. Grip it gently with the pliers. Turn the aerator counterclockwise to loosen it. If it’s tight, apply a little more pressure. Once loosened, unscrew it by hand. This method works well for stubborn aerators.
Using An Aerator Key
An aerator key is designed for easy removal. It fits snugly over the aerator, providing a firm grip. Insert the key onto the aerator. Twist counterclockwise to loosen it. This tool is useful for aerators stuck due to mineral deposits. Aerator keys are often included with new faucets. They offer a precise fit, reducing the risk of damage.
Cleaning The Aerator
Removing the aerator from a pull-down faucet is simple. Twist the aerator counterclockwise until it loosens. Use pliers if it’s stuck. Clean the aerator to improve water flow and remove debris.
Cleaning the aerator of your pull-down faucet is essential for maintaining water flow and ensuring the longevity of your faucet. Over time, mineral deposits and debris can build up, causing reduced water pressure. Tackling this task might seem daunting, but with a few simple steps, you can have your aerator sparkling clean in no time. Let’s dive into the methods to effectively clean your aerator. ###Rinsing
Start by rinsing the aerator under warm running water. Hold it firmly and allow the water to flow through both sides. This simple step can loosen and remove larger particles that are clogging the mesh. Use your fingers to gently rub the surface, ensuring that the water flows freely through the aerator. If you’ve ever noticed reduced water pressure, this might just be the quick fix you need. Wondering if just rinsing is enough? For light build-ups, it often is. However, if you still notice blockages, it’s time to bring in the big guns. ###Using Vinegar Solution
Vinegar is a household staple that works wonders in cleaning mineral deposits. Create a solution by mixing equal parts of white vinegar and warm water in a small bowl. Submerge the aerator in this solution for about 15-30 minutes. The acidity of the vinegar breaks down the stubborn deposits clogging the aerator. Have you ever felt amazed by the versatility of vinegar? This is just another example of its cleaning prowess. After soaking, use an old toothbrush to scrub the aerator gently. The bristles can reach into the tiny holes and crevices, ensuring a thorough clean. Rinse it again under warm water to wash away any remaining debris. Feel free to repeat the vinegar soak if necessary. Sometimes, a second round can make a world of difference. Cleaning your aerator is as simple as a rinse and a soak. Are you ready to experience better water flow from your faucet?Reinstalling The Aerator
Removing an aerator from a pull-down faucet involves unscrewing it gently with pliers. Ensure you grip it firmly to avoid damage. Clean the aerator thoroughly before reinstalling it to ensure optimal water flow.
Reinstalling the aerator in a pull-down faucet might seem tricky. Yet, with the right guidance, it’s a straightforward process. After cleaning or replacing the aerator, ensuring its proper placement is vital. This guarantees optimal water flow and prevents leakage. Follow this guide to secure the aerator firmly in place.Proper Positioning
The aerator must align perfectly with the faucet’s threads. Check the aerator for any debris or dirt. Clean it gently with a cloth to avoid clogging later. Locate the threads inside the faucet spout. Hold the aerator carefully and align its threads with those inside the spout. Ensure the aerator sits flush against the faucet’s mouth. This prevents water from escaping sideways. Feel the aerator’s surface to confirm it’s evenly positioned. This step is crucial for achieving a tight fit.Securing In Place
Begin twisting the aerator clockwise using your fingers. This should be done gently to avoid cross-threading. Tighten the aerator until it feels snug against the faucet. If it resists, backtrack and realign the threads. Consider using a wrench for the final tightening. Place a cloth between the aerator and wrench. This prevents scratches on the aerator’s surface. Turn slowly and stop once you feel resistance. Over-tightening may damage the threads. Once secure, test the water flow. Turn on the faucet and observe the stream. Ensure there’s no leakage around the aerator’s edge. A steady and even stream indicates proper installation.Testing The Faucet
Testing the faucet is an essential step after removing the aerator. This ensures everything works smoothly and no leaks occur. It helps you confirm that the faucet is clean and functional. Without testing, unnoticed issues might lead to bigger problems.
Check Water Flow
Turn on the faucet slowly. Observe the water flow. A smooth stream indicates successful aerator removal. If the water splashes or sprays unevenly, inspect the faucet for debris. You might need to clean it further.
Inspect For Leaks
Feel around the faucet base for any leaks. Use a dry cloth to detect wet spots. Leaks can cause damage if not addressed. Tighten any loose connections if necessary. This prevents water from seeping into unwanted areas.
Test Temperature Adjustment
Adjust the temperature settings. Ensure hot and cold water mix properly. Slow or uneven temperature changes might indicate a problem. This ensures your comfort and safety while using the faucet.
Examine Pressure Consistency
Check the water pressure from the faucet. It should remain consistent when adjusted. Inconsistent pressure can signal blockages or other issues. Addressing these ensures efficient water usage.
Troubleshooting Common Issues
Removing an aerator from a pull-down faucet often requires unscrewing it with a wrench or pliers. Gently twist to avoid damage. Clean the aerator to ensure smooth water flow and reattach securely.
When dealing with home repairs, the smallest issues can sometimes cause the most frustration. Removing an aerator from a pull-down faucet is a task that seems simple at first glance. However, it can quickly become complicated if you encounter common issues. Let’s dive into some practical solutions for these common problems, ensuring your experience is as smooth as possible.Difficulty In Removal
Facing difficulty in removing the aerator is more common than you might think. Many aerators become stuck due to mineral deposits or rust. This can make them feel almost welded to the faucet. To tackle this, start by soaking a cloth in vinegar and wrapping it around the aerator. Let it sit for about 30 minutes. The acidity of the vinegar helps dissolve mineral deposits, potentially loosening the aerator. If it’s still stuck, try using a rubber wrench. This tool provides a firm grip without scratching the faucet. Ensure you turn slowly to avoid damaging the aerator or the faucet. Have you ever tried using pliers only to find you’ve scratched the finish? Remember, a gentle touch and the right tool can prevent such mishaps.Water Flow Problems
After removing and reattaching an aerator, water flow issues can arise. This often happens when the aerator isn’t seated correctly or if debris has entered during the process. First, check that the aerator is screwed on tightly but not overly so. Over-tightening can compress the internal components, affecting water flow. If water pressure seems off, consider cleaning the aerator. Disassemble it carefully and rinse each part under running water to remove any debris. Sometimes, the problem lies with the faucet’s internal connections. Reinstall the aerator and test the water pressure. If it’s still not right, it might be worth examining the faucet itself for clogs or other issues. Have you noticed water spraying in unexpected directions? This could indicate the aerator’s screen is misaligned or damaged. Ensure everything is aligned properly when reassembling. By addressing these common issues, you’ll find that removing and maintaining your faucet’s aerator can be a straightforward task. Don’t let small challenges deter you from achieving a well-functioning faucet.Frequently Asked Questions
How To Get An Aerator Off A Pull Down Faucet?
Turn off the water supply. Unscrew the aerator using a wrench or pliers. Grip firmly and twist counterclockwise. Clean or replace the aerator as needed. Reattach by screwing it back on clockwise. Ensure tight fit to prevent leaks.
How To Remove Hidden Faucet Aerator Without Key?
Use a rubber band for grip. Wrap it around the aerator. Twist with pliers or a wrench gently to remove.
Do All Faucets Have Removable Aerators?
Not all faucets have removable aerators. Many modern faucets include them, but some designs are fixed. Check your faucet’s specifications to determine if the aerator is removable. Removable aerators help in cleaning and maintenance, improving water flow efficiency.
How Do You Clean The Aerator On A Delta Pull Down Faucet?
Remove the aerator by unscrewing it. Soak in vinegar for 30 minutes to dissolve mineral deposits. Rinse thoroughly and reattach.
How Do I Identify The Aerator Type On My Faucet?
Check the faucet’s manual or look online for model-specific details. This helps identify the aerator type.
Conclusion
Removing the aerator from a pull-down faucet is simple. Just follow the steps we discussed. Always ensure your tools are ready. Take care to avoid damaging the faucet. Clean the aerator once removed. This helps maintain good water flow. Regular maintenance keeps your faucet in top shape.
It’s a task you can do easily. Save money by doing it yourself. Enjoy the improved water pressure. A clean aerator makes a big difference. Now you’re ready to tackle this project with confidence.