Imagine transforming your kitchen into a space that exudes elegance and sophistication. One simple yet impactful way to achieve this is by installing crown molding on your kitchen cabinets.
Not only does it add a touch of class, but it also creates a seamless transition between your cabinets and the ceiling, giving your kitchen a polished and finished look. But here’s the secret: installing crown molding isn’t as daunting as it might seem.
In fact, with the right guidance, you can enhance your kitchen’s aesthetic without breaking a sweat. By the end of this guide, you’ll have all the tips and tricks you need to confidently install crown molding like a pro. So, if you’re ready to elevate your kitchen’s style and impress your guests with your DIY skills, keep reading. Your dream kitchen is just a few steps away.
Tools And Materials Needed
Essential tools and materials for installing crown molding on kitchen cabinets include a miter saw, measuring tape, and wood glue. Additional items like sandpaper, nails, and a hammer ensure proper fitting and finish. A paintbrush and matching paint can provide a seamless look.
Installing crown molding on kitchen cabinets can transform your space, adding elegance and a touch of sophistication. Before you dive into this rewarding project, it’s essential to gather the right tools and materials. Having everything prepared will streamline the installation process, making it more enjoyable and efficient. Let’s break down the essentials you’ll need to get started.Essential Tools
To ensure a smooth installation, you must have the right tools at your disposal. A miter saw is crucial for making precise angled cuts on the molding pieces, allowing them to fit seamlessly together. If you’re like me, you might find yourself enamored with the satisfaction of a perfect cut. A measuring tape will help you double-check dimensions, preventing any mishaps that could lead to wasted materials. A nail gun is highly recommended for securing the crown molding quickly and effectively. While a hammer and nails will do the job, a nail gun offers efficiency and a cleaner finish. Keep a level handy to ensure your molding is perfectly aligned. Lastly, a caulk gun can help fill any gaps and provide a polished look.Recommended Materials
Selecting quality materials can make all the difference in your project’s outcome. Opt for crown molding that complements your cabinet style and kitchen design. Consider materials like wood or MDF (medium-density fiberboard) for durability and aesthetic appeal. Have a few extra pieces on hand; trust me, it’s a lifesaver if you make a wrong cut. Use wood glue to reinforce the joints between the molding pieces. This adds stability, ensuring your molding stays put for years. Choose a matching caulk to seal the seams and edges, blending the molding seamlessly with your cabinets. Don’t forget the paint or finish that matches or enhances the existing color of your cabinets. Are you excited to see your kitchen transform with this simple addition? With the right tools and materials, you’re well on your way to mastering the art of crown molding installation. Your kitchen cabinets will thank you!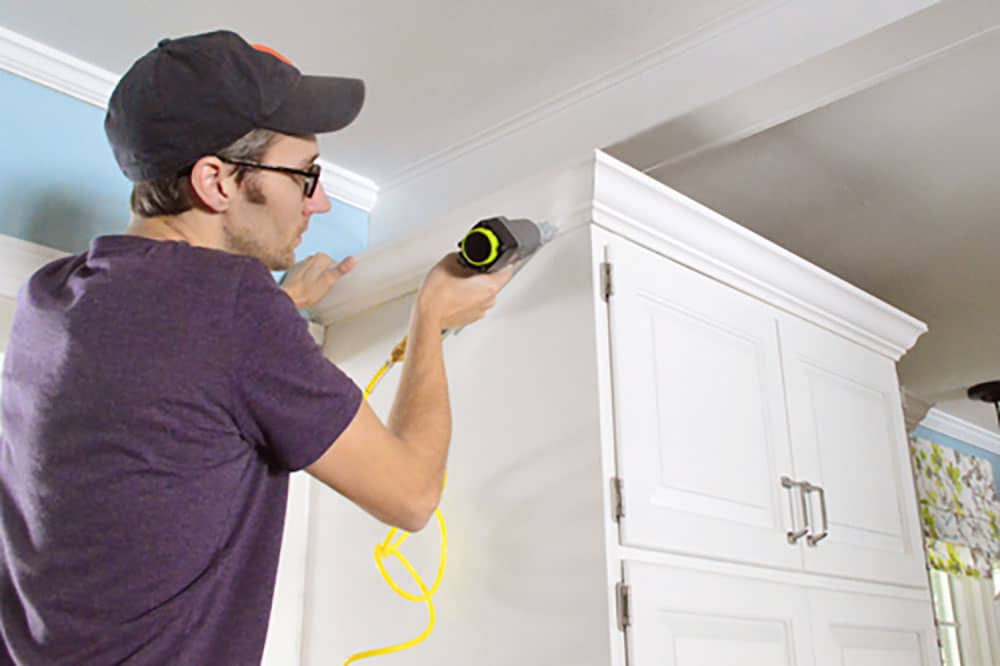
Credit: www.younghouselove.com
Measuring For Crown Molding
Measuring for crown molding ensures a perfect fit and professional look. Precise measurements are crucial for a seamless installation. This step involves determining the length, width, and angles of your kitchen cabinets.
Calculating Dimensions
Start by measuring the length of each cabinet side. Use a tape measure for accuracy. Measure from one end to the other. Record these dimensions on paper. Next, consider the width of the molding. This will affect the overall look. A standard width works well for most kitchens.
Measure the height of the space above the cabinets. This ensures the molding fits without gaps. If your cabinets form a corner, measure the angles. This requires extra care. Angles must be precise for a perfect fit.
Marking The Cabinets
With dimensions in hand, mark the cabinets. Use a pencil for easy adjustments. Draw a line where the molding will sit. This visual guide helps during installation.
Ensure marks are straight and level. A carpenter’s level can assist. Double-check all marks before moving forward. Align the molding with these marks for best results. Misaligned marks lead to uneven molding.
Check your measurements again. This avoids costly mistakes later. Once satisfied, proceed with cutting and installing the molding.
Cutting The Molding
Cutting the molding is a crucial step in installing crown molding on kitchen cabinets. Precision and accuracy are key to achieving a seamless look. Properly cut molding adds elegance and value to your kitchen space. This guide will help you understand the basics of cutting crown molding.
Understanding Angles
Angles are vital in cutting crown molding. Crown molding sits between the ceiling and cabinet, requiring specific angles. The angle typically used is 45 degrees. This angle ensures a smooth fit between the cabinet and the ceiling. It’s important to measure twice before cutting. This reduces errors and wasted material. Always use a protractor or angle finder for accuracy.
Using A Miter Saw
A miter saw is the best tool for cutting crown molding. It allows precise angle cuts with ease. Set your miter saw to the correct angle before starting. Double-check settings to avoid mistakes. Place the molding upside down on the saw table. This ensures the cut matches the correct orientation. Secure the molding firmly to prevent movement. Then, make your cut confidently and smoothly.
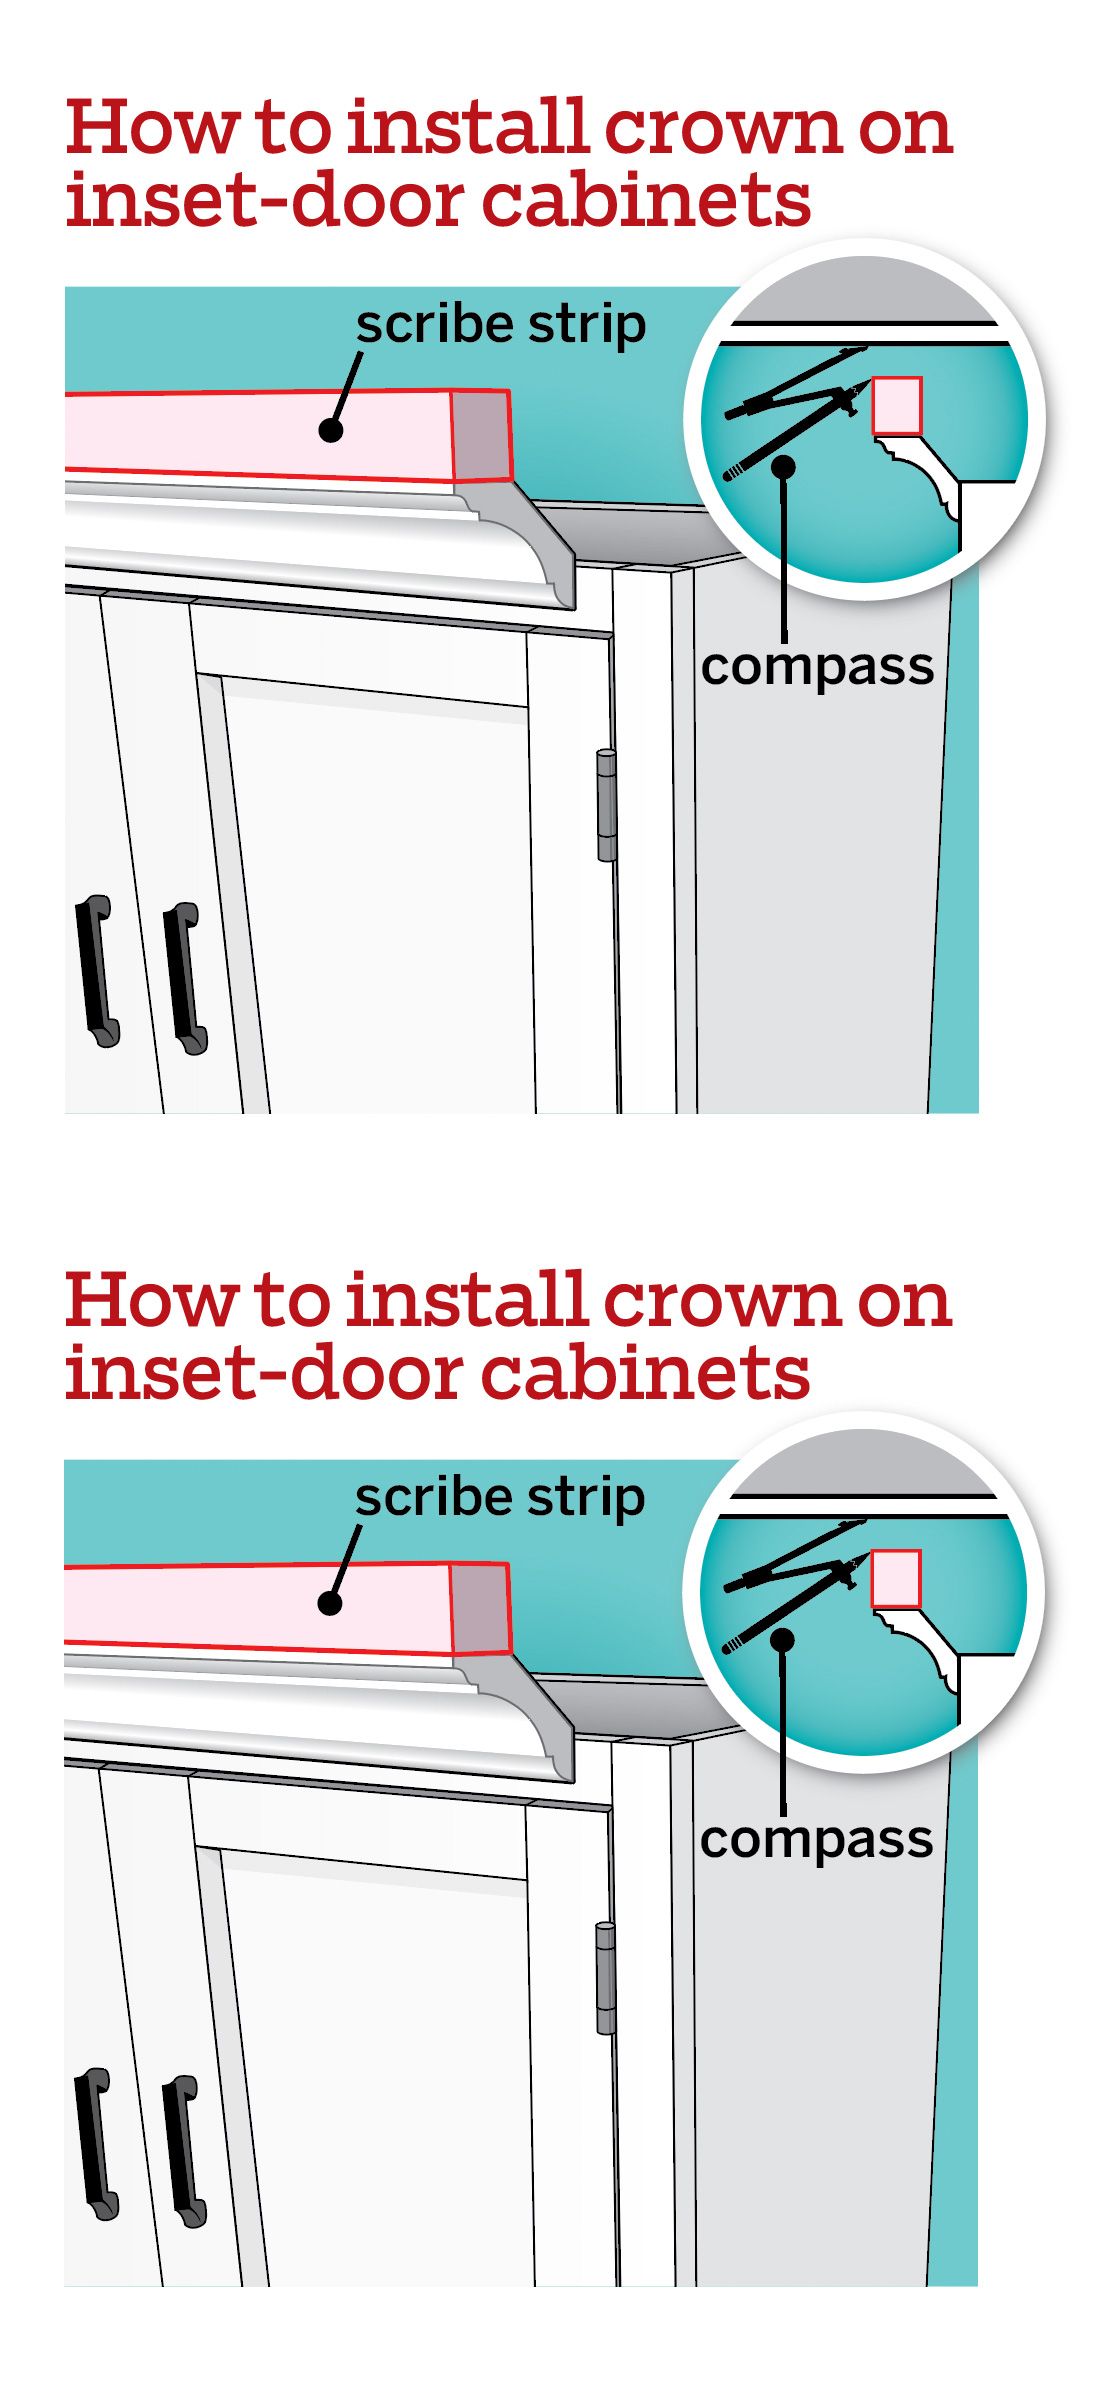
Credit: www.thisoldhouse.com
Preparing The Cabinets
Installing crown molding on your kitchen cabinets can elevate the look of your kitchen with a touch of elegance. But before you jump into the installation, preparing the cabinets is crucial for a seamless finish. Proper preparation ensures that the molding adheres correctly and stands the test of time. Let’s walk through the steps of cleaning the surface and attaching support blocks to get your cabinets ready.
Cleaning The Surface
Start by giving your cabinets a thorough cleaning. Dust, grease, and grime can prevent the molding from sticking properly. Use a mild detergent and a soft cloth to wipe down the surfaces. Pay special attention to the top edges where the molding will be attached.
Have you noticed how the smallest layer of dust can make a big difference? It’s like wiping off a foggy window; suddenly, everything’s clearer. Make sure your cabinets are spotless before moving on to the next step. This simple effort will save you from potential installation headaches.
Attaching Support Blocks
Support blocks provide a stable base for your crown molding, helping it sit securely against the cabinets. Cut small wooden blocks that match the height of the molding’s back edge. Use wood glue and finishing nails to attach these blocks to the cabinet tops.
Consider this: have you ever tried balancing a picture frame on a ledge without support? It’s precarious, right? Similarly, support blocks make sure your molding has a firm grip. This step not only ensures stability but also streamlines the installation process.
Once your support blocks are in place, take a moment to inspect your work. Are the blocks aligned evenly? A quick double-check can prevent alignment issues later. This attention to detail makes all the difference between a polished look and one that appears amateur.
As you prepare your cabinets, you’re setting the stage for a successful crown molding installation. Each step is a building block towards a kitchen transformation that you’ll be proud to show off. Are you ready to see your kitchen shine with a touch of sophistication?
Installing The Molding
Transform kitchen cabinets with crown molding for a polished look. Measure accurately and cut pieces to fit corners. Secure molding with nails or adhesive for a seamless finish.
Installing crown molding on kitchen cabinets adds a touch of elegance and sophistication. However, doing it right requires precision and a bit of patience. Whether you’re a DIY enthusiast or a first-timer, tackling this project can be a rewarding experience. You’ll need to focus on securing the molding properly and using the right nailing techniques to ensure a perfect finish. Let’s dive into how you can achieve this with confidence and finesse.Securing The Molding
Begin by measuring the length of the cabinets where the molding will be attached. Accurate measurements prevent gaps or overlaps. Use a miter saw to cut the molding at a 45-degree angle for corners, ensuring a snug fit. Dry fit the molding to the cabinet to check the alignment. Adjust as necessary before proceeding to the next step. Sometimes, minor adjustments can make a big difference in the overall look. Use a strong adhesive to secure the molding to the cabinet top. This adhesive acts as a primary support, especially in areas where nails are difficult to use. Hold the molding in place for a few moments to allow the adhesive to set.Nailing Techniques
Nailing the molding properly is crucial for a secure fit. Use a nail gun for precision and efficiency. If you don’t have one, a hammer and finishing nails will work, though it requires more effort. Place the nails at regular intervals—about every 8 to 12 inches—along the molding. This ensures stability and prevents the molding from detaching over time. It’s a small detail that ensures longevity. Be careful not to split the molding by placing nails too close to the edge. Consider pre-drilling small pilot holes to guide the nails and minimize splitting risks. This step, though optional, can save you from potential headaches later on. Remember, the effort you put into securing and nailing the molding pays off in the long run. It’s not just about aesthetics; it’s about creating a sturdy, lasting enhancement to your kitchen cabinets. Have you considered how this small upgrade could transform your kitchen space?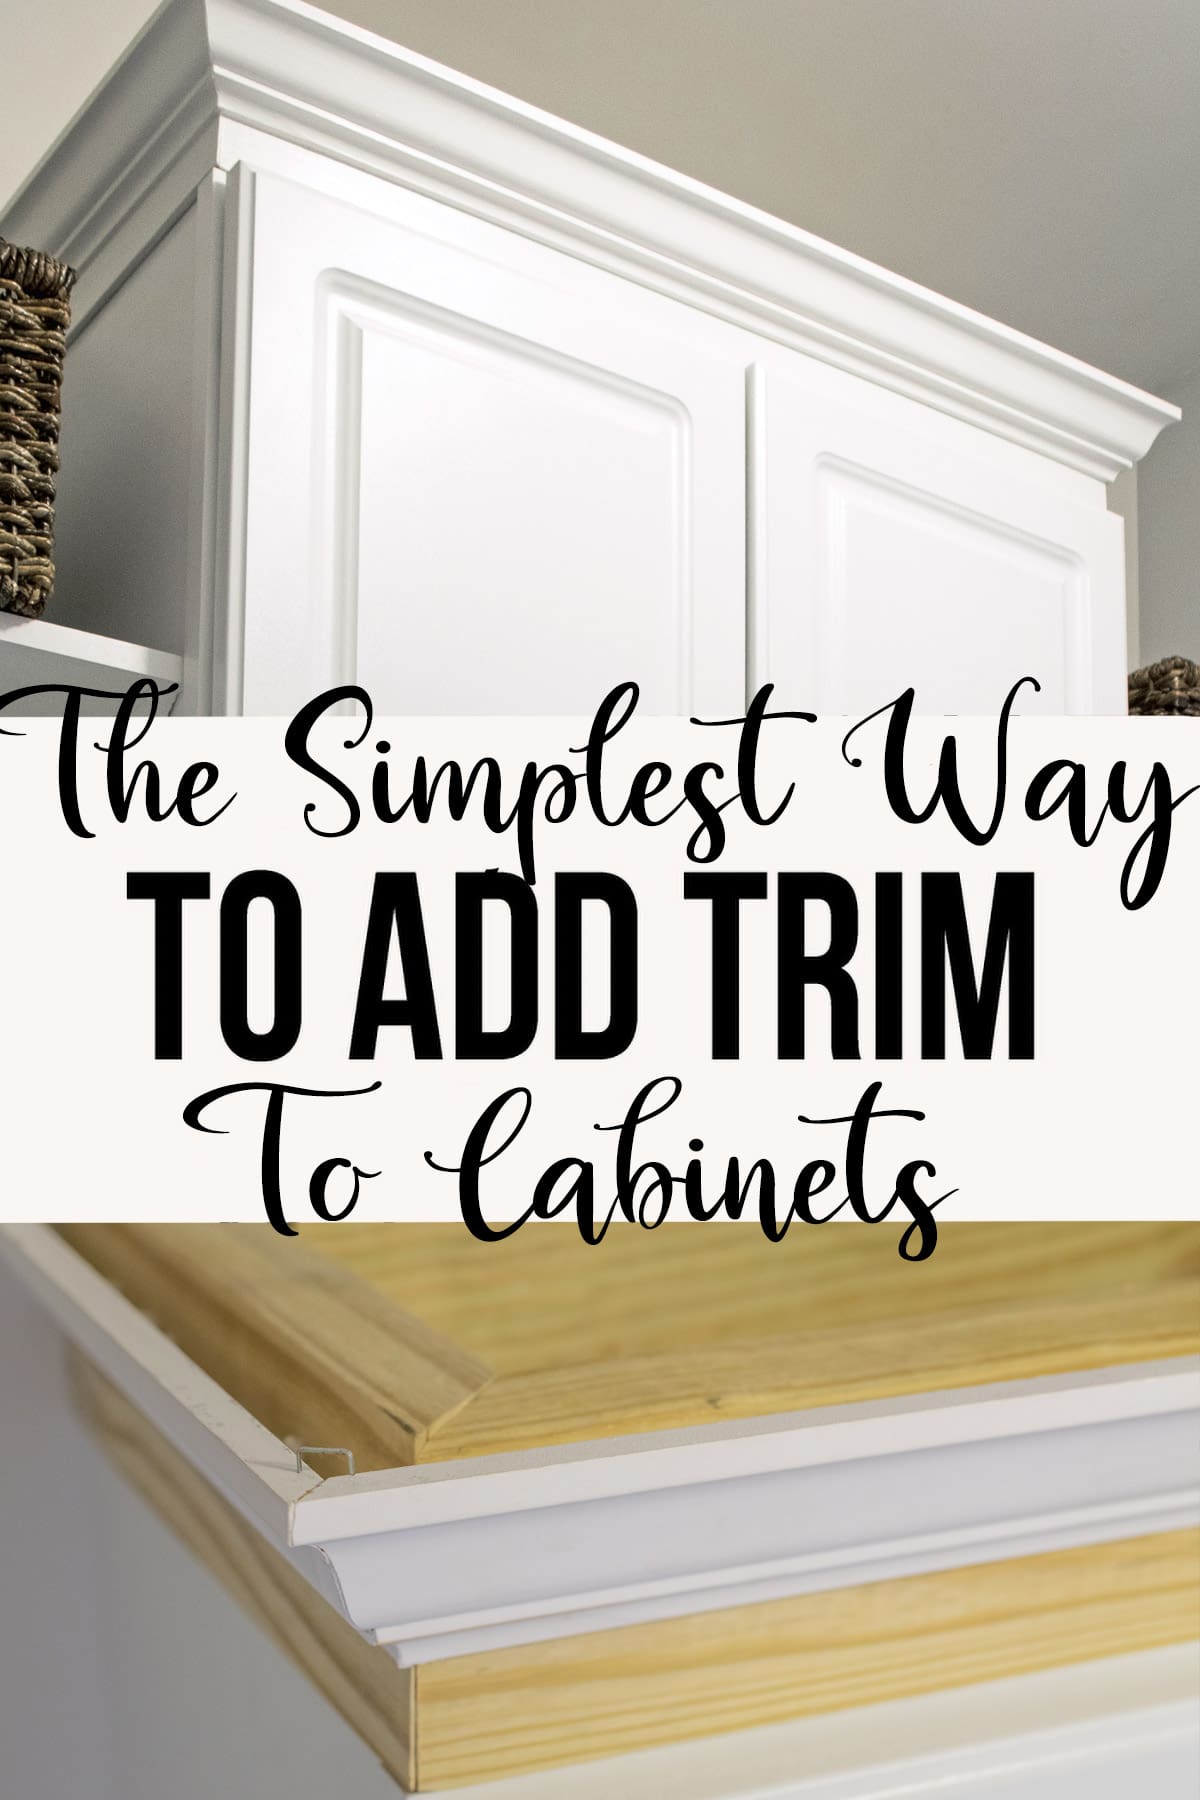
Credit: www.cravingsomecreativity.com
Finishing Touches
Crown molding adds a stylish touch to kitchen cabinets. First, measure the cabinet edges precisely. Then, cut molding pieces at the correct angles. Use a nail gun to attach them securely. Fill any gaps with caulk for a seamless look.
Finally, paint to match your cabinets for a perfect finish.
Adding crown molding to your kitchen cabinets is like giving your kitchen a facelift. But the job isn’t complete until you add those essential finishing touches. These final steps ensure your project looks polished and professional. They might seem small, but they make a big difference in the overall appearance. Are you ready to make your crown molding installation look flawless? Let’s dive into the details.Filling Gaps And Holes
Even with precise cuts and measurements, gaps and holes can appear. It’s normal and doesn’t mean you’ve made a mistake. Use wood filler to address these imperfections. Apply the filler with a putty knife, smoothing it into the gaps and holes. Once dried, sand the area for a seamless finish. This simple step transforms an amateur job into a professional one. Do you notice any tiny nail holes? They can be filled too. This ensures that every inch of your molding looks smooth and cohesive.Painting Or Staining
After filling gaps and holes, it’s time to decide on painting or staining. Your choice will depend on your kitchen’s style and the look you want to achieve. Painting can provide a fresh, clean appearance, while staining highlights the natural wood grain. Before applying paint or stain, always use a primer. This helps the finish adhere better and last longer. Apply paint or stain in thin, even coats. Patience is key here. Rushing could lead to drips or uneven coverage. Consider using a small brush for detailed areas and edges. This helps in maintaining a neat finish without overpainting or bleeding. What’s your preferred look for crown molding? Both paint and stain have their unique charm. Choose the one that best complements your kitchen’s personality. With these finishing touches, your crown molding project will not only look complete but also add elegance to your kitchen. Each step is crucial in achieving that perfect finish, so take your time and enjoy the process.Troubleshooting Common Issues
Learn how to install crown molding on kitchen cabinets by addressing common issues like uneven surfaces and incorrect measurements. Ensure a seamless fit by using proper tools and techniques. Enhance your kitchen’s look with well-installed molding.
Installing crown molding on kitchen cabinets can elevate the overall look of your kitchen, adding a touch of elegance and character. However, like any DIY project, it can come with its challenges. Troubleshooting common issues ensures your installation is as smooth as possible. Whether dealing with uneven cabinets or fixing miter mistakes, understanding these potential pitfalls can save you time and frustration. Let’s dive into some practical solutions.Dealing With Uneven Cabinets
Uneven cabinets can make crown molding installation a real headache. You might find that your cabinets aren’t perfectly level, leading to gaps or misalignments in your molding. Start by assessing the level of your cabinets using a spirit level. If they’re not even, consider using shims to level them out. Shims are thin pieces of wood you can insert between the cabinet and the wall to balance them. This simple adjustment can make a significant difference. Another option is to adjust the molding itself. You can trim the bottom edge of the molding to accommodate any discrepancies in cabinet height. It requires precision, but it’s an effective solution if shimming isn’t sufficient.Fixing Miter Mistakes
Miter mistakes can ruin the seamless appearance of your crown molding. Cutting perfect angles is tricky but vital for a polished finish. Have you ever cut a piece only to find it doesn’t fit quite right? You’re not alone. To address this, always double-check your measurements before cutting. A small error can lead to bigger problems. Use a miter saw with a sharp blade for cleaner cuts. If you make a mistake, don’t panic. You can use wood filler to patch small gaps or imperfections at the joints. Once dry, sand it smooth and paint over for an invisible fix. Consider practicing on scrap wood first. This can help you understand the nuances of your tools and prevent costly errors on the actual project. Do these challenges sound familiar? How do you handle obstacles in your DIY projects? Share your thoughts and let’s learn together.Frequently Asked Questions
How Do You Attach Crown Molding To A Cabinet?
Attach crown molding by measuring the cabinet’s edge. Cut molding pieces to fit. Secure them using wood glue and finish nails. Use a nail gun for precision. Ensure alignment before fastening. Fill gaps with wood filler for a seamless look.
Sand and paint for a polished finish.
Do You Glue Or Nail Crown Molding?
Use both glue and nails for crown molding installation. Glue provides a secure bond, while nails ensure stability. Apply construction adhesive to the back and use finishing nails. This combination prevents shifting and sagging, ensuring durability. Proper installation guarantees a professional finish and long-lasting results.
How Do You Fill A Gap Between Kitchen Cabinets And Ceiling?
Fill the gap using crown molding, trim pieces, or soffit panels. Measure the gap and cut the material accordingly. Secure with adhesive or nails for stability. Paint or stain to match cabinets or ceiling. Ensure a seamless look for aesthetic appeal.
What Angle To Cut Crown Molding For Cabinets?
Cut crown molding for cabinets at a 45-degree angle. Use a miter saw for precise cuts. Adjust the angle slightly if your cabinets aren’t perfectly square. Test-fit the pieces before final installation to ensure a seamless look.
What Tools Do I Need For Installing Crown Molding?
You need a saw, nails, and a hammer. A level and tape measure are helpful too.
Conclusion
Installing crown molding on kitchen cabinets transforms the room. It adds elegance and style. The process is simple and rewarding. Measure carefully. Cut the pieces accurately. Use adhesive and nails for secure mounting. Paint to match the kitchen decor. Enjoy your beautiful new cabinets.
Show off your handiwork to friends and family. Feel proud of your accomplishment. Remember, practice makes perfect. Start with one cabinet. Then tackle the rest. Soon, your kitchen will look amazing. Take your time, and enjoy the journey. With patience, you can achieve stunning results.
Happy decorating!