Are you tired of the constant drip-drip sound coming from your kitchen faucet? A dripping faucet is not just annoying; it can also lead to higher water bills and potential damage to your sink area.
But don’t worry—fixing a dripping kitchen faucet is easier than you might think! In this guide, you’ll discover simple steps to stop that pesky leak and regain peace in your kitchen. Imagine the satisfaction of solving this common household problem yourself, without the need for expensive plumber services.
By the end of this article, you’ll have the knowledge and confidence to tackle the issue head-on. Ready to get started? Let’s dive into the process!
Identify The Source Of The Drip
Identifying the source of a dripping kitchen faucet is vital. It helps prevent water wastage and potential damage. This step is crucial for effective repair. A drip may seem insignificant, but it can lead to bigger issues. Understanding where the leak originates is key.
Check The Handle
The handle is often the first suspect. A loose or worn handle can cause leaks. Inspect it closely for any visible damage. Tighten the screws and ensure it’s secure.
Inspect The Spout
The spout can also be a source of drips. Look for water pooling at its base. This may indicate a broken seal. Check for cracks or mineral buildup.
Examine The Valve Seat
The valve seat connects the faucet and spout. It can corrode over time, leading to leaks. Use a flashlight to inspect it for any wear. Replacing a damaged valve seat can stop the drip.
Assess The Washers And O-rings
Washers and O-rings are common culprits. These small parts can wear out with use. Remove the faucet handle to access them. Check for signs of wear or damage. Replacing worn washers and O-rings can fix the drip.
Look At The Cartridge
The cartridge controls water flow in modern faucets. A faulty cartridge can cause persistent dripping. Remove it carefully and inspect it. A damaged cartridge may need replacement.
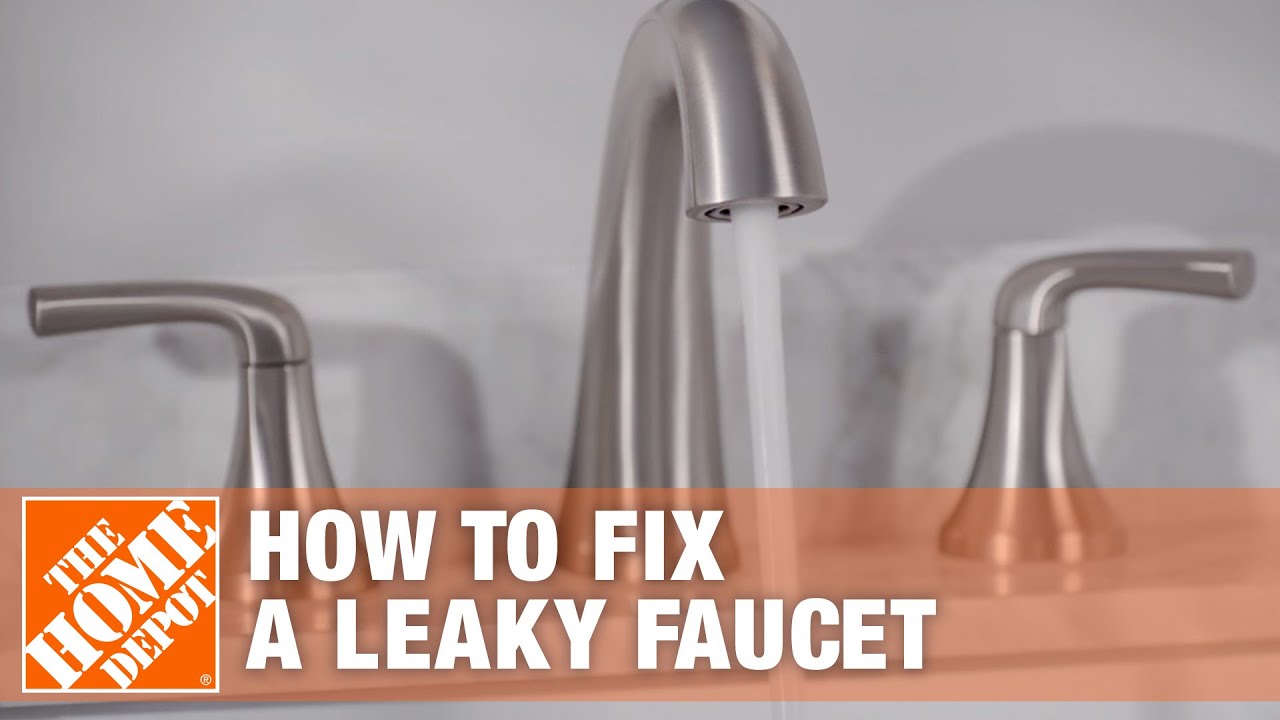
Credit: www.homedepot.com
Gather Necessary Tools
Start by gathering essential tools for fixing a dripping kitchen faucet. A wrench, screwdriver, and replacement parts are crucial. Also, ensure you have a towel or bucket ready for catching any water spills during the repair.
Fixing a dripping kitchen faucet might seem daunting at first, but with the right tools, it’s a task you can tackle confidently. Before you roll up your sleeves, make sure you have everything you need. Gathering the necessary tools is crucial for a smooth and efficient repair process. Imagine starting the repair only to realize you’re missing a key tool—it’s not only frustrating but also a waste of time.1. Collect Basic Household Tools
Start with what you likely already have at home. A screwdriver set and an adjustable wrench are essential. These tools will help you remove the faucet handle and tighten any loose parts. If you’re missing any, consider checking with a neighbor or friend before heading to the store.2. Have A Plumber’s Tape Ready
Plumber’s tape, also known as Teflon tape, is crucial for creating watertight seals. It’s a small investment but can prevent future leaks. Keep it handy to wrap around threads, ensuring a snug fit. You’ll thank yourself later when everything holds together perfectly.3. Don’t Forget A Flashlight
Sometimes, kitchen sink spaces are dimly lit, making it hard to see what you’re working on. A flashlight or a headlamp can illuminate those hard-to-see spots. This simple tool can save you from missteps due to poor visibility, ensuring you catch every detail.4. Keep A Bucket And Towels Nearby
Avoid potential messes by having a bucket and some towels ready. You might encounter some unexpected water spills. By being prepared, you can keep your workspace dry and tidy, minimizing cleanup time after the repair.5. Acquire A Faucet Repair Kit
For more complex leaks, a faucet repair kit might be necessary. These kits often contain washers, O-rings, and other small parts that might need replacement. Check your faucet’s brand and model to buy a compatible kit. It’s a smart move to have these specific items on hand, preventing last-minute trips to the hardware store. As you gather these tools, think about the satisfaction you’ll feel once that persistent drip is finally gone. Does your toolbox already have these essentials, or is it time for a quick shopping trip? Preparing thoroughly not only makes the job easier but also boosts your confidence in tackling such repairs.Turn Off Water Supply
Turning off the water supply is the first step to fix a dripping kitchen faucet. This prevents water from spilling while you work. Look under the sink and twist the valve clockwise to shut it off.
Turning off the water supply is a crucial step in fixing a dripping kitchen faucet. It ensures safety and prevents water damage. It also makes the repair process easier and more efficient. Let’s explore how you can do this properly.Locate The Shut-off Valves
Start by finding the shut-off valves. Usually, they are located under the kitchen sink. You might see two valves – one for hot water and one for cold. These valves control the water flow to your faucet.Turn The Valves Clockwise
Once you find the valves, turn them clockwise. This action stops the water flow. Use your hand or a wrench if the valve is tight. Ensure both valves are completely turned off to prevent any leaks.Check The Faucet
After turning off the valves, check the faucet. Turn it on to confirm the water supply is cut off. No water should come out if the valves are properly closed. This step is important for your safety during repairs.Inspect For Leaks
Now, inspect the area for any leaks. Look under the sink and around the faucet. Ensure there is no water dripping from the valves or pipes. Detecting leaks early can save you from future damage.Prepare For The Repair
With the water supply off, you can prepare for the repair. Gather necessary tools and parts. Make sure everything is within reach. This preparation ensures a smooth and quick fix for your dripping faucet.
Credit: www.youtube.com
Disassemble The Faucet
Disassembling your kitchen faucet is the first step to fixing a drip. This process helps you access the inner parts that might be causing leaks. Taking apart the faucet is not difficult, but requires careful attention. Follow these steps to ensure you do not damage any components.
Remove Faucet Handle
Start by turning off the water supply. This prevents water from spilling. Next, locate the screw on the handle. It might be hidden under a decorative cap. Use a flat screwdriver to remove this cap. Once visible, use a screwdriver to unscrew the handle. Pull the handle gently to detach it from the faucet body.
Detach Faucet Parts
Once the handle is off, remove the retaining nut. Use an adjustable wrench for this task. Turn the nut counterclockwise until loose. Next, take out the stem or cartridge from the faucet. This part might require gentle wiggling to remove. Be careful not to damage any seals or washers during removal.
Check each part for wear or damage. Replace any broken components to stop the drip effectively. Organize the removed parts for easy reassembly later.
Inspect And Replace Faulty Parts
Fixing a dripping kitchen faucet involves inspecting and replacing faulty parts. Identify worn-out washers or seals. Swap them with new ones to stop leaks.
Have you ever been kept awake at night by the relentless drip, drip, drip of your kitchen faucet? It’s more than just a nuisance; it can waste gallons of water over time. To tackle this issue, you need to inspect and replace any faulty parts. This might sound daunting, but with a little guidance, it’s something you can easily manage. Let’s dive into the specifics of what you should look for.Examine O-rings And Washers
O-rings and washers are often the culprits behind a dripping faucet. These small rubber or silicone rings ensure a tight seal, preventing water from escaping. Start by turning off the water supply to avoid any unwanted mess. Then, disassemble the faucet handle to access these components. Once exposed, carefully inspect the O-rings and washers for any signs of wear and tear. Look for cracks, flattening, or any signs of brittleness. If you notice any damage, it’s time to replace them. Replacement kits are available at most hardware stores and are usually inexpensive. Make sure to take your old rings with you to find a perfect match. Remember that a small investment of your time here can save you from a larger water bill later.Check For Damaged Valves
Valves are essential for controlling the flow of water. When they are damaged, they can cause persistent leaking. Begin by removing the faucet’s spout to reach the valve. This might require a bit of elbow grease, but it’s essential for a thorough inspection. Examine the valve for any corrosion, mineral deposits, or physical damage. These can be indicators that a replacement is necessary. If the valve is beyond repair, replace it with a new one that matches your faucet model. This ensures proper functioning and prevents future leaks. Replacing a valve might sound like a complex task, but think of it as a small adventure in home improvement. Have you ever tried fixing something and felt the rush of accomplishment when it worked perfectly again? Fixing a dripping faucet can give you that same satisfaction. Why not give it a try?Reassemble The Faucet
Reassembling the kitchen faucet is the final step in fixing the drip. After disassembling and replacing any faulty parts, you need to carefully put everything back together. This ensures the faucet works perfectly and prevents future leaks. Follow these steps to reassemble your faucet with ease.
Reattach Faucet Parts
Begin by placing the new or cleaned components back into their positions. Check the order of parts in your faucet manual or photos you took before disassembly. Insert the cartridge or ball assembly first. Make sure it fits snugly. Next, place the retaining nut over the cartridge. Tighten it with your wrench, ensuring it’s secure but not overly tight. This helps the faucet function smoothly.
Secure Faucet Handle
Now, align the faucet handle with the cartridge stem. Slide the handle over the stem carefully. Use a screwdriver to fasten the handle screw tightly. Ensure the handle moves without resistance. Test the handle by turning it on and off. This checks if all parts are in place and functioning. Once the handle is secure, your faucet should be drip-free and ready for use.
Test The Faucet
Testing your kitchen faucet after a repair is essential to ensure everything is in perfect working order. Imagine spending time fixing the drip, only to find out that the problem persists or another issue has arisen. Testing allows you to catch these issues early and provides peace of mind. Plus, it’s incredibly satisfying to see your handiwork result in a fully functioning faucet. Here’s how you can effectively test your kitchen faucet.
Turn On Water Supply
First, make sure the water supply is turned back on. This step is crucial as you can’t test the faucet without water flow. Turn the valves under your sink clockwise to open them. It’s like giving life back to your faucet.
Once the water supply is on, turn the faucet handle to allow water to flow. Feel the power as the water gushes out. It’s a small step, but it’s the moment when you see your hard work come to life.
Check For Leaks
With the water flowing, carefully inspect the faucet and surrounding area for any leaks. Pay special attention to the base and handles. These are common places where leaks can sneak up on you.
Use a flashlight to get a better look if needed. Sometimes leaks are subtle, like a ninja hiding in the shadows. If you find any, tighten the connections or replace seals as necessary.
Isn’t it amazing how a simple flashlight can turn you into a detective? Your attention to detail here can save you from future headaches.
If no leaks are found, pat yourself on the back. You’ve fixed the faucet like a pro. But don’t relax just yet—consider the water pressure. Is it consistent? Does the faucet shut off properly? These final checks ensure everything runs smoothly.
Are you ready for the next challenge, or do you prefer celebrating this small victory with a cup of coffee? Either way, testing your faucet isn’t just about fixing leaks—it’s about gaining confidence in your DIY skills.
Prevent Future Drips
Fixing a dripping kitchen faucet can prevent future leaks and save water. Replace worn-out washers or O-rings to stop the drip. Tightening loose parts might also help.
Preventing future drips in your kitchen faucet saves time and money. It also keeps your kitchen hassle-free and dry. Simple practices and smart choices help achieve this. Focus on regular maintenance and selecting quality parts. These steps ensure your faucet stays in great shape for years.Regular Maintenance Tips
Routine checks keep your faucet in good condition. Inspect seals and washers for wear. Replace them if they look damaged. Clean the aerator regularly to avoid clogs. Use a soft cloth to wipe the faucet surface. This prevents build-up that might cause leaks. Check for signs of corrosion or rust. Early detection stops problems from growing.Choosing Quality Parts
Quality parts make a difference in faucet longevity. Invest in durable washers and seals. Choose parts made from stainless steel or brass. These materials resist corrosion. Avoid plastic parts as they wear out quickly. High-quality parts perform better and last longer. Ensure parts fit your specific faucet model. This ensures a snug, leak-free installation.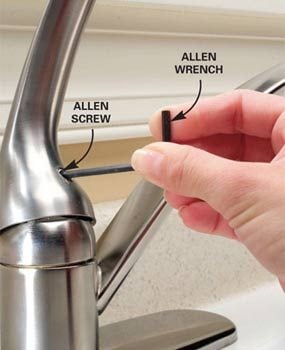
Credit: www.familyhandyman.com
Frequently Asked Questions
How To Stop Dripping Faucet Kitchen?
Turn off the water supply under the sink. Remove the faucet handle using a screwdriver. Replace the worn-out washer or cartridge. Reassemble the faucet and turn on the water supply. Check for any leaks to ensure the dripping has stopped.
Regular maintenance can prevent future faucet issues.
How To Replace A Cartridge In A Kitchen Faucet?
Turn off the water supply. Remove faucet handle using a screwdriver. Take out the old cartridge. Insert the new cartridge. Reattach the handle and turn on the water supply. Test for leaks.
What Causes A Kitchen Sink Faucet To Drip?
A kitchen sink faucet drips due to worn-out washers, corroded valve seats, or damaged O-rings. Mineral deposits can also cause drips. Regular maintenance and timely part replacements can prevent dripping. If DIY fixes don’t work, consulting a professional plumber might be necessary to address the issue effectively.
How To Stop A Dripping Tap In The Kitchen?
Turn off the water supply. Use a wrench to remove the tap handle. Replace the worn washer or O-ring. Reassemble the tap and turn the water supply back on. Check for leaks.
How Do I Identify The Cause Of Faucet Dripping?
Check the washer or O-ring. Mineral deposits can block water flow. Inspect the valve seat for damage.
Conclusion
Fixing a dripping kitchen faucet can be simple and rewarding. Start by identifying the problem. Is it a worn-out washer or a loose part? Gather your tools and follow the steps carefully. Always turn off the water supply first. Replace any faulty components with new ones.
Tighten everything securely. Test the faucet to ensure the drip has stopped. Regular maintenance helps prevent future leaks. Save water and reduce bills by fixing drips promptly. With practice, you’ll handle faucet repairs with ease. Enjoy a drip-free kitchen and peace of mind.