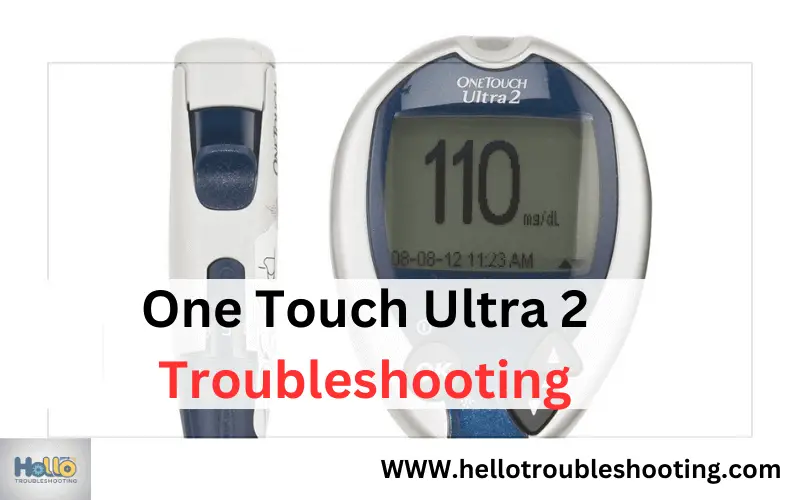
Managing diabetes can be challenging. The One Touch Ultra 2 helps monitor blood sugar levels.
Sometimes, though, issues arise with the device. If you face problems with your One Touch Ultra 2, don’t worry. Many common issues have simple solutions. This guide will help you troubleshoot your device effectively. Whether it’s an error message or inaccurate readings, we’ll cover solutions.
Understanding your device better can ensure accurate results and peace of mind. Let’s explore how to fix common problems with your One Touch Ultra 2.
Introduction To One Touch Ultra 2
In the world of diabetes management, the One Touch Ultra 2 meter is a trusted ally for many. Designed for simplicity and accuracy, it helps users monitor their blood sugar levels with ease. However, like any device, it can sometimes encounter issues. Don’t worry, though – we’re here to guide you through the basics and troubleshoot common problems.
Device Overview
The One Touch Ultra 2 is a compact, easy-to-use blood glucose meter. It’s designed to provide quick and accurate readings. But what exactly does it offer?
- Large, easy-to-read display
- Simple navigation buttons
- Fast results in just five seconds
- Memory to store up to 500 readings
- Ability to tag pre- and post-meal readings
All these features make it a reliable companion for everyday use. But what about its practical applications?
Common Usage Scenarios
Imagine you wake up in the morning, feeling a bit off. You grab your One Touch Ultra 2 to check your blood sugar levels. Within seconds, you have the information you need to make informed decisions about your breakfast and insulin dose. It’s that simple.
Another scenario: You’re out for dinner with friends. You discreetly use your meter to check your levels before indulging in that delicious dessert. The meter’s memory function even lets you track your readings over time, helping you and your healthcare provider make better decisions.
These everyday moments highlight the importance of a reliable glucose meter. Yet, even the best devices can face hiccups. Let’s delve into some common issues and how to troubleshoot them.
Battery Issues
Having trouble with your One Touch Ultra 2? If your device is acting up, it might be a battery issue. Let’s dive into some simple solutions to get your device back in action. Whether it’s replacing the battery or extending its life, we’ve got you covered.
Battery Replacement
Is your One Touch Ultra 2 not turning on? The battery might be dead. Here’s how you can replace it:
- Turn off your device.
- Open the battery compartment using a small screwdriver.
- Carefully remove the old battery.
- Insert a new CR2032 battery, ensuring the positive (+) side faces up.
- Close the battery compartment.
- Turn on your device to check if it works.
Simple, right? Just like changing the batteries in your TV remote. A quick and easy fix!
Battery Life Optimization
Want to make your battery last longer? Here are some tips:
- Turn off when not in use: Always switch off your device when you’re done checking your blood sugar levels.
- Store in a cool, dry place: Extreme temperatures can drain the battery faster. Keep your device in a safe spot.
- Check for software updates: Sometimes, an update can improve battery efficiency. Check the manufacturer’s website for any available updates.
- Reduce backlight usage: The screen backlight consumes a lot of power. Use it sparingly.
By following these tips, you can extend the battery life and save yourself from frequent replacements. It’s all about smart usage!
Battery issues can be a real headache, but with these simple steps, you can troubleshoot like a pro. Remember, a little care goes a long way. Keep your One Touch Ultra 2 running smoothly and stay on top of your health!
Display Problems
Display problems on the One Touch Ultra 2 can be frustrating. Whether the screen is not turning on or appears dim, these issues can interfere with your glucose monitoring. This section will guide you through common display problems and provide simple solutions.
Screen Not Turning On
First, check the battery. A dead or low battery can prevent the screen from turning on. Replace the battery with a new one to see if that resolves the issue. Ensure the battery is inserted correctly.
If the battery is fine, inspect the battery contacts. They should be clean and free of corrosion. Clean them gently with a soft cloth if needed. Sometimes, resetting the device helps. Remove the battery, wait for a minute, then reinsert it.
Dim Or Unreadable Screen
A dim screen often indicates a low battery. Replace it with a fresh one to improve the display brightness. If the screen remains unreadable, check the device’s settings. Adjust the contrast setting if possible.
Another cause for a dim screen could be dirt or smudges on the display. Clean the screen with a soft, dry cloth. Ensure no liquids enter the device during cleaning. If problems persist, consult the user manual or contact customer support.
Error Messages
Dealing with error messages on your One Touch Ultra 2 can be frustrating. Knowing what these errors mean can help you resolve issues quickly. This section will guide you through common error codes and how to reset the device.
Common Error Codes
Understanding common error codes can help you troubleshoot faster. Here are some frequent errors and their meanings:
E-1: This error indicates an issue with the test strip. Check if the strip is properly inserted or replace it.
E-2: This code signifies a problem with the glucose sample. Ensure the sample is sufficient and re-test.
E-3: An E-3 error points to a malfunction in the meter. Resetting the device can often resolve this.
Resetting The Device
Sometimes, resetting the One Touch Ultra 2 can fix many issues. Follow these steps to reset your device:
1. Remove the battery from the meter.
2. Wait for at least 10 seconds.
3. Reinsert the battery into the meter.
4. Turn on the device and check if the error persists.
Resetting helps clear temporary glitches and restores the device to normal function.
Test Strip Issues
When using the One Touch Ultra 2, you might encounter problems with test strips. These issues can be frustrating, but they often have simple solutions. Let’s dive into the common test strip problems and how you can fix them effortlessly.
Strip Insertion Errors
One common issue is improper strip insertion. It’s easy to make mistakes, especially if you’re in a hurry. Here are some tips to avoid this:
- Insert the strip gently: Force can damage the meter and the strip.
- Ensure proper alignment: The strip should fit snugly without being forced.
- Check the direction: Make sure the strip is the right way up. The contact bars should be facing you.
Imagine trying to jam a puzzle piece where it doesn’t belong; it won’t fit right! The same goes for test strips. Take a moment to align it correctly for accurate results.
Expired Or Damaged Strips
Using expired or damaged test strips can result in inaccurate readings. Here’s how you can avoid this:
- Check the expiration date: Always look at the date on the strip vial before use.
- Store properly: Keep strips in a cool, dry place. Humidity or extreme temperatures can damage them.
- Inspect the strips: If a strip looks damaged or discolored, don’t use it.
Think of it like using expired milk in your coffee – it’s not going to taste right! Similarly, expired strips won’t give you accurate results. So, always ensure your strips are fresh and in good condition.
By following these tips, you can troubleshoot and resolve most test strip issues with your One Touch Ultra 2. Remember, a little care goes a long way in ensuring accurate readings and a smooth testing experience.
Blood Sample Problems
Blood sample problems can interfere with the accuracy of your One Touch Ultra 2 readings. Understanding common issues with blood samples can help you get more reliable results. Let’s explore two main problems: insufficient blood samples and contaminated samples.
Insufficient Blood Sample
An insufficient blood sample can cause errors. To avoid this, ensure your finger is clean and dry. Warm your hands by rubbing them together or using warm water. This can increase blood flow. Puncture the side of your fingertip, as it’s less painful and produces more blood. Ensure the blood drop is large enough to fill the test strip window completely. If not, repeat the process.
Contaminated Sample
A contaminated sample can affect your readings. Clean your hands thoroughly with soap and warm water. Dry them completely. Avoid using alcohol wipes as they can leave residues. Ensure the test strip and meter are clean and free from dirt. Do not touch the blood sample area of the test strip. This can lead to contamination. Use a fresh, sterile lancet each time you test.
Data Management
Managing data on your One Touch Ultra 2 is essential for tracking your blood glucose levels effectively. It ensures that you have a clear picture of your health trends over time. But what happens when you need to transfer this data to your computer or clear the memory? Let’s delve into these aspects to make sure you know how to handle your device like a pro.
Transferring Data To Computer
Transferring data from your One Touch Ultra 2 to your computer is a straightforward process. This step is crucial for keeping a backup and analyzing your glucose levels with more advanced software. Here’s how you can do it:
- Connect the Device: Use a USB cable to connect your One Touch Ultra 2 to your computer.
- Install Software: Ensure you have the OneTouch software installed on your computer. This software is usually available on the official OneTouch website.
- Open the Software: Launch the OneTouch software and follow the on-screen instructions to import your data.
- Verify Transfer: Check if all your data has been successfully transferred by comparing the records on your device with those on your computer.
Once the data is transferred, you can create detailed reports, share them with your healthcare provider, or keep them for your personal records. Isn’t it amazing how technology simplifies health management?
Clearing Memory
After transferring your data, you might need to clear the memory of your One Touch Ultra 2 to make room for new readings. Here’s a simple way to do it:
- Turn on the Device: Press the power button to turn on your One Touch Ultra 2.
- Navigate to Memory: Use the navigation buttons to find the memory section in the menu.
- Clear Data: Select the option to clear all data. Confirm the action if prompted.
Clearing the memory ensures your device runs smoothly and avoids any confusion with old data. However, always double-check that you’ve backed up your data before clearing it. Better safe than sorry, right?
By mastering these data management steps, you can keep your One Touch Ultra 2 functioning efficiently and ensure that you never miss a beat in your health monitoring journey. Remember, staying organized is key to effective diabetes management.
Customer Support
Having trouble with your One Touch Ultra 2? Customer support can help. They provide solutions for various issues. Whether you need contact information, warranty details, or repair services, they have you covered.
Contact Information
For quick assistance, reach out to customer support. You can call them at their toll-free number. The number is available on their website. They also offer email support. Just fill out the contact form on their support page. Expect a response within 24 hours.
Warranty And Repairs
Check your warranty status if your device needs repair. The One Touch Ultra 2 usually comes with a limited warranty. This covers defects in materials and workmanship. You can find warranty details in your user manual. If your device is under warranty, repairs might be free.
For out-of-warranty repairs, contact customer support. They will guide you through the repair process. You may need to send your device to an authorized service center. Always use genuine parts for repairs to ensure the device works properly.
Frequently Asked Questions
How Do You Reset The Onetouch Ultra 2?
To reset the OneTouch Ultra 2, remove the battery, wait 10 seconds, then reinsert it. The meter will reset.
How Do I Get My One Touch Ultra 2 To Work?
Turn on your One Touch Ultra 2 by pressing the power button. Insert a test strip into the meter. Apply a blood sample to the test strip. Wait for the reading to display. Follow the on-screen instructions for further steps.
Why Was The Onetouch Ultra 2 Discontinued?
The OneTouch Ultra 2 was discontinued due to advancements in technology. Newer models offer more features and improved accuracy.
Why Is My Onetouch Ultra 2 Not Turning On When Inserting Strip?
Your OneTouch Ultra 2 may not turn on due to dead batteries, improper strip insertion, or a faulty meter. Ensure batteries are fresh and strips are correctly inserted.
Why Is My One Touch Ultra 2 Not Turning On?
Check the battery. Ensure it’s properly inserted and not dead. Replace if needed.
Conclusion
Troubleshooting the One Touch Ultra 2 can be simple. Follow these steps. Check battery life, clean the meter, and use fresh test strips. Contact customer support if issues persist. Regular maintenance ensures accurate readings. Keep your device in good condition.
This helps manage your health effectively. Remember, a well-functioning meter is key. Stay informed and proactive with your device. Happy testing!