Home security is vital. Liftmaster Security Plus 2.0 is a popular choice for many.
Yet, even the best systems face issues. Troubleshooting your Liftmaster Security Plus 2. 0 can seem daunting. But, understanding common problems and their solutions makes it easier. In this guide, we’ll cover the basics of diagnosing and fixing your garage door opener.
Whether it’s connectivity problems, sensor issues, or remote control glitches, we aim to help you resolve them. Knowing how to troubleshoot your system ensures your home remains secure. So, let’s dive in and get your Liftmaster back to perfect working order.
Credit: community.garadget.com
Common Issues
Many homeowners face common issues with their Liftmaster Security Plus 2.0. These problems can be frustrating. But, they are usually easy to fix. Let’s dive into some of the most frequent issues.
One common issue is with the remote control. Sometimes, it stops working. The first step is to check the batteries. Weak batteries can cause the remote to fail. Replace the batteries and try again.
If new batteries do not solve the problem, reprogram the remote. Follow the manual’s instructions. If the remote still does not work, check for interference. Nearby electronic devices can cause problems. Move any such devices away from the garage door opener.
Another frequent problem is the door not closing. This can be due to sensor issues. Make sure the sensors are aligned. Misaligned sensors can prevent the door from closing.
Also, check for obstacles. Objects in the path of the door can trigger the sensors. Remove any items blocking the door’s path. Clean the sensors’ lenses. Dust and dirt can interfere with their function.
If the door still does not close, check the opener’s settings. The force setting might be too low. Adjust it according to the manual. If none of these steps work, there could be a deeper issue. It might be time to call a professional.
Credit: www.youtube.com
Remote Control Problems
Hey friends, today let’s talk about something many of us deal with – remote control problems. Sometimes, our trusty Liftmaster Security Plus 2.0 remote stops working. Frustrating, right? But don’t worry. We will discuss how to fix common issues. Two main areas we will cover are battery replacement and programming the remote. Ready to get started? Let’s dive in!
Battery Replacement
First things first. If your remote isn’t working, it might just need a new battery. Here’s a simple step-by-step guide:
- Find the battery compartment. It’s usually on the back of the remote.
- Use a small screwdriver to open the compartment.
- Take out the old battery. Be careful not to damage any parts.
- Insert a new battery. Make sure it’s the right type. Check the manual if you’re unsure.
- Close the compartment and test the remote.
Easy, right? Just like changing the batteries in a TV remote. Sometimes, that’s all it takes to get things working again.
Programming Remote
Okay, so you’ve changed the battery, but the remote still isn’t working. No worries. It might need reprogramming. Follow these steps:
- Press and hold the learn button on your garage door opener until the indicator light turns on.
- Within 30 seconds, press and hold the button on your remote that you want to program.
- Release the button when the garage door opener light blinks. This means the remote is programmed.
There you go! Your remote should be working now. Programming it is like setting up a new phone. It just takes a few simple steps.
So, whether it’s a battery issue or programming problem, fixing your Liftmaster remote can be simple. Remember, troubleshooting is all about taking it step by step. Good luck and happy fixing!
Door Not Closing
Experiencing issues with your Liftmaster Security Plus 2.0 door not closing? This can be frustrating. Several factors might cause this problem. Understanding these factors can help resolve the issue quickly. Let’s explore some common reasons.
Sensor Alignment
The sensors near the ground play a key role. They ensure the door closes safely. If misaligned, the door won’t close. Check both sensors. They should face each other directly. A slight misalignment can cause problems.
Ensure there are no obstructions. Dirt or debris can block the sensors. Clean them regularly. A quick wipe can prevent many issues. If sensors still don’t align, consider professional help.
Obstruction Detection
Liftmaster doors have a safety feature. They won’t close if something blocks the path. Check for objects under the door. Even small items can trigger this. Clear any obstructions before trying again.
Sometimes, the door tracks have debris. Inspect and clean the tracks. This ensures smooth operation. Regular maintenance can prevent many issues. If the door still won’t close, there might be a more complex problem.
Credit: support.garagedoorzone.com
Motor Malfunctions
Hey friends, today we’re diving into troubleshooting motor malfunctions for the Liftmaster Security Plus 2.0. It’s quite common for your garage door opener to experience motor issues over time. But don’t worry, I’ve got you covered. Let’s look at some simple solutions to get your motor up and running smoothly again.
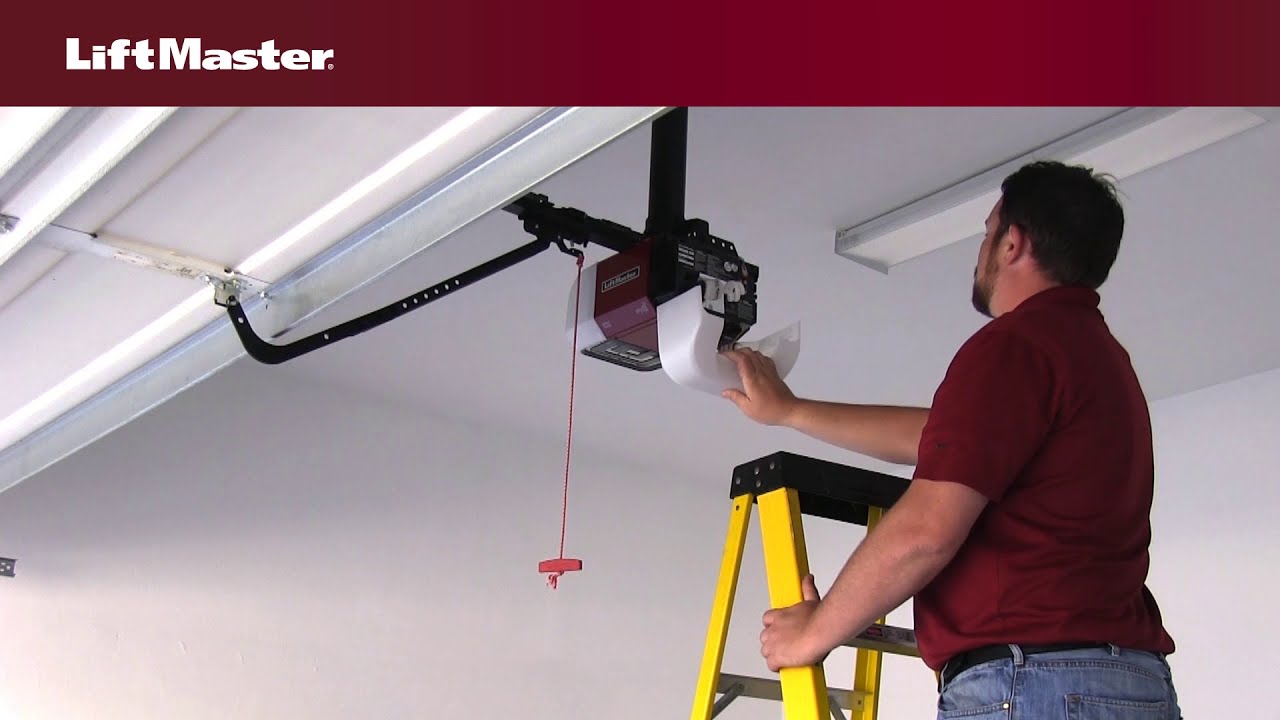
Motor Reset
Sometimes, your motor just needs a reset. Think of it like rebooting your computer when it starts acting up. Here’s how you can reset the motor:
- First, turn off the power to the garage door opener. This is important for safety.
- Next, unplug the opener from the electrical outlet.
- Wait for about 10 seconds. This gives the motor a chance to reset.
- Plug the opener back in and turn the power on.
- Try operating the garage door opener to see if the issue is resolved.
If this doesn’t work, don’t worry. There are other issues we can check.
Overheating Issues
Another common problem is motor overheating. This can happen if the motor is overworked or if there’s a lack of ventilation. Here are some signs of an overheating motor:
- The motor feels hot to the touch.
- The garage door opener stops working after a few uses.
- There’s a burning smell coming from the motor.
To fix overheating issues, you can try these steps:
- Give the motor a break. Let it cool down for about 15-30 minutes.
- Check for any obstructions. Sometimes, debris can block the motor’s ventilation.
- Ensure the motor has enough airflow. Make sure the area around the motor is clear.
Remember, regular maintenance can prevent overheating. Keep the motor clean and ensure it has proper ventilation.
There you have it! Some simple troubleshooting steps for motor malfunctions. Remember, patience is key. If these steps don’t solve the problem, it might be time to call a professional. Stay safe and good luck!
Keypad Entry Issues
Hey friends, have you ever tried to use your Liftmaster Security Plus 2.0 and found that your keypad just won’t work? It can be super frustrating, right? Don’t worry, we’ve all been there. Today, we’ll go through some simple steps to troubleshoot common keypad entry issues. Let’s make sure you can get back to using your garage door without any hassle.
Resetting Keypad
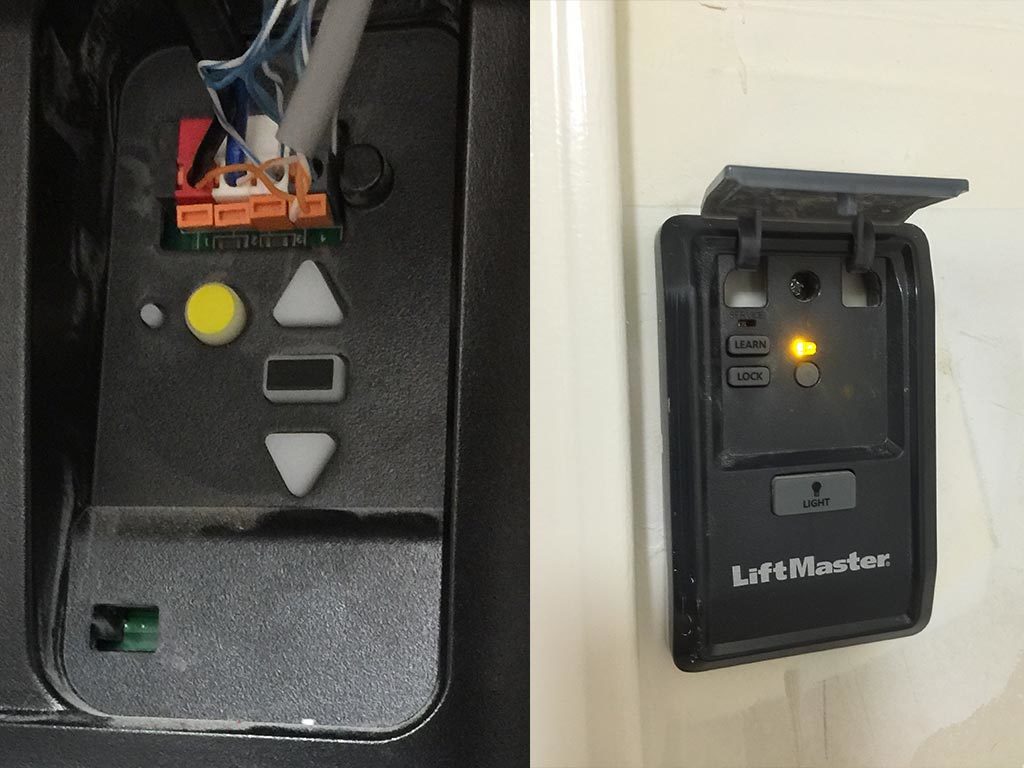
Sometimes, the easiest way to solve a keypad problem is to reset it. Think of it like rebooting your computer when it’s acting up. Here’s how you can do it:
- First, locate the Learn Button on your garage door opener. It’s usually on the back or side.
- Press and hold the Learn Button until the LED light turns off. This takes about 6 seconds.
- Release the button. This will erase all codes from the keypad.
- Now, enter a new 4-digit PIN on your keypad and press the Enter button.
And that’s it! Your keypad should be reset now. If it’s still not working, let’s move on to the next step.
Reprogramming Code
After resetting the keypad, you might need to reprogram the code. This is like setting up a new password for your email. Here’s a quick guide to do that:
- Press the Learn Button on your garage door opener.
- Within 30 seconds, enter your new 4-digit PIN on the keypad.
- Press and hold the Enter button until the opener lights blink. If there are no lights, you might hear two clicks instead.
Now, try using your new code to open the garage door. It should work smoothly.
Remember, if you’re still facing issues, it might be a good idea to check the battery in your keypad or consult the user manual for further instructions.
One time, I had a similar issue and thought my keypad was broken. After trying these steps, I realized it was just a simple reset that fixed everything. So, don’t stress. Just take it step by step and you’ll be fine.
Wi-fi Connectivity Problems
Experiencing Wi-Fi connectivity problems with your LiftMaster Security Plus 2.0 can be frustrating. A stable internet connection is vital for the smooth operation of your garage door opener. If you’re facing issues, several factors could be affecting the connectivity. Let’s explore some common troubleshooting steps to resolve these problems.
Router Placement
The position of your router impacts Wi-Fi signal strength. Ensure your router is placed centrally in your home. Avoid placing it near thick walls or metal objects. These can obstruct the Wi-Fi signal. Elevating the router can also improve signal coverage. Make sure the router is within a reasonable distance from your LiftMaster device. A closer router often means a stronger signal.
Network Settings
Checking your network settings can resolve connectivity issues. Ensure your Wi-Fi network operates on the 2.4 GHz band. The LiftMaster Security Plus 2.0 is compatible with this band. Also, ensure your network name (SSID) and password are correct. Incorrect credentials can prevent connection.
Ensure your router’s firmware is up to date. Firmware updates can fix connectivity issues. Check your router’s manual for update instructions. Also, reduce the number of devices connected to your network. Too many devices can strain your Wi-Fi, causing connectivity problems.
Battery Backup Issues
Hey friends, today we’re going to talk about a common problem with the Liftmaster Security Plus 2.0: Battery Backup Issues. If your garage door opener’s battery backup isn’t working, don’t worry. This happens to a lot of people. A battery backup is important because it keeps your garage door working during a power outage. Let’s dive into the details and see how to fix it.
Battery Testing
First things first, let’s test the battery. This is easier than you think. Just like testing a flashlight when it stops working. Here’s how you can do it:
- Unplug the garage door opener.
- Try to open the garage door using the wall control or remote.
- If the door opens, the battery is probably fine. If not, it might be dead.
Still unsure? Use a multimeter to test the battery voltage. It should be around 12 volts. If it’s lower, you need a new battery.
Battery Replacement
If testing shows your battery is dead, it’s time for a replacement. Don’t worry, replacing the battery is simple. It’s like changing the batteries in your TV remote. Follow these steps:
- Find the battery compartment on your garage door opener. It’s usually on the back or side.
- Remove the cover. You might need a screwdriver.
- Take out the old battery. Be careful with the wires.
- Put the new battery in, connecting the wires the same way as before.
- Replace the cover and plug the opener back in.
That’s it! Your garage door opener should now work even during a power outage. Easy, right?
Remember to check the battery every year. Just like you check the batteries in your smoke detectors. It’s a small task that can save you a big headache.
So, there you have it. Testing and replacing your Liftmaster Security Plus 2.0 battery backup is simple. No need to stress. Just follow these steps and you’ll be set.
Maintenance Tips
Maintaining your Liftmaster Security Plus 2.0 is crucial for its longevity. Regular maintenance helps avoid unexpected issues. It ensures smooth operation and enhances security. Below are some essential maintenance tips.
Regular Lubrication
Lubricate the moving parts of your garage door opener. This includes the hinges, rollers, and tracks. Use a silicone-based lubricant. Avoid using grease. Grease can attract dust and dirt. Apply the lubricant every six months. Make sure to wipe off any excess.
Checking Wear And Tear
Inspect your Liftmaster Security Plus 2.0 regularly. Look for signs of wear and tear. Check the cables and springs for damage. Look at the rollers and hinges. Replace any worn-out parts immediately. This prevents further damage. It also ensures the opener works efficiently.
Frequently Asked Questions
How Do I Reset My Liftmaster Security 2.0 Garage Door?
Press and hold the “Learn” button on the garage door opener until the LED light turns off. Then, press the “Learn” button again, followed by pressing your remote button. Your LiftMaster Security 2. 0 garage door opener is now reset.
What Does Flashing Light On Liftmaster Garage Door Opener Mean?
A flashing light on your LiftMaster garage door opener usually indicates an issue. It could be a safety sensor problem or a motor overload.
Why Is My Liftmaster Not Responding?
Your LiftMaster might not be responding due to power issues, remote battery problems, or signal interference. Check the power source and remote batteries. Ensure there are no obstructions or interference affecting the signal. If issues persist, consult the user manual or contact customer support for further assistance.
Why Is My Garage Door Opener Blinking And Not Opening?
Your garage door opener is blinking and not opening due to misaligned sensors or blocked safety beams. Check for obstructions and realign sensors.
Conclusion
Fixing Liftmaster Security Plus 2. 0 issues is simple with our tips. Regular maintenance prevents most problems. Always check battery and sensor alignment. Clear any obstructions. Follow the manual for troubleshooting steps. Seek professional help if needed. Consistent care ensures a reliable garage door system.
Happy troubleshooting!