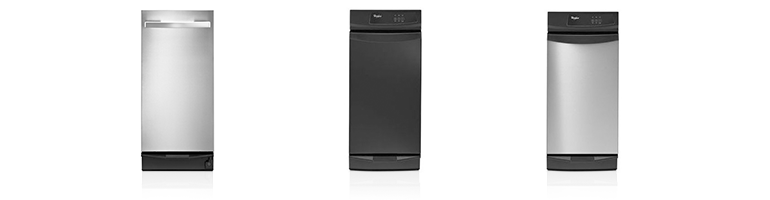
Dealing with a Whirlpool trash compactor that isn’t working? You’re not alone.
Many homeowners face common issues with their trash compactors. A Whirlpool trash compactor can be a convenient tool in your kitchen. It helps reduce the volume of your trash, making waste management easier. But what happens when it stops working properly?
Knowing how to troubleshoot common problems can save you time and money. This guide will help you identify and fix typical issues with your Whirlpool trash compactor. From not starting to noisy operations, we will cover practical solutions. Get ready to tackle these problems and keep your compactor running smoothly.

Credit: www.youtube.com
Common Issues
Whirlpool trash compactors, like any appliance, can have issues. Knowing how to troubleshoot common problems can save you time and money. Here are some frequent issues that users face.
Unit Won’t Start
One common problem is the unit not starting. First, check the power source. Make sure the compactor is plugged in. Next, inspect the circuit breaker or fuse box. A tripped breaker can cause the unit to stop working. Also, check the door switch. The compactor won’t start if the door isn’t closed properly.
Another possible issue is the start switch. If the switch is broken, the compactor won’t run. You might need to replace the switch. Lastly, consider the motor. A faulty motor can prevent the compactor from starting.
Noisy Operation
A noisy compactor can be annoying. Start by checking for loose items inside the compactor. Small objects can cause loud sounds during operation. Also, examine the drive gears. Worn gears can make grinding noises.
Look at the ram. If it’s misaligned, it can create a loud sound. Realigning the ram might solve the issue. Finally, check the motor. A failing motor can produce unusual noises. Replacing the motor could be necessary.

Credit: www.amazon.com
Tools Needed
When troubleshooting your Whirlpool trash compactor, having the right tools is essential. This ensures that you can address issues efficiently and effectively. Here, we will outline the basic tools and specialized equipment required for the task.
Basic Tools
To start, you’ll need some basic tools that most households already have. These tools are fundamental for any repair or maintenance task.
- Screwdrivers: Both Phillips and flathead screwdrivers are necessary.
- Pliers: Standard pliers help in gripping and removing parts.
- Adjustable Wrench: Useful for loosening or tightening nuts and bolts.
- Flashlight: Helps in illuminating dark areas within the compactor.
- Gloves: Protect your hands from sharp edges and debris.
Specialized Equipment
In addition to basic tools, some specialized equipment may be required. These are specifically designed for more complex troubleshooting tasks.
- Multimeter: Essential for checking electrical connections and components.
- Nut Driver Set: Helps in handling different sizes of nuts and bolts.
- Compression Tool: Needed for working with compactor’s internal parts.
- Wire Strippers: Useful for electrical repairs and adjustments.
- Manual: Always keep the Whirlpool trash compactor manual handy.
Here is a quick reference table for the tools:
| Tool | Purpose |
|---|---|
| Screwdrivers | Removing and securing screws |
| Pliers | Gripping and removing parts |
| Adjustable Wrench | Loosening and tightening nuts |
| Flashlight | Illuminating dark areas |
| Gloves | Hand protection |
| Multimeter | Checking electrical connections |
| Nut Driver Set | Handling nuts and bolts |
| Compression Tool | Working with internal parts |
| Wire Strippers | Electrical repairs |
| Manual | Reference guide |
Using these tools ensures your Whirlpool trash compactor runs smoothly and efficiently.
Safety Precautions
When troubleshooting your Whirlpool trash compactor, safety should be your top priority. Always take the necessary steps to ensure your protection. This section covers the essential safety precautions you need to follow.
Unplugging The Unit
Before starting any troubleshooting, unplug the trash compactor. This step prevents electrical accidents. A live unit can cause serious injury. Ensure the power cord is fully disconnected.
Protective Gear
Wear protective gear while working on the trash compactor. Gloves protect your hands from sharp edges. Safety goggles shield your eyes from debris. Proper footwear prevents foot injuries.
Fixing A Jammed Compactor
A jammed Whirlpool trash compactor can be a frustrating issue. It often halts your kitchen routine. Addressing this problem quickly and efficiently is crucial. Let’s dive into the process of fixing a jammed compactor.
Clearing The Jam
First, ensure the compactor is unplugged. Safety is paramount. Next, open the compactor drawer. Look for any visible obstructions. Remove any debris causing the jam. Common culprits include food scraps and small utensils.
- Check the ram. Ensure it is not stuck in a downward position.
- Inspect the drawer tracks. Clear any blockages.
- Use a flashlight. This helps spot hidden debris.
If the jam persists, examine the compactor’s drive gears. They can sometimes get clogged. Clean them with a soft brush.
Preventing Future Jams
Preventing jams is easier than fixing them. Follow these simple tips:
- Avoid overloading the compactor. Stick to the recommended load size.
- Ensure proper disposal of large items. Break down boxes and bulky trash.
- Regular cleaning of the compactor. This helps maintain smooth operation.
Regular maintenance is key. Keep your compactor in top shape. Regularly check for loose parts and tighten them.
Following these steps will help you avoid future jams. Keep your Whirlpool trash compactor running smoothly.
Addressing Odor Problems
A Whirlpool trash compactor can help manage waste efficiently. Yet, it can develop unpleasant odors if not maintained properly. Addressing these odor problems is essential for a pleasant kitchen environment. Here’s how you can tackle this issue.
Cleaning The Compactor
Regular cleaning prevents bad smells. First, unplug the compactor for safety. Remove the trash bag and any debris inside. Use warm, soapy water to clean the interior and exterior surfaces. Focus on corners and edges where grime can build up. Rinse with clean water and dry with a soft cloth.
Check the compactor’s filters if it has them. Replace or clean them according to the manufacturer’s instructions. This simple routine keeps your compactor smelling fresh.
Using Deodorizers
Deodorizers can help control odors effectively. Choose a deodorizer designed for trash compactors. Place it inside the compactor as per the product’s instructions. These deodorizers neutralize bad smells and add a pleasant scent.
Consider natural alternatives like baking soda. Sprinkle a small amount at the bottom of the compactor. Baking soda absorbs odors well and is safe to use. Vinegar is another option. Soak a cloth in vinegar and wipe the interior surfaces. Let it dry completely before using the compactor again.
By keeping your compactor clean and using deodorizers, you can maintain a fresh-smelling kitchen.
Replacing The Ram
Replacing the ram in your Whirlpool trash compactor can seem daunting. But with the right steps, you can do it yourself. This guide will walk you through the process.
Removing The Old Ram
First, unplug the trash compactor. This step ensures safety. Then, open the compactor door. Pull the drawer out fully.
Locate the ram inside the unit. Use a wrench to loosen the bolts holding it. Carefully lift the ram out of the compactor. Ensure you don’t damage other components.
Installing The New Ram
Take the new ram and align it with the mounting holes. Insert the bolts and tighten them using a wrench. Double-check to ensure it’s secure.
Slide the drawer back into place. Plug the compactor back into the outlet. Test the unit to ensure the new ram works correctly.
Following these steps will help you replace the ram efficiently. Your Whirlpool trash compactor will be back in working order.
Fixing Electrical Issues
Dealing with electrical issues in your Whirlpool trash compactor can be daunting. But, with a little guidance, you can troubleshoot and fix these issues with ease. This section will guide you through some common electrical problems and how to solve them.
Checking The Wiring
First, you need to inspect the wiring of your trash compactor. Unplug the appliance to ensure safety. Look for any visible signs of damage on the wires. Frayed or broken wires can cause electrical issues. If you see damaged wires, they need to be repaired or replaced.
Next, check the connections. Make sure all wires are properly connected. Loose connections can interrupt the power supply to the compactor. Tighten any loose connections to restore power. If you are unsure, consult the user manual or a professional.
Replacing Fuses
Fuses play a crucial role in your trash compactor’s electrical system. They protect the appliance from power surges. If your compactor is not working, the fuse might be blown. Locate the fuse box, usually found at the back of the compactor.
Carefully remove the fuse using a fuse puller or a similar tool. Inspect the fuse to see if it is blown. A blown fuse will have a broken filament or a discolored appearance. Replace it with a new fuse of the same rating. This should restore power to your compactor.
If the new fuse blows shortly after replacing it, there may be a deeper issue. At this point, it is best to consult a professional technician. They can diagnose and repair the underlying problem.
Preventive Maintenance
Preventive maintenance is key to keeping your Whirlpool trash compactor running smoothly. It helps avoid costly repairs and extends the life of your appliance. By following some simple steps, you can keep your compactor in top shape.
Regular Cleaning
Regular cleaning is essential for the proper functioning of your trash compactor. Clean the inside of the compactor weekly to remove any debris or spilled trash. Use a damp cloth and mild detergent to wipe down all surfaces. Pay special attention to the ram and the sides of the bin. This will prevent odors and buildup.
Don’t forget to clean the exterior of the compactor as well. Wipe down the door and control panel to keep it looking good. Regular cleaning will also help you spot any potential problems early.
Routine Inspections
Routine inspections can help identify issues before they become serious. Check the power cord for any signs of wear or damage. Ensure that the plug is secure and not frayed.
Inspect the ram and track for any signs of wear or misalignment. Make sure the ram moves smoothly without any resistance. Look for any unusual noises during operation. These can be signs of a problem.
Check the compactor’s air filter if it has one. A clogged filter can reduce efficiency and cause odors. Replace it as needed to maintain proper airflow.
Credit: www.americanappliancerepair.com
Frequently Asked Questions
Why Is My Whirlpool Trash Compactor Not Working?
A tripped breaker or blown fuse could be the issue. Check electrical connections.
How Do I Reset My Whirlpool Trash Compactor?
Locate the reset button, typically at the bottom or inside. Press and hold.
Why Does My Trash Compactor Smell Bad?
Food waste buildup causes odors. Clean the compactor regularly to prevent smells.
What Causes A Whirlpool Trash Compactor To Jam?
Large, hard objects can jam the compactor. Remove any obstructing items manually.
How Often Should I Clean My Trash Compactor?
Clean the compactor every month. This keeps it functioning well and prevents odors.
Conclusion
Troubleshooting your Whirlpool trash compactor can be simple. Follow the steps mentioned. Check for common issues like jammed trash, broken switches, or power problems. Regular maintenance helps prevent future issues. Keeping your trash compactor in good shape saves you time and money.
Don’t hesitate to seek professional help if needed. Understanding how your appliance works is key. Enjoy a smoothly running kitchen with a well-maintained trash compactor. Happy compacting!