Sewing machines are great tools, but they can have issues. Singer sewing machines are no exception.
Understanding how to troubleshoot them can save time and frustration. Sewing enthusiasts know the joy of creating with a Singer machine. Yet, occasional problems can disrupt this joy. From tangled threads to skipped stitches, issues arise. Knowing how to fix these common problems is essential.
This guide will help you troubleshoot your Singer sewing machine. It offers solutions for typical issues, ensuring smooth sewing projects. Whether you are a beginner or experienced, learning these tips can be valuable. Let’s dive into simple troubleshooting steps to keep your machine running smoothly.
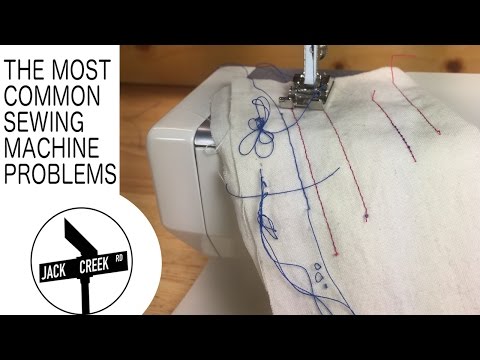
Credit: www.youtube.com
Common Issues
Experiencing issues with your Singer Sewing Machine? Many users encounter common problems that can be easily fixed. Let’s dive into some of these issues and how to resolve them.
Thread Bunching
Thread bunching can be frustrating. It’s often caused by incorrect threading. Follow these steps to troubleshoot:
- Check the threading path. Ensure it’s correct.
- Re-thread the machine. Make sure the thread is tight in the tension discs.
- Check the bobbin. Ensure it’s properly inserted and wound.
- Adjust the tension settings if needed.
Skipped Stitches
Skipped stitches can ruin your sewing project. This issue is often related to the needle. Consider these solutions:
- Use the correct needle type for your fabric.
- Ensure the needle is not bent or dull. Replace if needed.
- Check the needle insertion. It should be all the way up.
- Make sure the thread is compatible with the needle and fabric.
Machine Not Sewing
It’s alarming when your Singer Sewing Machine is not sewing at all. Here are common reasons and fixes:
| Issue | Solution |
|---|---|
| Power Connection | Ensure the machine is properly plugged in. |
| Foot Pedal | Check if the foot pedal is connected and working. |
| Bobbin | Ensure the bobbin is correctly inserted. |
| Thread | Re-thread the machine. |
| Settings | Check the stitch settings and adjust if necessary. |
Basic Maintenance
Maintaining your Singer sewing machine is crucial for its longevity. Regular upkeep ensures smooth operation and prevents costly repairs. Basic maintenance involves simple steps that anyone can follow. Let’s explore some essential tasks to keep your machine in top condition.
Cleaning The Machine
Dust and lint can build up inside your sewing machine. This can cause jams and poor stitching. Start by unplugging the machine. Remove the needle and presser foot. Use a small brush to clean the feed dogs and bobbin area. Wipe down the exterior with a soft cloth. Avoid using water or harsh chemicals.
Oiling Parts
Oiling the machine reduces friction and wear. Check your machine’s manual for oiling points. Use sewing machine oil, not household oil. Apply a few drops to the indicated spots. Run the machine for a few minutes to distribute the oil. Wipe off any excess oil to avoid staining your fabric.
Replacing Needles
Needles should be changed regularly. A dull needle can damage fabric and cause skipped stitches. Always use the correct needle type and size for your fabric. Turn off the machine and raise the needle to its highest position. Loosen the needle clamp screw and remove the old needle. Insert the new needle with the flat side facing the back. Tighten the clamp screw securely.
Threading Problems
Threading problems are common with Singer sewing machines. These issues can be frustrating but are usually easy to fix. This section will guide you through the most common threading problems. You’ll learn about proper threading, checking tension, and bobbin issues.
Proper Threading
Proper threading is crucial for smooth sewing. Follow the threading guide in your machine’s manual. Make sure the thread passes through all the guides and tension discs. Incorrect threading can cause loops and knots. Double-check each step to ensure proper threading.
Checking Tension
Incorrect tension can cause stitching issues. Check the tension settings on your machine. Start with the recommended settings in the manual. Adjust the tension slowly and test on a fabric scrap. Too tight tension can break the thread. Too loose tension can cause loose stitches.
Bobbin Issues
Bobbin problems are another common cause of threading issues. Make sure the bobbin is inserted correctly. Check the bobbin case for any damage. Use the correct bobbin type for your machine. Winding the bobbin evenly is also important. An uneven bobbin can cause thread jams.

Credit: www.reddit.com
Fabric And Needle Choices
Sewing can be a delightful experience. But using the wrong fabric and needle can lead to frustrating results. Choosing the right combination ensures smooth sewing and beautiful finishes. This section will guide you through the best practices for selecting needles and fabrics for your Singer sewing machine.
Choosing The Right Needle
Needles come in various sizes and types. Each serves a specific purpose. For instance, a universal needle works well with most fabrics. A ballpoint needle is ideal for knits. Denim needles are strong and can pierce through thick fabrics. Always check the needle size. Smaller numbers suit lightweight fabrics. Larger numbers are for heavy materials. Changing needles regularly prevents skipped stitches and fabric damage.
Matching Thread And Fabric
Thread choice is as important as needle selection. Use polyester thread for stretchy fabrics. Cotton thread works best with natural fabrics like cotton and linen. Silk thread is perfect for delicate fabrics. Always match thread color to your fabric for a seamless look. Using the right thread prevents breakage and ensures smooth sewing.
Handling Delicate Fabrics
Delicate fabrics need special care. Use a fine needle, like a size 70/10. This prevents damage to the fabric. Use a lightweight thread, like silk or fine polyester. Adjust the tension on your Singer sewing machine. Lower tension prevents puckering. Sew slowly and use a gentle hand. Stabilize the fabric with tissue paper if needed. This prevents snagging and ensures a clean finish.
Tension Adjustments
Tension adjustments are crucial for getting the best results from your Singer sewing machine. Proper tension ensures your stitches are even and secure. Incorrect tension can lead to broken threads and uneven stitches. Learn how to make simple tension adjustments to improve your sewing experience.
Balancing Upper Tension
Balancing the upper tension is key to achieving smooth stitches. Start by threading your machine correctly. Mis-threading can affect tension. Check if the thread is seated properly in the tension discs. Turn the tension dial to adjust the tension. Increase the tension for tighter stitches. Decrease it for looser stitches. Test on a scrap fabric. Adjust until the stitches look balanced.
Adjusting Bobbin Tension
Bobbin tension adjustments are less frequent but equally important. Locate the small screw on the bobbin case. Turn it slightly to adjust the tension. Turn clockwise to tighten. Turn counterclockwise to loosen. Make tiny adjustments. Test on a scrap fabric. Repeat until the stitches are even.
Signs Of Incorrect Tension
Knowing the signs of incorrect tension helps you fix issues quickly. Loose stitches on top indicate low upper tension. Tight stitches on top indicate high upper tension. Loose stitches on the bottom show low bobbin tension. Tight stitches on the bottom show high bobbin tension. Check your stitches and make the necessary adjustments.

Credit: sewingmastery.com
Electronic Machine Issues
Electronic sewing machines offer advanced features but can also face unique issues. Common problems include error codes, display malfunctions, and software updates. Understanding these can help maintain your machine’s performance.
Error Codes
Error codes appear on the display when something goes wrong. Each code indicates a specific problem. Check your user manual for a list of error codes. This can help you identify and resolve issues quickly.
Sometimes, the problem may be simple. For example, a loose thread or a bobbin issue. Fixing these minor problems can clear the error code. If the problem persists, consult a professional technician.
Display Malfunctions
A malfunctioning display can hinder your sewing projects. If the screen is blank or frozen, restart the machine. This can often solve minor glitches.
If restarting does not help, check the power connections. Ensure the machine is plugged in securely. Inspect the power cord for any damage. If the display still malfunctions, the issue may be internal. Professional help may be needed.
Software Updates
Electronic sewing machines may need software updates. Updates improve functionality and fix bugs. Check the manufacturer’s website for the latest software version.
Follow the instructions to download and install updates. Keep your machine’s software up-to-date. This ensures optimal performance and access to new features.
Mechanical Problems
Mechanical issues can disrupt your sewing projects. Understanding common problems will help you fix them quickly. This section covers motor issues, foot pedal troubles, and drive belt replacement.
Motor Issues
A faulty motor can halt your sewing machine. It may run slowly or not at all. Here are some common causes:
- Overheating: Let the motor cool down for 20 minutes.
- Loose connections: Ensure all wires are secure.
- Motor brushes: Check and replace worn-out brushes.
If these steps do not work, consult a professional technician. Motors are complex and may need expert repair.
Foot Pedal Troubles
Foot pedal problems can affect sewing speed. Here are common issues and solutions:
| Issue | Solution |
|---|---|
| Unresponsive pedal | Check the connection to the sewing machine. |
| Inconsistent speed | Clean the pedal’s internal contacts. |
| Sticking pedal | Lubricate the pedal mechanism. |
Drive Belt Replacement
A worn drive belt can stop your machine. Follow these steps to replace it:
- Unplug the machine for safety.
- Remove the machine’s cover to access the belt.
- Loosen the belt tension by adjusting the screws.
- Remove the old belt and place the new one.
- Tighten the screws to secure the new belt.
- Replace the cover and plug in the machine.
Test the machine to ensure the new belt works properly. Regular checks on the drive belt can prevent future issues.
Expert Tips
Expert Tips: Sewing machines can sometimes be tricky. Troubleshooting can save time and money. These expert tips will help keep your Singer sewing machine in top shape.
Regular Maintenance Schedule
Regular maintenance is crucial. It prevents many common problems. Create a weekly and monthly schedule. Follow it strictly.
Here is a basic maintenance plan:
| Task | Frequency |
|---|---|
| Dusting and cleaning | Weekly |
| Oiling the machine | Monthly |
| Checking the needle | Before each use |
Keep your machine clean. Use a soft cloth to dust it. Oil it regularly.
Using Quality Materials
Quality materials make a big difference. Cheap threads can cause issues. They might break or get stuck.
Use good quality threads and needles. This ensures smooth sewing. Your machine will thank you.
Here are some tips:
- Buy high-quality thread.
- Replace the needle often.
- Use the correct needle for your fabric.
Consulting The Manual
Consulting the manual is often overlooked. Your manual is a goldmine of information. It has specific instructions for your model.
Read the troubleshooting section. Follow the steps carefully. Many issues can be fixed this way.
If you lost your manual, check the Singer website. They often have downloadable manuals.
Frequently Asked Questions
Why Is My Singer Sewing Machine Not Stitching?
Check if the needle is properly inserted. Ensure the thread is correctly threaded.
How Do I Fix The Bobbin Tension?
Adjust the bobbin tension screw slightly. Test stitches on scrap fabric until even.
Why Is My Needle Breaking?
Use the right needle size for the fabric. Check for bent needles and replace if needed.
How Can I Stop Thread Bunching?
Re-thread both the upper and bobbin threads. Ensure correct threading path. Check tension settings.
Why Is My Machine Making Noise?
Clean lint and debris from the bobbin area. Oil the machine regularly as per manual.
Conclusion
Fixing your Singer sewing machine can be straightforward with the right guidance. Regular maintenance helps avoid common issues. Keep your machine clean and oiled. Always check for loose parts before starting. Troubleshoot with patience and care. Refer to your manual for specific solutions.
Happy sewing!