Well Pump Pressure Switch Troubleshooting is crucial for maintaining water flow. It ensures your well pump operates efficiently and prevents water supply issues.
Understanding the basics of a well pump pressure switch can save you time and money. This small device plays a big role in your water system. If it malfunctions, your pump may not work correctly, leading to water pressure problems.
Troubleshooting common issues can seem daunting, but with a bit of knowledge, it becomes manageable. In this post, we will explore common problems and solutions. By the end, you will know how to diagnose and fix issues with your well pump pressure switch, ensuring a steady water supply for your home.
Introduction To Well Pump Pressure Switches
Well pump pressure switches play a vital role in managing water systems. They control the water pressure in your home. Understanding their function can help you troubleshoot issues.
These switches ensure your water system operates smoothly. They monitor the pressure and turn the pump on or off. This keeps the pressure within a set range. Let’s dive into their purpose and common issues.
Purpose And Function
The main purpose of a well pump pressure switch is to control water pressure. It turns the pump on when pressure drops. It turns the pump off when pressure reaches a set level.
Pressure switches help maintain consistent water pressure. They protect the pump from damage. Without them, water flow can become erratic. This can lead to pump failure or other issues.
Common Issues
Several common issues can affect pressure switches. One issue is a clogged pressure sensor. This can prevent the switch from detecting pressure changes.
Another issue is electrical problems. Worn-out wires or connections can cause the switch to malfunction. This can lead to the pump not turning on or off correctly.
Incorrect settings can also cause problems. If the pressure settings are too high or low, the switch may not work properly. Regular maintenance can help prevent these issues.
Identifying Symptoms Of Pressure Switch Problems
Identifying symptoms of pressure switch problems is crucial for maintaining your well pump system. Recognizing these signs early can prevent major issues. This section will focus on the common symptoms that indicate pressure switch problems.
Low Water Pressure
One of the most noticeable symptoms is low water pressure. This can be frustrating, especially during daily activities like showering or washing dishes. If you notice a significant drop in water pressure, your pressure switch might be the culprit.
- Check if the water flow is weaker than usual.
- Inspect the pressure gauge on your pump system.
- Compare the reading to the normal operating range.
If the pressure is below the standard range, your pressure switch may need adjustment or replacement.
Pump Cycling On And Off
Another common symptom is the pump cycling on and off frequently. This is known as short cycling. It can cause wear and tear on your pump, leading to potential failures.
- Listen for unusual sounds from the pump.
- Observe the pump’s behavior over a short period.
- Note if the pump turns on and off in quick succession.
If you notice short cycling, it could indicate an issue with the pressure switch. This problem can also arise from a waterlogged pressure tank.
Addressing these symptoms promptly ensures the longevity and efficiency of your well pump system.
Basic Tools And Safety Precautions
When dealing with well pump pressure switch troubleshooting, the right tools and safety measures are vital. This section covers the basic tools you need and the safety precautions to follow. Let’s dive into the essential tools and safety tips.
Essential Tools
Having the right tools makes troubleshooting easier. Here is a list of essential tools:
- Screwdriver set: Both flathead and Phillips
- Multimeter: To measure voltage and resistance
- Insulated pliers: For safe handling of wires
- Wire stripper: To strip wire insulation
- Socket set: Various sizes for different nuts and bolts
These tools help you perform basic checks and adjustments on your well pump pressure switch.
Safety Tips
Safety is crucial while working with electrical components. Here are some key safety tips to follow:
- Turn off power: Always disconnect power before starting.
- Use insulated tools: Prevent electrical shocks by using insulated tools.
- Wear safety gear: Gloves and goggles protect you from injuries.
- Work in a dry area: Avoid wet areas to prevent electrical hazards.
- Check for voltage: Use a multimeter to ensure no live wires.
Following these safety tips ensures you troubleshoot the pressure switch without accidents.
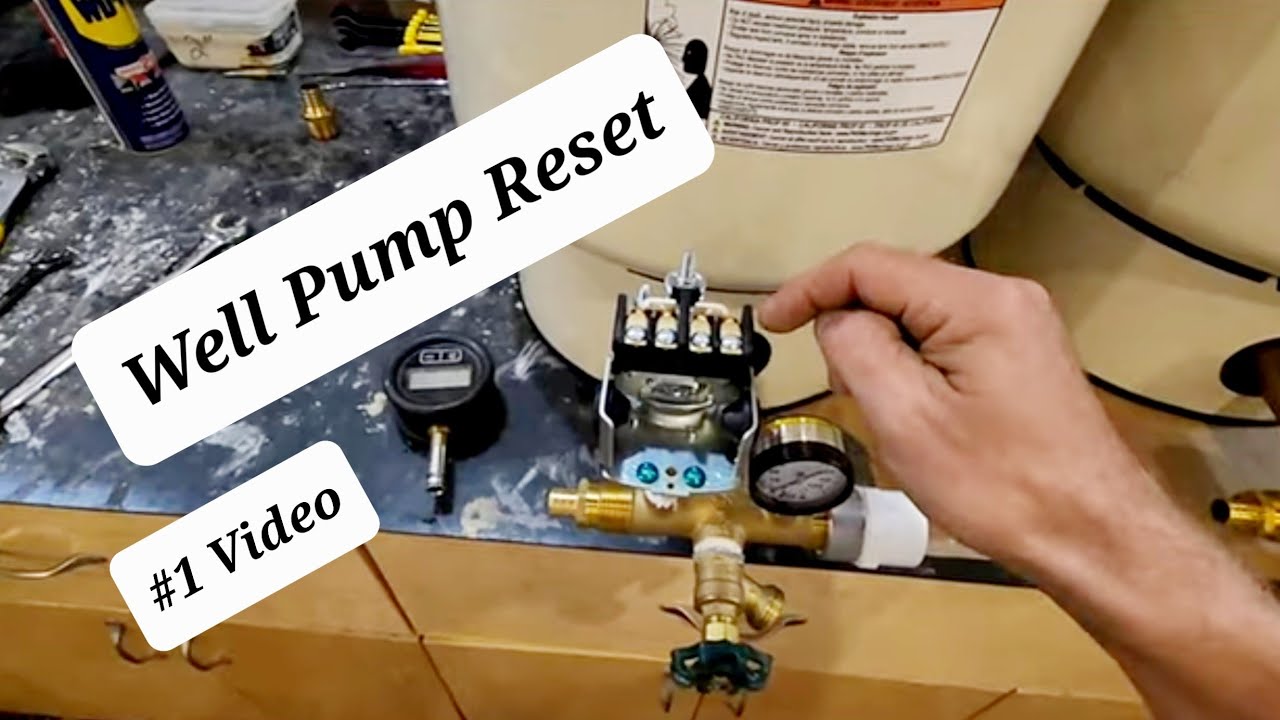
Credit: www.youtube.com
Checking Power Supply
Experiencing issues with your well pump pressure switch? Start by checking the power supply. This step is crucial to determine if your switch is receiving power. Ensuring a consistent power supply can help you avoid unnecessary repairs.
Inspecting Circuit Breaker
First, inspect the circuit breaker. Look at your home’s breaker box. Identify the breaker that controls the well pump. Is it tripped? If so, reset it.
If the breaker trips again, there might be an electrical issue. You may need an electrician. To reset the breaker:
- Turn the breaker off.
- Wait for a few seconds.
- Turn it back on.
Testing Voltage
Next, test the voltage at the pressure switch. Use a voltmeter for this task. Follow these steps:
- Set the voltmeter to AC voltage.
- Touch the leads to the input terminals of the switch.
- Check for a reading between 220-240 volts.
If there’s no voltage, the problem might be with the power source. If voltage is present, the switch is likely getting power.
Remember, always handle electrical components with care. Safety first!
Inspecting And Cleaning Contacts
Inspecting and cleaning the contacts of your well pump pressure switch is essential. This can solve many common issues. Dirty contacts can cause the switch to malfunction. Regular maintenance can extend the life of your pump system. Here’s a guide on how to inspect and clean the contacts.
Removing Debris
First, turn off the power supply to the well pump. Safety first. Open the pressure switch cover. You will see the contacts. These are usually small metal points. Use a flashlight to inspect them closely.
Debris can accumulate on these contacts. This can include dirt, rust, or insects. Use a small brush to remove loose debris. A toothbrush works well for this. Be gentle to avoid bending or damaging the contacts.
For stubborn dirt, use a fine-grit sandpaper. Gently rub the contacts to remove corrosion. Make sure all surfaces are clean and shiny. This ensures a good electrical connection.
Reassembling Contacts
Once the contacts are clean, reassemble the pressure switch. Ensure all parts are in their original positions. Tighten any screws that were loosened during the cleaning process. Double-check that all components are secure.
Replace the pressure switch cover. Turn the power back on. Test the system to ensure it works correctly. If the pump does not start, recheck the contacts. Make sure they are properly aligned and clean.
Regular inspection and cleaning of contacts can prevent future issues. It ensures your well pump operates efficiently. This simple maintenance task can save you from costly repairs.
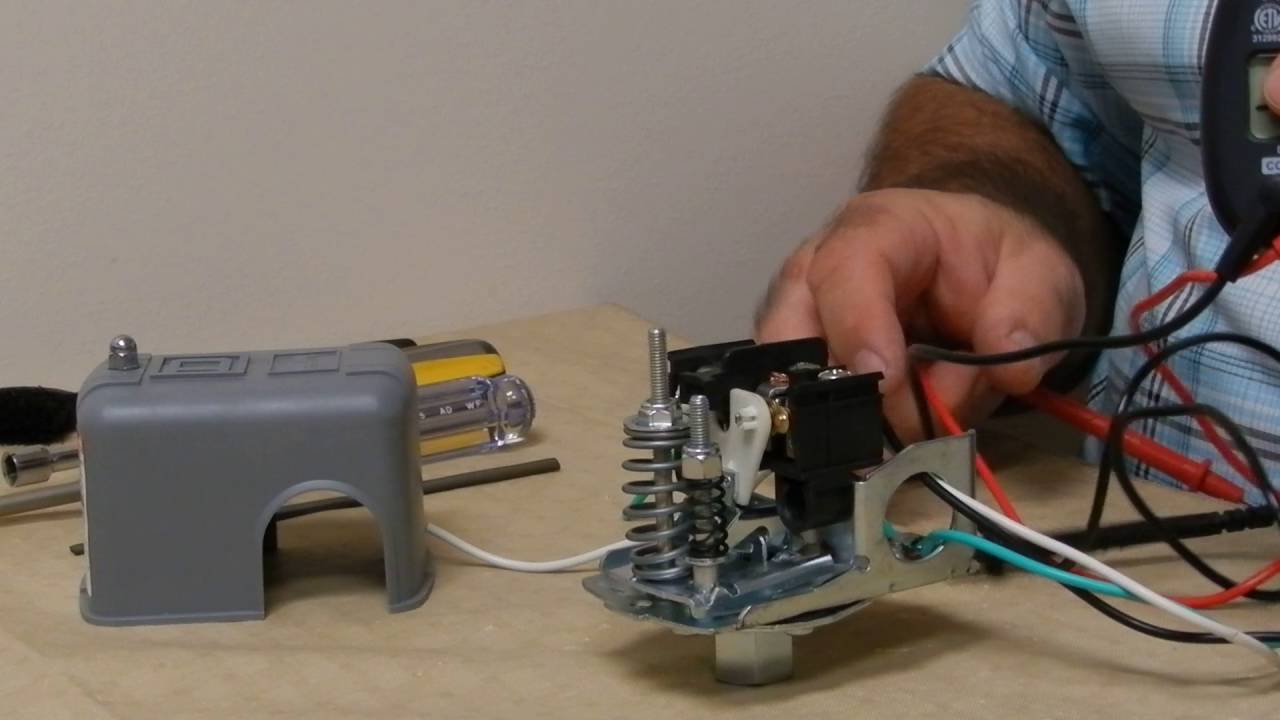
Credit: www.youtube.com
Adjusting Pressure Settings
Adjusting the pressure settings on your well pump pressure switch is crucial for optimal performance. By fine-tuning these settings, you can ensure your water system operates smoothly. This guide will help you adjust the pressure settings correctly.
Identifying The Pressure Setting Screws
First, locate the pressure switch on your well pump. It usually has a metal or plastic cover. Remove the cover to access the pressure setting screws. You will see two screws or nuts. They control the cut-in and cut-out pressure settings.
Adjusting Cut-in And Cut-out Settings
The cut-in setting determines when the pump starts. The cut-out setting determines when the pump stops. To adjust the cut-in setting, turn the larger nut clockwise to increase pressure. Turn it counterclockwise to decrease pressure. For the cut-out setting, adjust the smaller nut in the same manner.
Make small adjustments and test the system. Ensure the pump cycles correctly. If the pump runs too frequently, increase the cut-in setting. If the pump does not run enough, decrease the cut-in setting. Adjust until you find the perfect balance.
Replacing A Faulty Pressure Switch
Replacing a faulty pressure switch on your well pump can restore proper function. This task requires a few basic tools and a bit of patience. Here’s a step-by-step guide to help you through the process.
Removing The Old Switch
First, turn off the power to the well pump. This step is crucial for safety. Next, drain the water from the pressure tank. Find the old pressure switch. It’s usually located near the pressure tank. Use a wrench to disconnect the wires attached to the switch. Take note of where each wire connects. This will help you later. Finally, unscrew the old switch from its mounting.
Installing The New Switch
Begin by screwing the new switch into place. Use the same spot as the old one. Reconnect the wires to the new switch. Make sure each wire goes to the correct terminal. Tighten the connections securely. Now, turn the power back on. Your well pump should start working again. Check the pressure gauge. It should show the correct pressure range. If all looks good, you have successfully replaced the faulty switch.
Preventive Maintenance Tips
Preventive maintenance for your well pump pressure switch can save you time and money. Regular checks can help you avoid major issues. Follow these simple tips to keep your system in top shape.
Regular Inspections
Inspect your well pump pressure switch every few months. Look for signs of wear and tear. Check for any loose or corroded wires. Make sure the switch moves freely. If something looks off, address it right away. This can prevent bigger problems later.
Ensuring Proper Ventilation
Proper ventilation is crucial for your well pump pressure switch. Keep the area around the switch clean and free of debris. Make sure the switch is not exposed to extreme temperatures. Good airflow can extend the life of your equipment. This simple step can make a big difference.
When To Call A Professional
Troubleshooting a well pump pressure switch can sometimes be complex. While many homeowners handle minor issues themselves, some problems require expert intervention. Knowing when to call a professional can save time and prevent further damage.
Signs Of Major Issues
If your pump cycles on and off frequently, it indicates a problem. This may point to a malfunctioning pressure switch or a leaking bladder tank. Persistent low water pressure throughout your home is another red flag. This could mean the switch is failing to maintain adequate pressure. Strange noises from the pump also signal trouble. Grinding or clicking sounds mean internal components might be damaged.
Choosing The Right Technician
Finding the right technician ensures proper repairs and maintenance. Look for certified professionals with experience in well systems. Check reviews and ask for references to gauge their reliability. Make sure they use quality parts and offer a warranty on their work. Clear communication is crucial. The technician should explain the problem and the solution in simple terms. A good professional provides preventive advice to avoid future issues.

Credit: pumpituppump.com
Frequently Asked Questions
How Do I Reset My Well Pump Pressure Switch?
First, turn off the pump power. Then, adjust the switch lever to reset.
Why Is My Well Pump Pressure Switch Not Working?
Common reasons include a tripped breaker, damaged wiring, or a faulty pressure switch.
How Often Should I Check My Well Pump Pressure Switch?
Check it every six months. Regular inspection helps prevent issues and ensures proper function.
What Are Signs Of A Failing Well Pump Pressure Switch?
Signs include irregular water pressure, unusual noises, or frequent cycling of the pump.
Can I Replace A Well Pump Pressure Switch Myself?
Yes, you can. But follow safety guidelines and consult the manual. Consider professional help if unsure.
Conclusion
Troubleshooting a well pump pressure switch can seem daunting at first. Yet, with basic knowledge, you can fix many issues yourself. Regular checks and maintenance help avoid bigger problems. Always prioritize safety and turn off power before handling electrical components.
If unsure, consult a professional for assistance. Keep your well pump system in good shape and enjoy a reliable water supply. Your efforts now can prevent future headaches. Stay informed and proactive. Happy troubleshooting!