Diaphragm pumps are essential in many industries. They ensure smooth fluid transfer.
But what happens when they malfunction? Understanding how to troubleshoot diaphragm pump issues is crucial. This guide will help you diagnose and fix common problems. Diaphragm pumps work by moving fluids using a reciprocating diaphragm. They are known for their reliability and efficiency.
Yet, like any mechanical device, they can encounter issues. Common problems include reduced flow rates, strange noises, and leaks. Knowing how to identify and resolve these issues can save time and money. This blog will walk you through the troubleshooting process. You’ll learn what to look for and how to fix it. By the end, you’ll be more confident in keeping your diaphragm pump running smoothly.
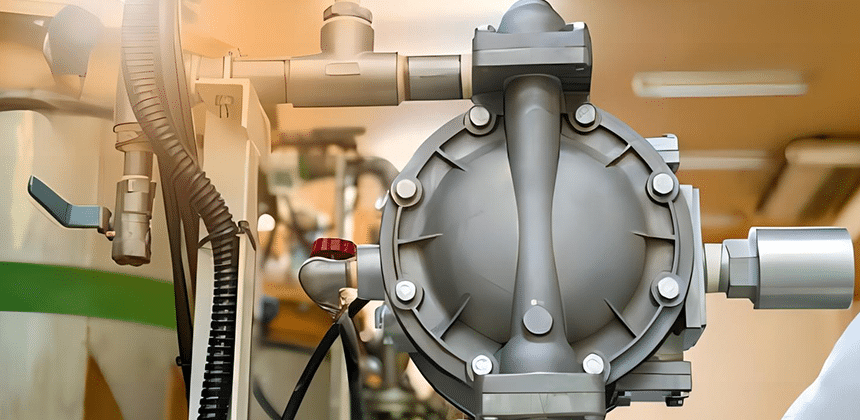
Credit: www.carlisleft.co.jp
Common Issues
Diaphragm pumps are reliable. But, even the best equipment faces problems. Understanding common issues helps keep your pump in top shape. Here we cover two frequent problems: Pump Not Starting and Low Flow Rate.
Pump Not Starting
A diaphragm pump not starting can be frustrating. Several factors might cause this issue. Here are some common reasons and solutions:
- Power Supply: Ensure the pump has the right power. Check if the electrical connections are secure.
- Air Supply: For air-operated pumps, ensure the air supply is on. Check the air pressure is within the required range.
- Clogged Inlet: Debris can clog the inlet. Inspect and clean the inlet to allow smooth flow.
- Damaged Diaphragm: A damaged diaphragm prevents the pump from operating. Replace the diaphragm if necessary.
Low Flow Rate
A low flow rate can affect productivity. It indicates that the pump is not working efficiently. Common causes and solutions include:
- Blocked Filters: Filters can get blocked. Clean or replace filters regularly to maintain flow rate.
- Air Leaks: Air leaks reduce efficiency. Check for any leaks and seal them properly.
- Valve Issues: Worn-out or damaged valves hinder performance. Inspect and replace faulty valves.
- Improper Operation: Ensure the pump is operated within the recommended parameters. Overworking the pump can lead to low flow rates.
By addressing these issues, you can maintain your diaphragm pump’s performance. Regular maintenance is key to avoiding major problems.
Credit: cannonwater.com
Identifying Air Leaks
Air leaks in diaphragm pumps can disrupt their performance. Identifying these leaks early can save time and money. This section will guide you on how to spot and test for air leaks.
Signs Of Air Leaks
Several signs indicate air leaks in a diaphragm pump. One common sign is a drop in suction power. The pump may also make unusual noises. Another sign is inconsistent flow rates. If you notice these, an air leak might be the cause.
Testing For Air Leaks
Testing for air leaks requires a few steps. First, check all connections and seals. Look for any visible damage or looseness. Next, use a soapy water solution. Apply it to the suspected areas. If bubbles form, you have found a leak.
Another method is to listen for hissing sounds. These sounds often point to air escaping. You can also use a vacuum gauge to measure pressure drops. A significant drop may indicate a leak.
Regular maintenance can prevent air leaks. Tighten connections and replace worn parts. This ensures your pump works efficiently.
Checking Valves
Diaphragm pumps are reliable and durable. Yet, they can face issues. One common problem area is the valves. Checking the valves is crucial. It ensures the pump works smoothly. Let’s explore the key areas to check.
Valve Blockages
Valve blockages are common in diaphragm pumps. Debris and particles can cause clogs. Regular cleaning helps prevent this. Here are some steps:
- Disassemble the valve section.
- Inspect for any debris or buildup.
- Use a soft brush or cloth to clean.
- Reassemble carefully, ensuring all parts fit well.
Clean valves ensure the pump runs efficiently. This reduces wear and tear.
Valve Wear And Tear
Valves can wear out over time. Signs of wear include leaks and reduced performance. Regular inspection helps identify issues early. Check for:
- Cracks or damage on valve surfaces.
- Worn-out seals or gaskets.
- Loose fittings or connections.
Replace any damaged parts immediately. Using high-quality parts can extend valve life. Timely maintenance can prevent major failures.
| Issue | Solution |
|---|---|
| Blockages | Regular cleaning |
| Wear and Tear | Replace damaged parts |
Monitoring valves is vital for diaphragm pump health. Follow these tips for a longer-lasting pump.
Credit: aoblpump.com
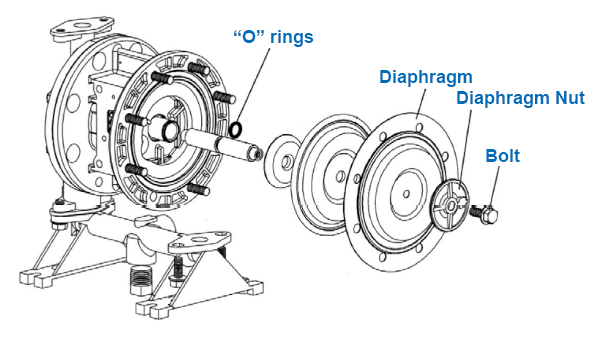
Inspecting Diaphragms
Inspecting diaphragms is a crucial step in diaphragm pump troubleshooting. Diaphragms are essential parts of the pump. They need regular checks to maintain efficiency. This section will guide you through the important aspects of inspecting diaphragms.
Diaphragm Cracks
Start by looking for any visible cracks on the diaphragm surface. Cracks can lead to leaks and reduced pump performance. Use a flashlight to inspect hard-to-see areas. If you find any damage, replace the diaphragm immediately. Regular inspection helps catch issues before they escalate.
Diaphragm Material Compatibility
Check if the diaphragm material is compatible with the pumped fluid. Incompatible materials can degrade over time. This can cause frequent failures and inefficiency. Refer to the pump manufacturer’s guide for material recommendations. Ensure the diaphragm material matches the fluid type. This will extend the pump’s lifespan.
Examining Seals
Diaphragm pumps are vital in many industries. They move liquids safely and efficiently. A key part of these pumps is the seals. Seals prevent leaks and keep the pump running smoothly. Regular seal checks are crucial. They ensure the pump works well and lasts longer. Below, we dive into common seal issues and their fixes.
Seal Damage
Seal damage can cause leaks. Leaks reduce the pump’s efficiency. There are many reasons for seal damage. One common reason is wear and tear. Over time, seals can break down. High pressure and heat can speed up this process. Chemicals in the liquid can also harm seals. Identifying seal damage early is important. Look for signs like leaks or unusual noises.
Another cause of seal damage is improper installation. Seals must be fitted correctly. If not, they won’t work as they should. Always follow the manufacturer’s instructions. Regular checks can spot issues early. This helps prevent bigger problems later.
Seal Replacement
Replacing a damaged seal is not hard. First, turn off the pump. Make sure it is safe to work on. Next, find the damaged seal. Remove it carefully. Check the area for any other damage. Clean the area before fitting a new seal. This ensures a good fit. Follow the instructions for the new seal. Fit it securely. Test the pump once the seal is in place. Ensure there are no leaks or issues.
Using the right seal is important. Different pumps need different seals. Always use the correct type for your pump. This ensures it works well and lasts longer. Regular checks and timely replacements keep your pump in top shape.
Pump Maintenance Tips
Diaphragm pumps are crucial for many industries. Regular maintenance ensures their optimal performance. Consistent care can prevent costly repairs and downtime. Below are some practical tips for maintaining your diaphragm pump.
Regular Inspections
Regular inspections are essential. Check for leaks around the pump. Inspect the diaphragm for any signs of wear. Listen for unusual noises during operation. Verify that all connections are secure.
Proper Cleaning Techniques
Cleaning the pump correctly is vital. Use a soft brush to remove debris. Avoid harsh chemicals that could damage parts. Rinse the pump with clean water after each use. Ensure all components are dry before reassembling.
Avoiding Cavitation
Diaphragm pumps are widely used for their efficiency and reliability. Yet, cavitation can pose a significant problem. Understanding and avoiding cavitation is crucial for the smooth operation of these pumps. This section will guide you through identifying causes and preventive measures for cavitation in diaphragm pumps.
Cavitation Causes
Cavitation occurs when vapor bubbles form in the pump. It happens due to low-pressure zones. These bubbles collapse, causing noise and damage. Common causes include high fluid temperature, poor suction conditions, and excessive flow rates. Incorrect pump installation can also lead to cavitation.
Preventive Measures
To avoid cavitation, ensure proper pump installation. Maintain optimal fluid temperature and pressure. Use appropriate suction lines and avoid sharp bends. Regularly check and clean filters to prevent blockages. Adjust flow rates to match the pump’s capacity. Implementing these steps can significantly reduce the risk of cavitation in diaphragm pumps.
When To Call A Professional
Diaphragm pumps are reliable. But sometimes, issues arise that require expert help. Knowing when to call a professional saves time and prevents further damage.
Complex Issues
Some diaphragm pump problems are too complex for DIY fixes. These include:
- Electrical Failures: When the pump does not start or stops suddenly.
- Seal Leaks: Persistent leaks that are not solved by simple tightening.
- Unusual Noises: Continuous strange sounds that indicate internal damage.
Professional technicians have the tools and knowledge to diagnose and repair these problems accurately.
Routine Servicing
Regular maintenance is crucial for diaphragm pump longevity. Some tasks are best left to professionals:
- Inspection: Checking for wear and tear in parts.
- Lubrication: Ensuring all moving parts are well-lubricated.
- Calibration: Adjusting the pump settings for optimal performance.
Routine servicing helps in early detection of potential issues and ensures the pump runs smoothly.
Frequently Asked Questions
What Are Common Diaphragm Pump Problems?
Common problems include low flow rate, air leaks, and diaphragm wear. Regular maintenance can prevent these issues.
Why Is My Diaphragm Pump Losing Pressure?
Your pump might be losing pressure due to air leaks or worn-out diaphragms. Check for leaks and replace faulty parts.
How Can I Fix A Noisy Diaphragm Pump?
A noisy pump may have air trapped inside. Bleed the air and ensure all connections are tight.
Why Is My Diaphragm Pump Not Priming?
If your pump is not priming, check for clogs or air leaks. Ensure the suction line is sealed.
How Often Should I Maintain My Diaphragm Pump?
Maintain your pump every 6 months. Regular checks help prevent major issues and extend the pump’s life.
Conclusion
Fixing diaphragm pump issues needn’t be stressful. Follow our tips for quick solutions. Check connections, seals, and valves regularly. Clean and replace worn parts as needed. Maintain your pump often to prevent future problems. A well-maintained pump runs smoothly and lasts longer.
Stay proactive to avoid costly repairs. Troubleshooting can be simple with the right approach. Your diaphragm pump will thank you. Happy pumping!