Water softeners are essential for maintaining clean, soft water in your home. But even the best systems can face issues.
Rainsoft water softeners are reliable, but like any appliance, they might need troubleshooting. Understanding common problems and their fixes can save you time and money. This blog will guide you through the most frequent issues Rainsoft water softeners encounter. You’ll learn how to identify and solve these problems.
This knowledge helps ensure your system runs smoothly. Let’s dive in and keep your water softener in top shape.

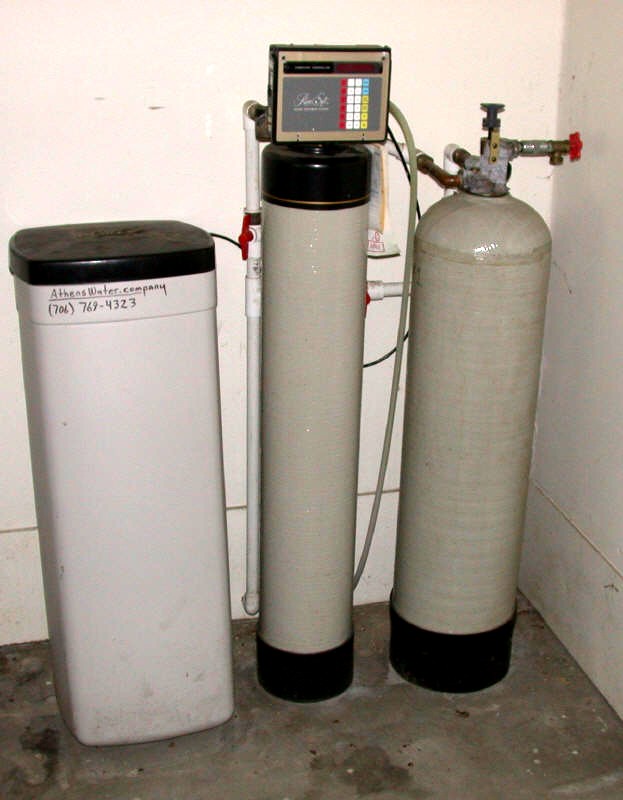
Credit: www.reddit.com
Common Issues
Dealing with water softeners can sometimes be tricky. Rainsoft water softeners are no exception. Owners often experience a range of common issues. Understanding these problems helps in troubleshooting effectively. Let’s explore some of these issues.
Low Water Pressure
Low water pressure can be a real headache. It can be due to a clogged filter. Check the filter and clean it if needed. Sediment buildup can restrict water flow. Regular maintenance can prevent this issue. Another cause could be a malfunctioning valve. Inspect the valve for any signs of wear or damage.
Water Hardness Persistence
Sometimes, water hardness remains even after using a softener. This can be frustrating. Check the salt level in the brine tank. Low salt can affect the softening process. Also, inspect the resin beads in the softener. They may need replacement if they are worn out. Ensure the regeneration cycle is working properly. An incomplete cycle can lead to persistent hardness.
Diagnosing Problems
Experiencing issues with your Rainsoft water softener can be frustrating.
Diagnosing problems early can save time and money. This guide will help you
diagnose common issues with your water softener.
Checking For Salt Bridges
A salt bridge occurs when salt hardens and forms a crust in the brine tank.
This prevents the water softener from regenerating properly. To check for a salt bridge:
- Open the brine tank lid.
- Use a broom handle to gently break up the salt.
- If the broom handle does not go through easily, a salt bridge may be present.
If you detect a salt bridge, remove the hardened salt and refill the tank with fresh salt.
Inspecting The Resin Tank
The resin tank plays a crucial role in the softening process. Over time, the resin beads can become worn out or clogged.
To inspect the resin tank:
- Turn off the water supply to the softener.
- Disconnect the softener and open the tank.
- Check the resin beads. They should be round and amber-colored.
If the resin beads appear damaged or discolored, it may be time to replace them.
Regular inspection ensures your softener functions efficiently.
Regular maintenance and inspection can prevent many common issues with your Rainsoft water softener.
By checking for salt bridges and inspecting the resin tank, you can keep your water softener working effectively.
Salt And Brine Tank Maintenance
Maintaining the salt and brine tank of your Rainsoft water softener ensures optimal performance. Regular checks and cleaning prevent common issues. Follow these simple steps to keep your system running smoothly.
Refilling Salt
Check the salt level in your brine tank regularly. Low salt levels can hinder the softening process. Refill the tank when the salt level drops below half.
Use high-quality salt for best results. Pour the salt slowly into the tank. Avoid overfilling. Leave some space at the top to prevent clumping and ensure proper water flow.
Cleaning The Brine Tank
Cleaning the brine tank prevents salt buildup and debris. Begin by emptying the tank. Remove any remaining salt and water. Use a mild detergent and warm water to clean the inside of the tank.
Scrub the sides gently with a soft brush. Rinse thoroughly to remove all soap residue. Dry the tank completely before refilling with fresh salt.
Regular maintenance of the salt and brine tank keeps your Rainsoft water softener in top condition. Follow these steps to ensure clean, soft water throughout your home.
Credit: able2know.org
Resin Replacement
Resin replacement in a Rainsoft water softener is vital for maintaining efficiency. Over time, the resin beads in the softener wear out and lose their ability to soften water. Knowing the signs of resin wear and the steps to replace resin will keep your system running smoothly.
Signs Of Resin Wear
Identifying resin wear early can prevent bigger issues. Some signs include hard water spots on dishes and fixtures. You might also notice that your soap does not lather well. In some cases, the water may have an unusual taste or odor.
Steps To Replace Resin
Replacing the resin in your Rainsoft water softener is a straightforward process. Follow these steps to ensure a smooth replacement:
1. Turn off the water supply: Shut off the main water valve to stop water flow.
2. Release the pressure: Open a faucet to release any remaining pressure in the system.
3. Remove the control valve: Unscrew the control valve from the resin tank carefully.
4. Extract the old resin: Use a wet/dry vacuum to remove the old resin from the tank.
5. Clean the tank: Rinse the inside of the tank thoroughly to remove any residue.
6. Add new resin: Pour new resin beads into the tank using a funnel.
7. Reattach the control valve: Screw the control valve back onto the resin tank.
8. Turn on the water supply: Open the main water valve and allow the system to refill.
9. Regenerate the system: Run a regeneration cycle to ensure the new resin is ready for use.
By following these steps, you can extend the life of your water softener. Ensure your water remains clean and soft.
Control Valve Malfunctions
Control valve malfunctions in Rainsoft water softeners can disrupt your water quality. These issues can cause hard water problems, leading to scale buildup in pipes and appliances. Identifying and fixing these malfunctions quickly can save you time and money.
Identifying Valve Issues
First, listen for unusual noises from the control valve. Humming, clicking, or grinding sounds can indicate a problem. Check the display panel for error codes. These codes can help pinpoint the issue. Inspect the valve for visible damage or leaks. A leaking valve can reduce system efficiency.
Next, monitor water softness. If you notice hard water signs, the valve might be malfunctioning. Look for excessive salt usage. This can also indicate a faulty control valve. Regular inspections can help catch these issues early.
Repairing And Replacing Valves
Repairing a faulty valve often involves cleaning or replacing parts. Start by turning off the water supply. Remove the valve cover and inspect the internal components. Clean any debris or buildup. Replace worn or damaged parts as needed.
If the valve is beyond repair, consider replacing it. Purchase a compatible valve from a trusted supplier. Follow the manufacturer’s instructions for installation. Ensure all connections are secure to prevent leaks. Test the system to confirm proper operation.
Regular maintenance can prevent control valve malfunctions. Schedule routine inspections and cleanings. Replace parts before they fail. This proactive approach can extend the life of your Rainsoft water softener.
Credit: www.homedepot.com
Addressing Regeneration Problems
Experiencing regeneration problems with your Rainsoft Water Softener can be frustrating. Regeneration is crucial for maintaining soft water. It cleans the resin beads inside your water softener. If it fails, you may notice hard water again.
Several issues can cause regeneration problems. Incorrect timer settings and manual regeneration process faults are common. Let’s explore how to address these issues.
Timer Settings Adjustment
Incorrect timer settings can disrupt the regeneration cycle. First, check the current time on your system. It must match the actual time. If not, adjust it.
Next, review the regeneration schedule. Ensure it aligns with your household’s water usage. Typically, regeneration occurs during low water usage times. For most homes, early morning is ideal.
If your water softener regenerates too often, it wastes salt. If it regenerates too infrequently, it may not soften water properly. Balance is key.
Manual Regeneration Process
If automatic regeneration fails, use the manual regeneration process. Locate the manual regeneration button on your unit. Press and hold it for a few seconds. This initiates the regeneration cycle.
Observe the process. Ensure it completes all stages: backwash, brine draw, rinse, and refill. If any stage fails, it may indicate a deeper issue.
Regular maintenance can prevent manual regeneration needs. Clean the brine tank and check for clogs. This ensures smooth operation.
Water Softener Leaks
Water softener leaks can be a frustrating issue for many homeowners. They can lead to water damage and wasted resources. Identifying and fixing these leaks quickly is essential. In this section, we will discuss how to find and fix water softener leaks.
Finding Leak Sources
First, inspect the water softener unit for visible water. Look for puddles around the base. Check all connections, pipes, and valves. Pay close attention to the bypass valve and the control valve. Use a dry cloth to wipe these areas. This helps to see where water appears.
Next, examine the brine tank and resin tank. Look for cracks or wet spots. Check the hose connections and fittings. Ensure they are tight and secure. If you find any loose connections, tighten them. This might fix the leak.
Fixing Common Leak Points
One common leak point is the O-ring. This is found in the control valve. If the O-ring is damaged, replace it. Another leak point is the bypass valve. Ensure it is in the correct position. If it is leaking, the valve may need replacement.
Check the drain line for clogs or kinks. Clear any blockages to stop leaks. Inspect the brine tank float valve. If it is stuck, clean or replace it. This prevents overflow leaks.
Finally, examine the resin tank. If it is cracked, it may need replacement. Small cracks can sometimes be patched. But large cracks usually require a new tank.
Professional Assistance
Sometimes, your Rainsoft water softener might need professional help. While many issues can be fixed with basic troubleshooting, there are times when you need a technician. Knowing when to call and how to choose the right service provider can save time and money.
When To Call A Technician
Understanding when to call a technician is crucial. Some signs indicate that you need professional assistance. These include:
- Constant low water pressure
- Water leakage from the unit
- Unusual noises
- Unresponsive control panel
These issues often require expert knowledge to diagnose and fix. Attempting to fix them without the right skills might cause more damage.
Choosing The Right Service Provider
Choosing the right service provider ensures your water softener gets proper care. Here are some tips:
- Check credentials: Ensure they are certified and experienced with Rainsoft products.
- Read reviews: Look at customer feedback to gauge their reputation.
- Get quotes: Compare prices from different providers.
- Ask for references: Contact previous clients to understand their service quality.
A good service provider will have a track record of reliability and customer satisfaction. They will also offer warranties for their work, giving you peace of mind.
Frequently Asked Questions
Why Is My Rainsoft Water Softener Not Regenerating?
Your Rainsoft water softener might not regenerate due to a power issue or a blocked valve.
How Do I Reset My Rainsoft Water Softener?
To reset, press and hold the reset button for three seconds until it beeps.
What Causes Low Water Pressure In Rainsoft Water Softeners?
Low water pressure can be due to clogged filters or resin buildup in the system.
How Often Should A Rainsoft Water Softener Regenerate?
Typically, it should regenerate every three to seven days, depending on your water usage and hardness.
What Does The Error Code E1 Mean On A Rainsoft Water Softener?
The E1 error code usually means a problem with the water flow meter or sensor.
Conclusion
Troubleshooting your Rainsoft water softener can be simple with these tips. Regular maintenance ensures optimal performance. Check salt levels and clean parts often. Address minor issues quickly to prevent bigger problems. Always refer to your user manual for specific guidance.
Don’t hesitate to contact professional help if needed. Keep your water softener running smoothly for better water quality. Happy troubleshooting!