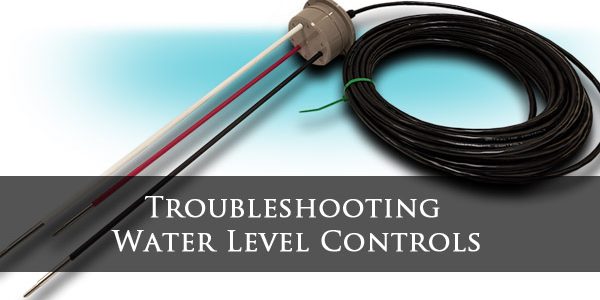
Warrick level controls help manage fluid levels in tanks and vessels. They are crucial for many industries.
If you’ve encountered issues with Warrick level controls, you’re not alone. Troubleshooting these systems can be challenging. Understanding the common problems and their solutions is key. This guide will help you identify and fix issues with your Warrick level controls.
From sensor malfunctions to wiring problems, we will cover it all. Stay with us as we explore practical tips and steps for effective troubleshooting. Your system will be back on track in no time.

Credit: www.youtube.com
Common Issues With Warrick Level Controls
Warrick Level Controls are essential for managing liquid levels in various industrial applications. Despite their reliability, users sometimes face common issues. Identifying these problems can help maintain system efficiency and prevent downtime.
Sensor Malfunctions
Sensors are critical components of Warrick Level Controls. They detect the liquid level and send signals to the control system.
- Corrosion: Corrosion can impair sensor function. Regular inspection and cleaning help mitigate this.
- Build-up: Dirt and residue can accumulate on sensors. This impacts their accuracy. Cleaning is essential.
- Faulty Sensors: Sensors can wear out. Replacing them as needed maintains system accuracy.
Wiring Problems
Wiring issues are another common problem. They can disrupt the signal between sensors and controllers.
- Loose Connections: Check for loose wires. Tighten them to ensure proper signal transmission.
- Damaged Wires: Inspect for any cuts or frays. Replace damaged wires to restore functionality.
- Incorrect Wiring: Ensure wires are correctly connected. Incorrect wiring can cause system malfunctions.
Controller Errors
Controllers process signals from sensors and manage the system’s response. Errors here can cause significant issues.
- Software Glitches: Controllers may experience software issues. Updating or resetting the software can help.
- Faulty Components: Internal components can fail. Regular maintenance and timely replacements are crucial.
- Calibration Issues: Incorrect calibration affects system performance. Calibrate controllers regularly for accuracy.
Addressing these common issues ensures the smooth operation of your Warrick Level Controls. Routine maintenance and inspections are key to preventing these problems.
Credit: waterlevelcontrols.com
Diagnosing Sensor Malfunctions
Warrick level controls are reliable, but sensor malfunctions can occur. Diagnosing these issues quickly is essential to maintain system efficiency. This guide will help identify and fix sensor problems. Follow these steps to ensure your sensors function correctly.
Identifying Faulty Sensors
Begin by examining the sensor’s physical condition. Look for visible damage or corrosion. Next, check if the sensor is correctly installed and securely connected to the system.
Use a multimeter to measure the sensor’s output. Compare the readings with the manufacturer’s specifications. If the readings are outside the recommended range, the sensor may be faulty.
| Step | Action |
|---|---|
| 1 | Inspect physical condition |
| 2 | Check installation and connections |
| 3 | Measure output with a multimeter |
| 4 | Compare readings with specifications |
Testing Sensor Connectivity
Ensure the sensor is receiving power. Verify this by measuring the voltage at the sensor’s power terminals. Use a multimeter for this task. The voltage should match the system’s requirements.
Next, test the connectivity between the sensor and the control unit. Use a continuity tester to check for any breaks in the wiring. If the wiring is intact, the issue may lie with the sensor or the control unit itself.
To summarize:
- Verify power supply voltage
- Test wiring continuity
- Check connection to control unit
Replacing Damaged Sensors
If a sensor is damaged or faulty, replacement is necessary. First, disconnect the power supply to ensure safety. Carefully remove the sensor from its mounting.
Install the new sensor according to the manufacturer’s instructions. Ensure all connections are secure. Finally, restore power and test the new sensor to confirm proper operation.
Steps to replace a sensor:
- Disconnect power supply
- Remove the faulty sensor
- Install the new sensor
- Secure all connections
- Restore power and test
Addressing Wiring Problems
Wiring problems can often lead to issues with Warrick Level Controls. Addressing these problems quickly is crucial. Below, we discuss several key aspects to look at when troubleshooting wiring problems.
Checking For Loose Connections
Loose connections can disrupt the performance of Warrick Level Controls. Start by checking all terminals and connections. Ensure each connection is tight and secure.
- Use a screwdriver to tighten screws.
- Check for wires that may have slipped out.
- Inspect connectors for proper fit.
Inspecting For Corroded Wires
Corrosion can impede electrical flow, causing malfunctions. Inspect all wires for signs of corrosion.
| Signs of Corrosion | Action |
|---|---|
| Green or white residue | Clean or replace the wire |
| Rusty connectors | Replace connectors |
Repairing Or Replacing Wires
If wires are damaged, repair or replacement is necessary. Here are steps to follow:
- Identify the damaged wire.
- Use wire cutters to remove the damaged section.
- Strip the insulation from the new wire ends.
- Connect the new wire using wire nuts or soldering.
- Secure the connection with electrical tape.
Make sure the connections are secure to avoid future issues.
Fixing Controller Errors
Experiencing errors with your Warrick Level Controls can be frustrating. Addressing these issues promptly can help maintain efficient operations. This section will guide you through fixing common controller errors, ensuring your system runs smoothly.
Resetting The Controller
Resetting the controller is often the first step in troubleshooting. It can help clear minor glitches and restore normal operations.
- Disconnect the power supply to the controller.
- Wait for at least 30 seconds.
- Reconnect the power supply.
- Check if the error has been resolved.
If the issue persists, consider the next steps.
Updating Controller Firmware
Outdated firmware can cause errors. Updating it ensures the controller operates with the latest improvements and bug fixes.
- Visit the manufacturer’s website to download the latest firmware version.
- Follow the provided instructions to install the update.
- Restart the controller after the update completes.
- Verify if the error is resolved.
Calibrating The Controller
Calibration is essential for accurate readings and error-free operations. Incorrect calibration can lead to false error alerts.
Follow these steps to calibrate the controller:
- Refer to the user manual for specific calibration instructions.
- Use the recommended calibration tools.
- Adjust the settings as required.
- Test the controller to ensure accurate readings.
Regular calibration can prevent many common errors.
Preventative Maintenance Tips
Preventative maintenance is essential for Warrick Level Controls. It ensures reliable operation and extends the equipment’s lifespan. Following these tips will help you maintain your system effectively.
Regular Inspection Schedules
Set up a regular inspection schedule. Check the system weekly or monthly based on usage. Look for any signs of wear or damage. Regular checks help identify issues early, preventing costly repairs.
| Inspection Frequency | Tasks |
|---|---|
| Weekly | Visual inspection, check connections, verify operation |
| Monthly | Test sensors, inspect wiring, check for corrosion |
Cleaning And Maintenance Procedures
Keep the controls clean. Dirt and debris can affect performance. Use a soft cloth to wipe the surfaces. Avoid using harsh chemicals. Proper cleaning ensures accurate readings.
- Turn off the power before cleaning.
- Use a damp cloth for cleaning.
- Inspect for dirt build-up regularly.
Documentation And Record Keeping
Maintain detailed records of all maintenance activities. Documenting helps track the system’s history. Keep records of inspections, cleanings, and any repairs. This information is valuable for troubleshooting and future reference.
Use a logbook or digital records for easy access. Record the date, time, and details of each maintenance activity. Include the name of the person performing the task. Consistent documentation ensures the system’s reliability.
Advanced Troubleshooting Techniques
Troubleshooting Warrick level controls requires a blend of skill and knowledge. Advanced troubleshooting techniques can help resolve complex issues effectively. This section explores three key methods: using diagnostic tools, interpreting error codes, and consulting technical support.
Using Diagnostic Tools
Diagnostic tools are essential for identifying problems in Warrick level controls. These tools provide real-time data and insights.
- Multimeters: Measure voltage, current, and resistance.
- Oscilloscopes: Visualize electrical signals and detect irregularities.
- Signal Generators: Test the response of level controls to specific signals.
Using these tools can pinpoint issues accurately. Ensure your diagnostic tools are calibrated for precise readings.
Interpreting Error Codes
Error codes are crucial for troubleshooting. They indicate specific problems within the system.
| Error Code | Meaning | Action |
|---|---|---|
| E01 | Power Failure | Check power supply connections. |
| E02 | Sensor Fault | Inspect and replace the sensor. |
| E03 | Communication Error | Verify communication cables. |
Refer to the user manual for a full list of error codes. Understand what each code means to take appropriate action.
Consulting Technical Support
If troubleshooting steps do not resolve the issue, consulting technical support is recommended.
- Gather Information: Collect details about the problem, including error codes and symptoms.
- Contact Support: Reach out to technical support with the gathered information.
- Follow Instructions: Adhere to the guidance provided by the support team.
Technical support can offer expert advice and advanced solutions. They are equipped to handle complex issues that may be beyond basic troubleshooting.
Safety Precautions During Troubleshooting
When troubleshooting Warrick Level Controls, safety is the top priority. This section covers essential safety precautions to prevent accidents and ensure a smooth troubleshooting process.
Wearing Protective Gear
Always wear appropriate protective gear before starting any troubleshooting. This includes:
- Safety goggles to protect your eyes from debris.
- Insulated gloves to avoid electric shocks.
- Non-conductive footwear to prevent grounding yourself.
Wearing the right gear minimizes the risk of injury.
Disconnecting Power
Disconnecting power is crucial for your safety. Follow these steps:
- Turn off the main power switch to the unit.
- Unplug the device from the power source.
- Use a voltage tester to ensure no power is flowing.
Never skip these steps to avoid electrical hazards.
Following Manufacturer Guidelines
Always follow the manufacturer guidelines when troubleshooting. These guidelines include:
- Specific instructions on how to handle components.
- Recommended tools for safe troubleshooting.
- Warnings about potential hazards.
Adhering to these guidelines ensures safety and proper functioning of the equipment.
When To Seek Professional Help
Troubleshooting Warrick Level Controls can be straightforward. Yet, certain issues demand expert intervention. Knowing when to call a professional is crucial. This guide will help you decide when you need expert help.
Identifying Complex Problems
Some issues are easy to solve. For example, replacing a faulty sensor. But complex problems need a professional touch. These include:
- Repeated system failures
- Unusual noises or vibrations
- Unresponsive controls
If your system shows these signs, it’s time to seek help. Ignoring these can lead to bigger issues.
Finding Qualified Technicians
Finding the right technician is key. Look for these qualifications:
| Qualification | Importance |
|---|---|
| Experience with Warrick systems | Ensures specific knowledge |
| Certifications | Proves expertise |
| Customer reviews | Indicates reliability |
A good technician will have the right experience and certifications. Always check reviews before hiring.
Cost-benefit Analysis
Professional help costs money. But it can save you in the long run. Consider these benefits:
- Accurate diagnosis
- Permanent solutions
- Preventing future issues
While upfront costs might be high, the benefits outweigh them. Think about long-term savings and system longevity.
Credit: www.gemssensors.com
Frequently Asked Questions
What Are Common Warrick Level Controls Issues?
Common issues include incorrect wiring, sensor fouling, and relay failures. Regular maintenance can prevent these.
How Do You Reset Warrick Level Controls?
To reset, turn off power, check connections, and restart the system. Always refer to the manual.
Why Is My Warrick Level Control Not Responding?
It might be due to power issues, faulty sensors, or relay problems. Check each component.
How To Test A Warrick Level Control Sensor?
Use a multimeter to check for continuity. Ensure sensor contacts are clean and dry.
What Maintenance Is Required For Warrick Level Controls?
Regularly clean sensors, check wiring, and test relays. Follow manufacturer guidelines for best results.
Conclusion
Troubleshooting Warrick level controls can seem tricky, but it’s manageable. First, check connections. Loose wires often cause issues. Next, clean sensors. Dirt buildup leads to faulty readings. Also, verify power supply. A steady current is crucial. Lastly, consult the manual.
It holds valuable information. Regular maintenance prevents most problems. Keeping these tips in mind ensures smooth operations. Your level controls will work efficiently and last longer.