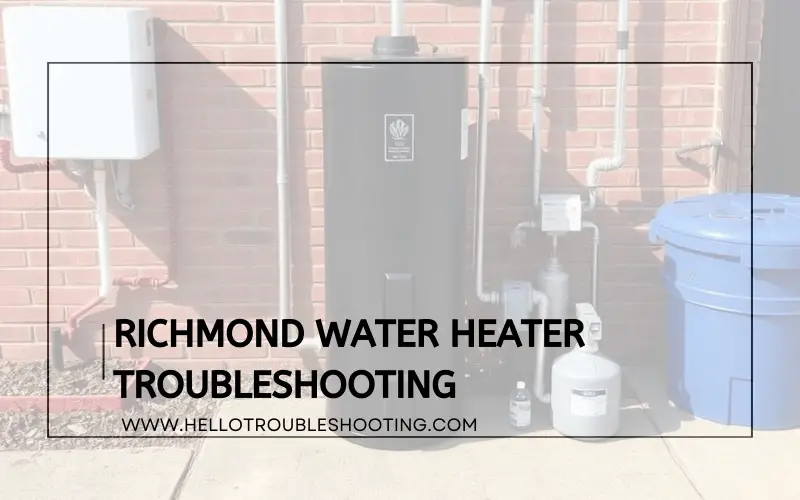
Richmond water heater troubleshooting involves checking for common issues like insufficient hot water and unusual noises. Ensure the power supply and thermostat settings are correct.
Richmond water heaters are reliable but can face occasional issues. Common problems include lack of hot water, strange noises, or water that is too hot or cold. Users should first check the power supply and thermostat settings. Inspecting the pilot light and ensuring there are no leaks can also help.
Regular maintenance can prevent many of these issues. Proper troubleshooting can extend the life of your Richmond water heater and ensure optimal performance. By addressing minor problems early, you can avoid costly repairs and enjoy consistent hot water.
Common Issues
Richmond water heaters are generally reliable. Yet, you may face some common issues. This section will help you troubleshoot these problems. Here, we discuss two frequent problems: no hot water and inconsistent temperature.
No Hot Water
If you get no hot water from your Richmond water heater, check these points:
- Power Supply: Ensure the heater is plugged in and the circuit breaker is on.
- Thermostat Setting: Verify that the thermostat is set to the desired temperature.
- Heating Element: A broken heating element can be the cause. Use a multimeter to check if it’s working.
- Reset Button: Press the reset button on the thermostat. It might have tripped.
Inconsistent Temperature
Inconsistent water temperature can be annoying. Here are some steps to fix it:
- Thermostat Calibration: Ensure the thermostat is calibrated correctly. Adjust it if necessary.
- Mineral Buildup: Sediment can collect at the bottom of the tank. This affects heating efficiency. Drain and flush the tank to remove buildup.
- Faulty Thermostat: A faulty thermostat may cause temperature swings. Test it and replace if needed.
- Water Flow Rate: A high flow rate can reduce water temperature. Lower the flow rate to maintain a steady temperature.
Following these steps can resolve most common issues. Always consult the user manual for specific instructions.
Pilot Light Problems
Facing issues with your Richmond water heater pilot light? This guide covers common problems and simple fixes. Resolve your heater issues quickly and easily.
Pilot Won’t Stay Lit
If your pilot light won’t stay lit, there may be several causes. Here are a few steps to troubleshoot:
- Check the Thermocouple: Ensure it’s tightly connected and positioned correctly.
- Inspect the Pilot Orifice: Clean it if it’s clogged with dirt.
- Examine the Gas Supply: Make sure the gas valve is open and working.
Follow these steps to identify and fix the issue:
- Turn off the gas supply.
- Wait for a few minutes to let any gas dissipate.
- Check the thermocouple connection and adjust if necessary.
- Clean the pilot orifice with a thin wire.
- Turn the gas back on and try lighting the pilot again.
Relighting The Pilot
If the pilot light goes out, relighting it is simple. Follow these steps:
| Step | Action |
|---|---|
| 1 | Turn the gas control knob to “Off” and wait 5 minutes. |
| 2 | Turn the knob to “Pilot” and press down. |
| 3 | Hold a match or lighter to the pilot opening. |
| 4 | Keep pressing the control knob until the pilot stays lit. |
| 5 | Turn the knob to “On” and check for a steady flame. |
Make sure to hold the control knob for about 60 seconds. This ensures the thermocouple is heated properly.
Thermostat Settings
Adjusting the thermostat settings on your Richmond water heater can solve many issues. It ensures your water heater is running efficiently. Incorrect thermostat settings can lead to inconsistent water temperatures. Here’s how you can manage these settings effectively.
Adjusting The Temperature
To adjust the temperature, you first need to locate the thermostat. It is usually behind an access panel on the side of the water heater. Follow these steps to adjust the temperature:
- Turn off the power to the water heater at the circuit breaker.
- Remove the access panel and insulation to expose the thermostat.
- Use a flathead screwdriver to adjust the temperature dial. The recommended setting is 120°F (49°C).
- Replace the insulation and access panel.
- Turn the power back on at the circuit breaker.
Make sure to test the water temperature after adjusting. This ensures the new settings are correct.
Replacing The Thermostat
Sometimes, adjusting the thermostat may not fix the issue. You might need to replace the thermostat. Follow these steps:
- Turn off the power at the circuit breaker.
- Remove the access panel and insulation.
- Disconnect the wires from the old thermostat. Note the wire connections for the new thermostat.
- Remove the old thermostat by unscrewing it from the mounting bracket.
- Install the new thermostat by screwing it into the mounting bracket.
- Reconnect the wires to the new thermostat.
- Replace the insulation and access panel.
- Turn the power back on at the circuit breaker.
After replacing, test the water heater to ensure it works correctly. Replacing the thermostat is a straightforward process. It can make your water heater run more efficiently.
Sediment Buildup
Richmond water heaters can face issues due to sediment buildup. Sediment is debris that settles at the bottom of the tank. This can cause the heater to work less efficiently. It can also shorten the lifespan of the unit. Regular maintenance can help prevent these problems.
Draining The Tank
To remove sediment, you need to drain the tank. Follow these steps:
- Turn off the power supply. For gas heaters, set the gas control to “Pilot.”
- Connect a garden hose to the drain valve at the bottom of the tank.
- Place the other end of the hose in a safe location. A floor drain or outside area works well.
- Open the drain valve and allow the water to flow out. Be cautious as the water will be hot.
- Once the tank is empty, close the drain valve and remove the hose.
- Refill the tank by turning on the cold water supply.
- Turn on the power supply or set the gas control back to “On.”
Preventing Future Buildup
To prevent future sediment buildup, consider these tips:
- Install a water softener if you have hard water.
- Flush the tank every six months to remove any debris.
- Use a sediment filter to catch particles before they enter the tank.
These steps can help keep your Richmond water heater running smoothly. Regular maintenance will save you money and extend the life of your unit.
Leaking Water Heater
A leaking water heater can cause many problems in your home. It can lead to water damage, higher utility bills, and even mold growth. Identifying and repairing the leak quickly can save you money and stress.
Identifying The Source
Identifying the source of the leak is the first step. Check the following areas for leaks:
- Top of the water heater: Look for water around the inlet and outlet pipes.
- Bottom of the tank: Water pooling here may indicate a serious issue.
- Temperature and pressure relief valve: This valve can sometimes release water.
- Drain valve: Inspect the drain valve for any signs of leakage.
Repairing The Leak
Once you’ve identified the source, you can start repairing the leak. Here’s how:
| Leak Source | Repair Steps |
|---|---|
| Inlet/Outlet Pipes |
|
| Bottom of the Tank |
|
| Temperature and Pressure Relief Valve |
|
| Drain Valve |
|
Repairing leaks promptly can extend the life of your water heater and ensure it operates efficiently.

Credit: m.youtube.com
Strange Noises
Strange noises from your Richmond water heater can be alarming. These sounds often signal issues requiring your attention. Understanding these noises helps in troubleshooting and fixing the problem.
Humming Sounds
A humming sound is usually caused by the heating element. This part vibrates when water flows through the tank. The vibrations create a humming noise.
You can fix this by tightening the heating element. Use a wrench to gently tighten it. Ensure you do not overtighten. Over-tightening can cause damage.
Another cause could be the water pressure. High water pressure makes the heater vibrate. Check and adjust the water pressure if needed. Use a pressure-reducing valve to control it.
Popping Noises
Popping noises are often due to sediment build-up in the tank. Sediment forms from minerals in the water. It settles at the bottom of the tank.
To fix this, flush the water heater. Follow these steps:
- Turn off the heater.
- Connect a hose to the drain valve.
- Open the valve and let the water flow out.
- Close the valve and remove the hose.
Repeat this process until the water runs clear. This removes the sediment and stops the popping noise.
Another possible cause is a faulty dip tube. The dip tube directs cold water to the bottom of the tank. A broken dip tube causes noise and uneven heating.
| Noise | Possible Cause | Solution |
|---|---|---|
| Humming | Loose heating element | Tighten the element |
| Humming | High water pressure | Adjust pressure |
| Popping | Sediment build-up | Flush the tank |
| Popping | Faulty dip tube | Replace dip tube |
Understanding these noises helps you maintain your Richmond water heater. Regular checks and maintenance extend its lifespan.
Pressure Relief Valve Issues
The pressure relief valve is crucial for your Richmond water heater. It ensures the system doesn’t over-pressurize. If this valve malfunctions, it can lead to serious problems, including potential damage to the water heater. Addressing these issues promptly is essential for maintaining your water heater’s efficiency and safety.
Testing The Valve
Testing the pressure relief valve is a simple process. Follow these steps:
- Turn off the water heater.
- Place a bucket under the valve’s discharge pipe.
- Lift the valve’s lever to let water out.
If water flows freely, the valve works. If not, it might be faulty.
Replacing The Valve
Sometimes, the valve needs replacing. Here’s a guide:
- Turn off the water heater and water supply.
- Drain some water from the tank to reduce pressure.
- Unscrew the old valve using a pipe wrench.
- Wrap Teflon tape around the new valve’s threads.
- Screw the new valve into place securely.
- Turn on the water supply and check for leaks.
Ensure you perform this task carefully to avoid damage or injury.
| Step | Description |
|---|---|
| 1 | Turn off the water heater and water supply. |
| 2 | Drain some water from the tank. |
| 3 | Unscrew the old valve. |
| 4 | Wrap Teflon tape around new valve threads. |
| 5 | Screw the new valve into place. |
| 6 | Turn on the water supply and check for leaks. |
Both testing and replacing the pressure relief valve are vital for safe water heater operation. Regular maintenance keeps your water heater running smoothly.
Maintenance Tips
Maintaining your Richmond water heater ensures its longevity and efficiency. Follow these essential maintenance tips to keep your water heater in top shape. Regular checks and seasonal upkeep can prevent costly repairs and extend the life of your unit.
Regular Inspection
Regular inspection is crucial for the health of your water heater. Check the anode rod every three years. The anode rod prevents rust and corrosion inside the tank. Replace it if it’s less than half an inch thick or coated with calcium.
Look for leaks around the tank and pipes. Leaks can indicate serious issues. Inspect the pressure relief valve by lifting its lever and letting it snap back. Water should flow through the discharge pipe. If not, replace the valve.
Flushing the tank annually removes sediment buildup. Connect a hose to the drain valve, empty the tank, and then refill it. This simple step can improve efficiency and extend the heater’s life.
Seasonal Maintenance
Seasonal maintenance ensures your water heater runs efficiently throughout the year. In the winter, set the thermostat to 120 degrees Fahrenheit. This prevents scalding and reduces energy consumption.
Insulate the pipes and the water heater tank with a water heater blanket. This helps maintain the temperature and reduces heat loss. Insulation is especially important in colder climates.
Check the venting system in gas water heaters for blockages. Ensure there are no obstructions in the flue. This is important for safety and efficiency.
In the summer, turn off the water heater if you’ll be away for an extended period. This saves energy and prevents unnecessary wear and tear.
Below is a quick reference table for seasonal maintenance tasks:
| Task | Winter | Summer |
|---|---|---|
| Thermostat Setting | 120°F | Turn off if away |
| Insulation | Wrap pipes and tank | Check for wear |
| Venting System | Inspect for blockages | Ensure clear flue |
Frequently Asked Questions
How Do I Reset My Richmond Water Heater?
To reset your Richmond water heater, press the reset button on the thermostat.
Why Is My Richmond Water Heater Not Heating?
Your Richmond water heater might not heat due to a faulty thermostat, heating element, or a tripped circuit breaker.
What Causes A Richmond Water Heater To Leak?
A Richmond water heater may leak due to a corroded tank, loose connections, or a faulty pressure relief valve.
How Often Should I Service My Richmond Water Heater?
Service your Richmond water heater annually to ensure efficient performance and to identify potential issues early.
What Is The Average Lifespan Of A Richmond Water Heater?
The average lifespan of a Richmond water heater is 8-12 years, depending on usage and maintenance.
Conclusion
Resolving Richmond water heater issues can be simple with the right steps. Regular maintenance ensures optimal performance. Always consult a professional for complex problems. Addressing minor issues early prevents costly repairs. Keep your water heater running smoothly for years. Proper care extends its lifespan and ensures efficient operation.