To troubleshoot an Orbit sprinkler timer, first check the power source and then inspect the timer settings. Reset the timer if issues persist.
Orbit sprinkler timers help maintain your lawn efficiently but can sometimes malfunction. Regular troubleshooting ensures your system works correctly. Start by checking the power source and ensuring the timer is plugged in securely. Inspect the timer settings to confirm they are programmed correctly.
If problems continue, resetting the timer often resolves minor glitches. Clean the timer contacts and ensure the wiring is intact. Regular maintenance and proper troubleshooting can extend the life of your Orbit sprinkler timer. By addressing issues promptly, you ensure your lawn receives adequate watering, promoting healthy grass and plants.

Common Issues
Orbit sprinkler timers are essential for effective garden watering. Sometimes, they can encounter common issues. This section will help you troubleshoot some of these problems.
Timer Not Turning On
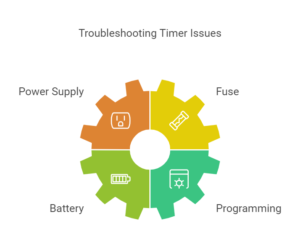
If your timer is not turning on, it might be due to several reasons. Here are some common causes and solutions:
| Cause | Solution |
|---|---|
| Power Supply | Ensure the timer is plugged in correctly. Check the power source. |
| Fuse | Check the fuse inside the timer. Replace if necessary. |
| Battery | Replace the battery. A dead battery can prevent the timer from working. |
| Programming | Ensure the timer is programmed correctly. Check the manual. |
Display Problems
Display problems can make it hard to use the timer. Here are some common display issues and their solutions:
- Blank Screen: Ensure the power supply is working. Replace the battery if needed.
- Flickering Display: Check for loose connections. Secure all wires and connections.
- Partial Display: This might be due to a faulty LCD. Consider contacting customer support.
- Incorrect Time: Reset the timer. Set the correct time and date.
Battery Problems
Battery problems are common with Orbit Sprinkler Timers. They can cause the timer to malfunction. Understanding how to address these issues is crucial. Below are two main areas to focus on: replacing batteries and checking battery connections.
Replacing Batteries
Replacing the batteries in your Orbit Sprinkler Timer is simple. Follow these steps:
- First, locate the battery compartment. It’s usually at the back or bottom.
- Next, open the compartment using a small screwdriver.
- Remove the old batteries carefully. Dispose of them properly.
- Insert new, high-quality batteries. Ensure they are the correct type.
- Close the battery compartment securely.
Using high-quality batteries ensures your timer runs smoothly. Always check the battery type before purchasing.
Checking Battery Connections
Poor battery connections can cause issues. Here’s how to check them:
- First, open the battery compartment.
- Next, inspect the battery contacts. They should be clean and free of corrosion.
- If you see corrosion, clean the contacts with a small brush.
- Ensure the batteries are inserted correctly. The positive and negative ends must align.
- Close the compartment after checking.
Regularly checking and cleaning battery contacts can prevent issues. Always ensure the batteries are seated correctly.
| Problem | Solution |
|---|---|
| Timer not working | Replace batteries |
| Corroded contacts | Clean contacts |
| Batteries not seated | Reinsert batteries |
Addressing battery problems can prolong the life of your Orbit Sprinkler Timer. Regular maintenance is key to smooth operation.
Programming Errors
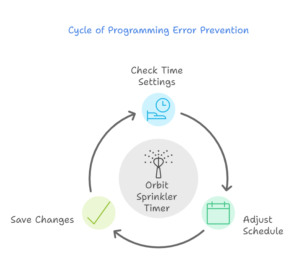
Programming errors in your Orbit Sprinkler Timer can lead to improper watering schedules. These errors often cause frustration. Let’s look at common programming issues and their solutions.
Incorrect Time Settings
Incorrect time settings can disrupt your watering schedule. Ensure the current time is set accurately. Follow these steps to check and correct time settings:
- Locate the “Clock” button on your timer.
- Press and hold the “Clock” button.
- Use the “+” and “-” buttons to set the correct hour.
- Repeat the process for minutes.
Accurate time settings ensure your plants get watered at the right time. Double-check AM and PM settings to avoid nighttime watering.
Schedule Overlaps
Schedule overlaps can cause excessive watering or dry patches. It’s crucial to avoid overlapping schedules. Here’s how to manage and adjust schedules:
- Select the “Schedule” button on your timer.
- Review each zone’s start and end times.
- Adjust the times to ensure no overlap between zones.
- Save changes by pressing the “Enter” button.
Using a table can help visualize your watering schedule:
| Zone | Start Time | End Time |
|---|---|---|
| Zone 1 | 6:00 AM | 6:30 AM |
| Zone 2 | 6:35 AM | 7:05 AM |
| Zone 3 | 7:10 AM | 7:40 AM |
Preventing schedule overlaps ensures efficient watering and healthy plants.
Valve Issues
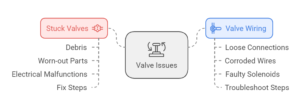
Orbit Sprinkler Timer users often face valve issues. These problems can disrupt watering schedules. Addressing valve issues quickly ensures your lawn stays healthy. This section will focus on two main areas: stuck valves and valve wiring.
Stuck Valves
A stuck valve can prevent water from flowing correctly. This can lead to overwatering or dry patches in your lawn. Here are common reasons for stuck valves:
- Debris in the valve
- Worn-out parts
- Electrical malfunctions
To fix a stuck valve, follow these steps:
- Turn off the water supply.
- Remove the valve cover.
- Check for and remove any debris.
- Inspect the valve for wear and tear.
- Reassemble the valve and turn the water back on.
Valve Wiring
Valve wiring issues can cause the timer to malfunction. Bad wiring can prevent the valve from opening or closing. Ensuring proper wiring is crucial for effective irrigation. Here are common wiring issues:
- Loose connections
- Corroded wires
- Faulty solenoids
To troubleshoot valve wiring:
- Turn off the power to the timer.
- Inspect the wires for damage or corrosion.
- Tighten any loose connections.
- Replace damaged wires or solenoids.
- Turn the power back on and test the system.
By addressing these valve issues, your Orbit Sprinkler Timer will work efficiently. Proper maintenance ensures your lawn gets the right amount of water.
Water Flow Problems
Is your Orbit sprinkler timer not delivering water as it should? Water flow problems can disrupt your garden’s health. This section will help you diagnose and fix common water flow issues.
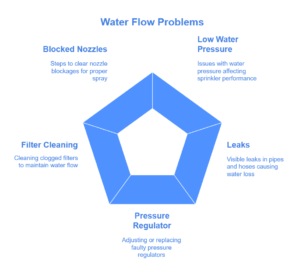
Low Water Pressure
Low water pressure can affect the performance of your sprinkler system. Here are some potential causes and fixes:
- Check the main water valve: Ensure the valve is fully open.
- Inspect for leaks: Look for visible leaks in your pipes and hoses.
- Examine the pressure regulator: Adjust or replace if it’s faulty.
- Clean the filter: A clogged filter can reduce water pressure.
Blocked Nozzles
Blocked nozzles can restrict water flow and disrupt the spray pattern. Follow these steps to clear blockages:
- Turn off the water supply to the sprinkler system.
- Remove the nozzle from the sprinkler head.
- Clean the nozzle using a small brush or a pin.
- Rinse the nozzle under running water.
- Reattach the nozzle and turn the water back on.
By addressing these water flow problems, your garden will thrive again.
Electrical Faults
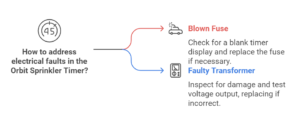
Electrical faults can disrupt your Orbit Sprinkler Timer’s functionality. Identifying and fixing these issues quickly is essential. This section will cover common electrical faults: blown fuses and faulty transformers.
Blown Fuses
A blown fuse is a common problem in sprinkler timers. Fuses protect the system from electrical surges and overloads. When a fuse blows, it cuts off the power supply to the timer.
Signs of a blown fuse include:
- Timer display is blank or unresponsive.
- Sprinkler system does not turn on.
To check and replace a blown fuse:
- Turn off the power to the timer.
- Open the timer’s control panel.
- Locate the fuse and inspect it.
- If the fuse is blackened or broken, replace it.
- Close the control panel and turn the power back on.
Faulty Transformers
A faulty transformer can also cause electrical issues. Transformers convert high voltage to a lower voltage that the timer can use. A faulty transformer can prevent the timer from working properly.
Symptoms of a faulty transformer include:
- No power to the timer.
- Timer resets frequently.
To troubleshoot a faulty transformer:
- Turn off the power supply.
- Inspect the transformer for any visible damage.
- Use a multimeter to check the voltage output.
- If the voltage is incorrect, replace the transformer.
Keep an eye on these electrical faults to maintain your sprinkler system. Regular checks can help avoid serious issues.
Resetting The Timer
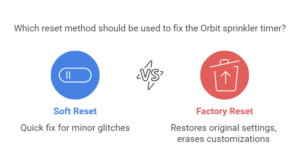
Resetting your Orbit sprinkler timer can solve many issues. Sometimes, the timer may not work as expected. A reset can bring it back to its default settings. There are two main types of resets: Soft Reset and Factory Reset. Each serves a different purpose. Learn how to perform these resets below.
Soft Reset
A soft reset is useful for minor glitches. It does not erase all your settings. Follow these steps to perform a soft reset:
- Press and hold the Reset button for 3 seconds.
- Wait until the display turns off and on.
- Check if the timer works as expected.
The soft reset is quick and easy. Your watering schedules will stay intact.
Factory Reset
A factory reset restores the timer to its original settings. Use this if the timer has major issues. Be aware, this will delete all your customized settings.
To perform a factory reset, follow these steps:
- Turn the dial to the Off position.
- Press and hold the Clear button.
- While holding the Clear button, turn the dial to Auto.
- Release the Clear button.
- Wait for the display to reset.
After the factory reset, you need to reprogram your watering schedules. Ensure you have a backup of your settings before proceeding.
Preventative Maintenance
Keeping your Orbit Sprinkler Timer in top shape ensures a lush, green lawn. Preventative maintenance helps avoid unexpected issues and costly repairs. Follow these simple tips to extend the life of your sprinkler system.

Regular Inspections
Check your sprinkler timer every month. Look for any signs of wear or damage. Ensure all connections are tight and secure. Inspect the wiring for frayed or exposed wires. Replace damaged parts immediately to prevent further issues.
- Check for loose connections.
- Inspect wiring for damage.
- Replace worn parts promptly.
Seasonal Adjustments
Adjust your sprinkler timer settings with the changing seasons. Different plants need different amounts of water throughout the year. During spring, increase watering times to support new growth. In summer, water more frequently to combat heat and evaporation.
| Season | Watering Frequency | Watering Duration |
|---|---|---|
| Spring | 2-3 times per week | 10-15 minutes |
| Summer | 3-4 times per week | 15-20 minutes |
| Fall | 2 times per week | 10-15 minutes |
| Winter | 1 time per week | 5-10 minutes |
During fall, reduce watering as temperatures drop. In winter, set your timer to water less often. Adjusting your timer helps save water and keeps your plants healthy year-round.
Frequently Asked Questions
How To Reset Orbit Sprinkler Timer?
To reset your Orbit sprinkler timer, press and hold the reset button for 10 seconds.
Why Is My Orbit Timer Not Working?
Check if the timer is properly plugged in and the power source is functional. Also, inspect for any blown fuses.
How To Set Orbit Sprinkler Timer?
Set the current time and date first. Then, program the watering schedule by selecting zones and times.
Why Does My Orbit Timer Display Error?
Error messages usually indicate low battery, wiring issues, or software glitches. Check and resolve these issues.
How To Replace Orbit Timer Battery?
Open the battery compartment, remove the old batteries, and insert new ones, ensuring correct polarity.
Conclusion
Troubleshooting your Orbit sprinkler timer is now straightforward with these tips. Regular maintenance ensures optimal performance. Always refer to the manual for specific issues. Properly functioning sprinklers save water and keep your lawn lush. Keep these steps handy for future reference.
Happy gardening!
